OBD2 tools on OBD2shop.co.uk https://blog.dnevnik.hr/obd2shop
ponedjeljak, 31.03.2025.
OBDSTAR DC706 Volvo HCM R/W Data, Coding, Change Left Side
This article will demonstrate how to use OBDSTAR DC706 to read and write data, read coding, and modify left or right-side settings on the Volvo HCM module. It also supports OBDSTAR X300 Classic G3.
Required Tools:
DC706 ECU Tool
High-power DC regulated power supply
Main cable
ECU clone jumper
120© resistor
MP001 Programmer
Volvo HCM module

Procedure
Before proceeding, you need to upgrade the software to the latest version.
ECU Flasher >> BODY/CHASSIS/OTHER >> Latest version >> VOLVO HCM(OLD) CONTINENTAL RIGHT R7F7010244 >> Pinout >> BENCH, MP001, OK
Check if the module's appearance is consistent.
Click "Guide" and carefully read the warm reminder, function description, operation introduction, and connection method.
Connect the device according to the wiring diagram.


After connecting, click "Start".
BENCH >> MP001 >> OK
This function is available when connecting to the service. Please ensure the Internet connection is normal.
Click "Connect >> OK".
Here, we can read and write coding, read and write INT flash(R7F7010244), and change the left side.


www.obd2shop.co.uk
Oznake: obdstar dc706
petak, 28.03.2025.
Fixing W177 Frame Misalignment with Yanhua ACDP Module 37
Customer Problem: Hi, I have an issue with the W177 frame. It is mikes off and not correct when using Yanhua ACDP Module 37. You'll see from the Pics that it doesn't line up. All line up apart from that one circled.
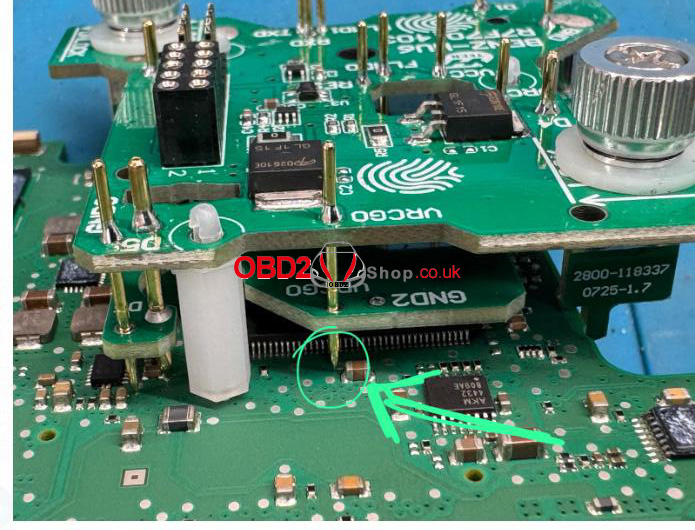
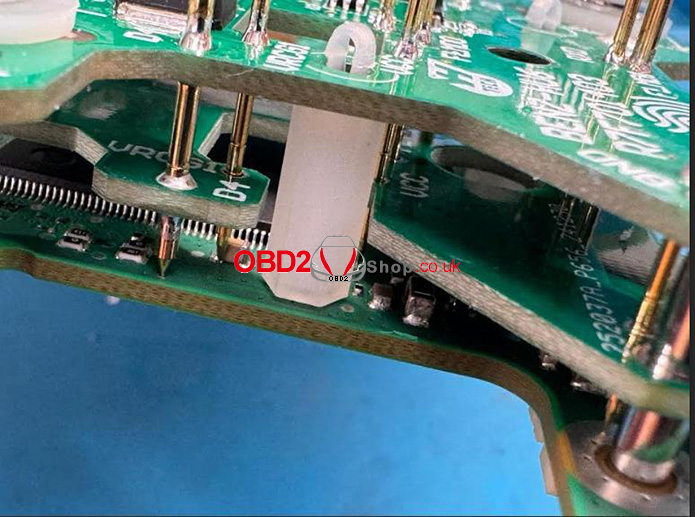
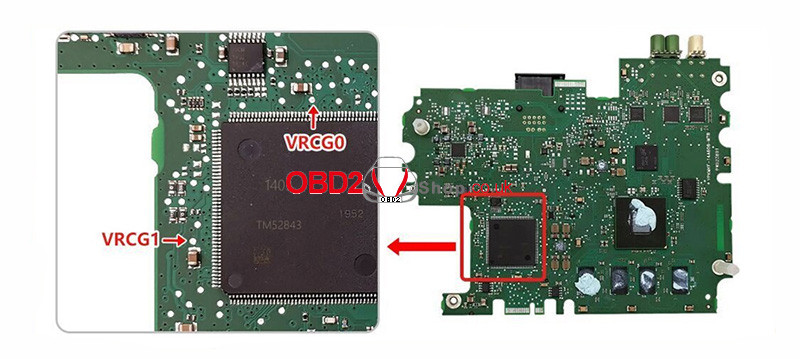
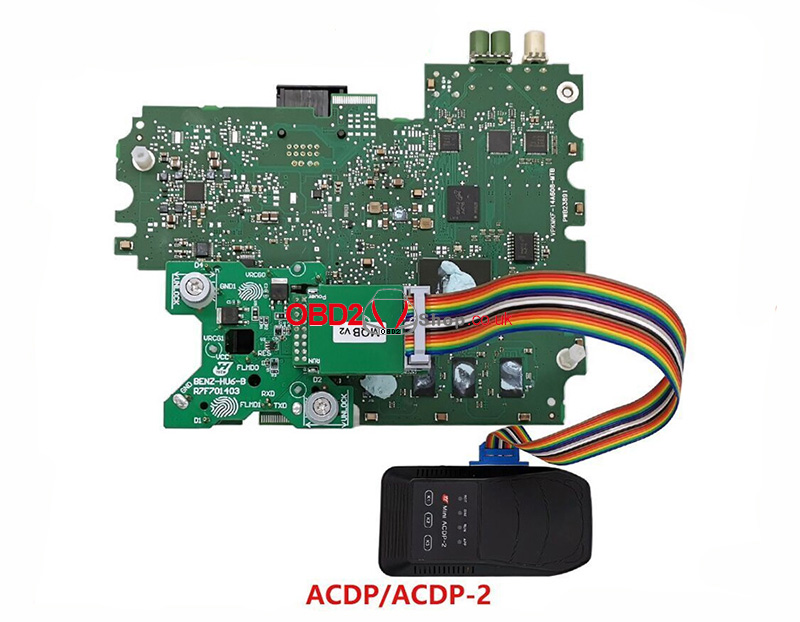
Salutation: You only need to purchase the HU6-R7F71403-B board.
www.obd2shop.co.uk
Oznake: yanhua acdp module 37
četvrtak, 27.03.2025.
Fix Android Phone USB Connection Failure with ACDP2
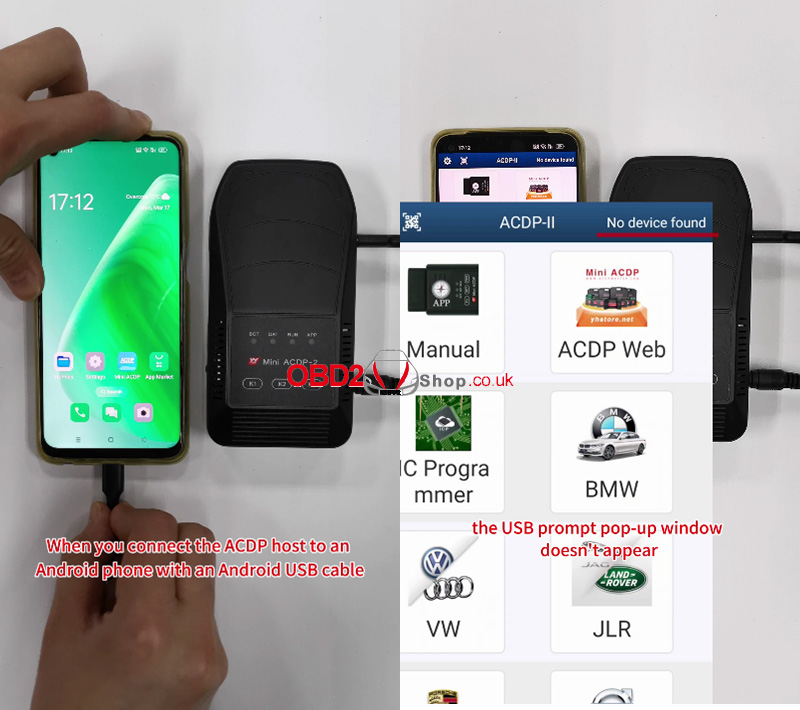
If you are experiencing issues connecting your Android phone to the ACDP2 host using a USB cable and the USB prompt pop-up window does not appear, follow the steps below to resolve the issue.
Step-by-Step Solution
1. Connect the ACDP2 Host to Your Android Phone
Connect the ACDP2 host to your phone using a compatible Android USB cable.
Open the ACDP software on your device.
2. Check for the USB Prompt Pop-Up
If the USB prompt pop-up window does not appear, the ACDP host may not be recognized by your phone.
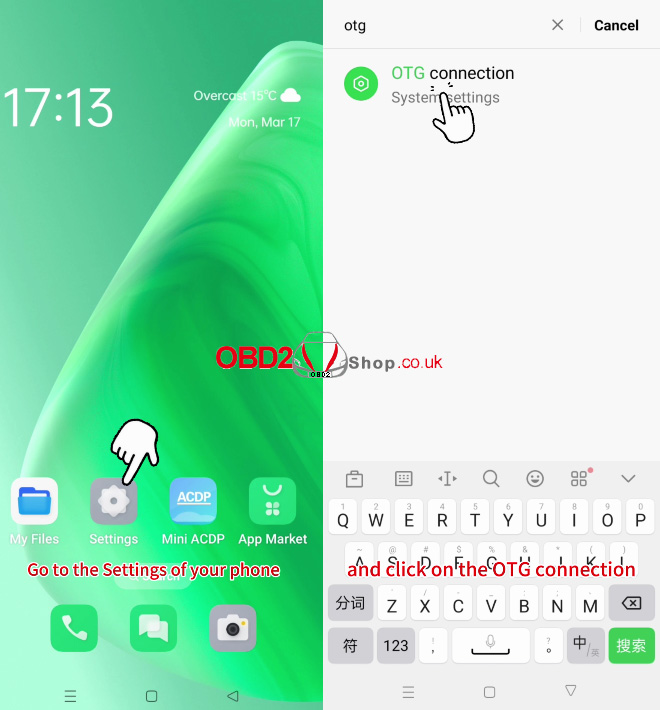
3. Enable OTG Connection
Go to your phone’s Settings.
In the search bar, type "OTG" and select the OTG connection.
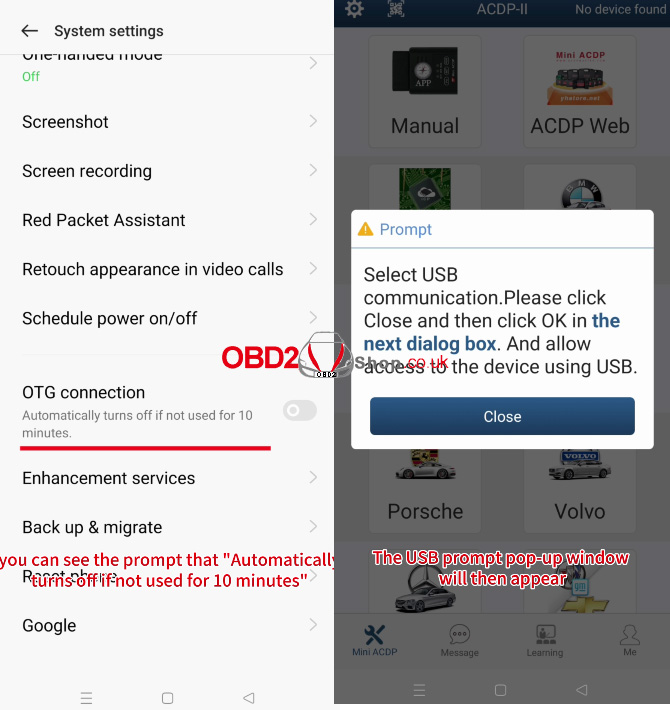
You will see a message: "Automatically turns off if not used for 10 minutes."
Turn on the OTG switch.
4. Return to ACDP Software
After enabling OTG, switch back to the ACDP software.
The USB prompt pop-up window should now appear.
5. Confirm the Connection
Click "Close" on the pop-up window.
Then click "OK" to finalize the connection.
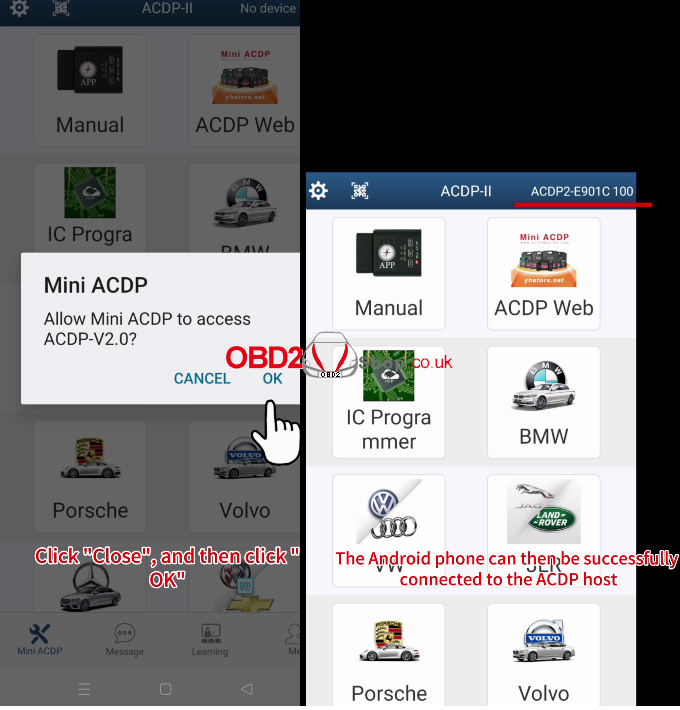
Once these steps are completed, your Android phone should successfully connect to the ACDP2 host.
Article source: http://blog.obd2shop.co.uk/fix-android-phone-usb-connection-failure-with-acdp2/
Oznake: yanhua acdp 2
srijeda, 26.03.2025.
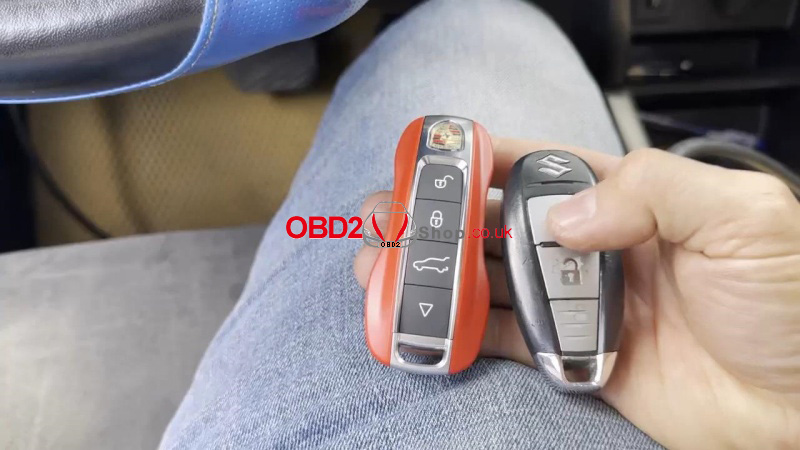
Autel IM608 II Add 2014-2020 Suzuki Vitara Smart Key Success
Today, I'm going to add 2014-2020 Suzuki Vitara smart keys with AUTEL MaxiIM IM608 PRO II by OBD. After generating a VITARA(2016+) KeylessGo ID47 433M remote with VVDI Key Tool Max PRO, we go to program the keys.
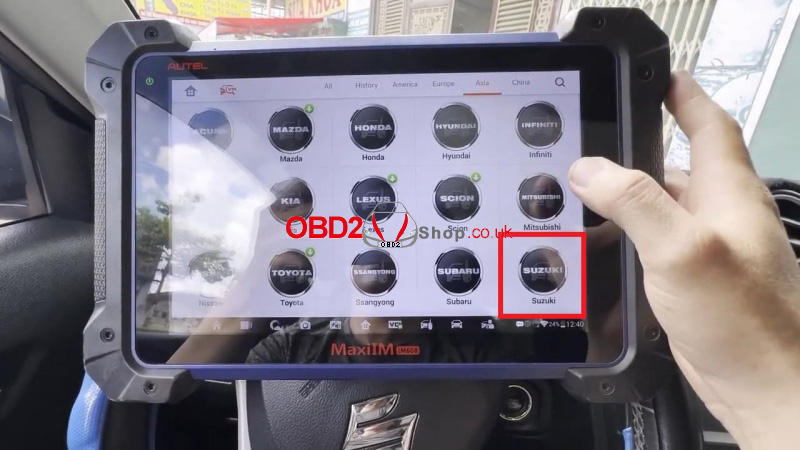
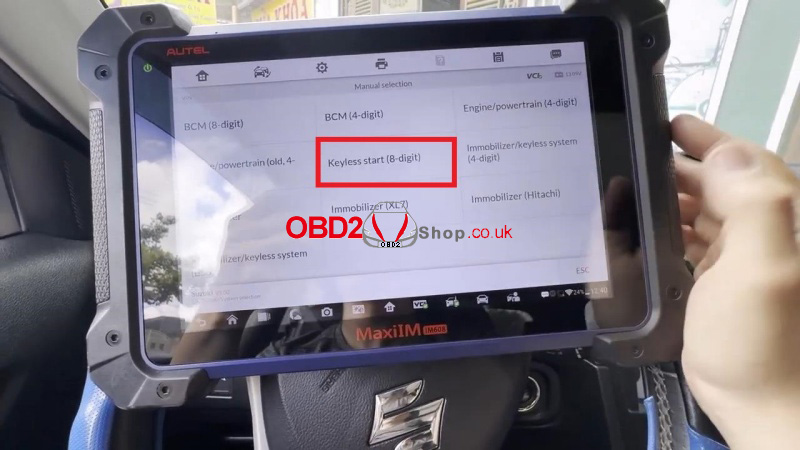
IMMO >> Accept >> Suzuki >> System selection >> Manual selection >> Keyless start(8-digit) >> Remote control learning
Please switch Hazard ON.
Please switch ignition ON(when doing all keys lost, if cannot switch ignition ON, you can try the immobilizer box wire short-circuit.)
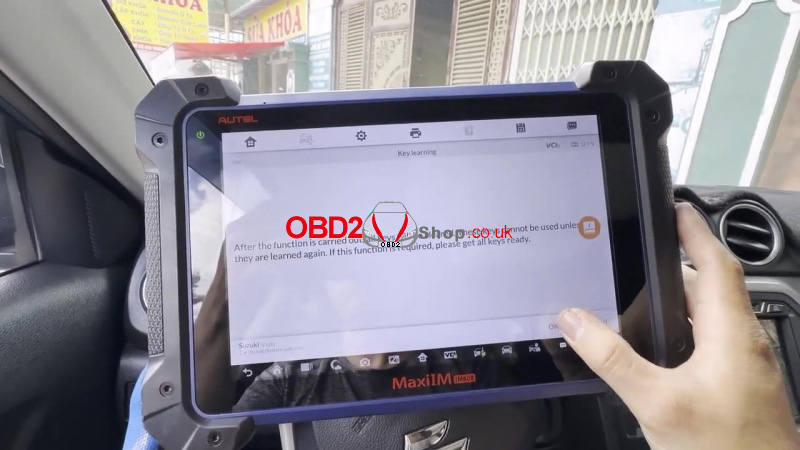
Press "Key learning".
After the function is carried out, all keys will be cleared. These keys cannot be used unless they are learned again. If this function is required, please get all the keys ready.
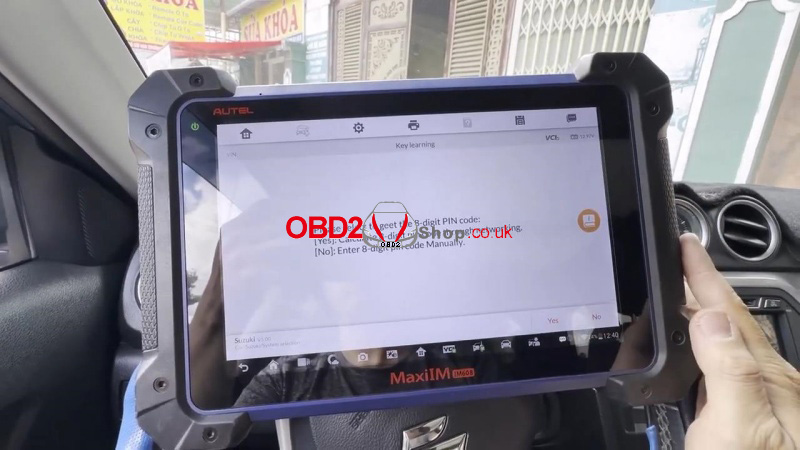
Please select to get the 8-digit PIN code:
[Yes]: Calculate 8-digit pin code through networking.
[No]: Enter 8-digit PNI code manually.
Follow the IM608 Pro2 guidance step according to the key type:
Mechanical Key: Switch on ignition with keys that need to match;
Smart Key: Place the smart key, which needs to match on the push start button(key logo face push start button);
Knob Type Smart Key: Slot the mechanical key on the ignition cylinder and place the smart card on the knob switch.
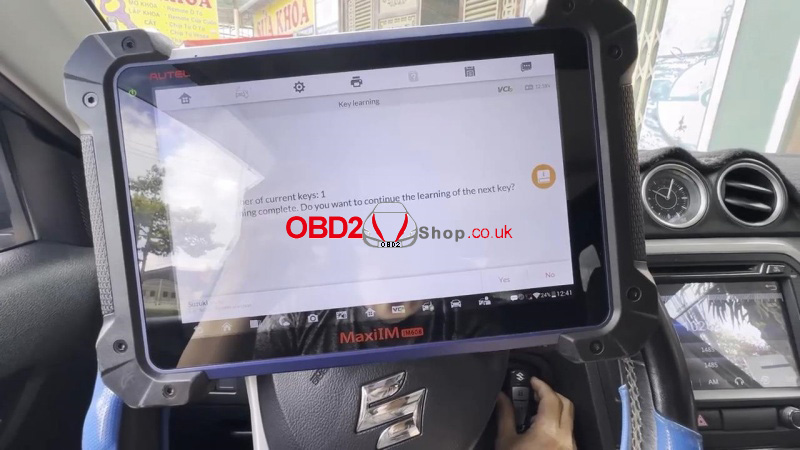
Number of current keys: 1
Learning complete.
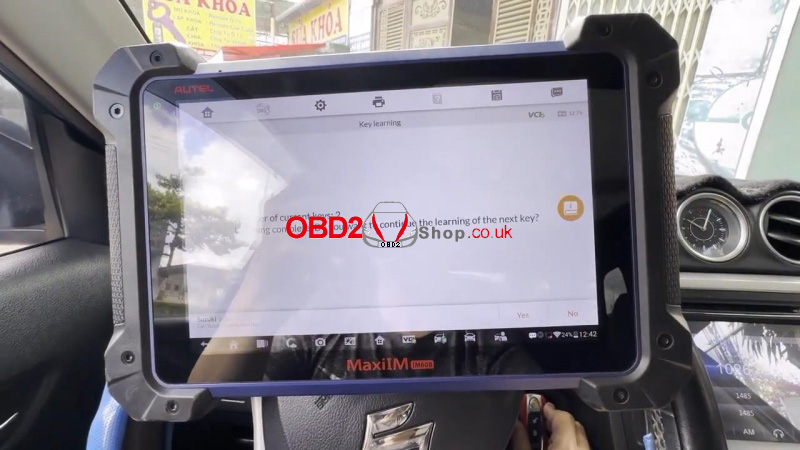
Do you want to continue learning about the next key? Yes.
Just repeat the same operation as the previous.
Number of current keys: 2
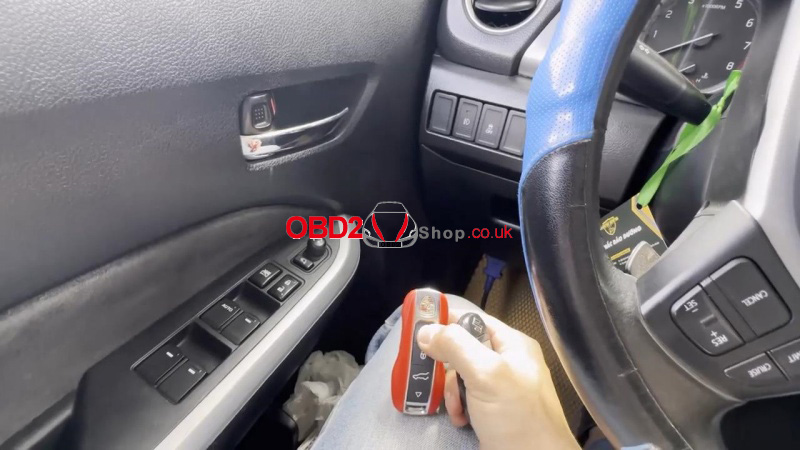
Press No to complete.
Test the new keys. All can normally work.
Done.
www.obd2shop.co.uk
Oznake: autel im608 ii
ponedjeljak, 24.03.2025.
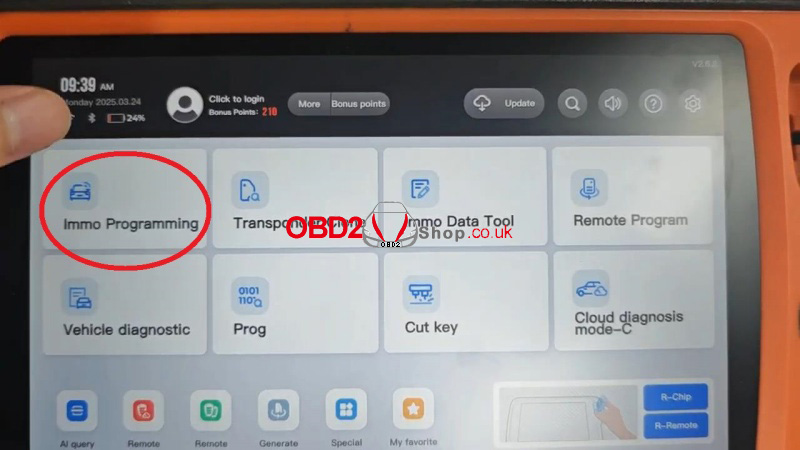
How to Check Bonus Points of VVDI BE Key on Xhorse Key Tool Plus?
This is a quick guide on checking VVDI BE Key Pro bonus points on Xhorse VVDI Key Tool Plus. Follow the steps below to find out if the BENZ Key points have been used.
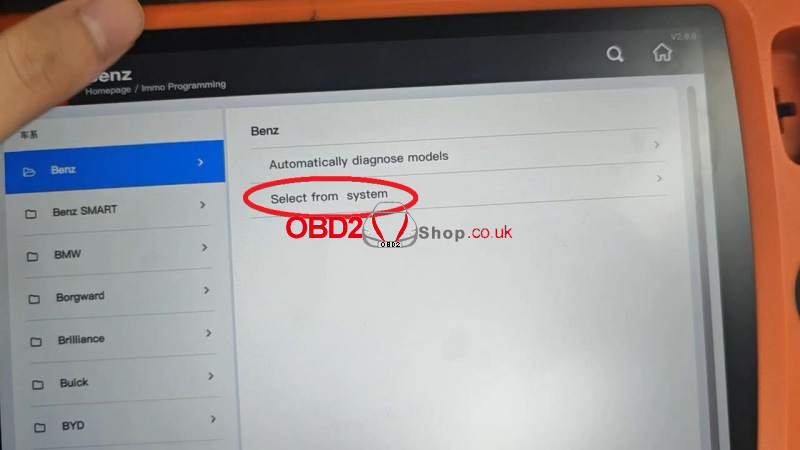
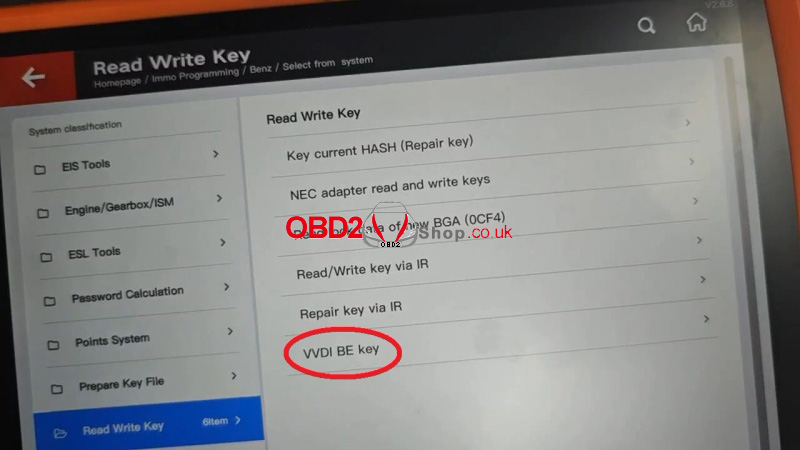
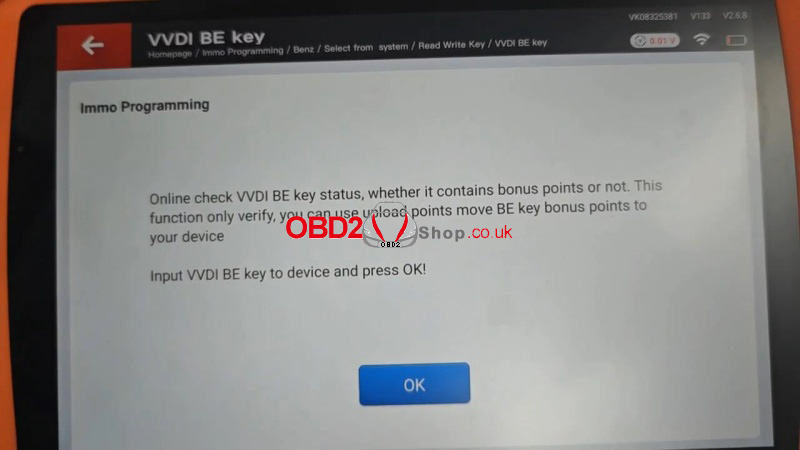
Immo programming >> Benz >> Select from system >> Read Write Key >> VVDI BE key >> Start programming >> Online verify BE key
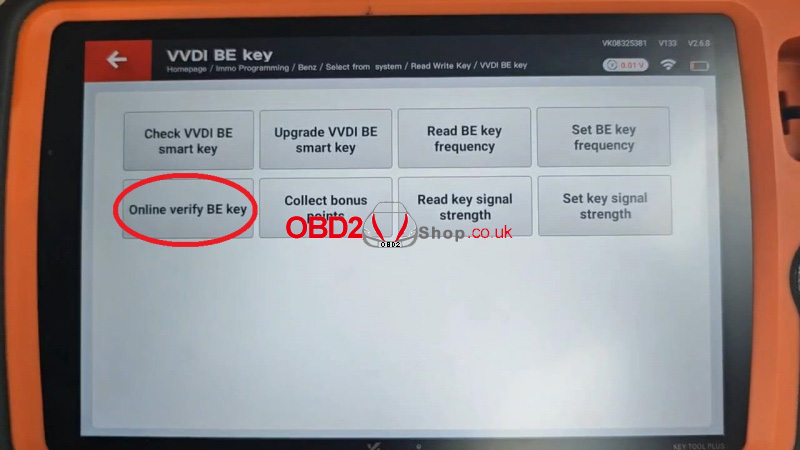
Online check VVDI BE key status, whether it contains bonus points or not. This function only verifies, you can use upload points to move BE key bonus points to your device.
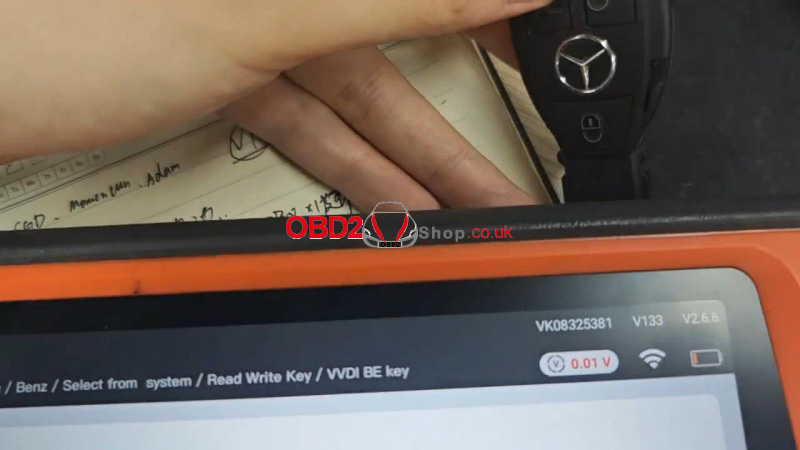
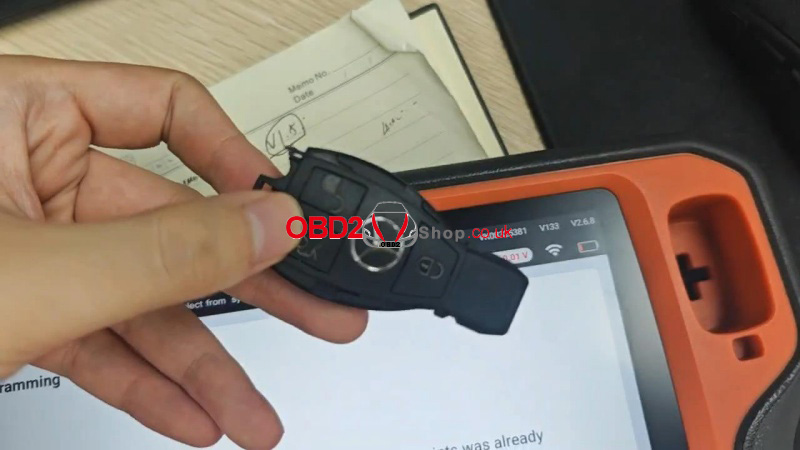
Input the VVDI BE Key to the device, and press OK!
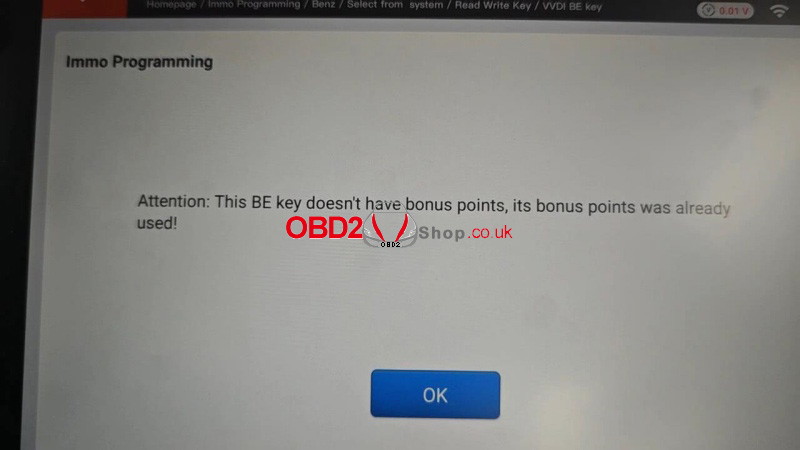
Xhorse Key Tool Plus will tell the result.
Attention: This BE key doesn't have bonus points, its bonus points were already used!
www.obd2shop.co.uk
Oznake: vvdi key tool plus
petak, 21.03.2025.
How to Update Your CGSULIT SC530 Pro Scanner
Keep your CGSULIT SC530 Pro Scanner up to date with the latest features, bug fixes, and expanded compatibility. Follow these simple steps to ensure seamless updates:
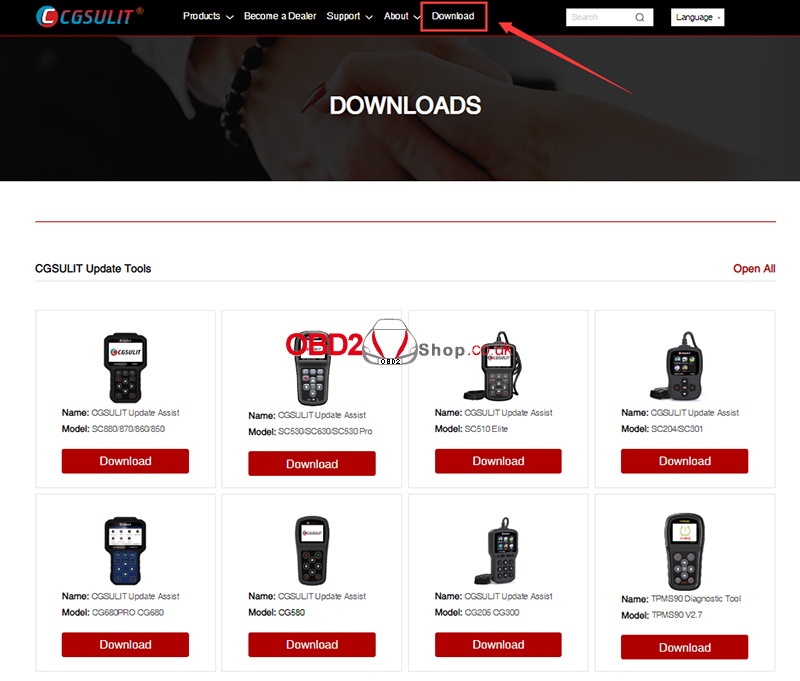
Step 1: Download the Update Tool
1. Visit the official CGSULIT website: www.cgsulit.com.
2. Click the "Download" button on the homepage.
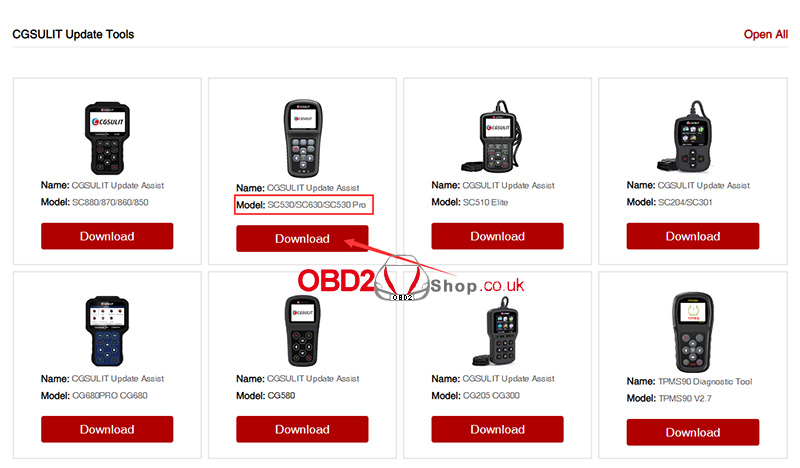
Step 2: Install the Update Tool
Select "SC530 Pro" from the product list.
Download the update tool to your computer and follow the on-screen instructions to install it.
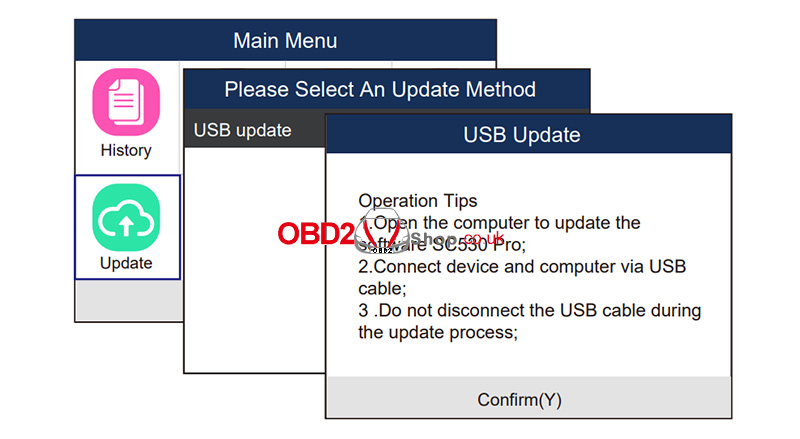
Step 3: Prepare Your Scanner
1. Connect the SC530 Pro to your PC using the included USB cable.
2. Launch the installed update tool on your computer.
3. On the scanner’s interface, navigate to "Update Mode" by selecting the "Update" option.
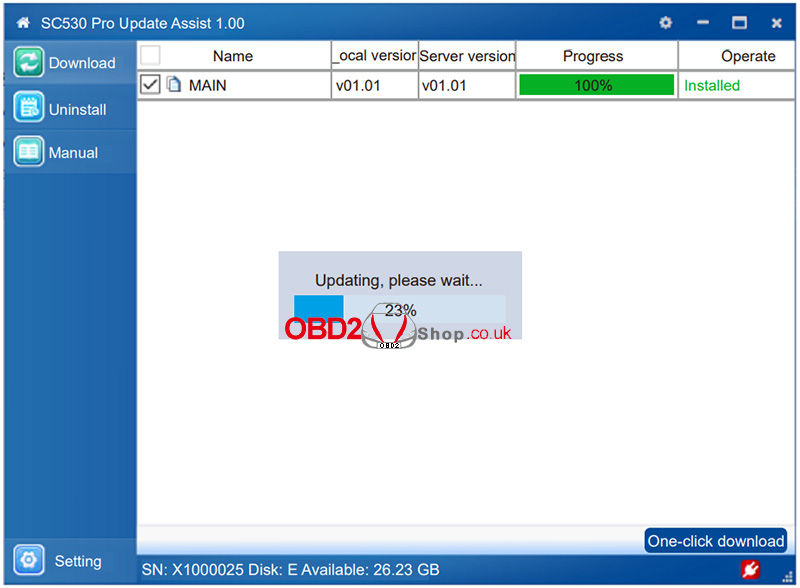
Step 4: Complete the Update
1. In the update tool, choose the latest firmware file for your SC530 Pro.
2. Click "Download" to start the update process.
3. Wait for the progress bar to reach 100%. A confirmation message ("Installed") will appear once the update is successful.
Important Notes:
Ensure your scanner remains connected to the PC throughout the update.
Do not interrupt the process to avoid firmware corruption.
For troubleshooting, visit the CGSULIT support page or contact customer service.
Figures 1–4 illustrate each step visually for clarity. Refer to them if needed during the process.
This streamlined guide ensures your SC530 Pro stays optimized for peak performance. Happy scanning! €
www.obd2shop.co.uk
Oznake: cgsulit sc530 pro
srijeda, 19.03.2025.
PadFlash Tool Software Installation Guide (Windows System)
This detailed walkthrough will teach you how to install and set up the PadFlash Programmer Software on Windows seamlessly.
I. System Requirements & Preparations
Recommended OS: Windows 7 64-bit (for optimal compatibility)
II. Software & Driver Downloads
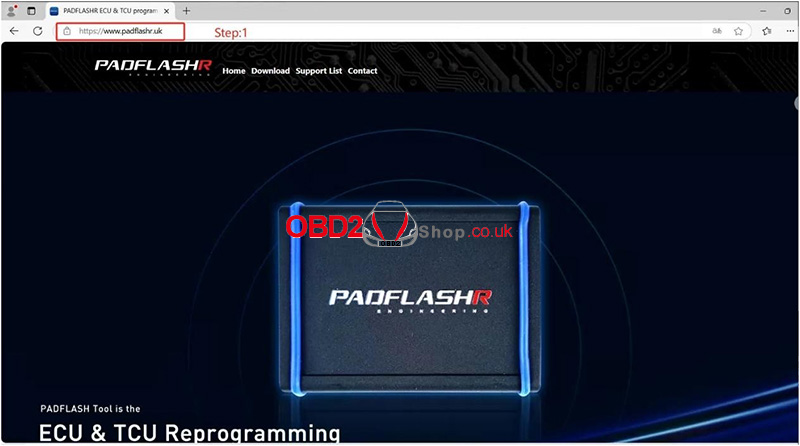
1. Access the Official Website
Visit https://www.padflashr.uk/
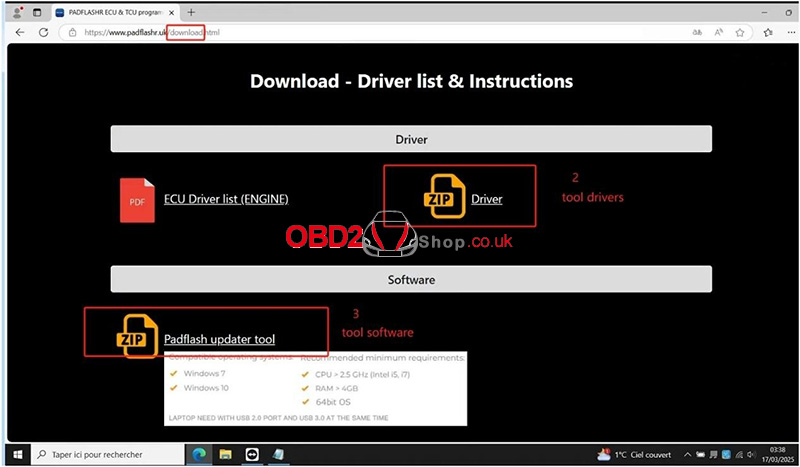
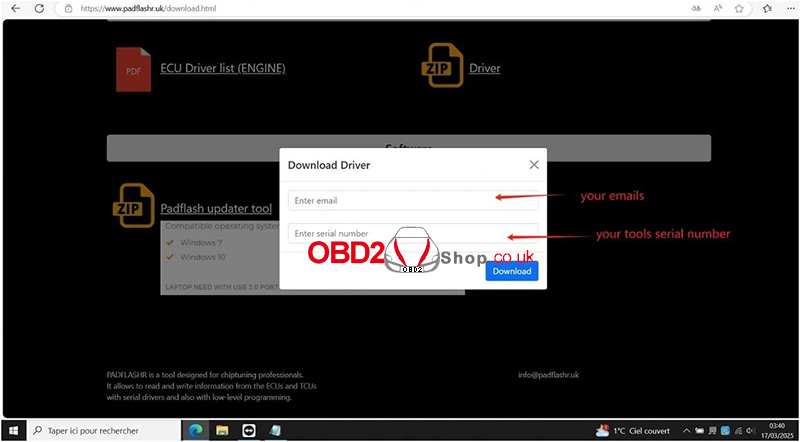
2. Download Drivers
On the download page, provide:
Email address
Tool Serial Number (SN)
Click "Download" to obtain drivers.
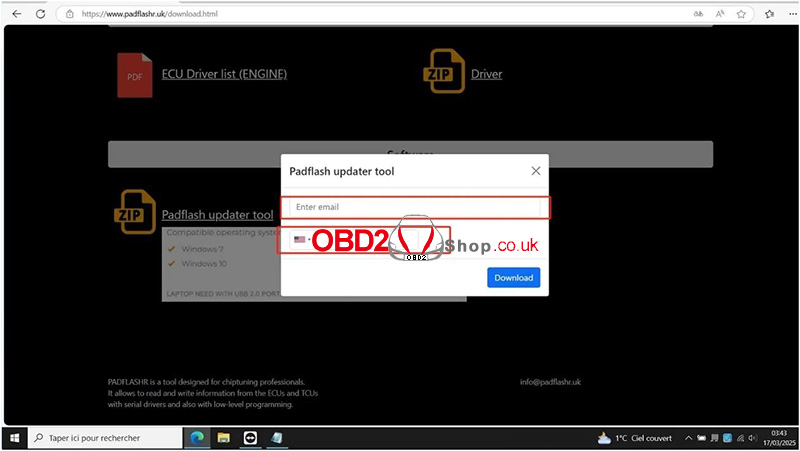
3. Download the PadFlash Updater Tool
On the download page, provide:
Email address
Phone number
Click "Download" to get the Updater tool
III. Software Installation & Registration
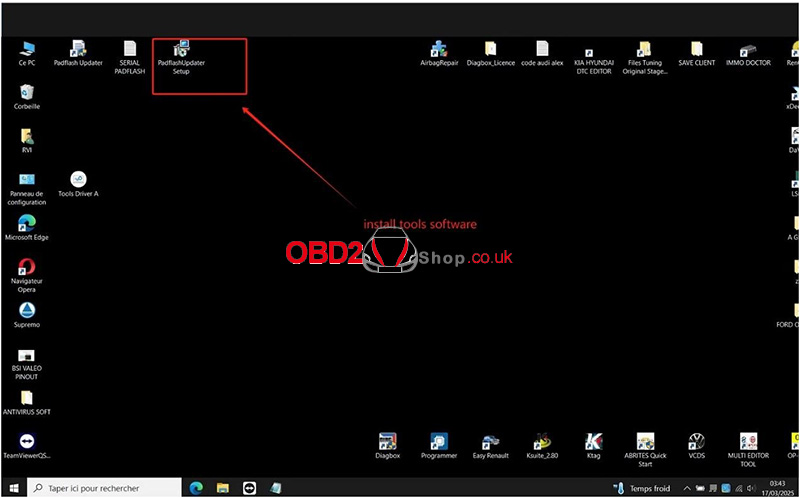
1. Install PadFlash Updater
Run the downloaded installer and follow the default setup steps.
A desktop shortcut named PadflashUpdater Setup will be created.
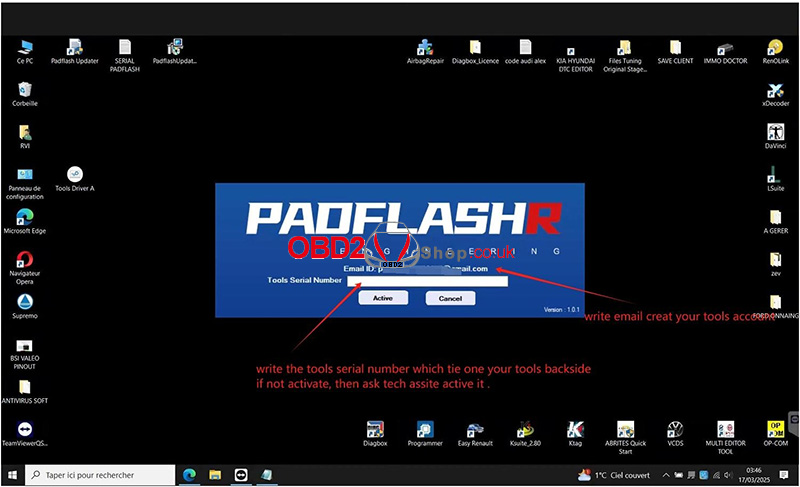
2. Register Your Account
Launch the Updater via the desktop shortcut.
Enter the following details to register:
Email address
Tool Serial Number (SN)
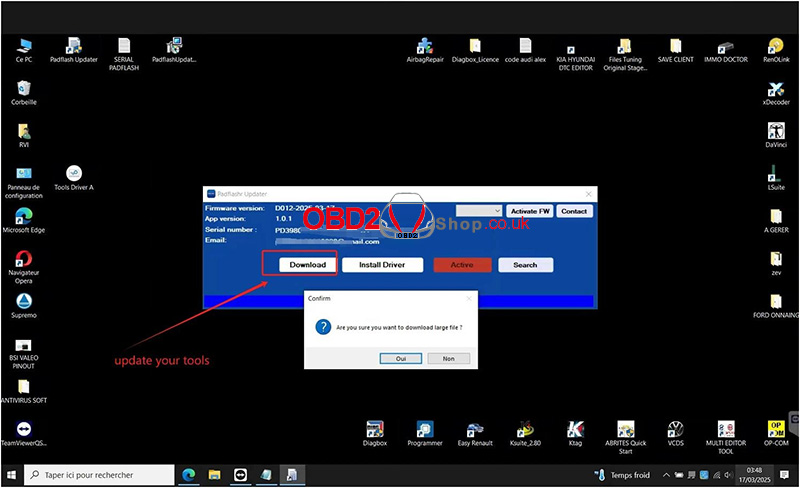
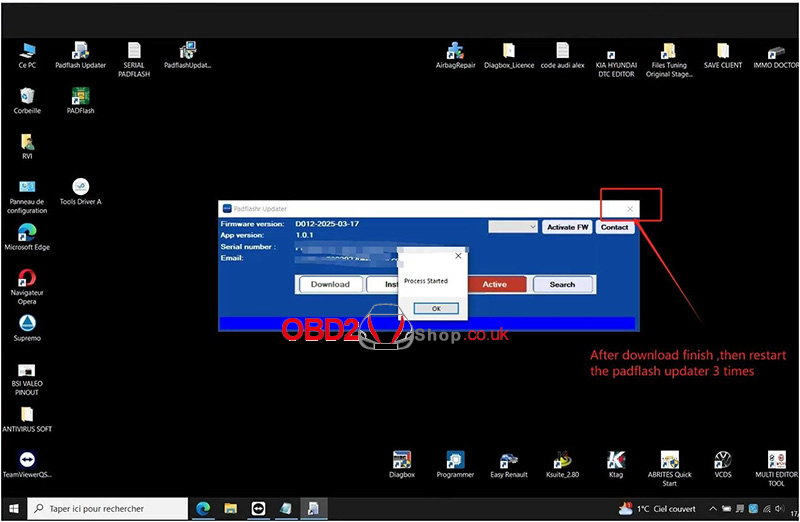
3. Initialize Updates
Restart the PadFlash Updater.
Click Download Update Files and wait for completion.
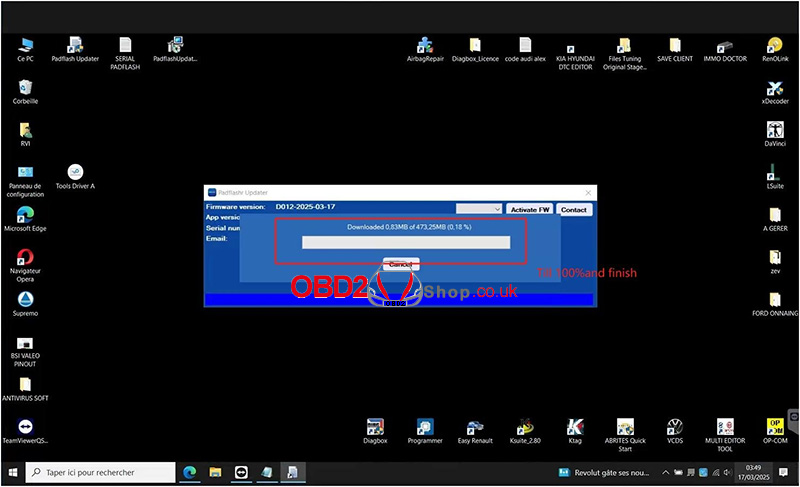
Critical Step: After the download, restart the Updater 3 times.
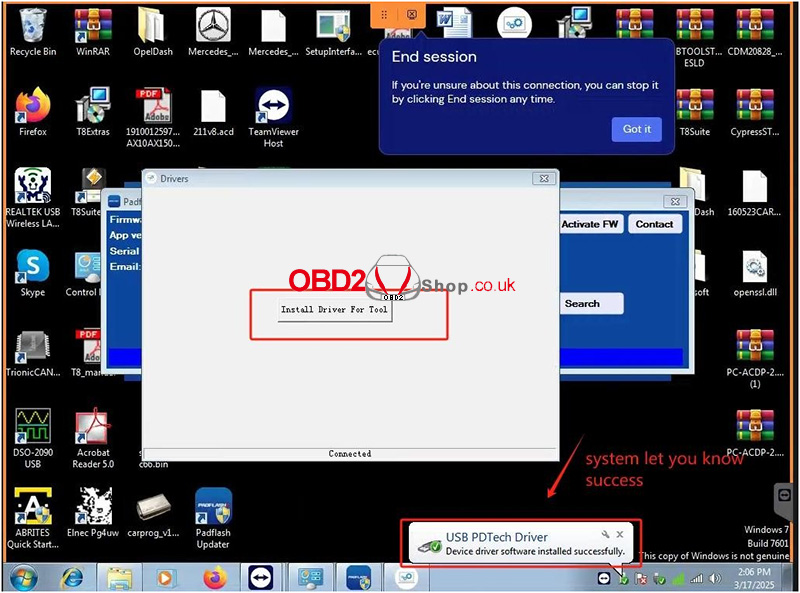
IV. Hardware Driver Installation
1. Install Dongle Driver
Insert the dongle into a USB port.
Allow the system to detect it, then install the driver automatically.

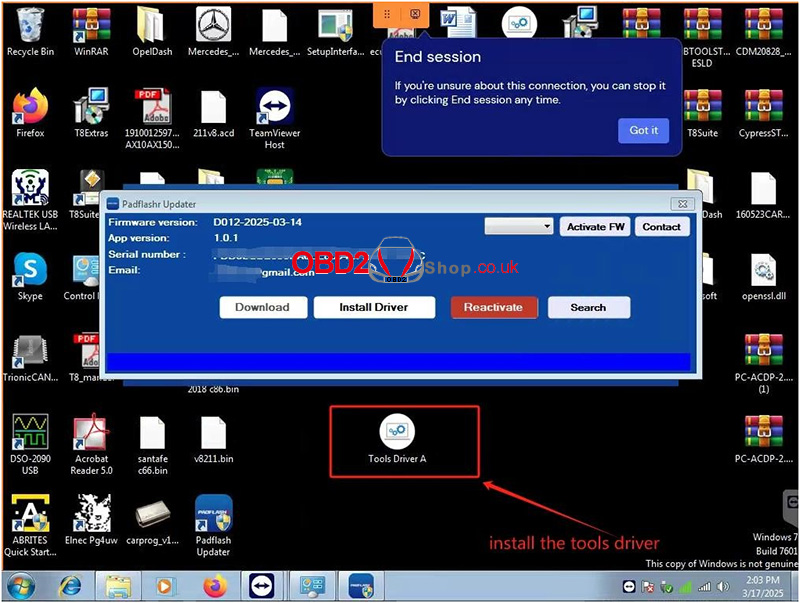
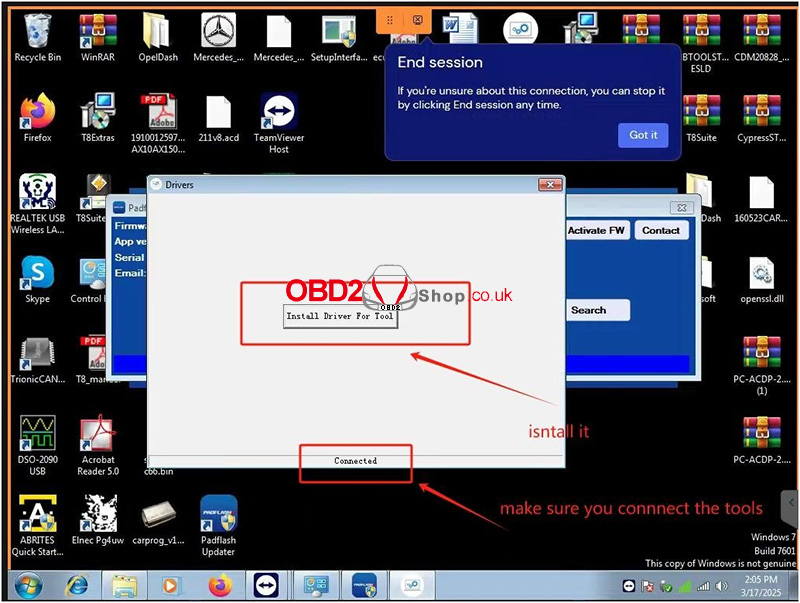
2. Install Tool Drivers
Connect the PadFlash tool to your PC via USB.
Install the drivers in this order
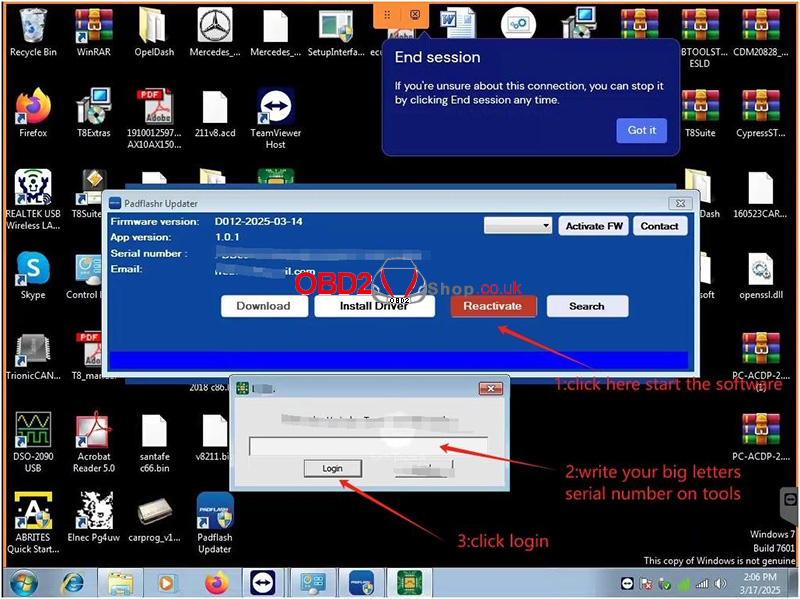
V. Software Activation & Usage
1. Activate Tool License
Launch the PadFlash software and click Active.
Enter the tool serial number in UPPERCASE letters.
2. Firmware Update Workflow
Before closing the software:
Click Activate the FW to update the tool’s firmware.
Exiting the software triggers a full firmware upgrade. Repeat this step every time you close the software.
VI. Important Notes
1. Ensure the serial number is entered in UPPERCASE (copy-paste recommended).
2. Do NOT disconnect the tool or dongle during updates.
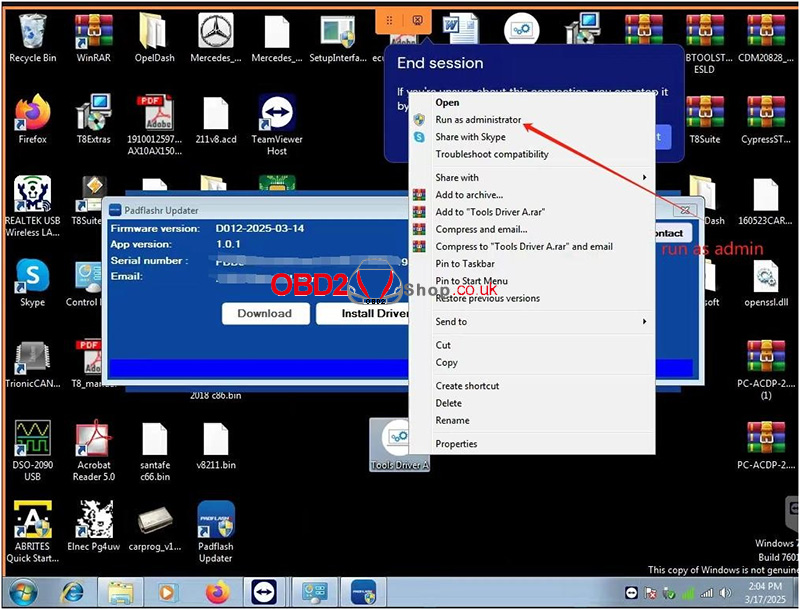
3. If driver installation fails, run the installer as Administrator.
4. Temporarily disable antivirus/firewall to avoid false positives.
By following these steps, you have completed the setup of the PadFlash tool. For technical support, contact www.obd2shop.co.uk.
Oznake: padflash
ponedjeljak, 17.03.2025.
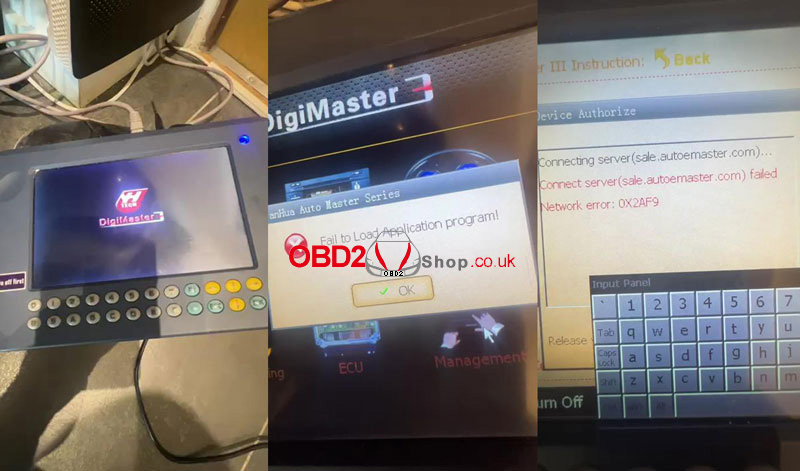
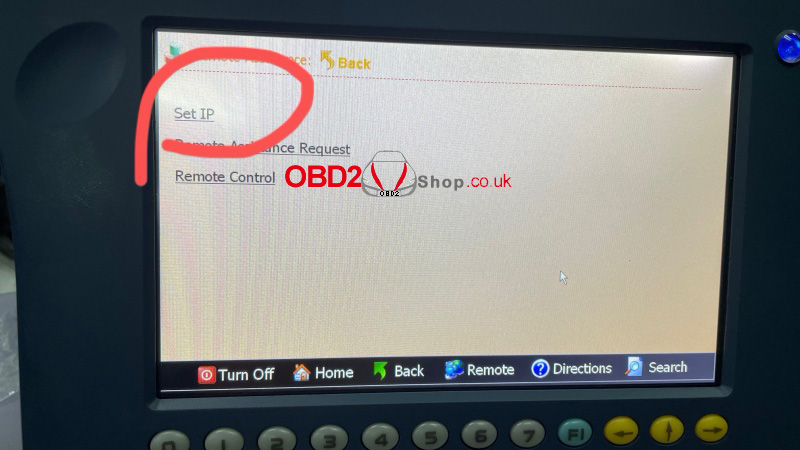
Fixed: Yanhua D3 Fail to Load Application Program! 0X2AF9 Error
Problem: The Yanhua Digimaster 3 was prompted with the "Fail to Load Application program!" Connect server(sale.autoemaster.com) failed. Network error: 0X2AF9" even though I connected it with a network cable.
What's the problem? Please advise.
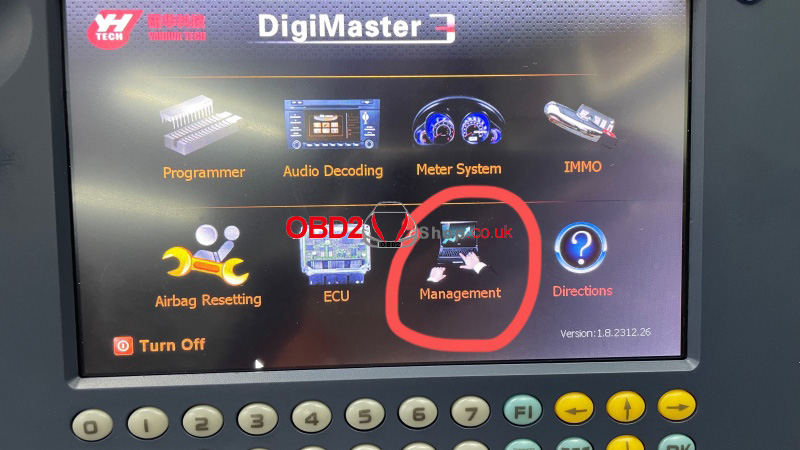
Solution
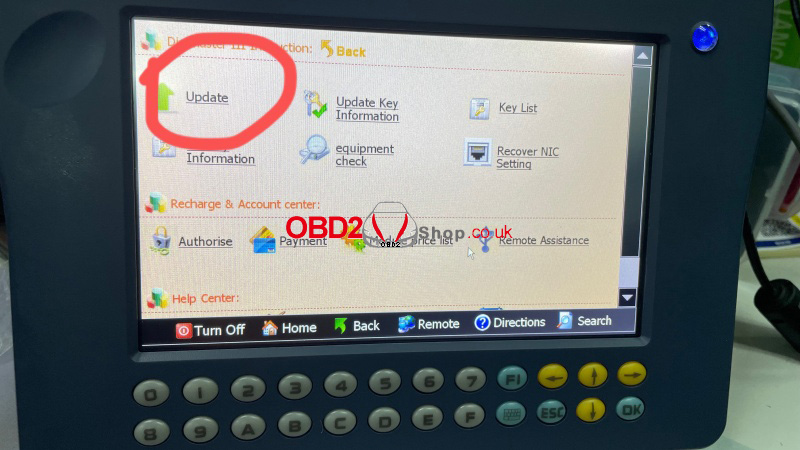
1. Management >> Remote Assistance >> Set IP >> Automatically Obtain IP Address >> OK
2. Go to "Update".


www.obd2shop.co.uk
Oznake: yanhua digimaster 3
srijeda, 12.03.2025.
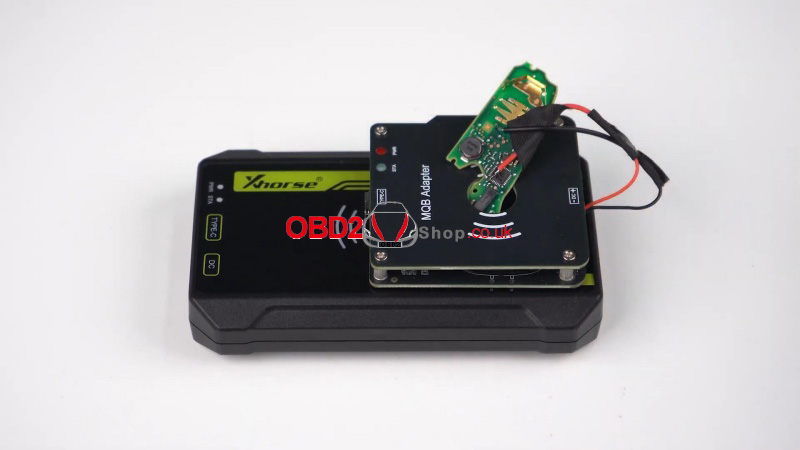
How to Replace Xhorse MLB Tool Chip for MQB Adapter Use?
Before using the MQB Adapter, it's necessary to upgrade the enhanced chip on the Xhorse MLB Tool hardware. When switching back to MLB, there's NO need to replace the chip again. Once the modification is complete, the MLB WILL NOT lose its guarantee.
Note that even a new MLB Tool will require this chip replacement. After these steps, you can collect MQB48 NEC35XX immobilizer key data with the MLB Tool + MQB48 Adapter.
The package should contain the following items:
XDMLB0GL MLB Tool
MQB Adapter
Enhanced Chip
Key Soldering Cable

How do I replace the Xhorse MLB Tool Enhanced Chip?
Please follow these steps to complete the hardware upgrade and ensure the normal use of the MQB key data reading feature.
1. Unscrew the four corner screws and remove the outer casing.
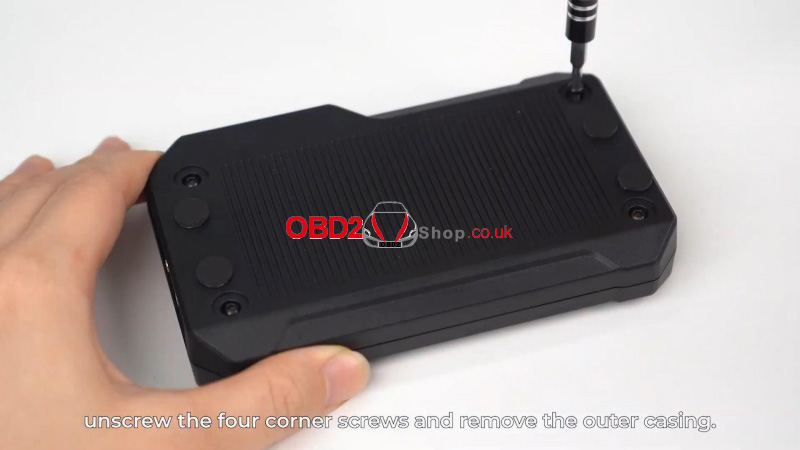
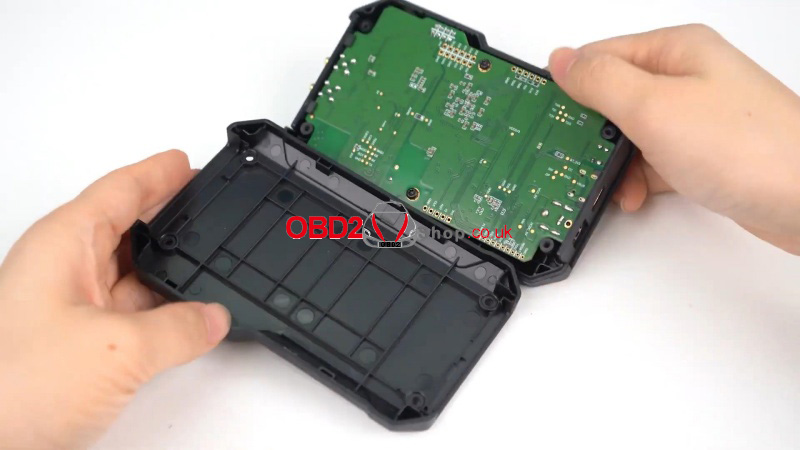
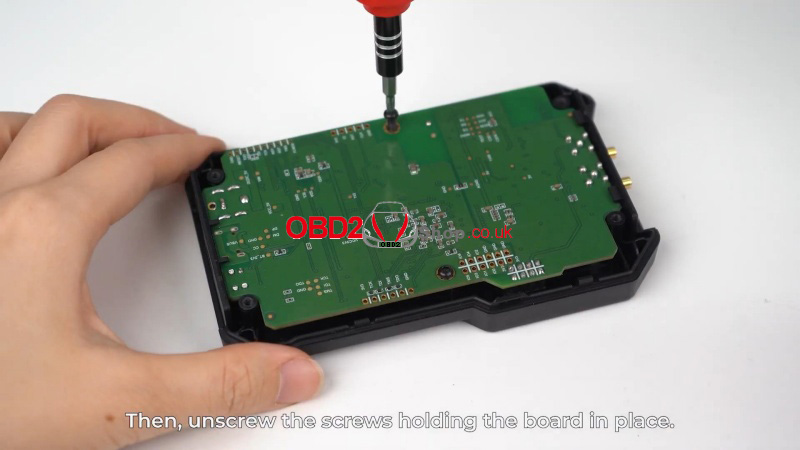
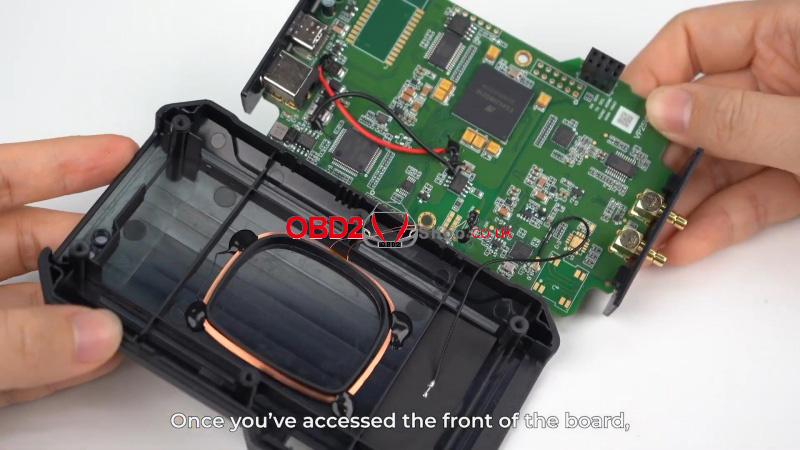
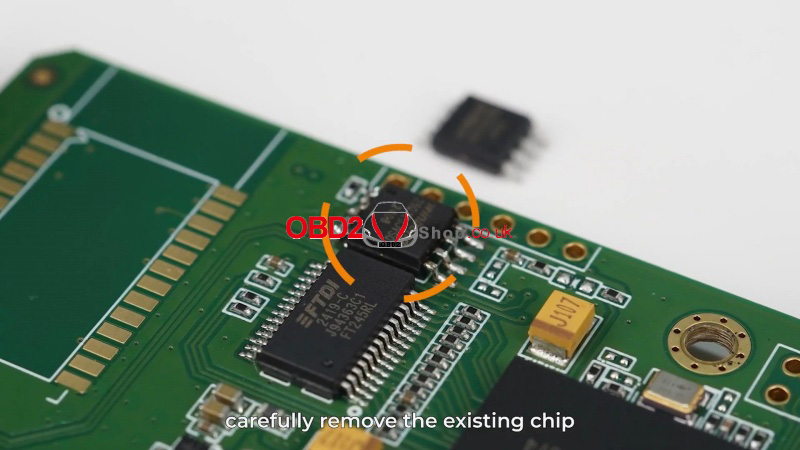
2. Unsrew the screws holding the board in place. Once you've accessed the front of the board, carefully remove the existing chip and replace it with the enhanced chip.
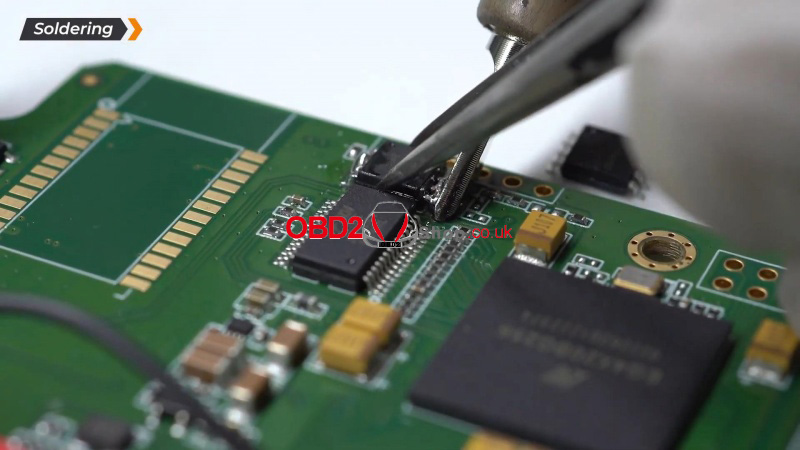
3. After replacing the chip, reassemble the device
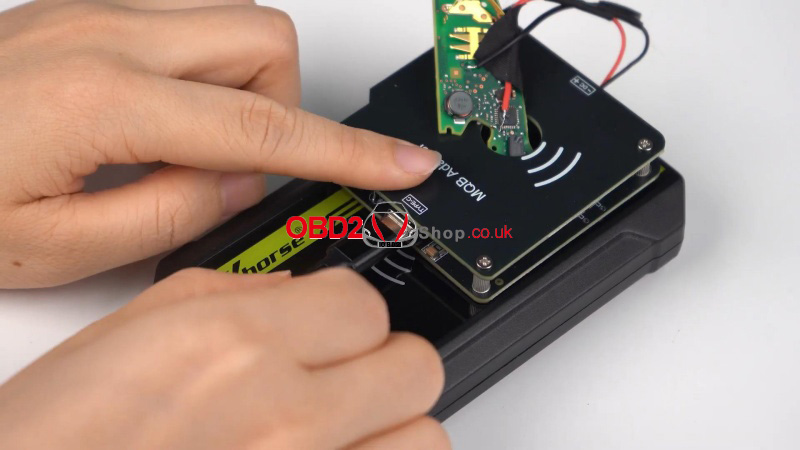
Important:
Both the device and the adapter need to be powered on for future use.
www.obd2shop.co.uk
Oznake: xhorse mlb tool
ponedjeljak, 10.03.2025.
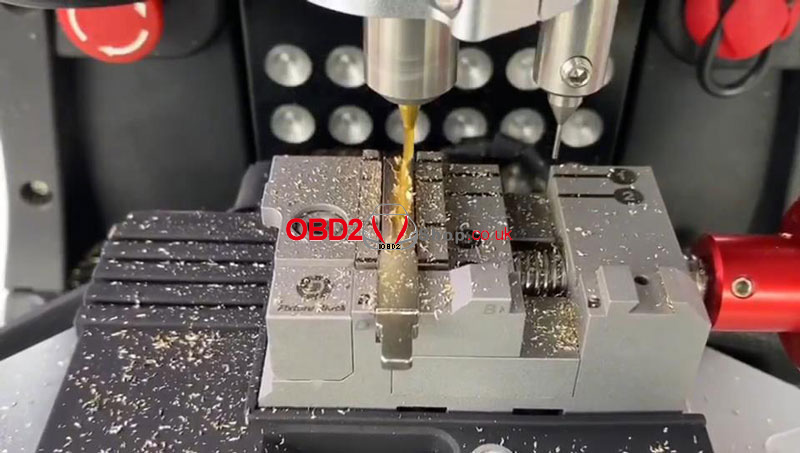
2M2 TANK 2 Pro CNC Query Ford FO21/HU198T All Keys Lost
How do I query Ford FO21 or HU198T all keys lost with 2M2 TANK 2 Pro CNC key cutting machine? This is a tutorial that shows the procedure step by step.
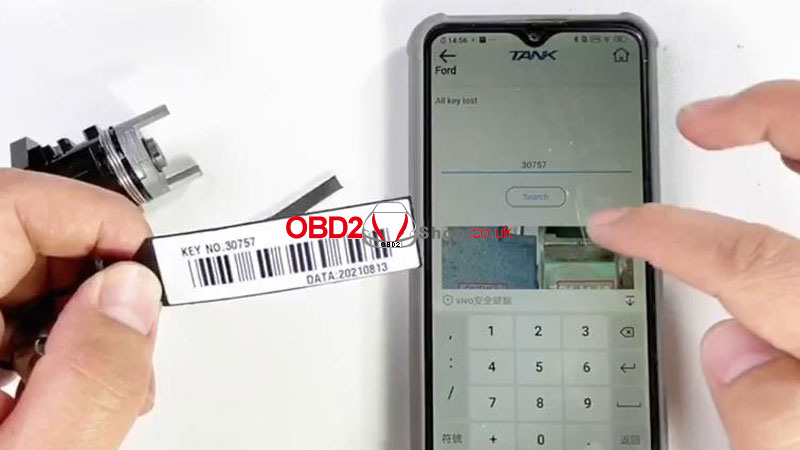
Here we have the key number: 30757.
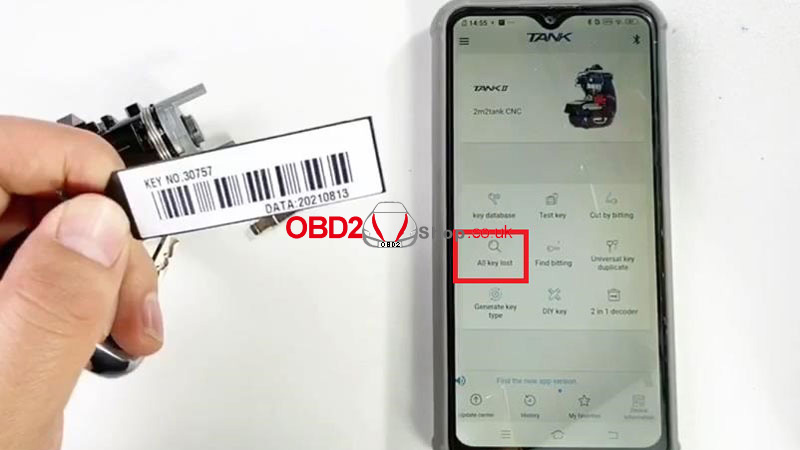
Open 2M2 TANK 2 APP.
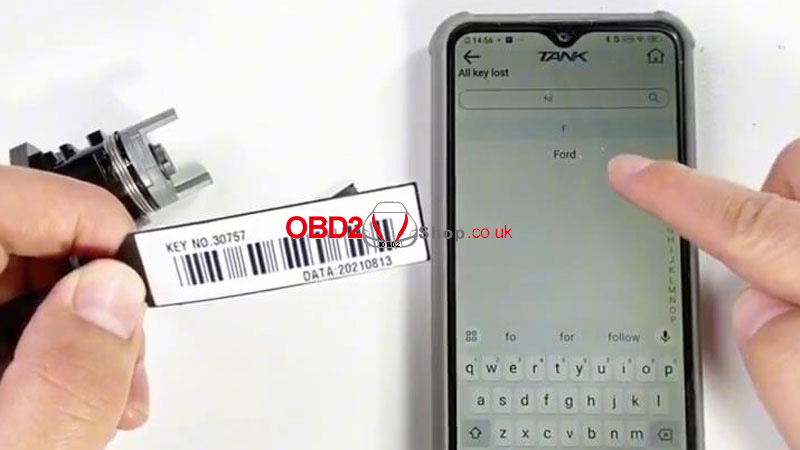
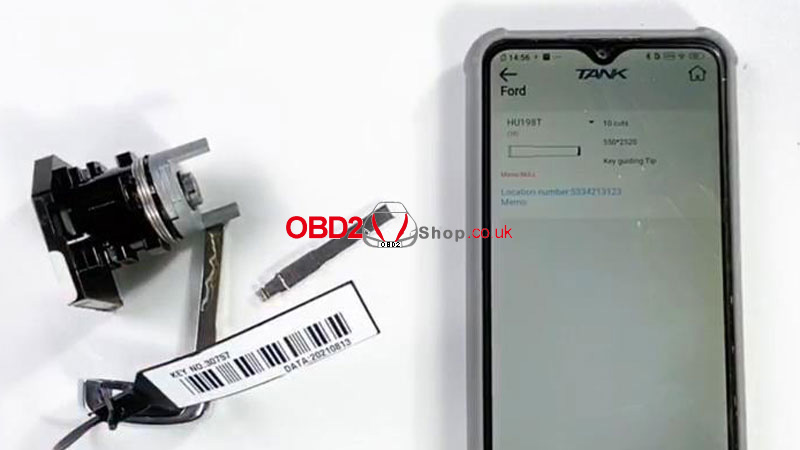
All keys lost >> Ford >> Input pin code: 30757 >> Search >> HU198T >> Cut
Follow the instructions to fix the blank key on the clamp.
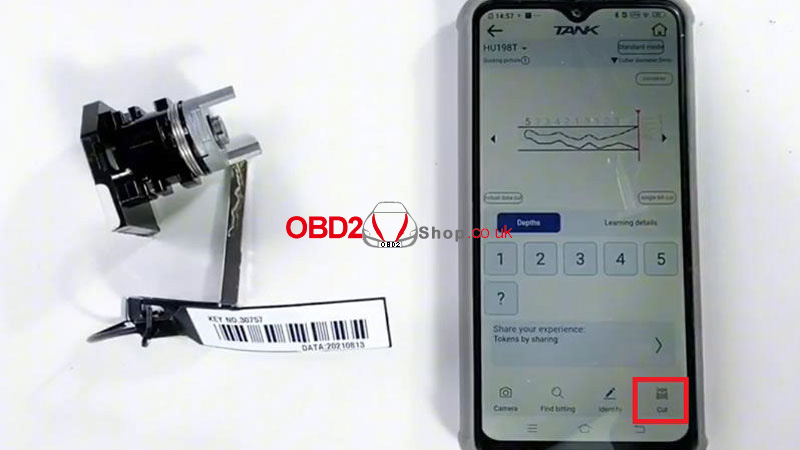
Continue >> Cut
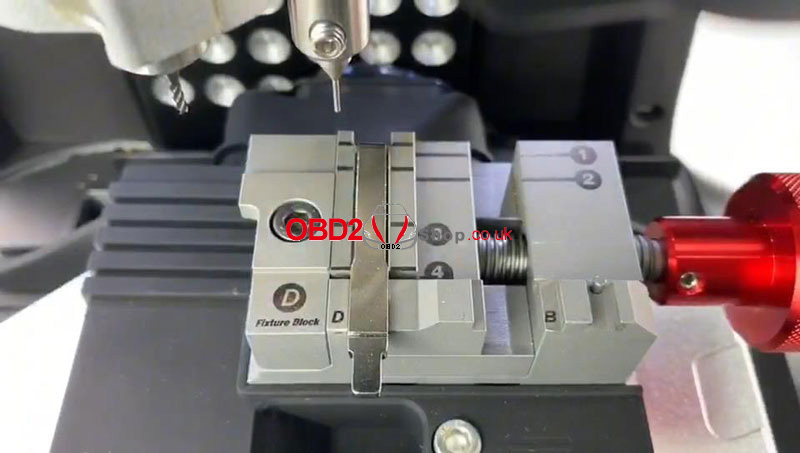
The 2M2 TANK machine will start to cut keys automatically...
Just wait until the processing is finished.
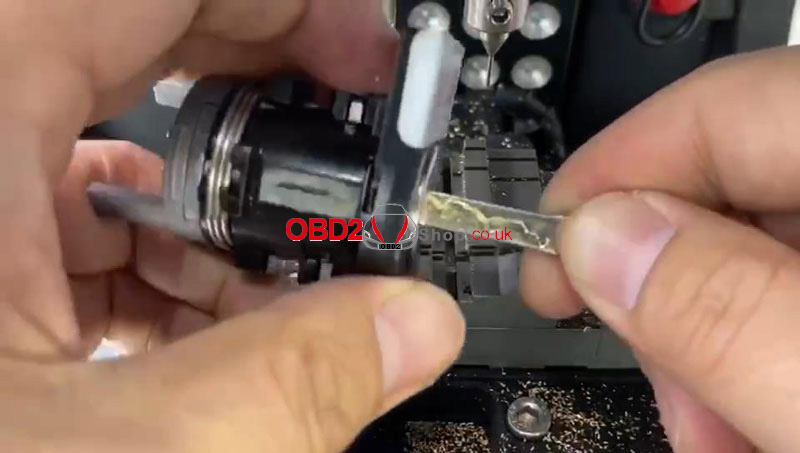
After key cutting is completed, take it out for a try.
It can successfully work.
Done.
www.obd2shop.co.uk
Oznake: 2m2 tank 2 pro cnc
četvrtak, 06.03.2025.
Yanhua ACDP BMW G Series ID8 Special Filter for ODO Correction
New arrival!!! Yanhua BMW ID8 Special Filter supports G Series ID8 odometers, such as BMW 3/4/5/7/X5/X6/X7/XM. It needs to work with Yanhua Mini ACDP 2&YH35XX Programmer + Simulator.

How to connect BMW ID8 Special Filter?
The filter does not require soldering; you only need to plug it into the car's Odometer plug and socket. The installation is simple, safe, and reliable.
1. Modify the 35128WT/35160WT simulator with YH35XX Programmer.
2. Soldering the simulator into the instrument module.
3. Insert the ID8 Special Filter into the instrument.
*The operation is the same as the ID7 instrument; no need to open the screen.


www.obd2shop.co.uk
Oznake: yanhua bmw id8 special filter
srijeda, 05.03.2025.
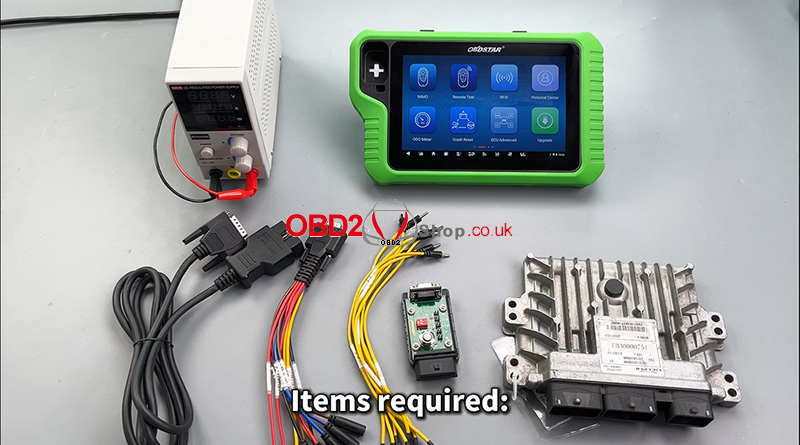
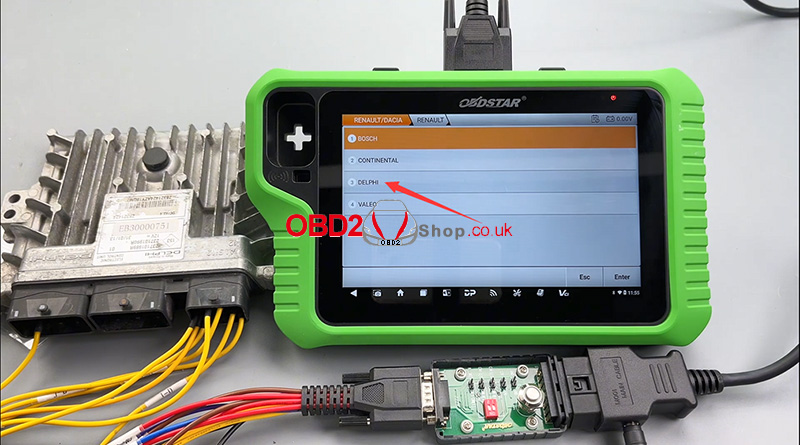
Renault Delphi DCM3.4 ECU Mileage Calibration by OBDSTAR X300 Classic G3
This post will show you how to use OBDSTAR X300 Classic G3 to perform the mileage recalibration function on the Renault Delphi DCM3.4 engine ECU.
The tools we need:
X300 Classic G3
High-power DC regulated power supply
Main cable
ECU clone jumper
P004 adapter
Renault Delphi DCM3.4 engine ECU
Before proceeding, you need to upgrade the software to the latest version.
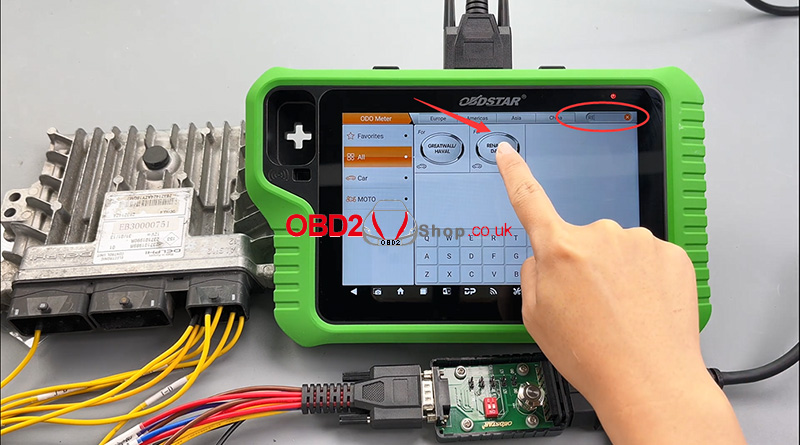
Open [ODO Meter], and in the top right corner, enter a keyword to select quickly.
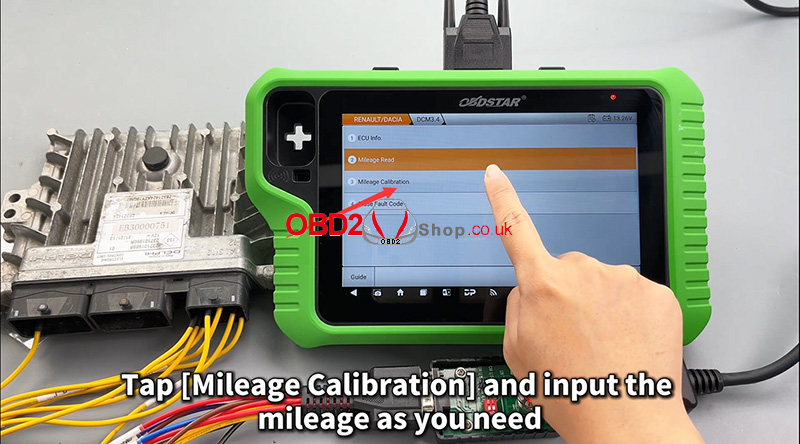
Then we click [RENAULT/DACIA] >> [RENAULT/DACIA V41.16] >> [ECM] >> [RENAULT] >> [DELPHI] >> [DCM3.4]
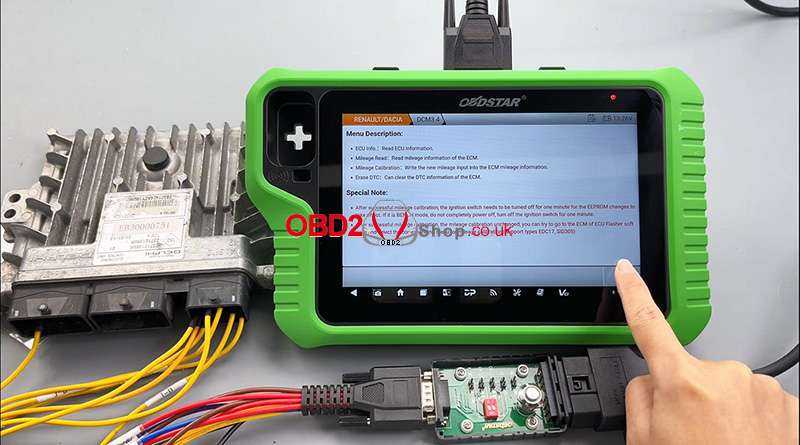
Open the [Guide] section and read the menu description and special note carefully.
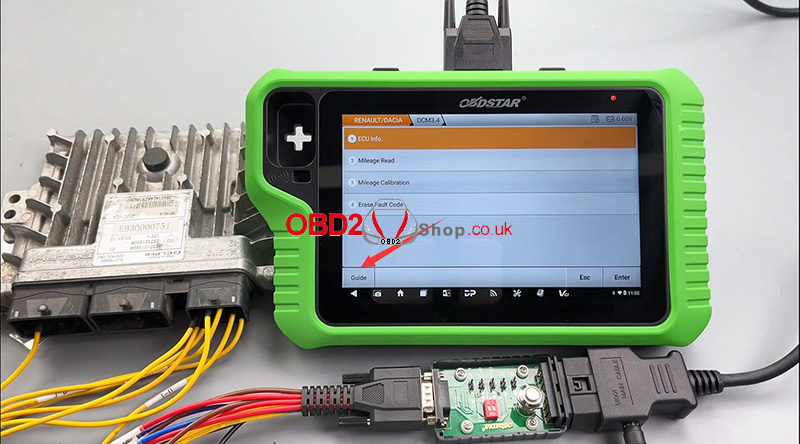
First, open the P004 adapter and check the [ECU Info.]
Check [Mlieage Read]
Tap [Mileage Calibration] and input the mileage as you need.

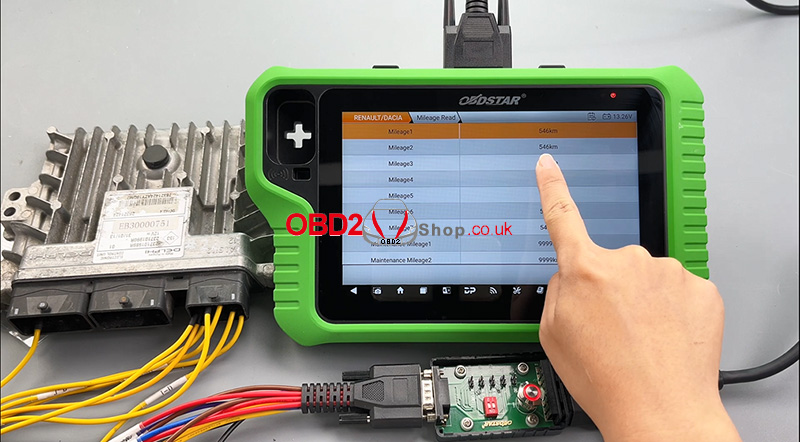
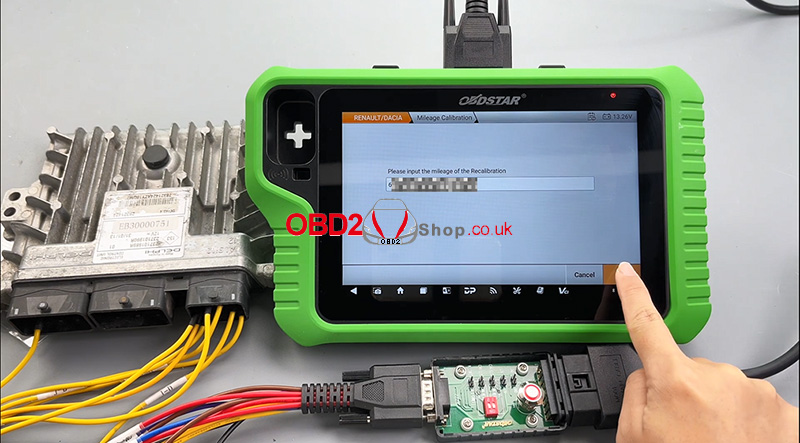
Mileage repair successful.
According to the prompt, we need to unplug one IG(ignition) wire and wait one minute before reconnecting it.
Video guides:
https://youtu.be/SdJpLcHtl5g
www.obd2shop.co.uk
Oznake: obdstar x300 classic g3

| < | ožujak, 2025 | > | ||||
| P | U | S | Č | P | S | N |
| 1 | 2 | |||||
| 3 | 4 | 5 | 6 | 7 | 8 | 9 |
| 10 | 11 | 12 | 13 | 14 | 15 | 16 |
| 17 | 18 | 19 | 20 | 21 | 22 | 23 |
| 24 | 25 | 26 | 27 | 28 | 29 | 30 |
| 31 | ||||||
Svibanj 2026 (1)
Siječanj 2026 (19)
Prosinac 2025 (22)
Studeni 2025 (21)
Listopad 2025 (20)
Rujan 2025 (21)
Kolovoz 2025 (8)
Srpanj 2025 (13)
Lipanj 2025 (9)
Svibanj 2025 (12)
Travanj 2025 (10)
Ožujak 2025 (12)
Veljača 2025 (14)
Siječanj 2025 (8)
Prosinac 2024 (6)
Studeni 2024 (6)
Listopad 2024 (4)
Rujan 2024 (7)
Kolovoz 2024 (14)
Srpanj 2024 (12)
Lipanj 2024 (10)
Svibanj 2024 (13)
Travanj 2024 (12)
Ožujak 2024 (11)
Veljača 2024 (2)
Siječanj 2024 (10)
Prosinac 2023 (8)
Studeni 2023 (6)
Listopad 2023 (7)
Rujan 2023 (9)
Kolovoz 2023 (6)
Srpanj 2023 (10)
Lipanj 2023 (4)
Veljača 2023 (8)
Siječanj 2023 (14)
Prosinac 2022 (13)
Studeni 2022 (14)
Listopad 2022 (18)
Rujan 2022 (9)
Kolovoz 2022 (16)
Srpanj 2022 (11)
Lipanj 2022 (14)
Svibanj 2022 (13)
Travanj 2022 (12)
Ožujak 2022 (12)
Veljača 2022 (13)
Siječanj 2022 (10)
Srpanj 2021 (1)
Dnevnik.hr
Gol.hr
Zadovoljna.hr
Novaplus.hr
NovaTV.hr
DomaTV.hr
Mojamini.tv