OBD2 tools on OBD2shop.co.uk https://blog.dnevnik.hr/obd2shop
utorak, 31.10.2023.
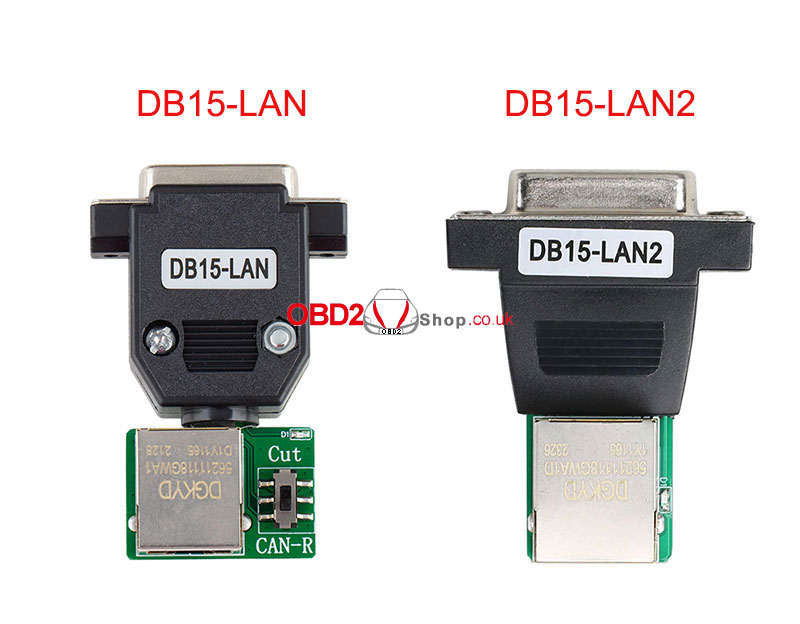
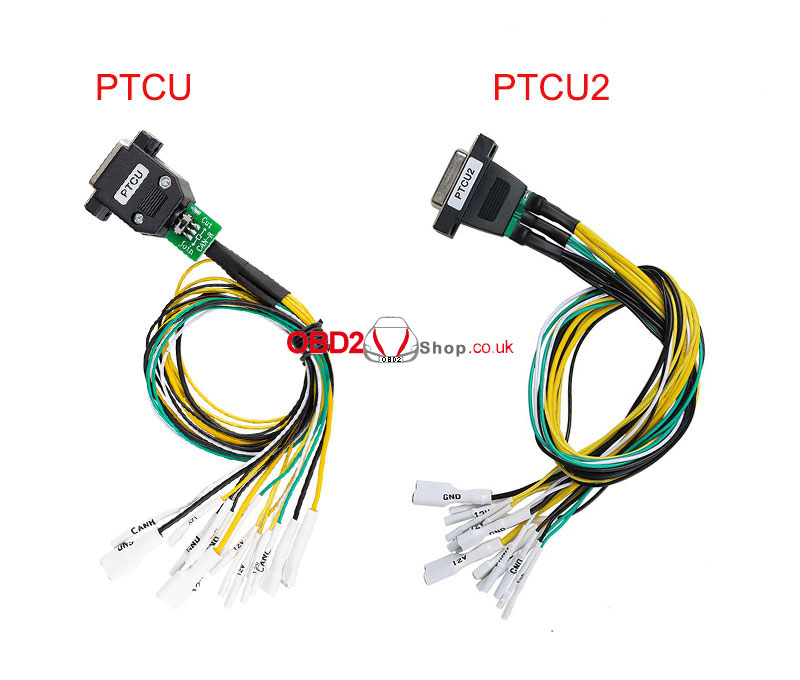
Modify ACDP-1 Module 18/19/25/30 adapters to fit ACDP-2
This post shows how to modify the DB15-LAN and PTCU adapters in ACDP-1 Module 19 to fit ACDP-2.
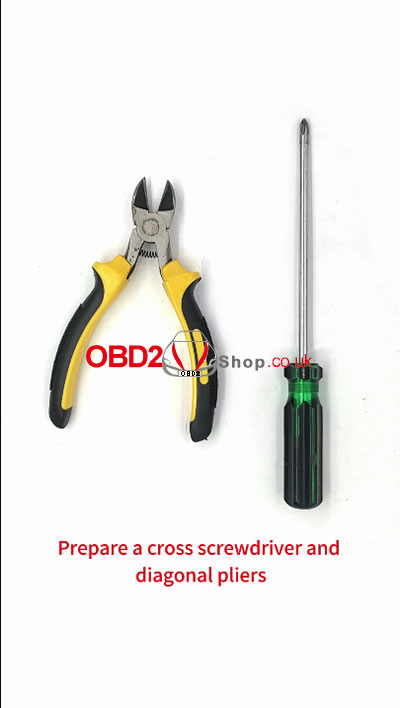
Prepare a cross screwdriver and diagonal pliers.
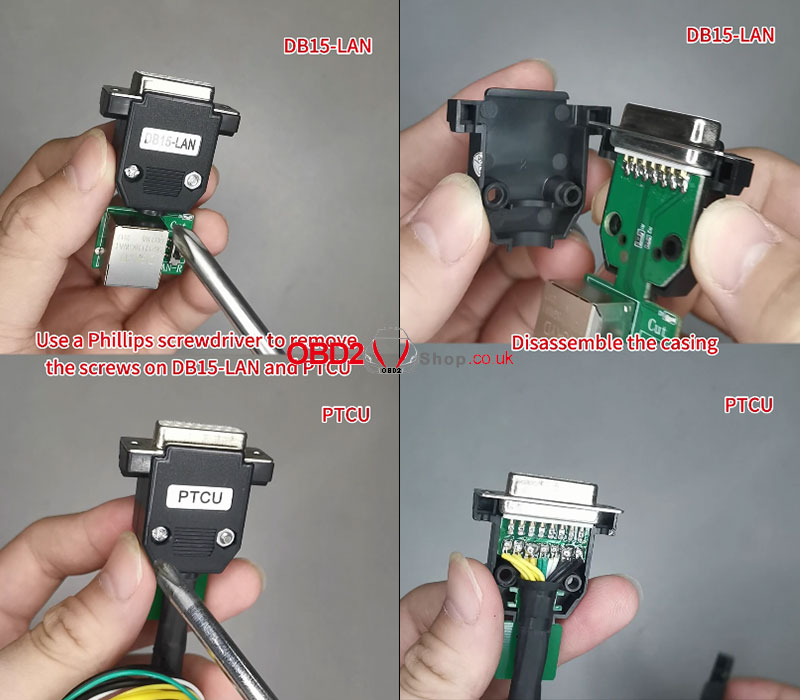
Use a phillips screwdriver to remove the screw on DB15-LAN and PTCU.
Disassemble the casing.
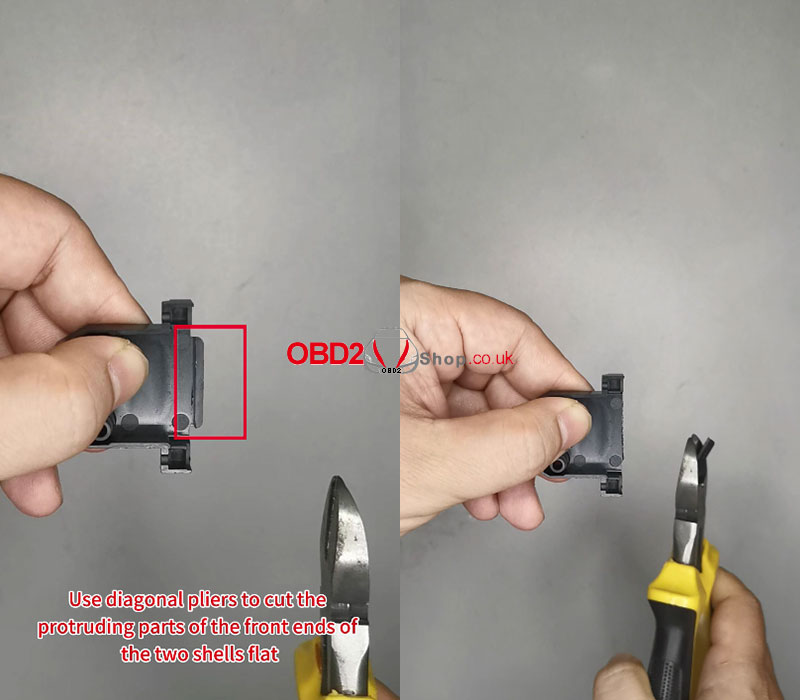
Use diagonal pliers to cut the protruding parts of the front ends of the two shells flat.
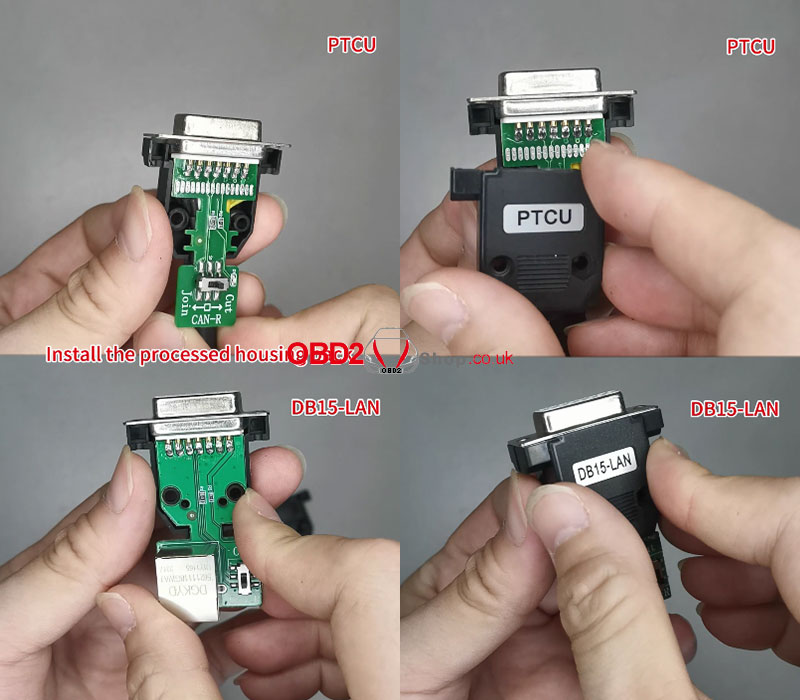
Install the processed housing back.
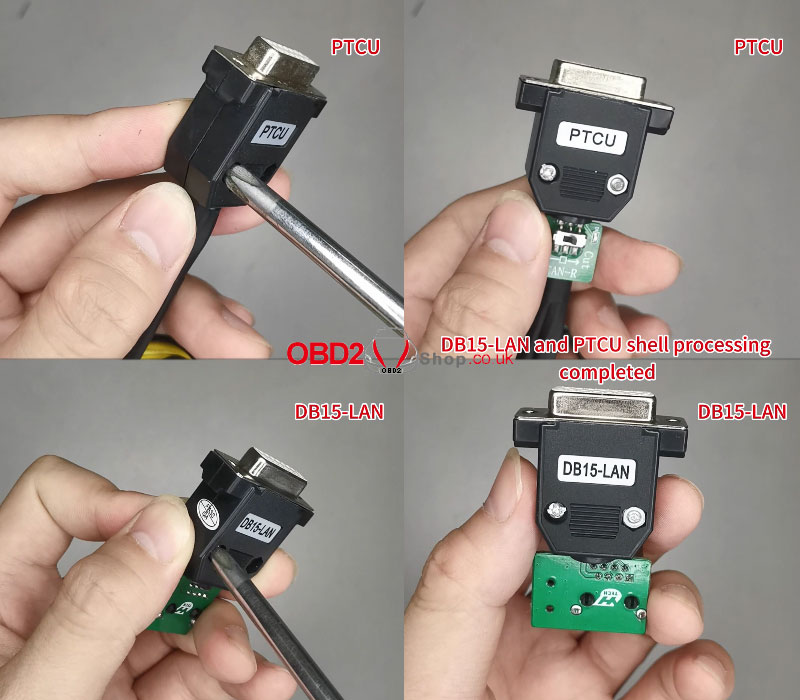
Tighten the screws.
DB15-LAN and PTCU shell processing completed.
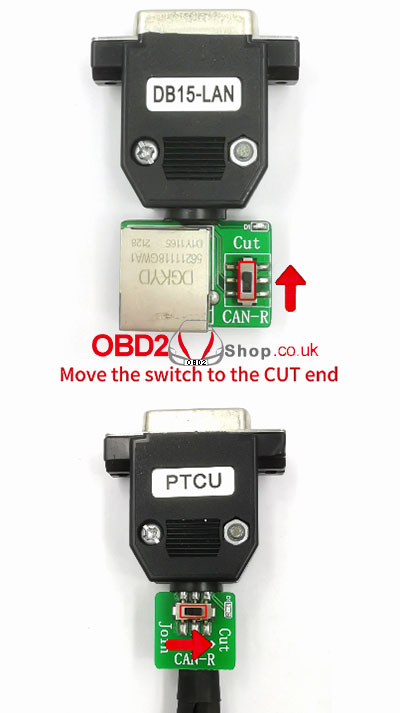
Move the switch to the CUT end.
Oznake: yanhua mini acdp 2
četvrtak, 26.10.2023.
(Solved) ACDP-2 connection to PC with USB cable failed
The previous article introduced that there are three ways to connect ACDP-2: Android, iOS, and PC.
For specific connection methods, please refer to the article:
Connect Yanhua Mini ACDP-2 to Android/iOS/PC via USB Cable
This article will tell you how to fix the problem when ACDP-2 fails to connect to the computer via a USB cable.
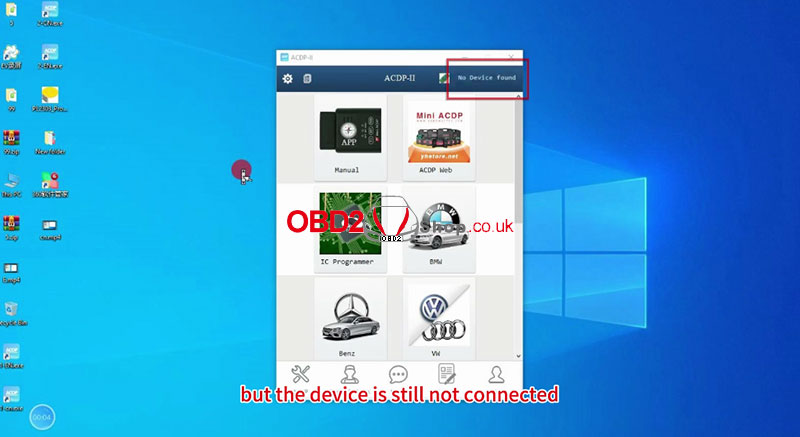
The situation where ACDP-2 connected to a computer via USB cable failed:
When the ACDP host is connected to the computer and then you open the ACDP 2 software on the PC, it shows that the device is not connected.
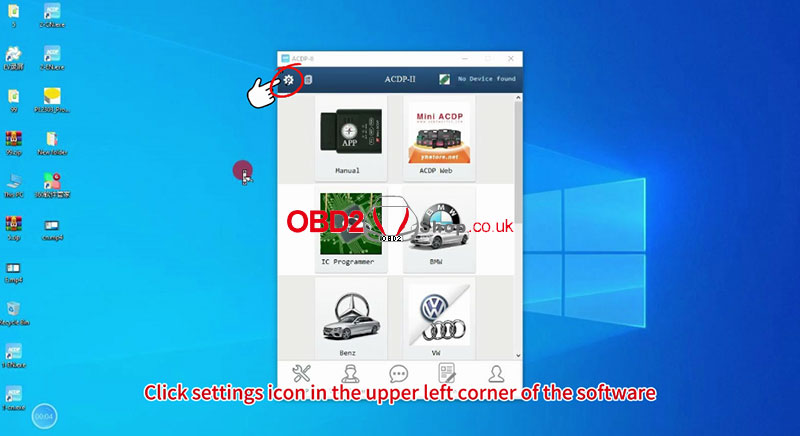
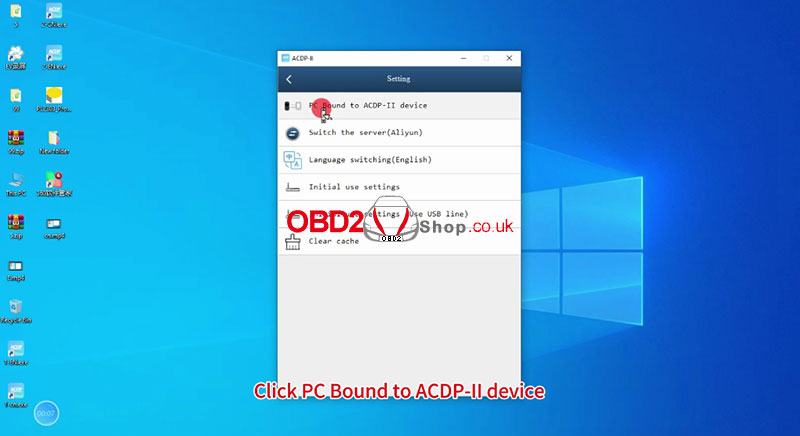
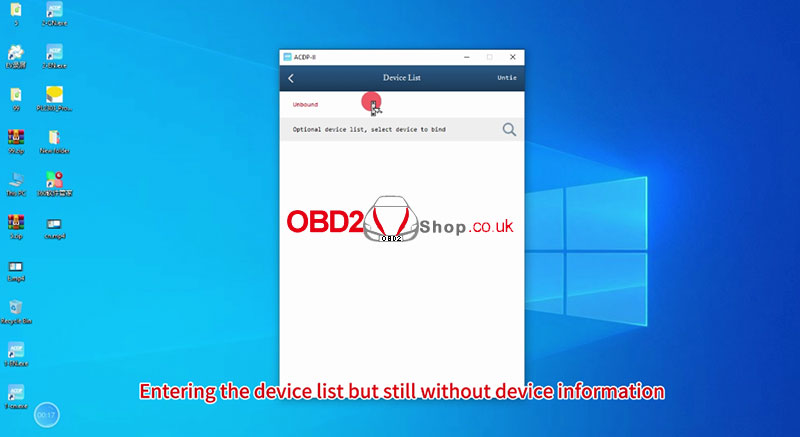
Click the "Setting" icon in the upper left corner of the software, then "PC Bound to ACDP-II device", and we can see the device list without any device information.

How to solve it:
This situation can be achieved by changing the device IP and connecting to the device.
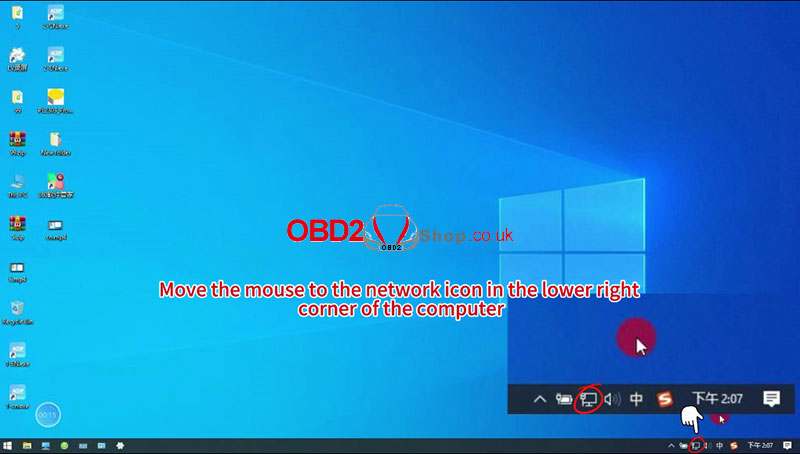
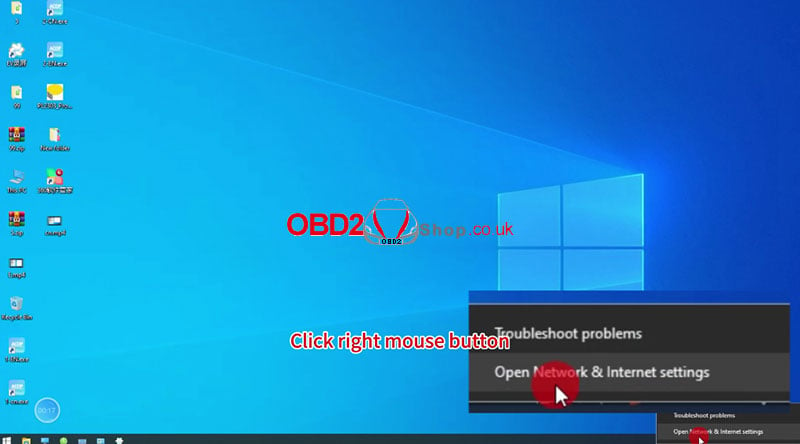
Step 1. Move your mouse over the network icon in the lower right corner of your computer, then right-click and select "Open Network & Internet Settings".
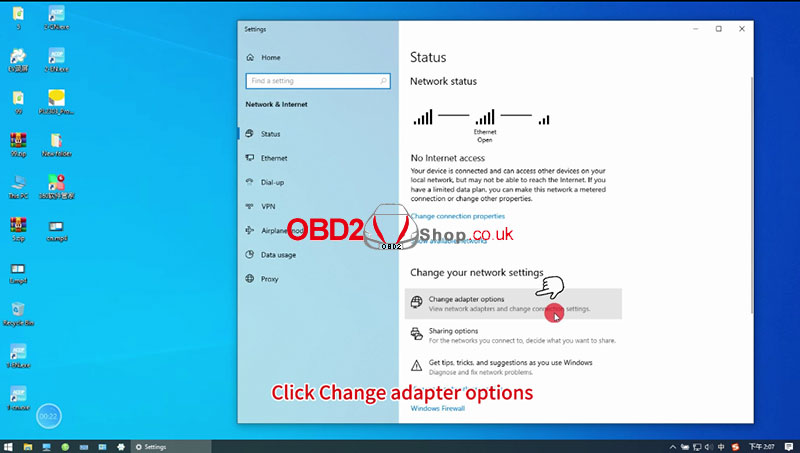
Step 2. Click "Change adapter options".
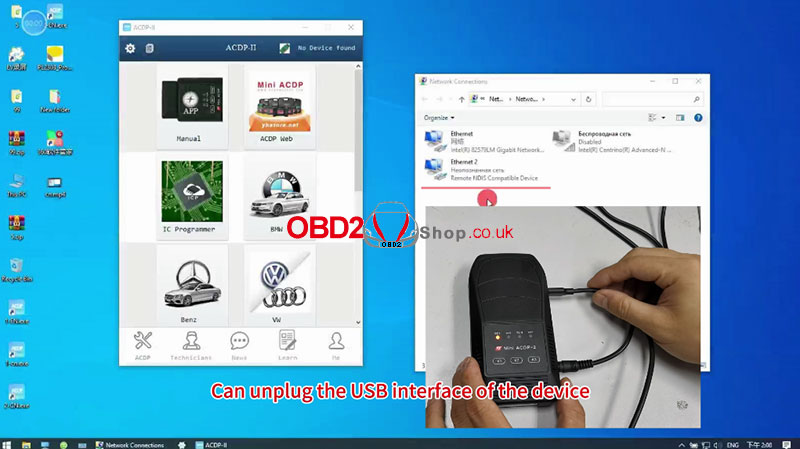
If you don't know which network ACDP is active on, you can unplug the USB interface connected to the device to confirm.
Step 3. Move the mouse over the device network.
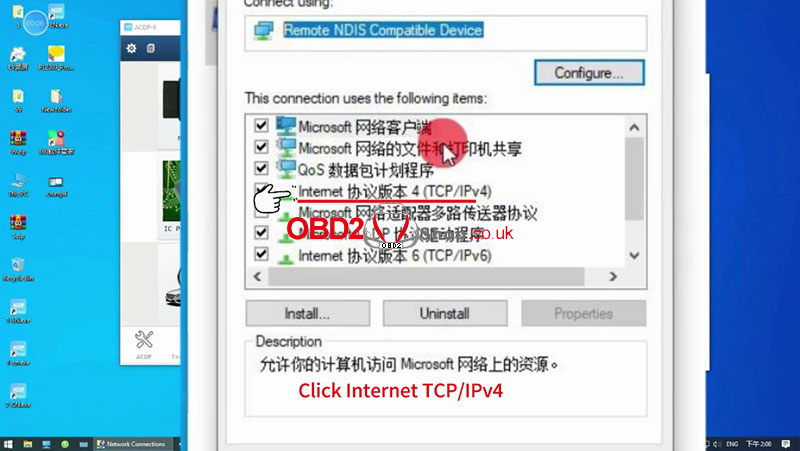
Right-click and click "Properties."
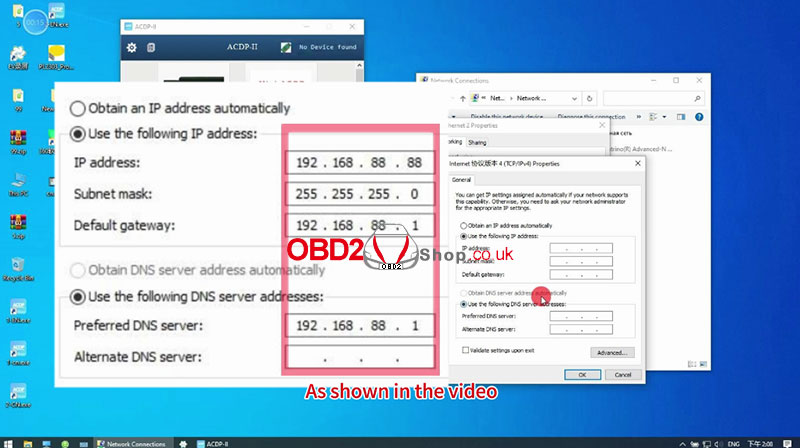
Choose "Internet TCP/IPv4" >> "Use the following IP address:"
Enter your IP address and DNS, as shown below, and click "OK" to continue.
Wait a few seconds before the device automatically connects.
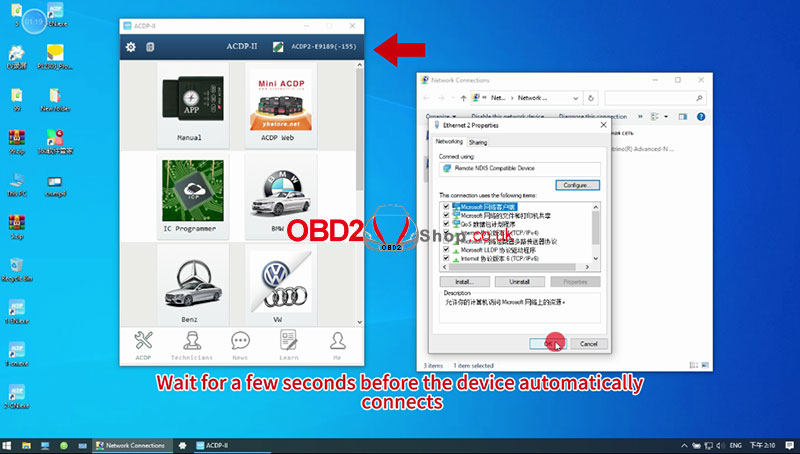
Done!
For detailed operations, please refer to:
https://youtu.be/eNv3jIiCSGo
Oznake: yanhua mini acdp 2
utorak, 24.10.2023.
Mitsubishi Triton 2019 Steering Angle Sensor Calibration via Launch X431
This post will guide you on how to use Launch X431 PAD VII/PAD V to perform steering angle sensor calibration for your 2019 Mitsubishi Triton.
Procedure:
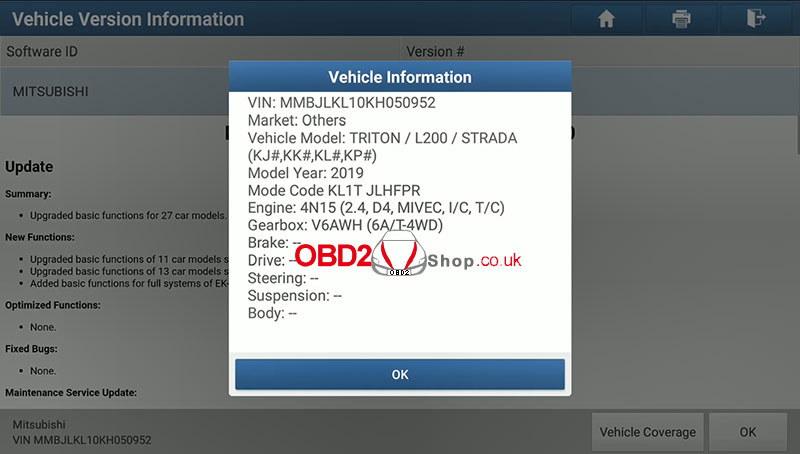
Open the X431 APP to identify vehicle information.
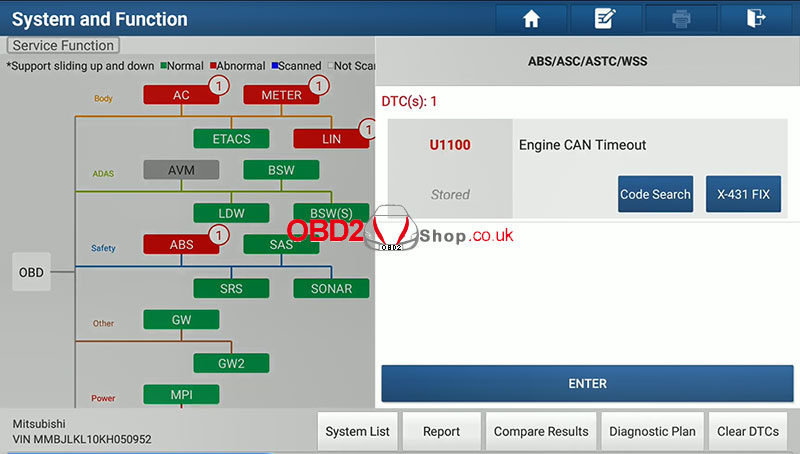
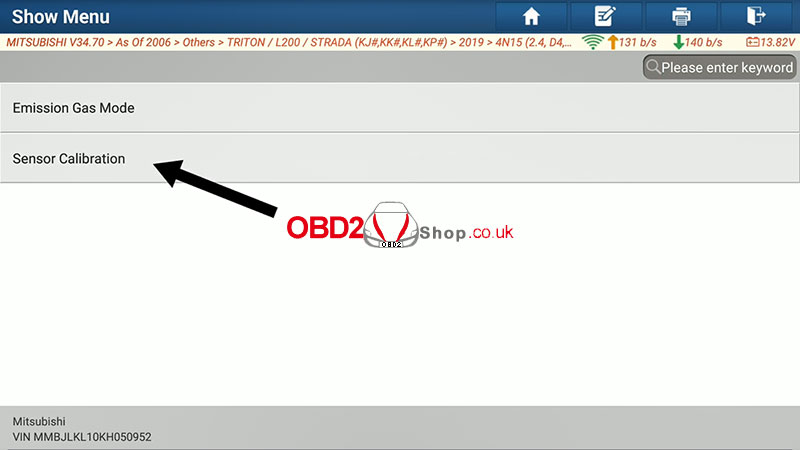
Then click back and select "Service Function".
The following error has been recognized, click "Enter" to continue.
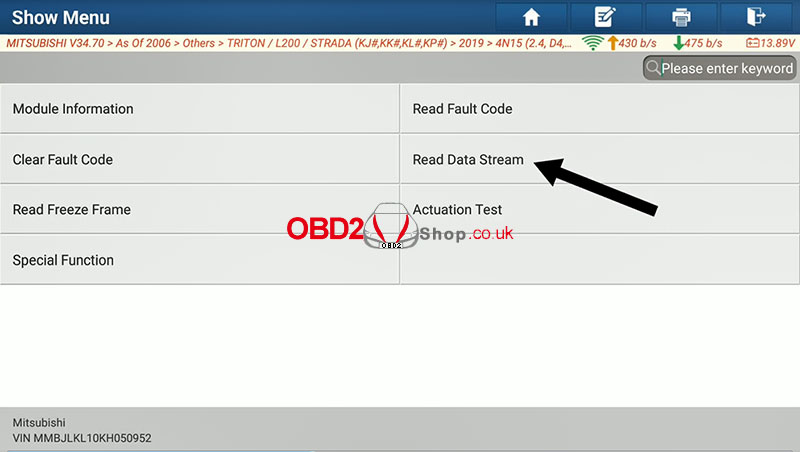
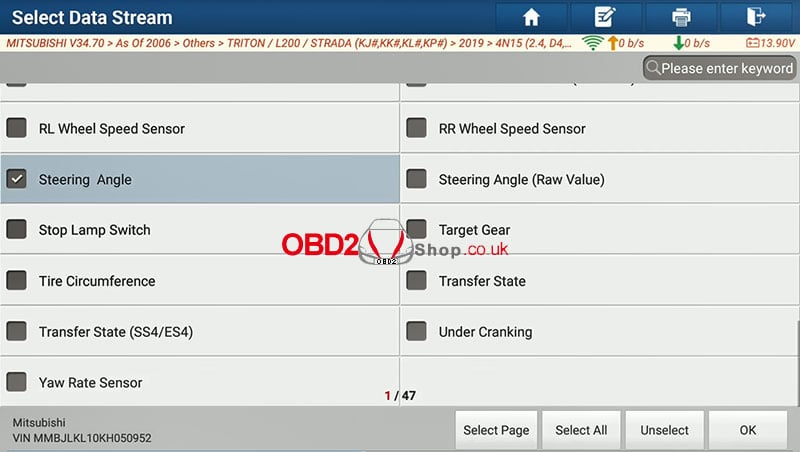
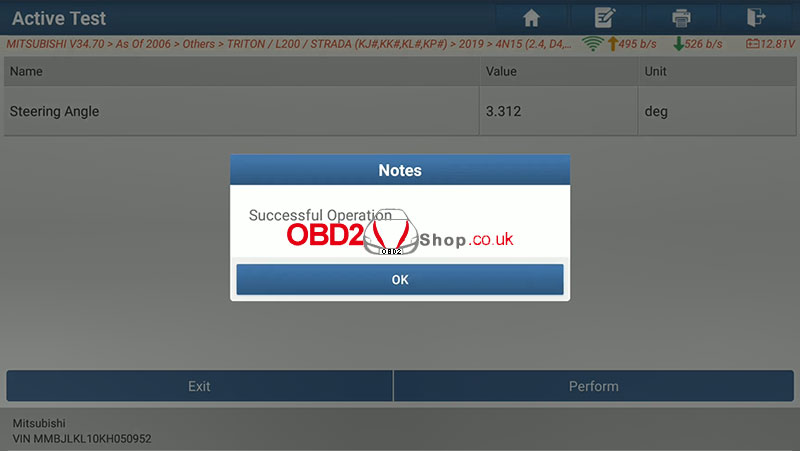
Select "Read data stream" >> "Steering angle" and click "OK" to continue.
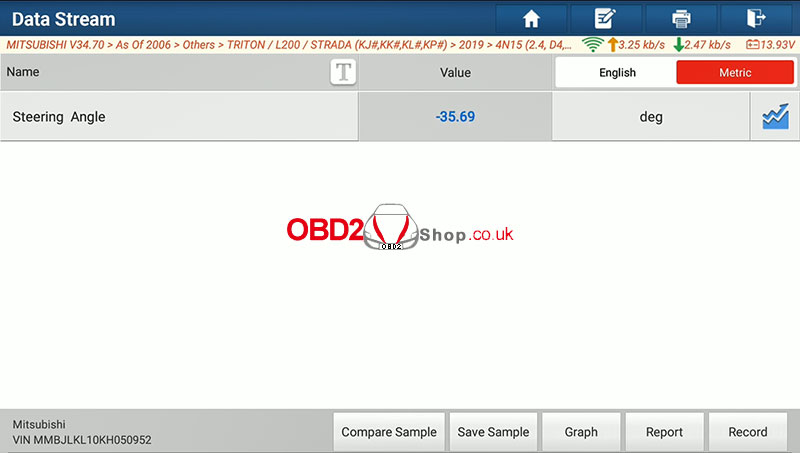
Turn the steering wheel to make sure it works.
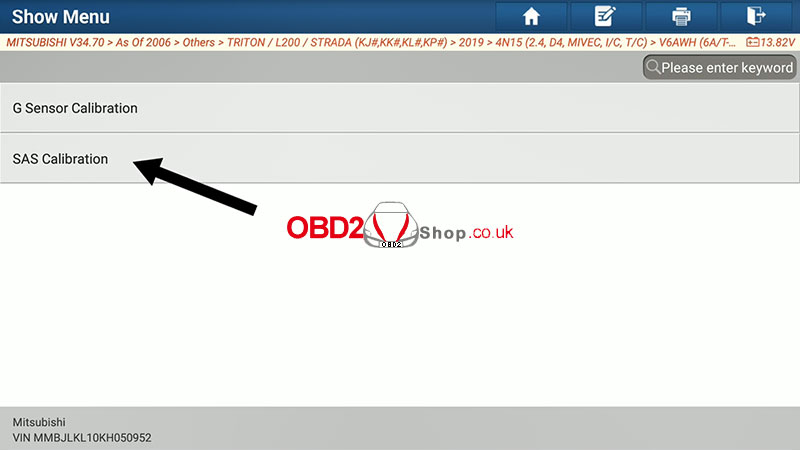
Go back and select "Read data stream" again and click "Sensor Calibration" >> "SAS Calibration".

"Are you sure to perform this function?" Click "Yes" to continue.
Initializing Communication, please wait...
Use X431 Pad VII to calibrate the steering angle sensor of your 2019 Mitsubishi Triton successfully.

Video Guides:
https://youtu.be/JNNumZltxA0
Oznake: launch x431 pad v 7
srijeda, 18.10.2023.
Launch X431 ECU & TCU Programmer Clone BMW MSV90
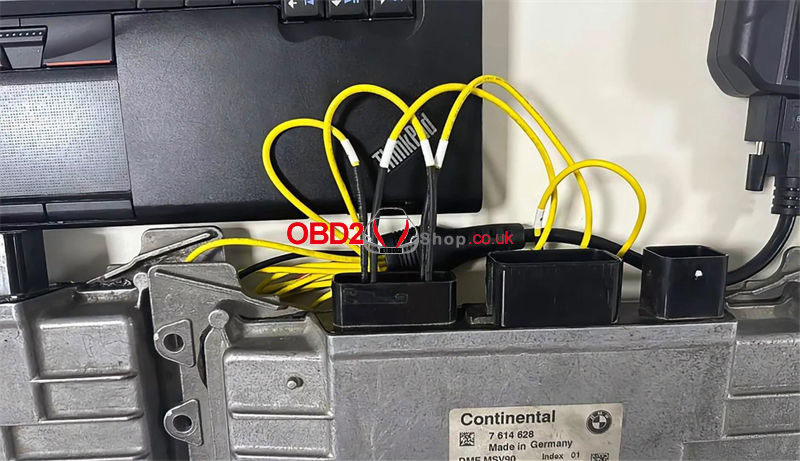
How to clone BMW MSV90 with Launch X431 ECU & TCU Programmer by bench? Read this article to learn the operation. Users can follow the same steps if having X431 X-PROG3 + PC Adapter instead.
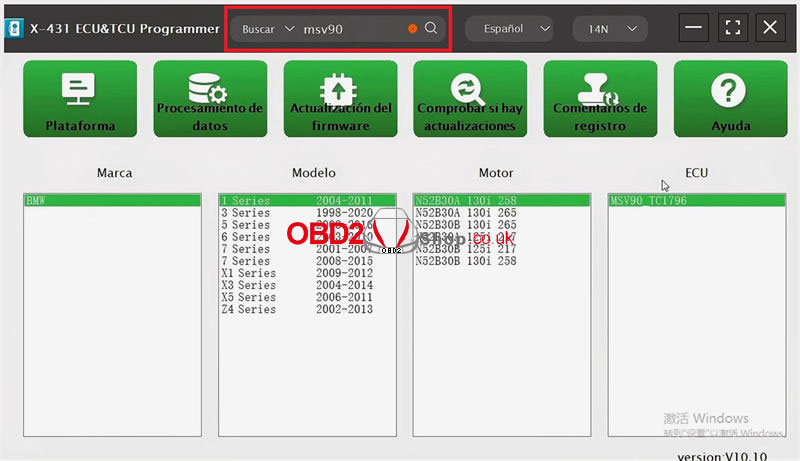
Open X431 ECU & TCU Programmer software,
Search or selected ECU model: MSV90
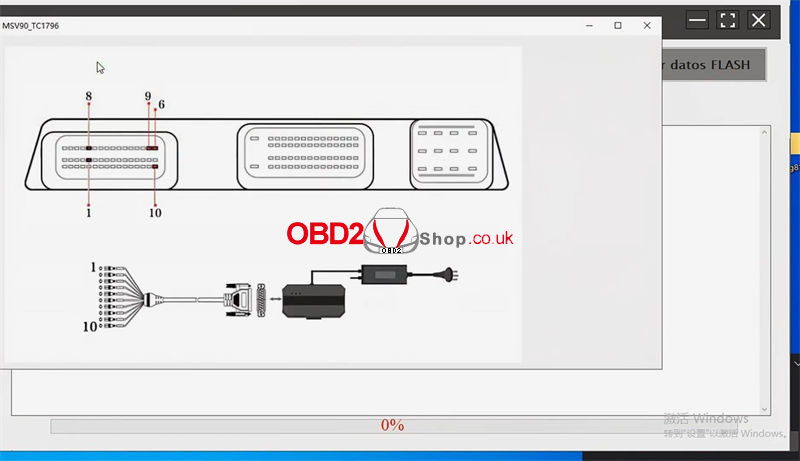
BMW, 1 series 2004-2011, N52B30A 130i 258, MSV90 TC1796 ECU
Click "Direct connection of diagram" to check wiring diagram.
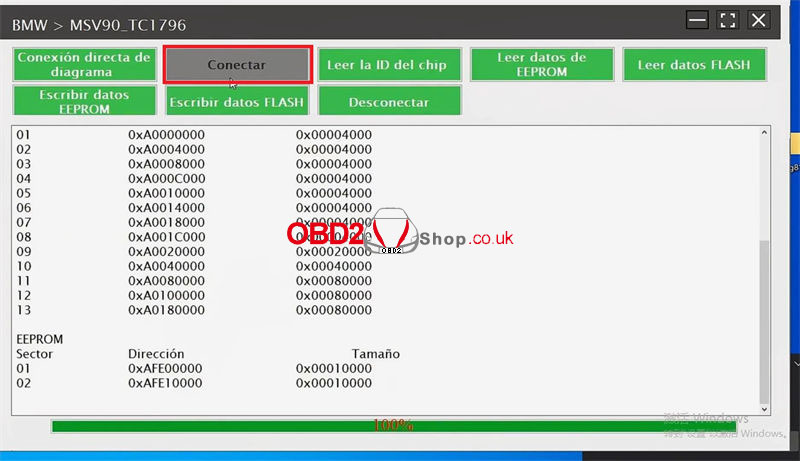
Click "Connect" to connect device.
Click "Read EEPROM data".
Save EEPROM data.
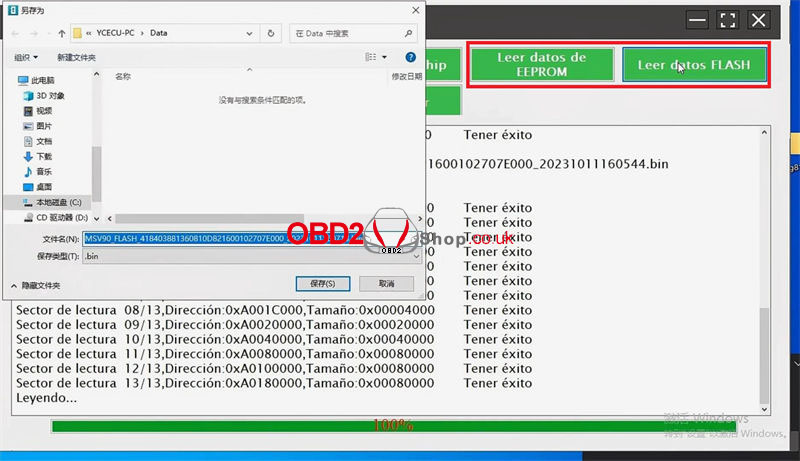
Click "Read FLASH data".
Save FLASH data.
Click "Disconnect" to re-connect the external ECU computer.
Click "Connect".
Click "Read EEPROM data".
Save EEPROM data.
Click "Read FLASH data".
Save FLASH data.
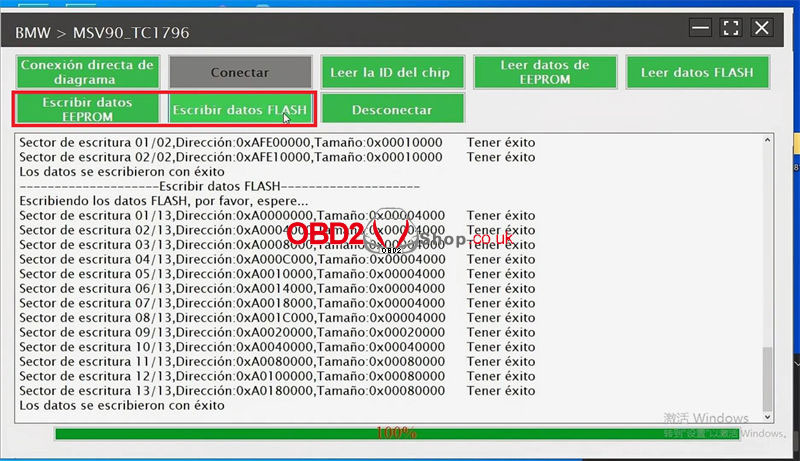
Click "Write EEPROM data".
Load EEPROM data file.
EEPROM data was written successfully.
Click "Write FLASH data".
Load FLASH data file.
FLASH data was written successfully.
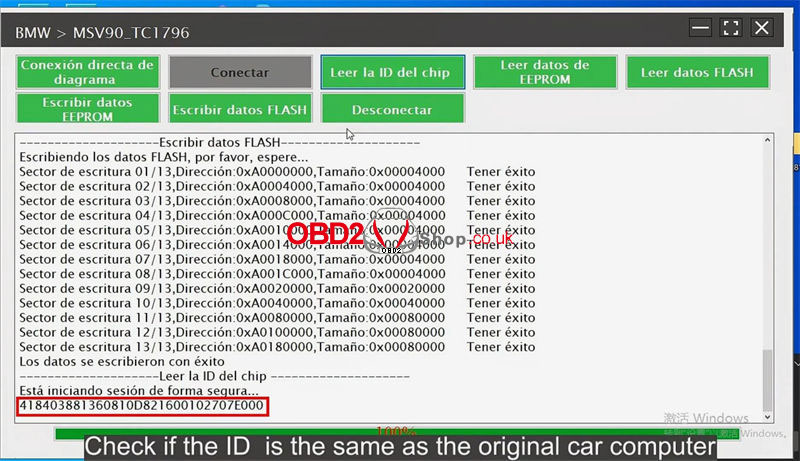
Click "Read chip ID".
Check if the ID is the same as the original car computer.
Click "Disconnect" when completed.
Done.
www.obd2shop.co.uk
Oznake: launch x431 ecu tool
utorak, 17.10.2023.
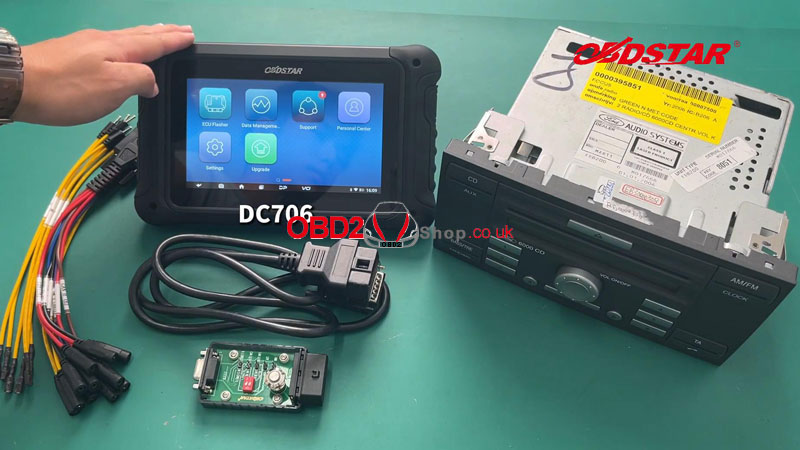
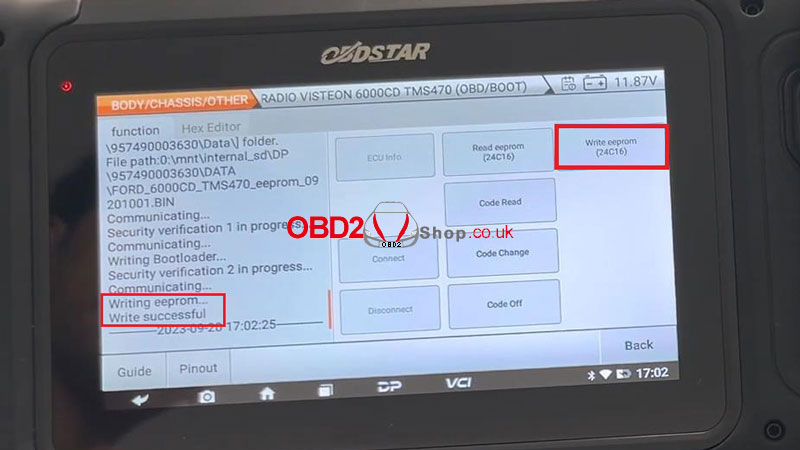
OBDSTAR DC706 Read & Write Ford 6000CD Radio Code
This is a tutorial on how to read and write Ford 6000CD radio code with OBDSTAR DC706 by bench. It can also support to clone EEPROM. Read this article to learn step by step.
Accessories
DC706 ECU Tool
P004 ECU Clone Adapter + Jumper
Main cable
Ford 6000CD
Please keep DC706 charging and communicating during the whole process.
Operation
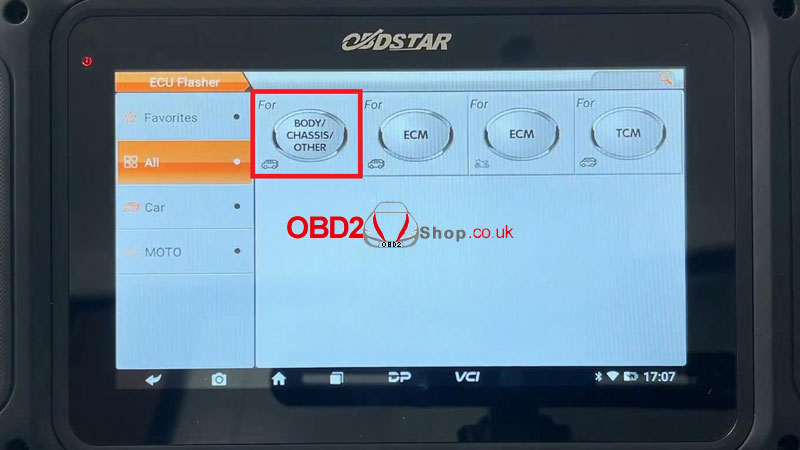
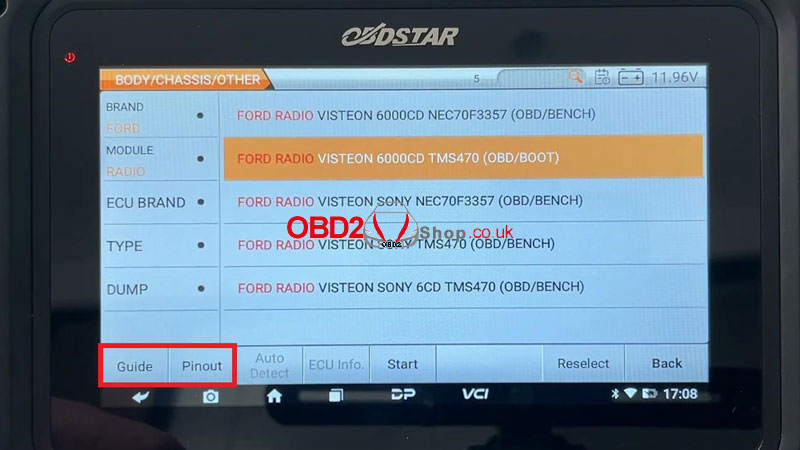
ECU Flasher >> BODY/ CHASSIS/ OTHER >> Latest version >> BRAND >> FORD >> FORD RADIO VISTEON 6000CD TMS470(OBD/BOOT)
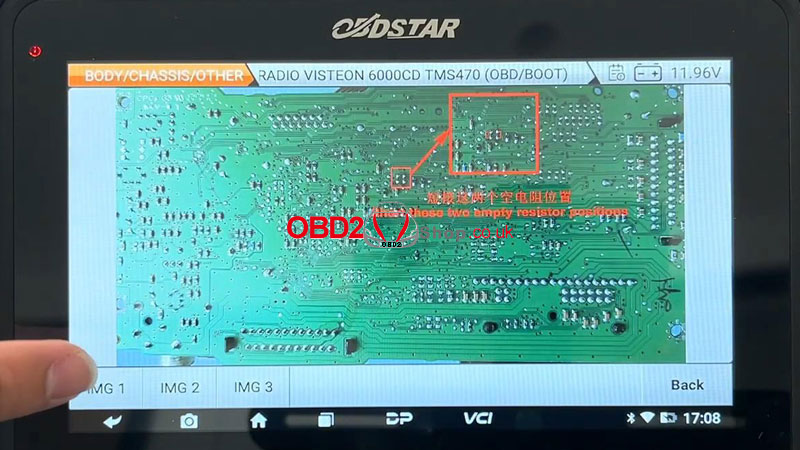
Press "Guide/Pinout" to check the best detection method.
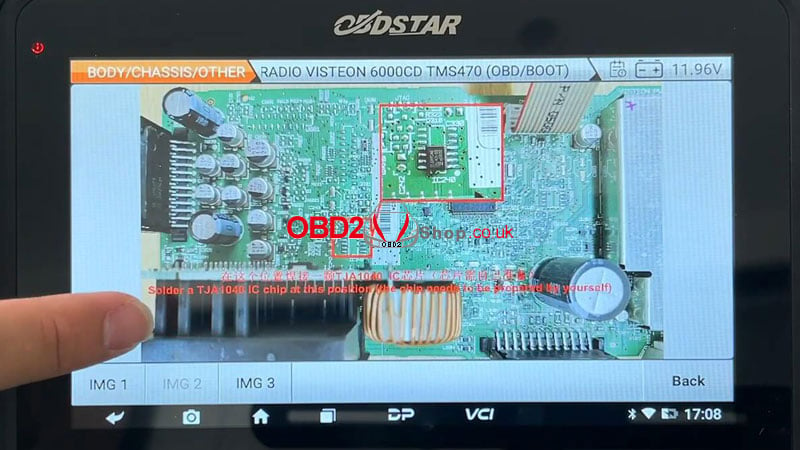
Connect the harness according to the wiring diagram.

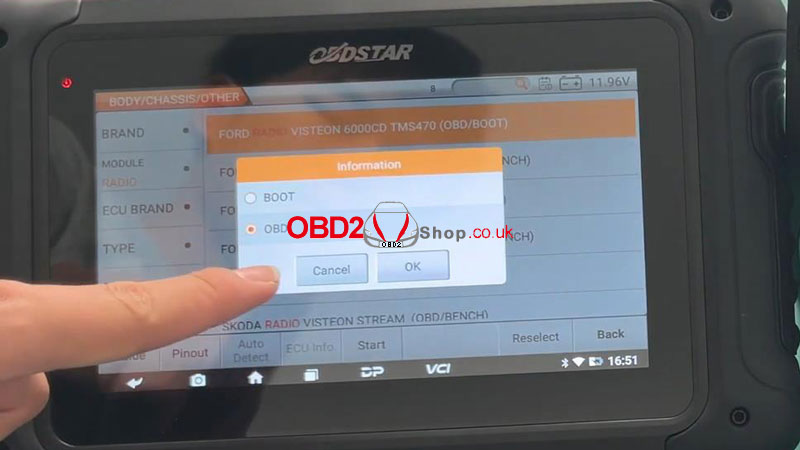
After a successful connection, press
Start >> OBD >> OK
This function is available by connecting the server, please ensure the Internet connection is normal.
Switch on P004 ignition.
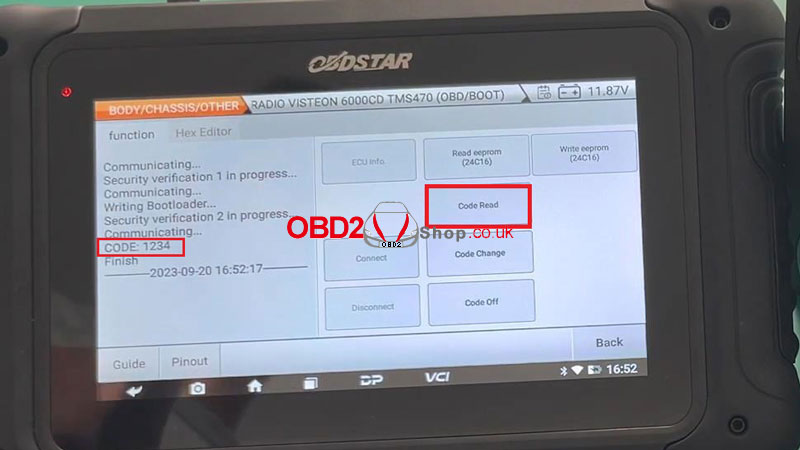
Press "Code Read".
Writing bootloader...
Pincode read successfully:1234
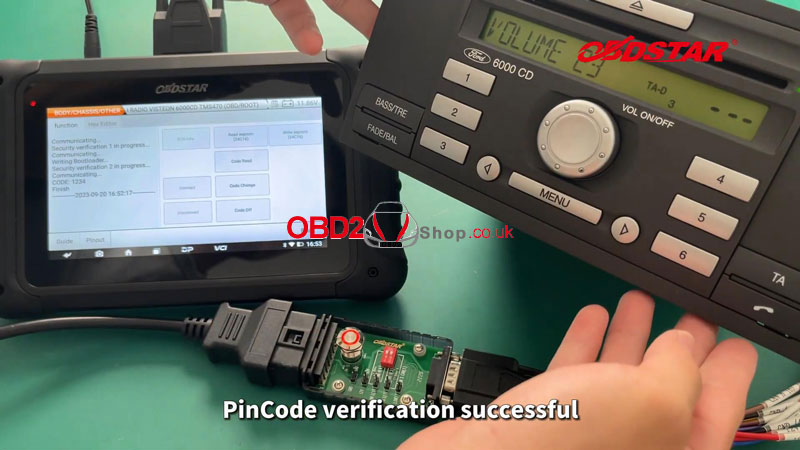
Reboot and enter the pincode on Ford 6000CD radio for verification.
Pincode verification is successful.
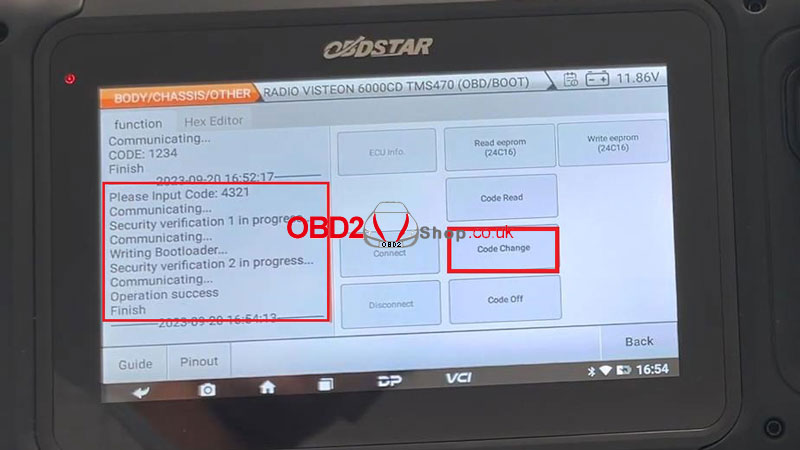
Press "Code Change" to change the pin code: 4321
Operation success.
Reboot and verify the changed pincode on the 6000CD radio.
Pincode changed successfully.
Press "Code off".
Security verification in progress...
Operation success.
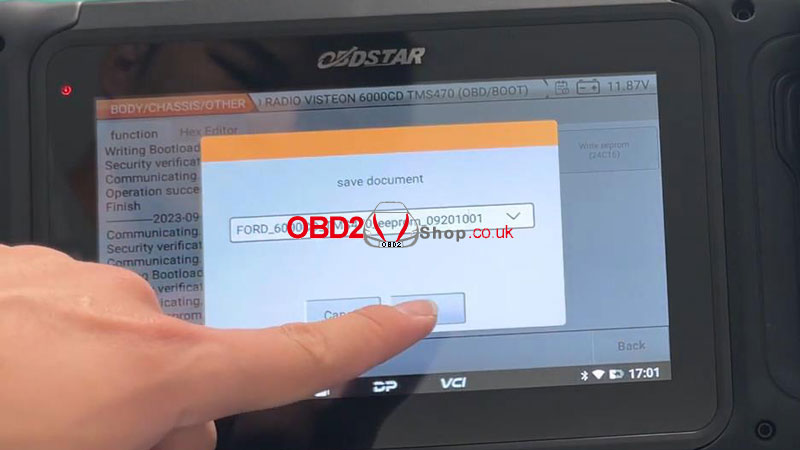
Next, we can also read/write EEPROM (24C16) for radio ECU cloning.
Save EEPROM's success.
WriteEEPROM(24C16) >> Load external data
Writing EEPROM...
Writing success.
The read-and-write EEPROM operation is completed.
www.obd2shop.co.uk
Oznake: obdstar dc706
ponedjeljak, 16.10.2023.
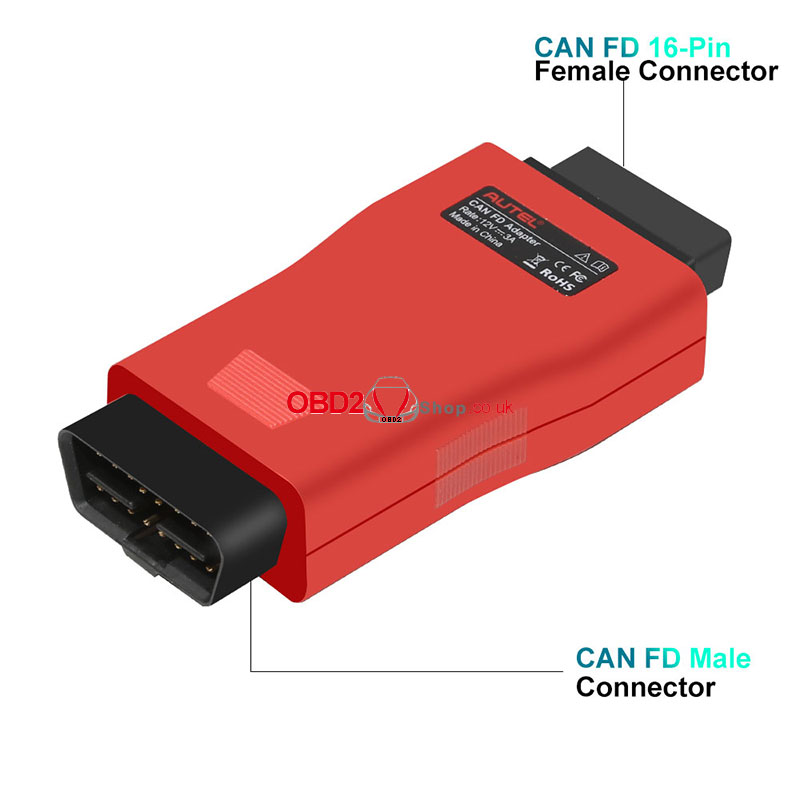
Autel CAN FD adapter can expand the support of the CAN FD protocol to specifically support the diagnosis of some new models, such as 2020 GM models.
The CAN FD Adapter must be used with a supported Autel Vehicle Communication interface (VCI) to communicate with applicable vehicles.
IMPORTANT:
1. The CAN FD Adapter is currently compatible with Autel's MaxiFlash Elite J2534-VCI, Wireless Diagnostic Interface, VCI 100, and VCI Mini.
2. Prior to use, update the VCI with the latest firmware.
VCI update please refer to How to update your Autel V200 VCI
There are two connection methods, you can select one based on the type of VCI device you have.
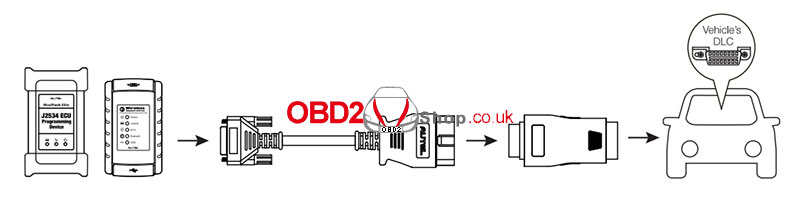
1. MaxiFlash Elite J2534-VCI/Wireless Diagnostic Interface:
` Connect the main cable's female adapter to the Vehicle Data Connector on the VCI unit, and tighten the captive (thumb) screws.
a Connect the CAN FD adapter's 16-pin female connector to the main cable's male adapter.
b Connect the attached CAN FD adapter to the vehicle's DLC, which is generally located under the vehicle dashboard.
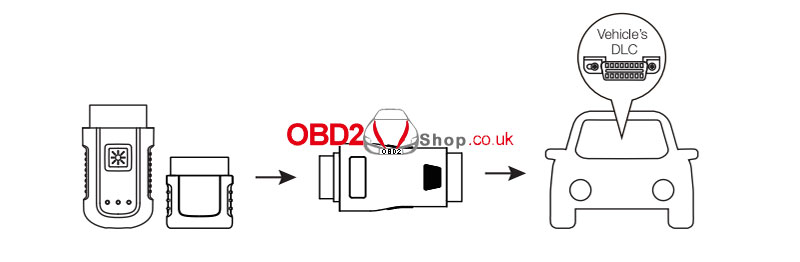
2. VCI 100/VCI Mini:
` Connect the CAN FD adapter's 16-pin female connector to the Vehicle Data Connector on the VCI unit.
a Connect the attached CAN FD adapter to the vehicle's DLC, which is generally located under the vehicle dashboard.
www.obd2shop.co.uk
Oznake: autel adapter
petak, 13.10.2023.
(Fixed) Autel IM608/IM608Pro is stuck on startup page
Customer problem: My IM608 PRO remains on this interface and does not move, what should I do?
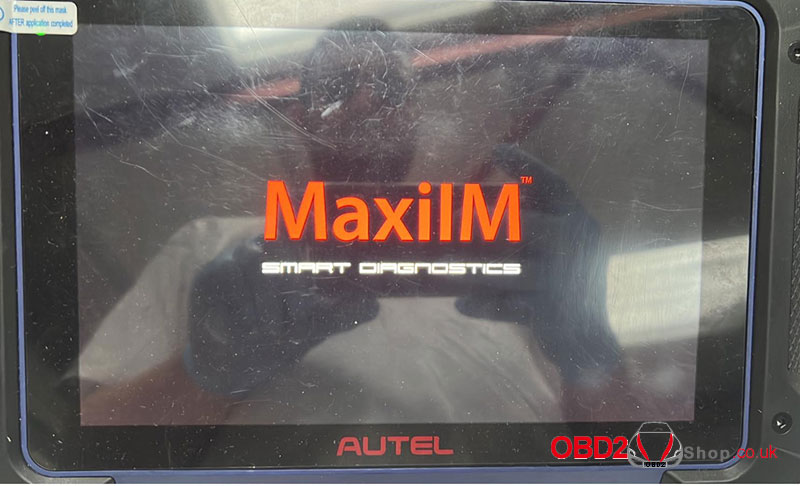
Technician's Solution: Flash your device to solve the issue.
Step 1. Download the compressed file and unzip it, will see the ‘autel_odm’ folder.
Step 2. Copy the whole ‘autel_odm’ folder to the blank TF card root menu. (The TF card should be formatted to FAT32)
Step 3. Plug the TF card into the IM608/IM608Pro card slot.
Step 4. Power on the IM608/IM608Pro and it will go to the flash process automatically.
Tech support:
www.obd2shop.co.uk
Oznake: Autel IM608

| < | listopad, 2023 | > | ||||
| P | U | S | Č | P | S | N |
| 1 | ||||||
| 2 | 3 | 4 | 5 | 6 | 7 | 8 |
| 9 | 10 | 11 | 12 | 13 | 14 | 15 |
| 16 | 17 | 18 | 19 | 20 | 21 | 22 |
| 23 | 24 | 25 | 26 | 27 | 28 | 29 |
| 30 | 31 | |||||
Svibanj 2026 (1)
Veljača 2026 (1)
Siječanj 2026 (19)
Prosinac 2025 (22)
Studeni 2025 (21)
Listopad 2025 (20)
Rujan 2025 (21)
Kolovoz 2025 (8)
Srpanj 2025 (13)
Lipanj 2025 (9)
Svibanj 2025 (12)
Travanj 2025 (10)
Ožujak 2025 (12)
Veljača 2025 (14)
Siječanj 2025 (8)
Prosinac 2024 (6)
Studeni 2024 (6)
Listopad 2024 (4)
Rujan 2024 (7)
Kolovoz 2024 (14)
Srpanj 2024 (12)
Lipanj 2024 (10)
Svibanj 2024 (13)
Travanj 2024 (12)
Ožujak 2024 (11)
Veljača 2024 (2)
Siječanj 2024 (10)
Prosinac 2023 (8)
Studeni 2023 (6)
Listopad 2023 (7)
Rujan 2023 (9)
Kolovoz 2023 (6)
Srpanj 2023 (10)
Lipanj 2023 (4)
Veljača 2023 (8)
Siječanj 2023 (14)
Prosinac 2022 (13)
Studeni 2022 (14)
Listopad 2022 (18)
Rujan 2022 (9)
Kolovoz 2022 (16)
Srpanj 2022 (11)
Lipanj 2022 (14)
Svibanj 2022 (13)
Travanj 2022 (12)
Ožujak 2022 (12)
Veljača 2022 (13)
Siječanj 2022 (10)
Dnevnik.hr
Gol.hr
Zadovoljna.hr
Novaplus.hr
NovaTV.hr
DomaTV.hr
Mojamini.tv