OBD2 tools on OBD2shop.co.uk https://blog.dnevnik.hr/obd2shop
četvrtak, 01.01.2026.
Mercedes-Benz W221 Dashboard Programming with OBDSTAR X300 Classic G3
In this article, we demonstrate the advanced ECU programming function of the OBDSTAR X300 Classic G3 (Keymaster G3), illustrating how to quickly program a used instrument cluster from a Mercedes-Benz S-Class W221 model. This function allows you to restore a used instrument cluster to factory settings and complete its programming.
Important: Before starting any operation, make sure the main cable is properly connected to the vehicle to avoid communication errors.
Step 1: Enter the Dashboard Programming Menu
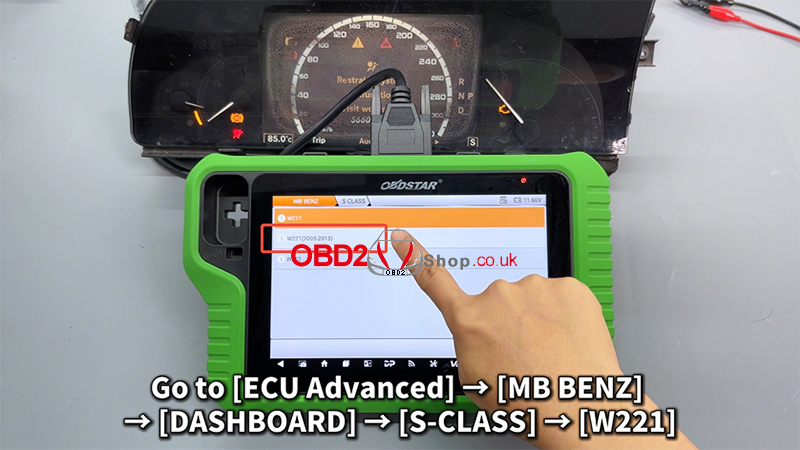
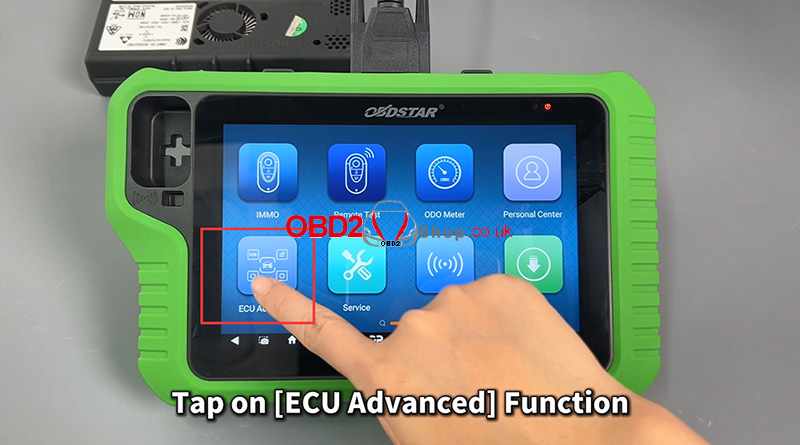
1. On the KeyMaster G3 device, navigate through the following path:
[ECU Advanced] ’ [MB BENZ] ’ [DASHBOARD] ’ [S-CLASS] ’ [W221]
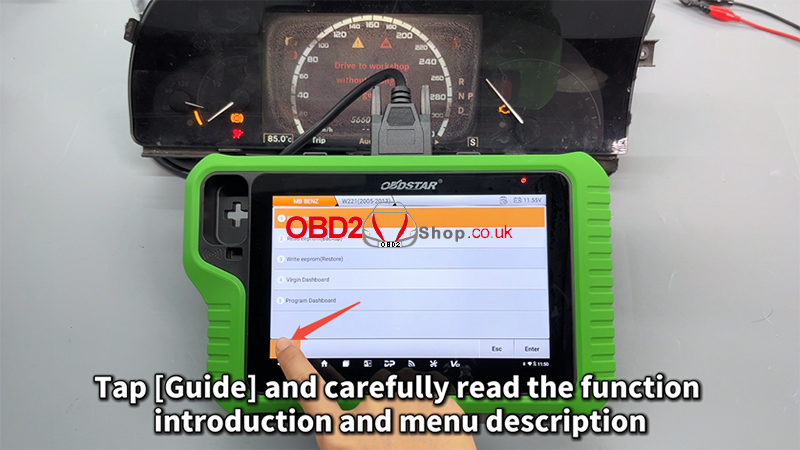
2. Tap [Guide] and carefully read the function introduction and menu descriptions to understand the operation process and precautions.
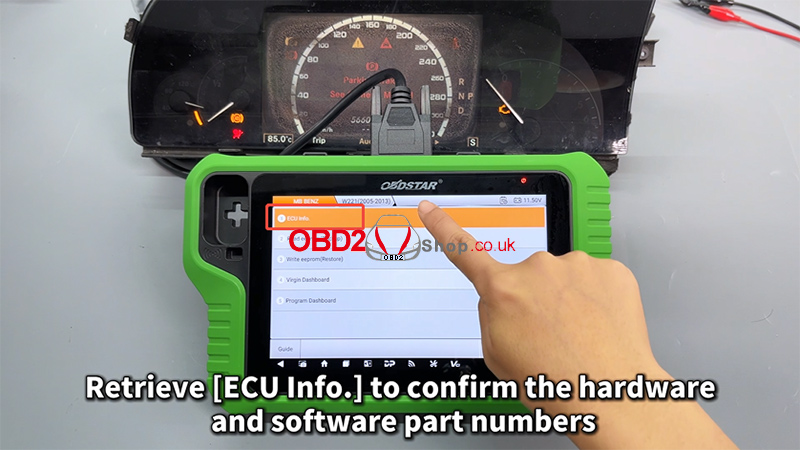
3. Next, retrieve [ECU Info.] to confirm the hardware and software part numbers of the dashboard, ensuring compatibility before proceeding.

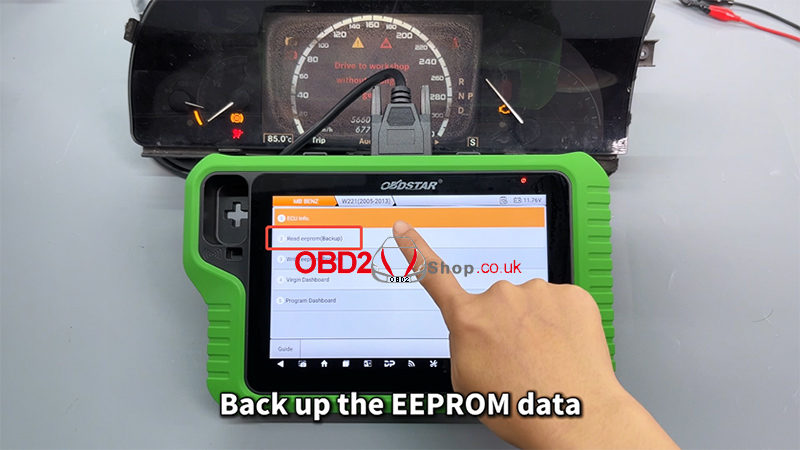
Step 2: Back Up the EEPROM Data
Before performing any modifications, it is strongly recommended to back up the original data.
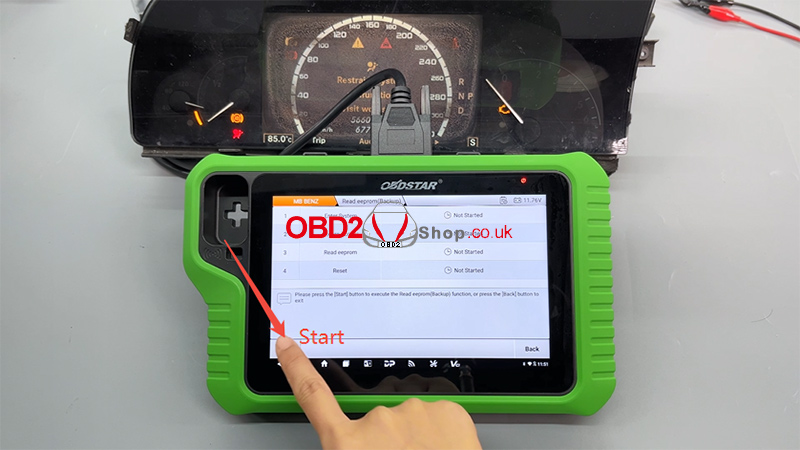
1. Select [EEPROM Backup]
2. Tap [Start] to begin backing up the data
3. You can customize the filename of the saved backup file for easier identification later
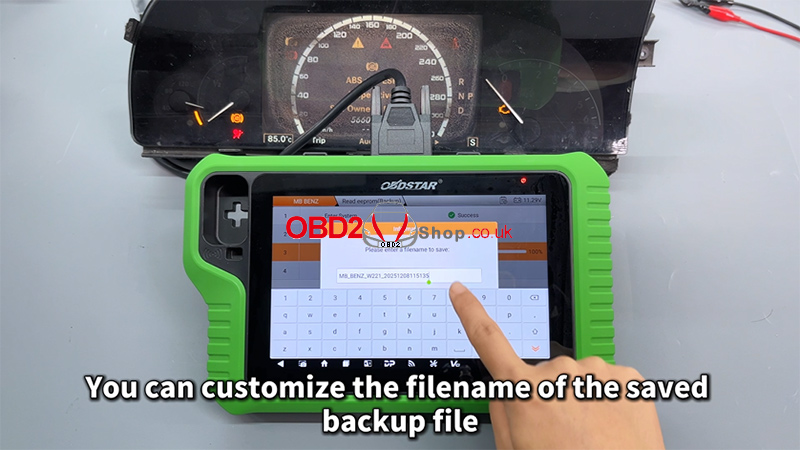
This backup file is critical and will be used in the following steps, so make sure it is saved correctly.
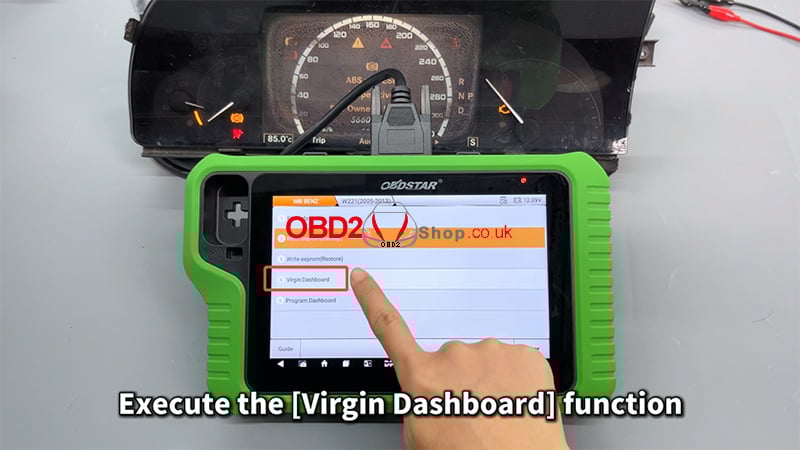
Step 3: Virginize the Used Dashboard
Now, execute the [Virgin Dashboard] function.
1. Carefully select the correct backup file
2. Double-check the file before confirming
3. Tap [OK] to proceed

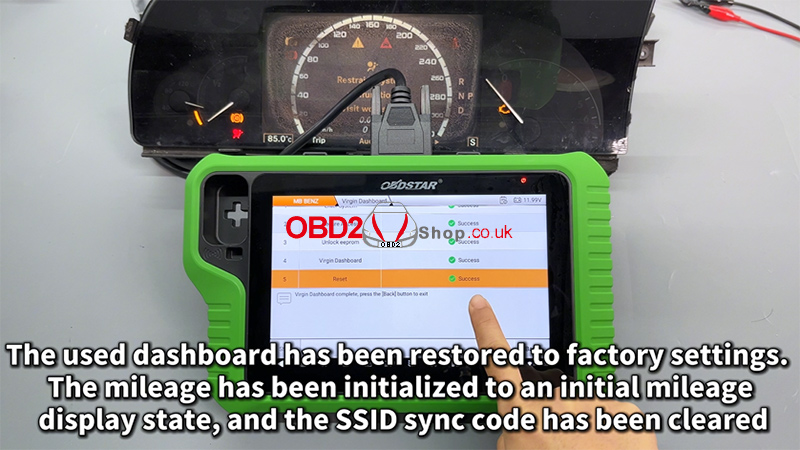
Once completed, the used dashboard will be restored to factory (virgin) status:
1. The mileage will be initialized to its initial display state
2. The SSID synchronization code will be cleared
Step 4: Program the Dashboard
After virginizing the dashboard, proceed with the dashboard programming function.
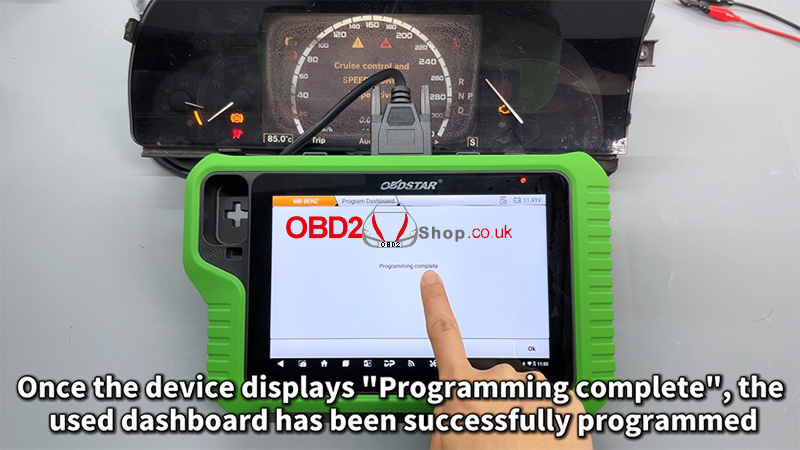
When the device displays [Programming complete], it means the used Mercedes-Benz W221 dashboard has been successfully programmed and is ready for use.

For a full step-by-step visual demonstration, please watch the video guide:
https://youtu.be/iPN2KPHBZ0E
Visit our website for more professional automotive diagnostic tools and tutorials: www.obd2shop.co.uk
Oznake: obdstar x300 classic g3
utorak, 27.05.2025.
OBDSTAR X300 Classic G3 Porsche Cayenne Battery Programming Guide
Battery replacement or upgrade in modern vehicles like the Porsche Cayenne requires proper coding to ensure accurate battery management. This guide walks you through using the battery programming function of OBDSTAR X300 Classic G3 for Porsche Cayenne models from 2018 to 2023.
Function Overview
The Battery Programming feature allows users to:
Modify battery parameters
Register battery capacity and serial number
Use one-click automatic code setting to update ECU data
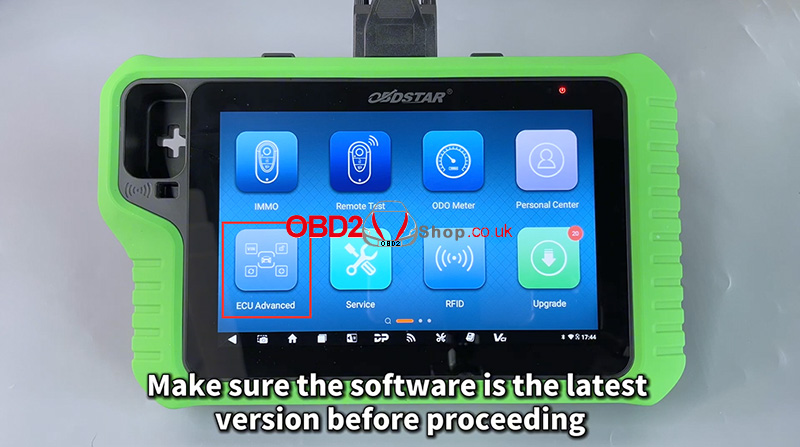
Note: Ensure your diagnostic software is updated to the latest version before proceeding.
Step-by-Step Instructions
1. Access the ECU Advanced Menu
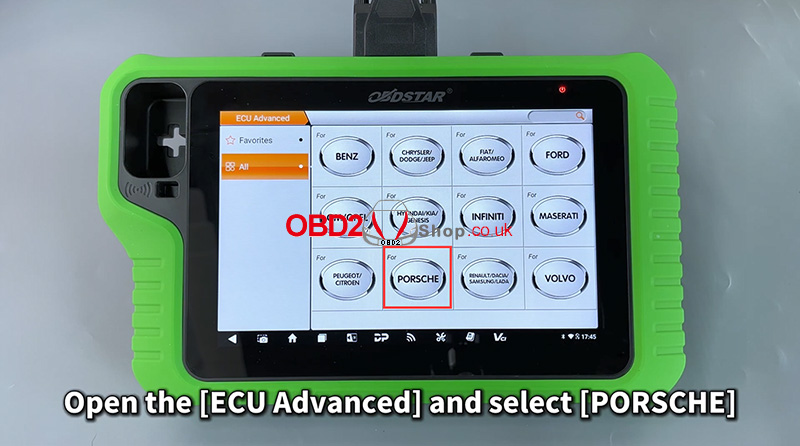
Open the [ECU Advanced] module.
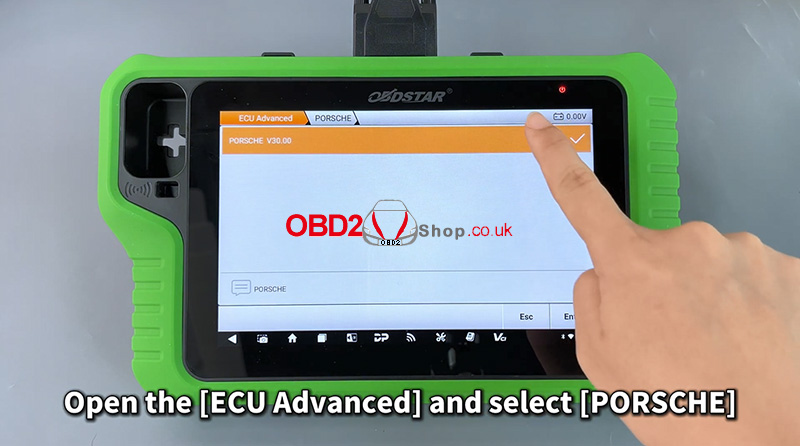
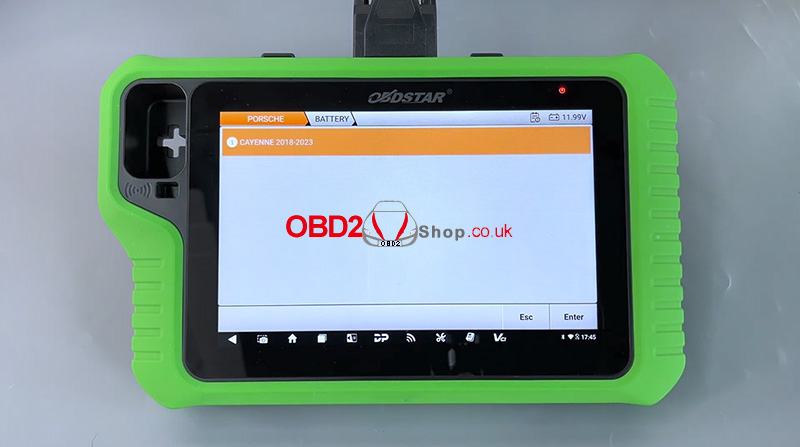
Navigate to [Porsche] >> [Porsche V30.00] >> [Battery] >> [Cayenne 2018-2023].
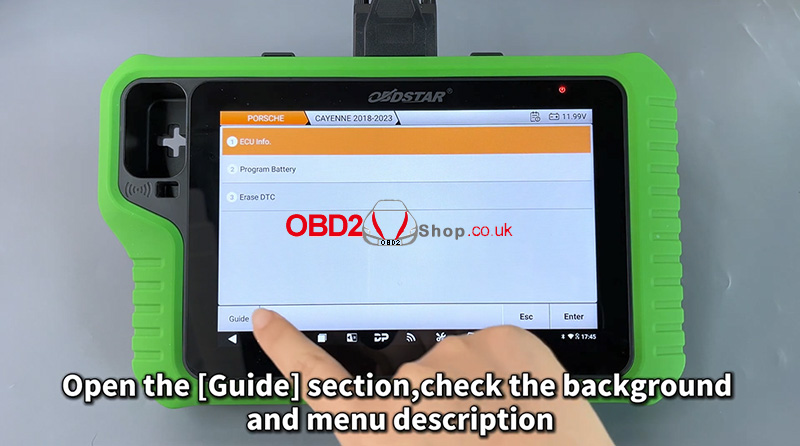
2. Review the Guide Section
Open the [Guide] tab to read background information and menu descriptions.
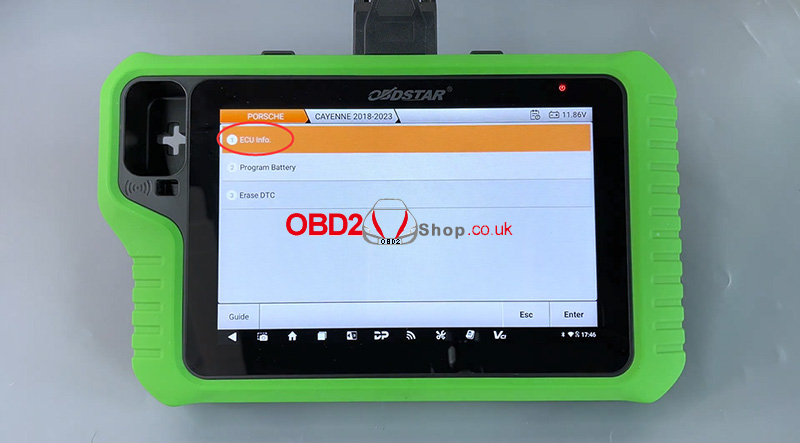
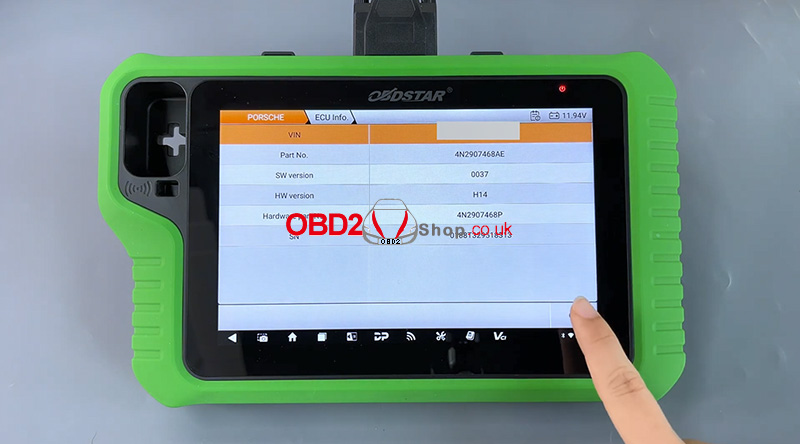
3. Check ECU Information
Select [ECU Info.] to verify the current battery and control module data.
4. Enter Battery Programming Mode
Open the [Program Battery] function to access the parameter modification page.
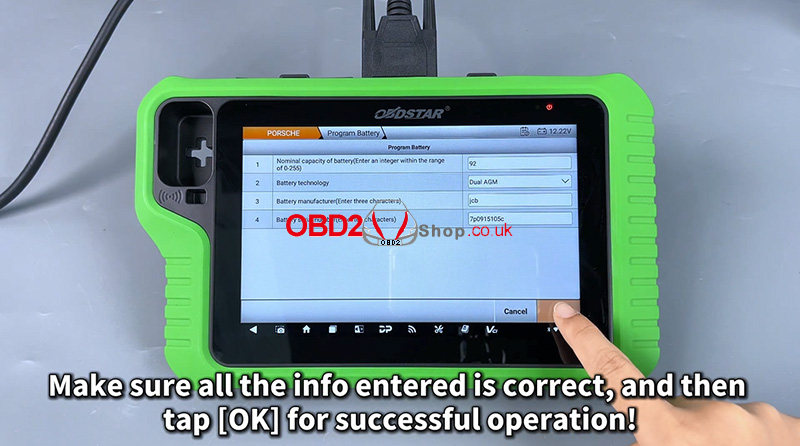
5. Modify Battery Parameters
Adjust the battery capacity and serial number as needed.
Double-check all entries for accuracy to avoid errors.
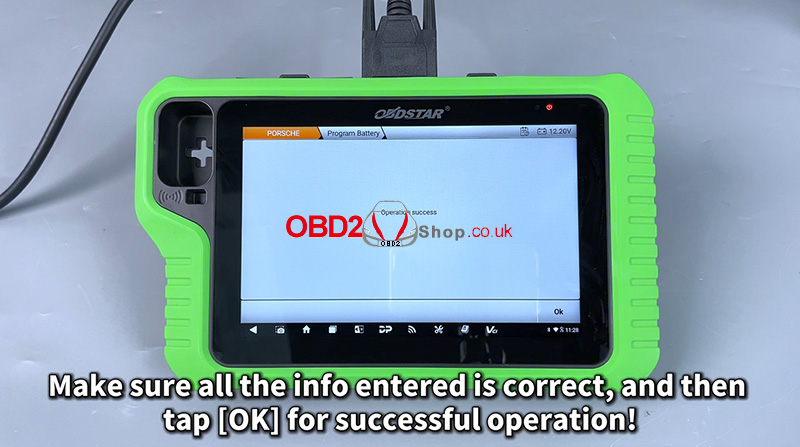
6. Finalize Changes
Tap [OK] to confirm and execute the programming process.

Important Notes
1. Incorrect parameter entries may cause system malfunctions. Always validate data before confirming.
2. This function requires a stable OBD-II connection to the vehicle’s diagnostic port.
For tool compatibility or technical support, visit:
www.obd2shop.co.uk
Oznake: obdstar x300 classic g3
petak, 18.04.2025.
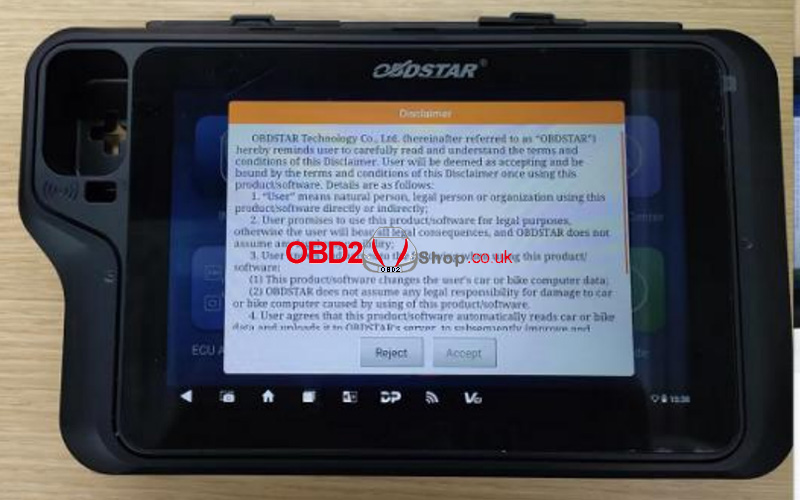
OBDSTAR X300 Classic G3 Startup Failure Repair Guide
If your OBDSTRA X300 Classic G3 device won't start, don't worry! Follow this step-by-step guide to troubleshoot and fix the issue by checking key components like the battery, U17 chip, and L8 inductor.
Tools Required
Screwdriver (hex-compatible)
Multimeter
Soldering iron or hot air gun (temperature adjustable)
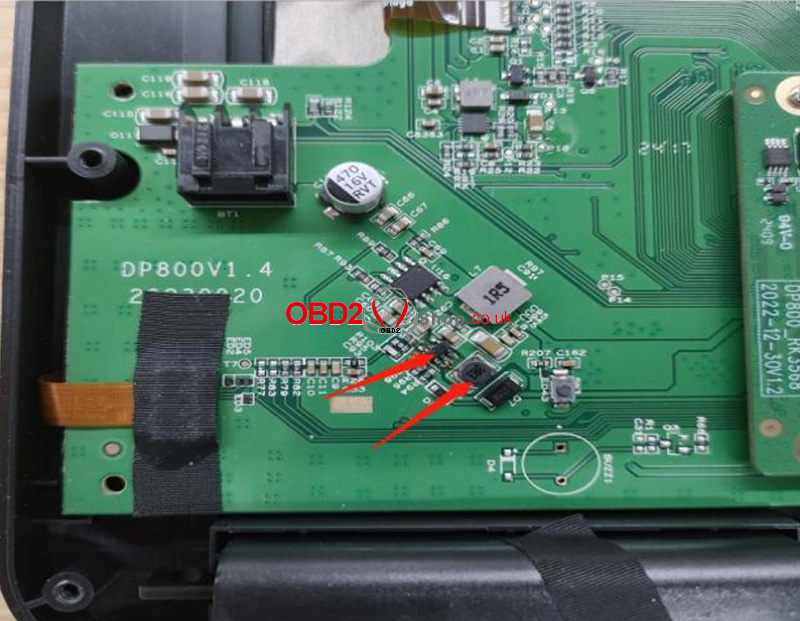
Replacement components: U17 (IC) and L8 (1µH inductor)
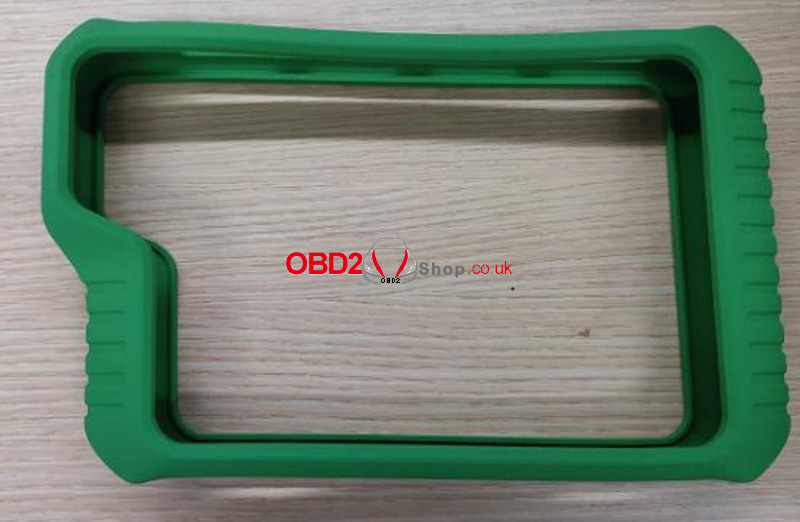
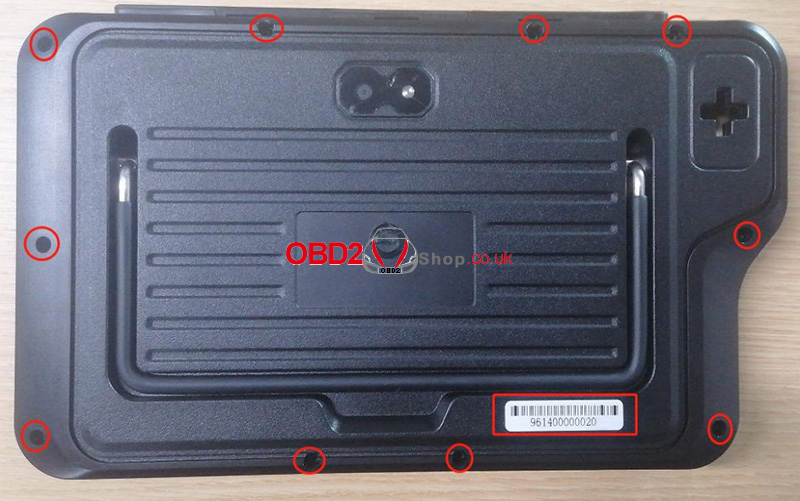
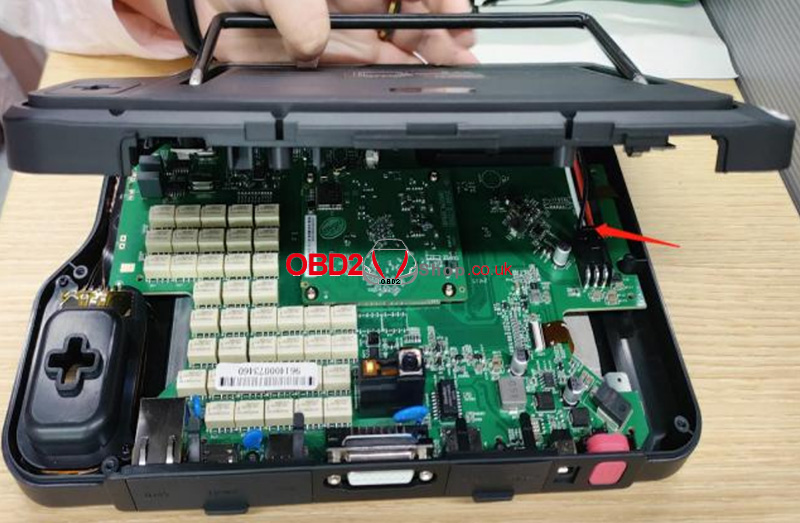
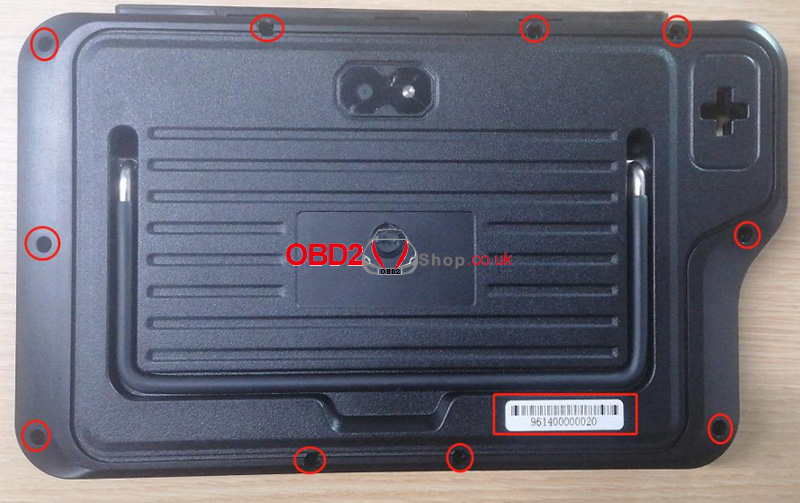
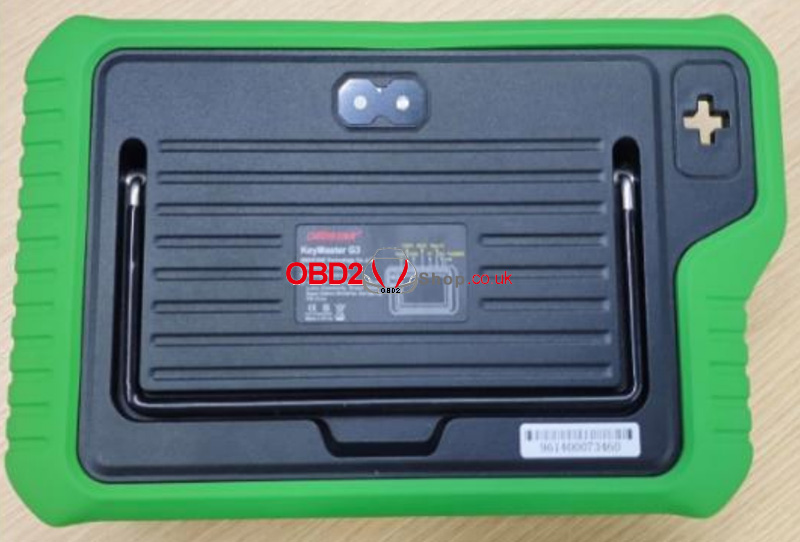
Step 1: Remove the rubber case. Then, use a screwdriver to loosen and remove the fixed hex screws.
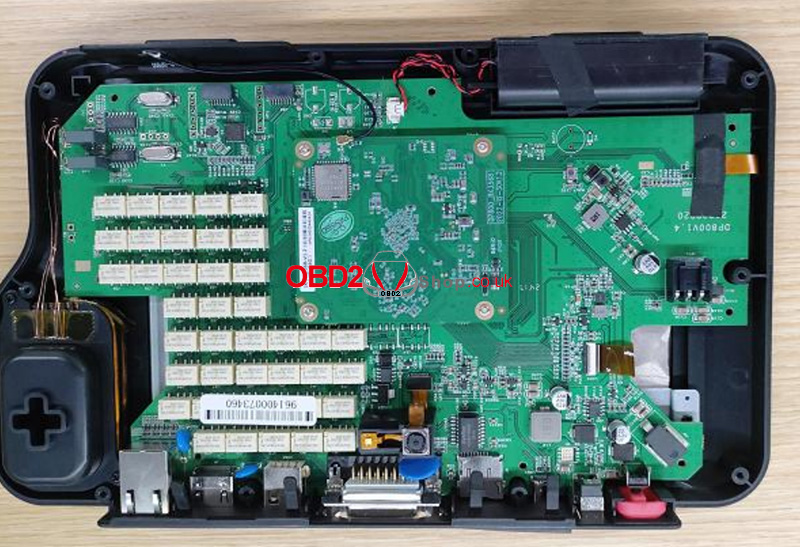
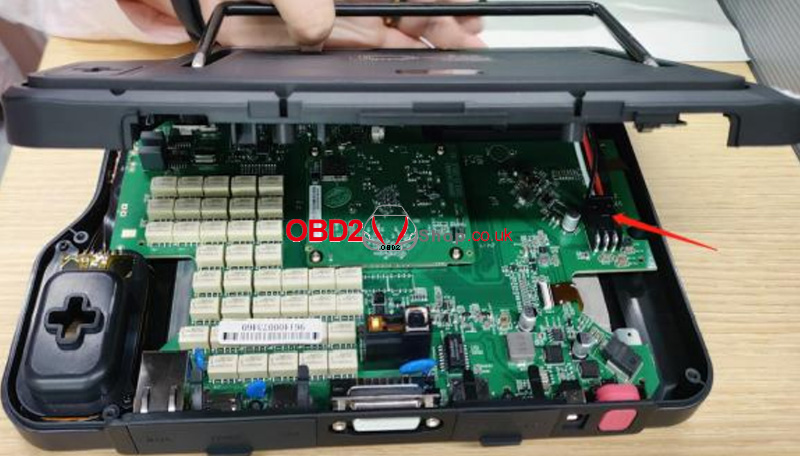
Step 2: Open the back cover, press down on the battery connector clip with your hand, and then pull out the battery connector.
Step 3: Use a multimeter set to the ohms range to test the two ends of capacitor C75. If the resistance is around 0©, it indicates that U17 and L8 are damaged and are causing a short circuit. Replace U17 and L8.
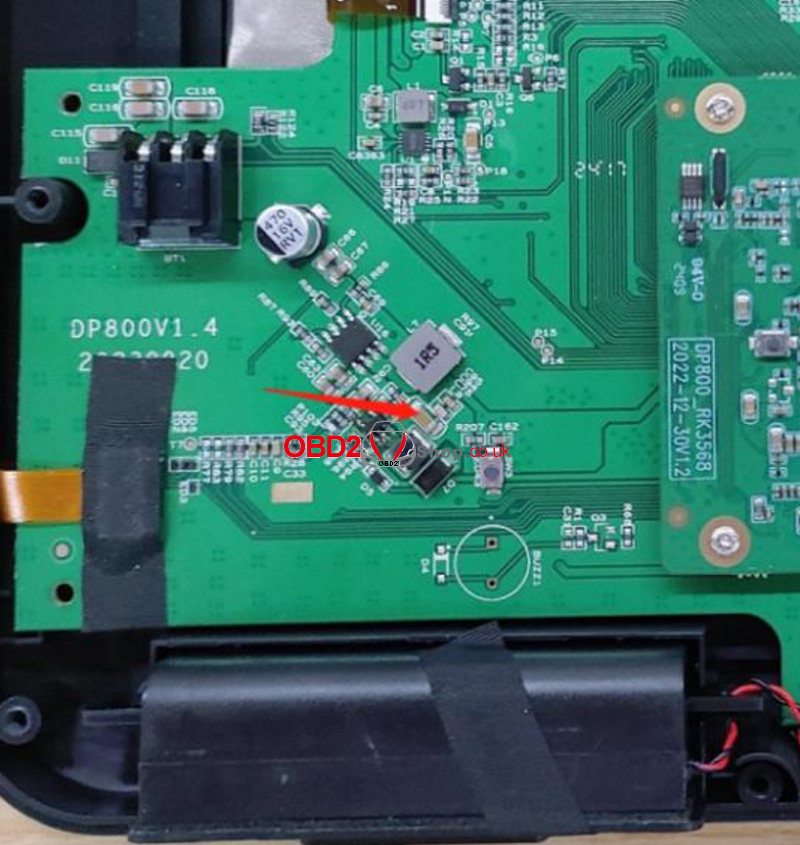
Step 4: Use a soldering iron or hot air gun set to 350 ± 10°C to desolder and remove U17 and L8. (Replace L8 with a 1uH inductor.)
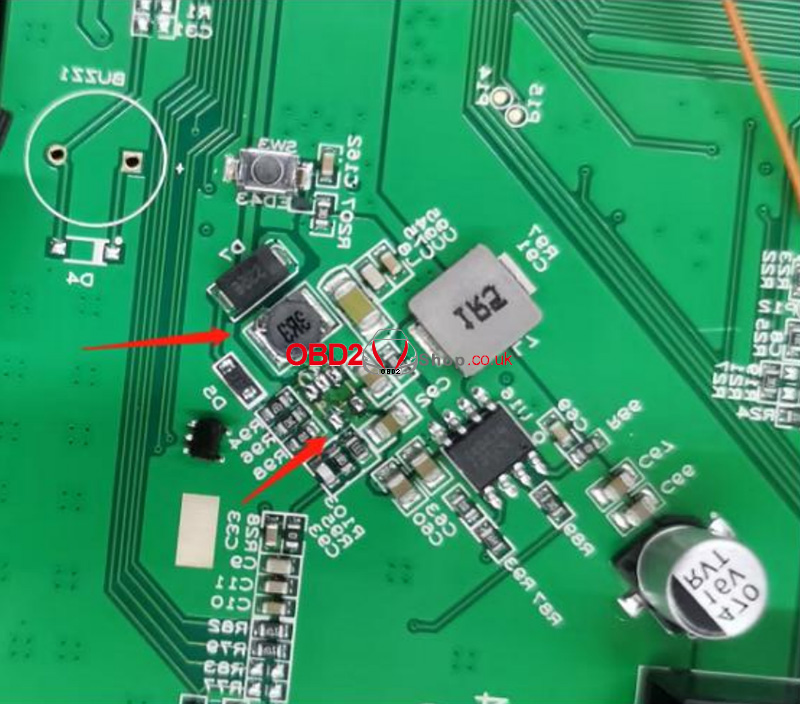
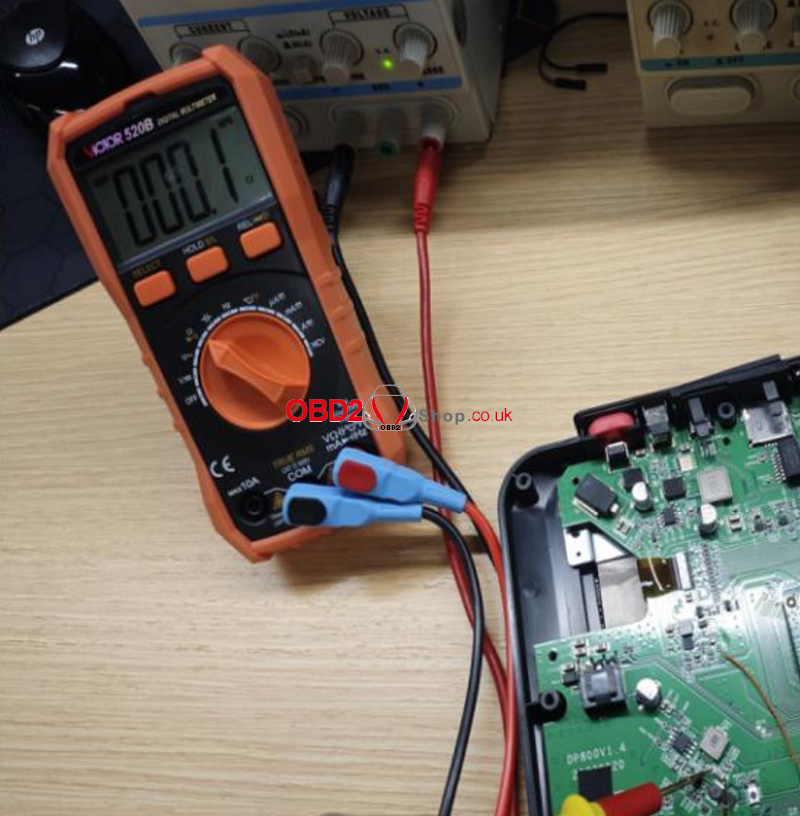
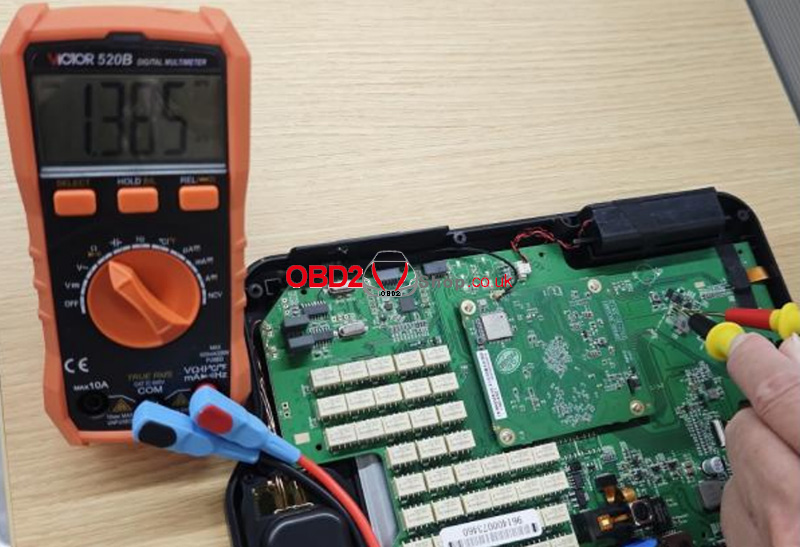
Step 5: After the replacement, use the multimeter set to the ohms range to test the two ends of capacitor C75 again. If the resistance is approximately 1.36K©, it confirms that U17 and L8 have been successfully replaced.
Step 6: Insert the battery connector, reassemble the back cover, and press the power button to turn on the device. If it starts up normally, the replacement is successful.
Step 7: Use a screwdriver to fasten the screws to the back cover, and put the rubber case back on. The replacement is complete!
This guide resolves short-circuit issues caused by faulty U17 and L8, restoring normal operation to the X300 Classic G3.
www.obd2shop.co.uk
Oznake: obdstar x300 classic g3
petak, 11.04.2025.
GM HMI Module VIN Reset by OBDSTAR X300 Classic G3
This guide will walk you through resetting the VIN (Vehicle Identification Number) on a GM HMI 2.0/2.5 module using the OBDSTAR X300 Classic G3 device.
Step-by-Step VIN Reset Procedure:
1. Enter ECU Advanced Mode
On the main screen of the device, tap:
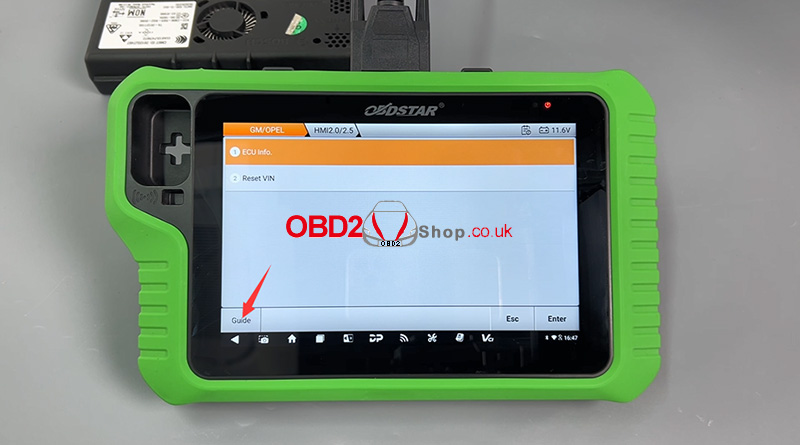
[ECU Advanced] >> [GM/OPEL] >> [GM/OPEL V30.04] >> [OPEL] >> [HMI2.0/2.5]
Then tap on [Guide] to read the connection and operation instructions carefully.
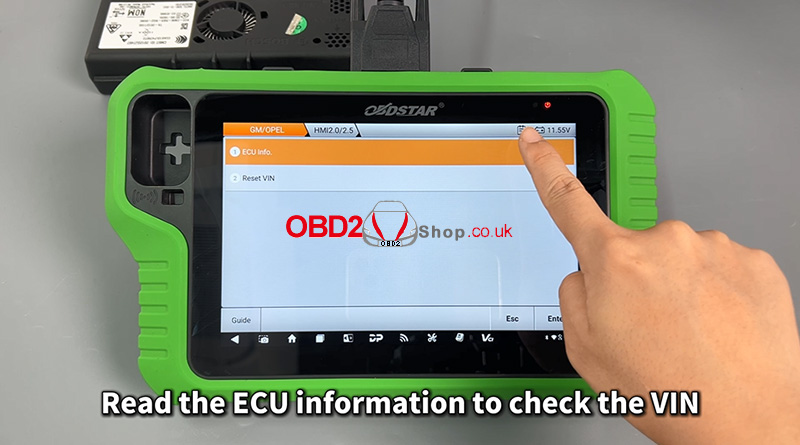
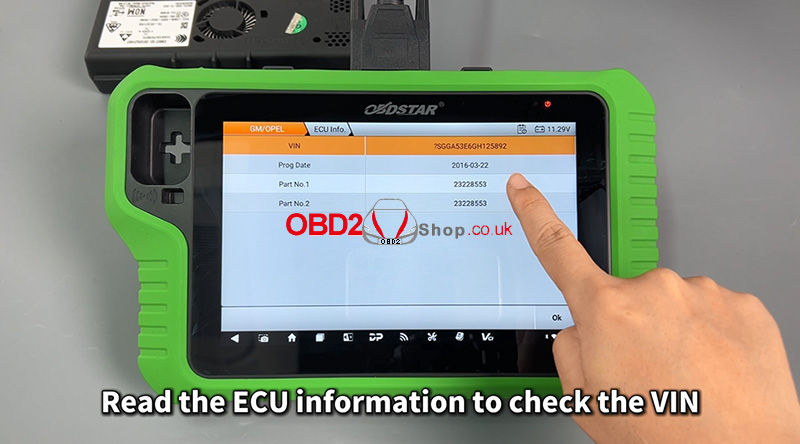
2. Read ECU Information
Select [ECU info.] to retrieve the current information stored in the HMI module, including the existing VIN.
www.obd2shop.co.uk
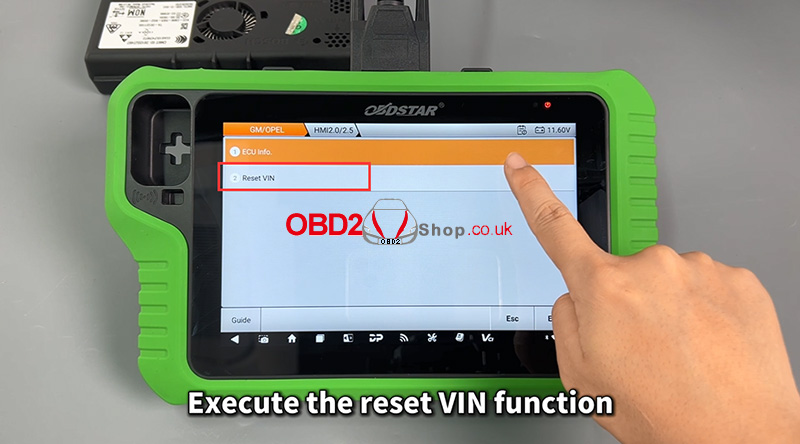
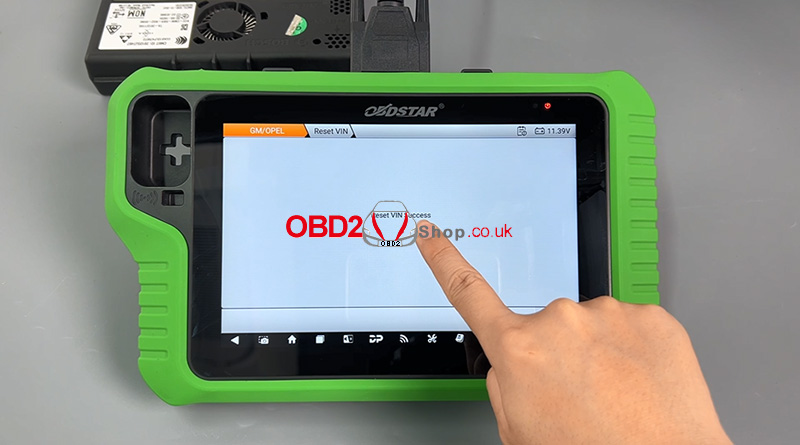
3. Reset VIN
Choose the Reset VIN function from the menu.
The tool will process the request, and once complete, you should see a confirmation message: “Reset VIN Success.”
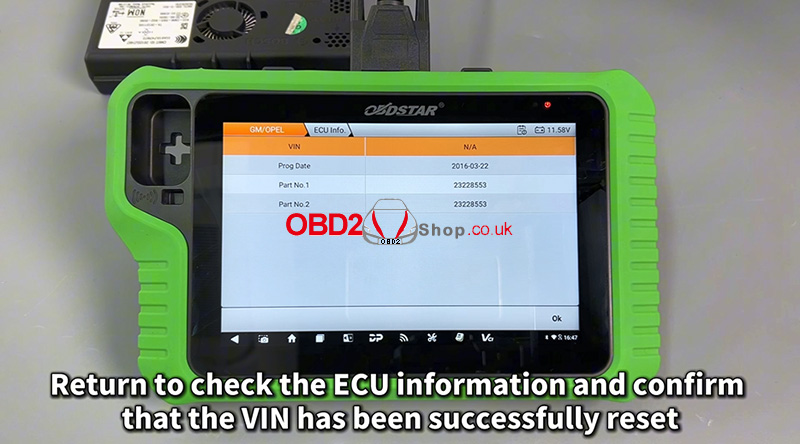
4. Confirm the VIN Reset
Return to [ECU info.] and re-read the data to verify that the VIN has been successfully cleared or modified.
Always ensure your device software is updated to the latest version before starting.
It's recommended to back up any important data before making changes.
Use a proper power supply to avoid unexpected interruption during operation.
Using OBDSTAR X300 Classic G3, you can successfully reset the VIN on a GM HMI module with just a few simple steps.
Video guides:
https://youtu.be/Zce1u6FpBFk
www.obd2shop.co.uk
Oznake: obdstar x300 classic g3
srijeda, 05.03.2025.
Renault Delphi DCM3.4 ECU Mileage Calibration by OBDSTAR X300 Classic G3
This post will show you how to use OBDSTAR X300 Classic G3 to perform the mileage recalibration function on the Renault Delphi DCM3.4 engine ECU.
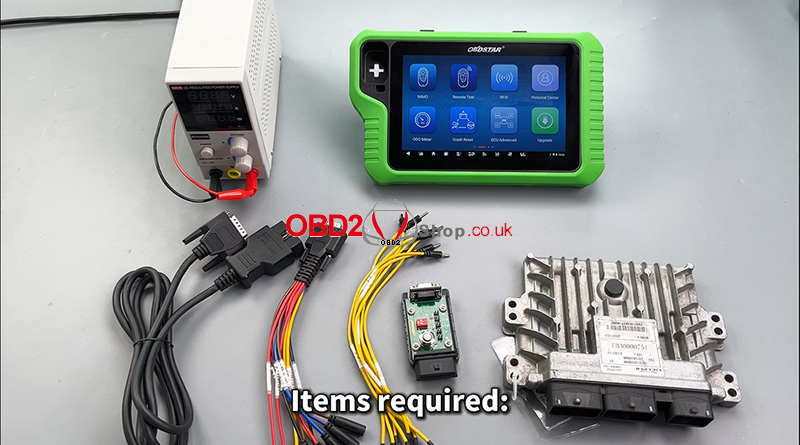
The tools we need:
X300 Classic G3
High-power DC regulated power supply
Main cable
ECU clone jumper
P004 adapter
Renault Delphi DCM3.4 engine ECU
Before proceeding, you need to upgrade the software to the latest version.
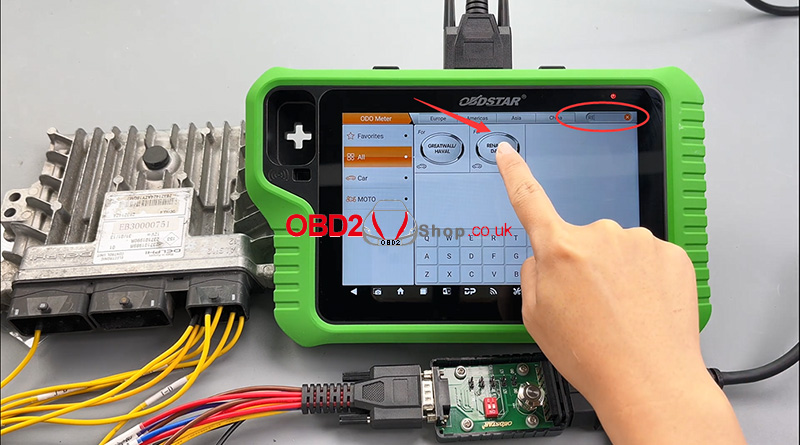
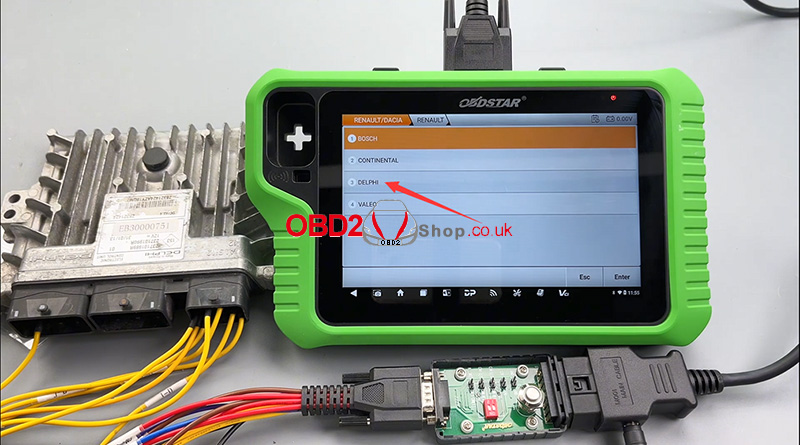
Open [ODO Meter], and in the top right corner, enter a keyword to select quickly.
Then we click [RENAULT/DACIA] >> [RENAULT/DACIA V41.16] >> [ECM] >> [RENAULT] >> [DELPHI] >> [DCM3.4]
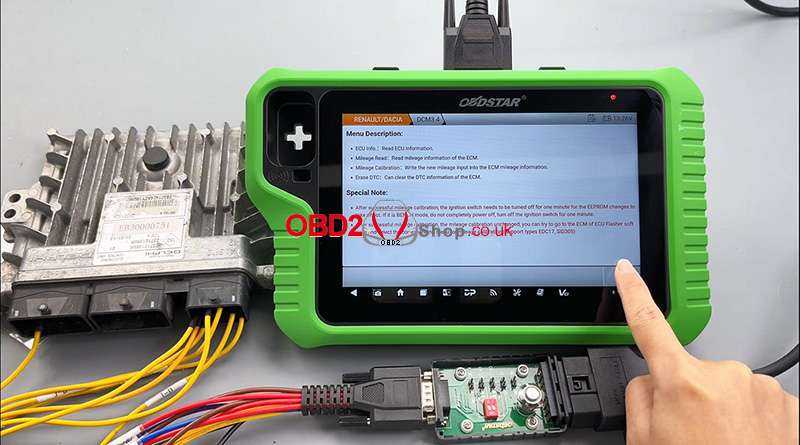
Open the [Guide] section and read the menu description and special note carefully.
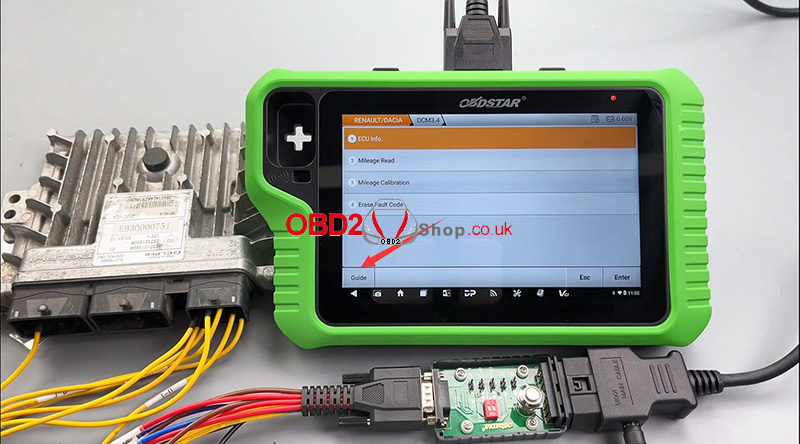
First, open the P004 adapter and check the [ECU Info.]
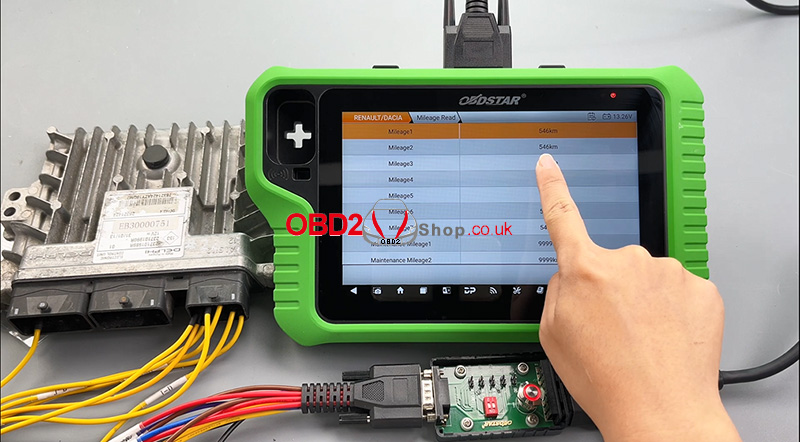
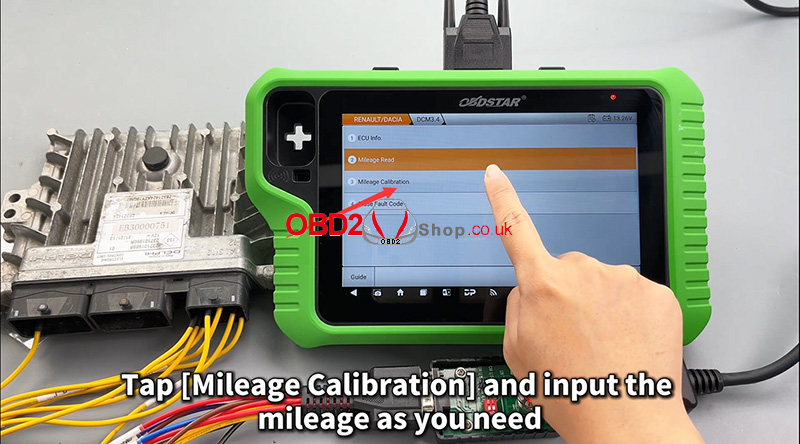
Check [Mlieage Read]
Tap [Mileage Calibration] and input the mileage as you need.

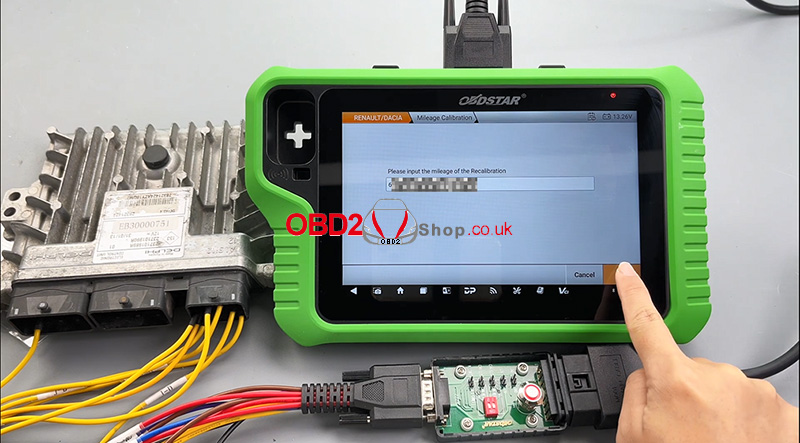
Mileage repair successful.
According to the prompt, we need to unplug one IG(ignition) wire and wait one minute before reconnecting it.
Video guides:
https://youtu.be/SdJpLcHtl5g
www.obd2shop.co.uk
Oznake: obdstar x300 classic g3
srijeda, 14.08.2024.
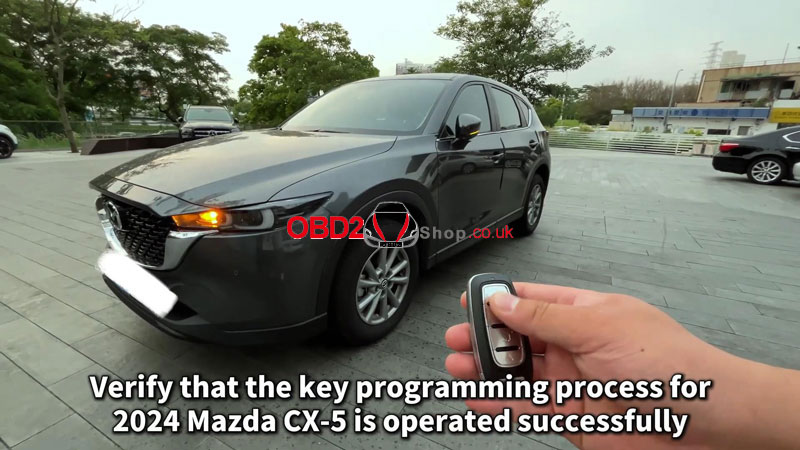
OBDSTAR X300 Classic G3 Program 2024 Mazda CX-5 All Keys Lost
Today we'll demonstrate how to program the 2024 Mazda CX-5 all keys lost with OBDSTAR X300 Classic G3 by OBD.

Tools Required:
OBDSTAR Key Master G3
2 Blank Keys
Main Cable
Operation
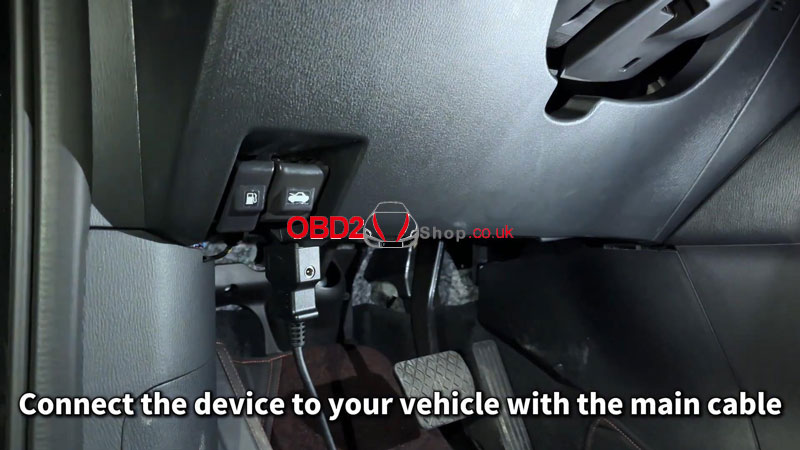
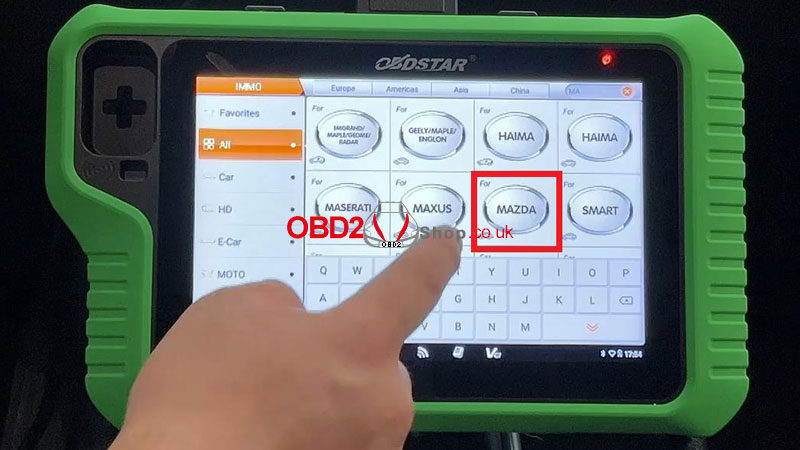
Connect the device to your vehicle with the main cable.
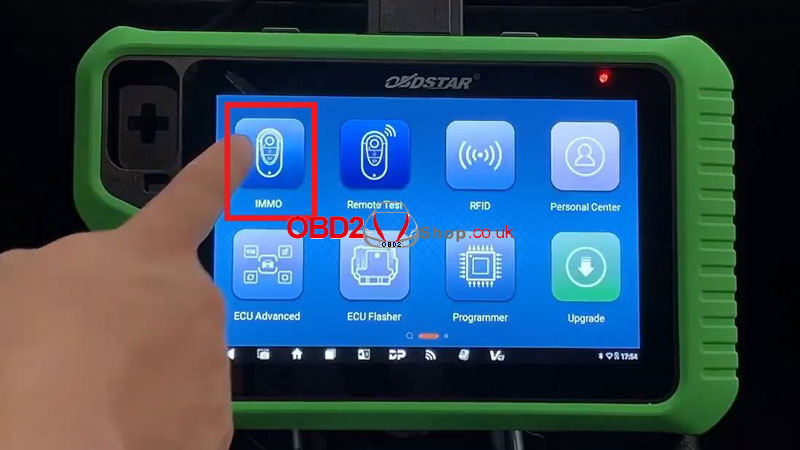
IMMO >> MAZDA >> Latest Version >> Manual Select Model >> CX-5 >> PROXIMITY >> 2018- >> TYPE 1 >> All Smart Keys Lost
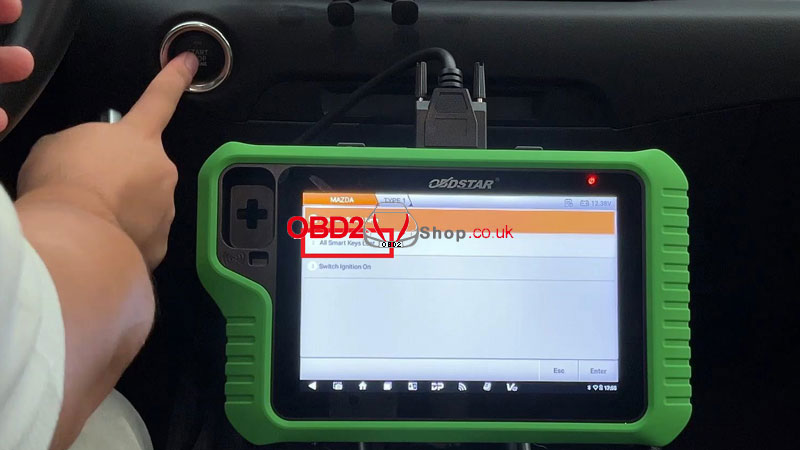
All the smart keys out of the car 1 meter away.
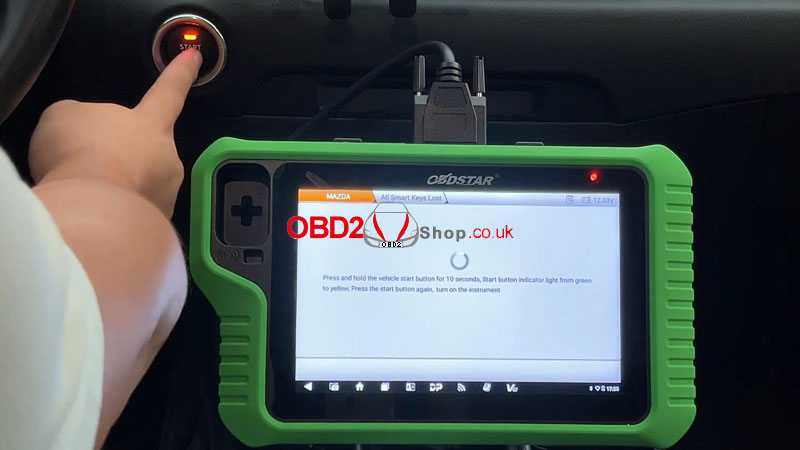
Press and hold the vehicle start button for 10s, Start button indicator lights from green to yellow. Press the start button again, and turn on the instrument.
Instruction
All smart keys will be erased.
Mini keys are required: 2
Is ignition status open? Yes
When figuring out how to configure the system, please wait for about 7 minutes. After 7 minutes, the speaker will ring.
Current number of smart keys: 0
Switch the ignition off.
Note:
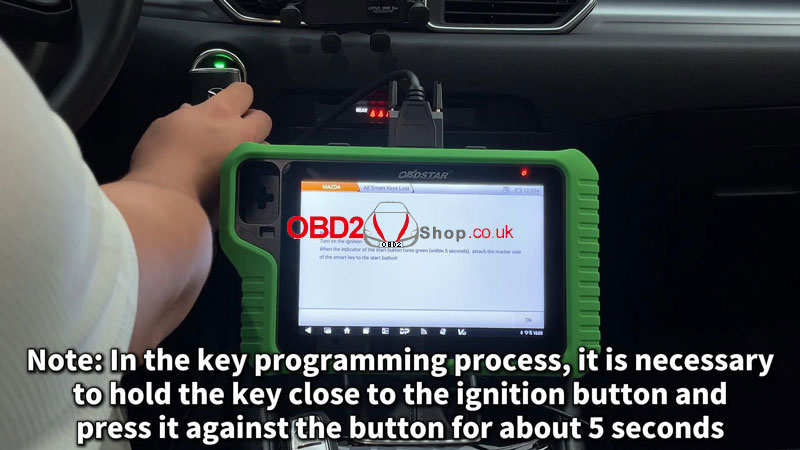
Turn on the ignition.
When the indicator of the start button turns green(within 5 seconds), attach the marker side of the smart key to the start button!
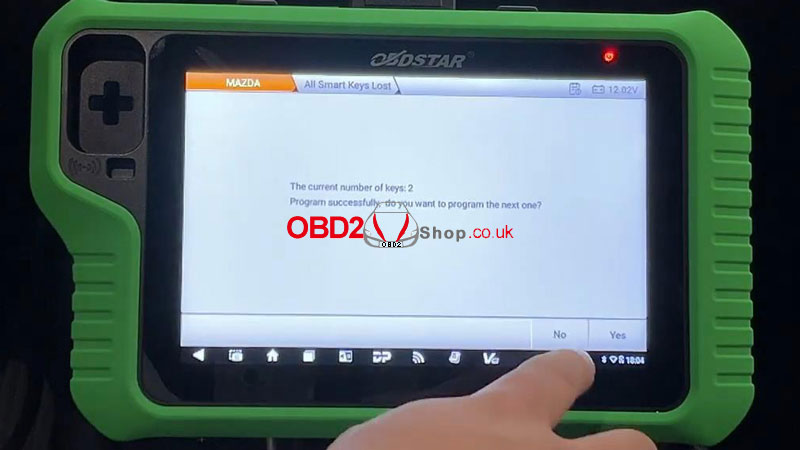
The current number of keys: 1
The program is successful, do you want to program the next one? Yes
Just repeat the operation as before.
The current number of keys: 2
Press No to continue.
You have to complete the following procedure, before the engine can be started:
1. Switch ignition off.
2. Put on the brakes, turn all the programmed keys to the start button to start the engine for 3s, then switch the ignition off.
Program complete.
Test the keys, both can work successfully.
Done.
www.obd2shop.co.uk
Oznake: obdstar x300 classic g3
srijeda, 17.07.2024.
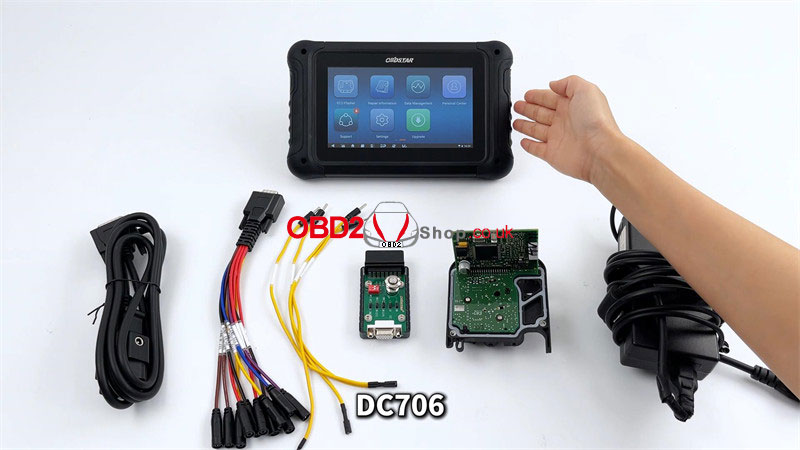
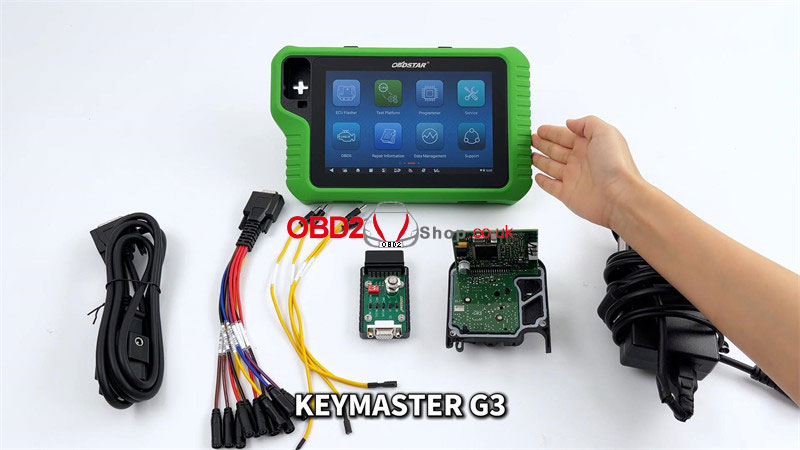
OBDSTAR X300 Classic G3/DC706 Clone LR AHCM 9S12DG256 ECU
This tutorial is on cloning LandRover AHCM 9S12DG256 ECU with the OBDSTAR tool by bench. Here we'll use the OBDSTAR X300 Classic G3 & DC706 to read and write ECU. The operations are the same.
Check the video to learn:
OBDSTAR X300 Classic G3 Read and Write LandRover AHCM Module 9S12DG256 ECU
https://www.youtube.com/watch?v=1_Er3TA3wU0
OBDSTAR DC706 Read and Write LandRover AHCM Module 9S12DG256 ECU
https://www.youtube.com/watch?v=FtEdJtlSk_4
Required Tools
OBDSTAR Key Master G3/ OBDSTAR DC706
Main Cable
P004 ECU Clone Jumper & Adapter
LandRover Parking Heater Module(9S12DG256)
12V 5A Power Supply(DC)
Operation
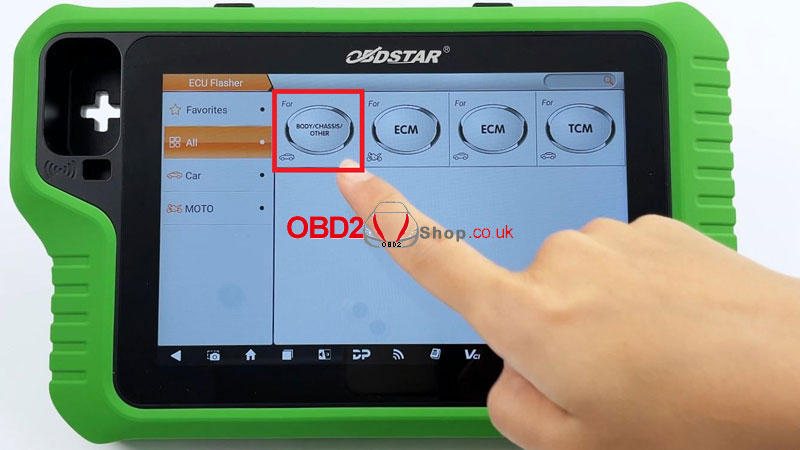
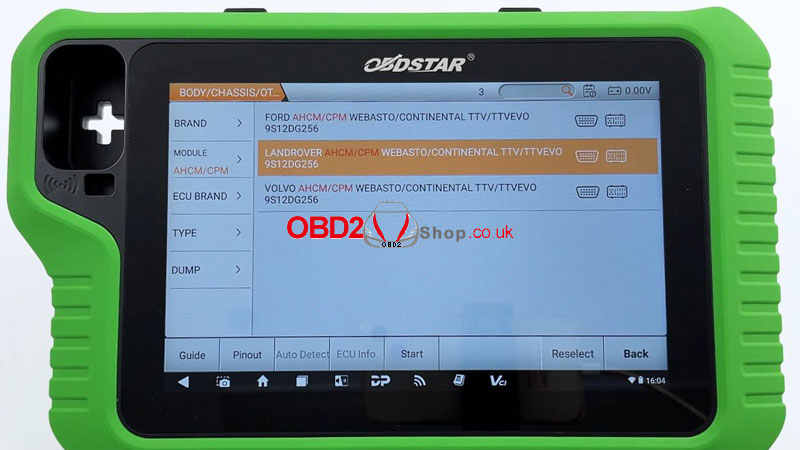
ECU Flasher >> BODY/CHASSIS/OTHER >> Latest Version >> MODULE >> AHCM/CPM >> LANDROVER AHCM/CPM WEBASTO/CONTINENTAL TTV/TTVEVO 9S12DG256 >> Guide & Pinout

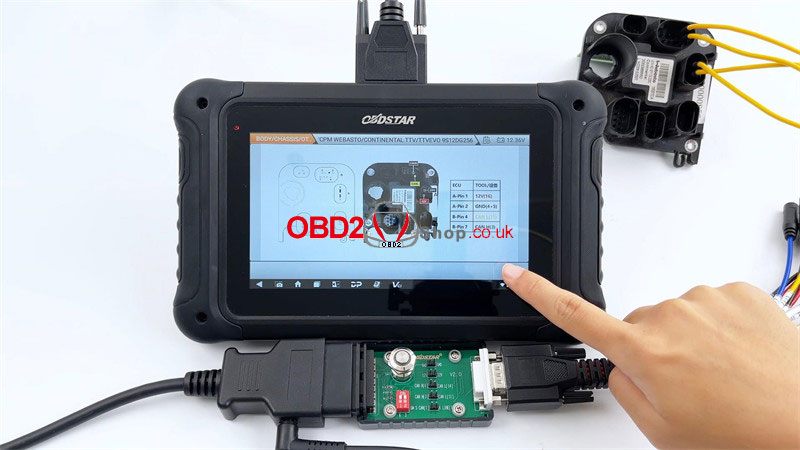
Follow the wiring diagram to connect the harness.
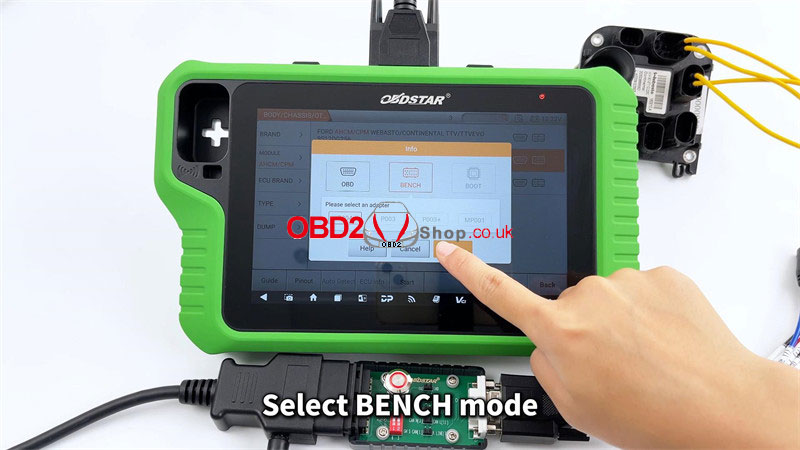
Start >> BENCH >> P004 >> OK
This function is available by connecting the server, please ensure the Internet connection is normal. Press OK.
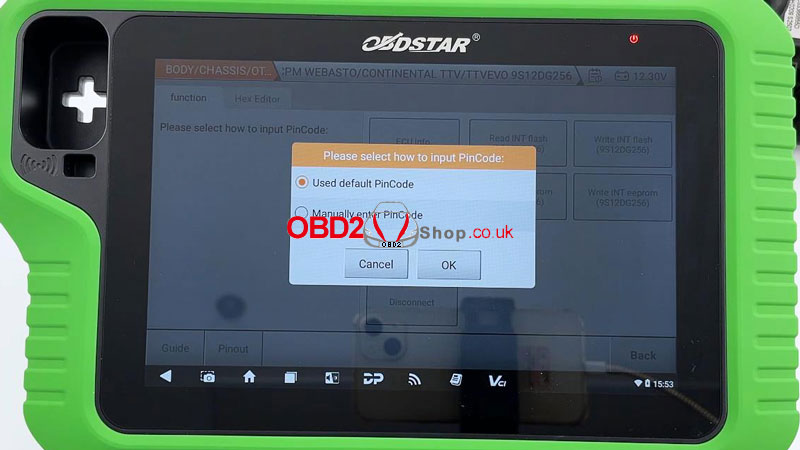
Connect >> Use default PinCode
Now here we can read ECU info., INT flash and EEPROM (9S12DG256), write INT flash & EEPROM (9S12DG256).
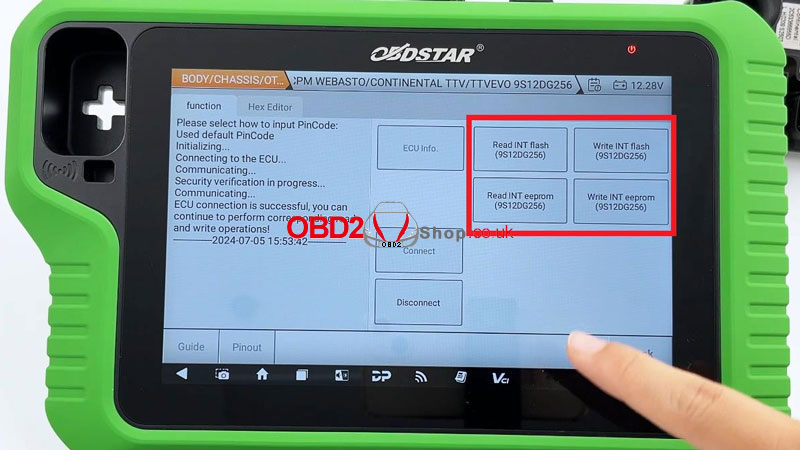
www.obd2shop.co.uk
Oznake: obdstar x300 classic g3
četvrtak, 30.05.2024.
OBDSTAR X300 Classic G3 Manual: Screen Recording
This article will guide you on how to use OBDSTAR X300 Classic G3 to record screens.
Procedure:
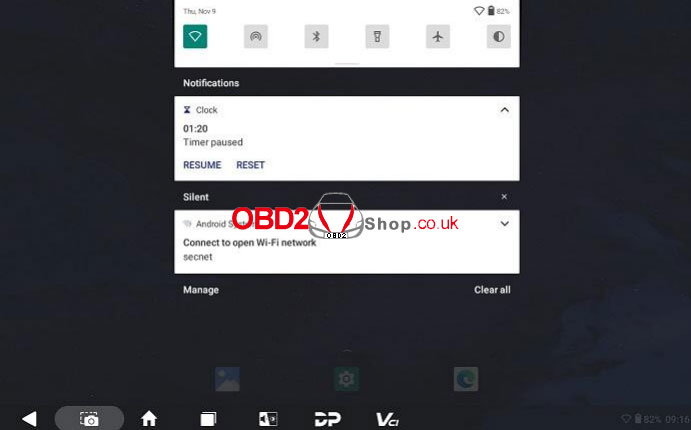
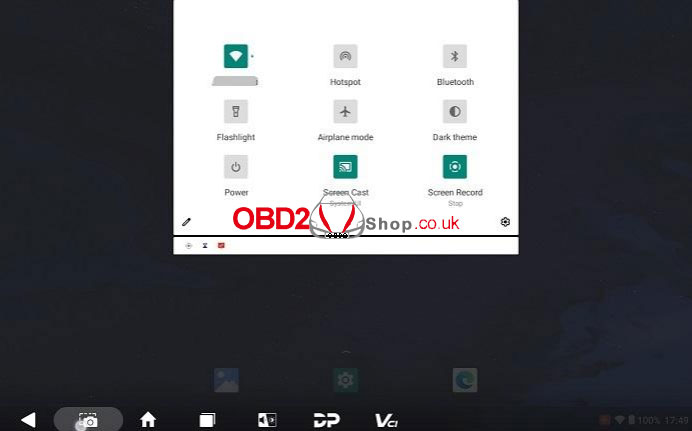
Step 1. Open the hidden menu at the bottom of the desktop and select [Screen Recording]. Or you can swipe down from the top of any interface to expand the drop-down box, then swipe down again to expand the first column and select [Screen Recording].
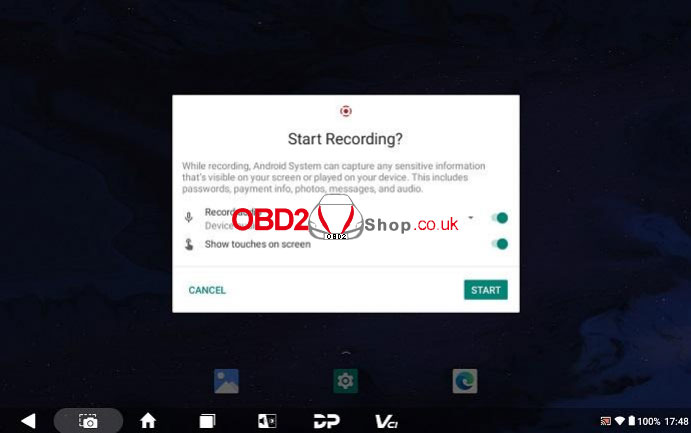
Step 2. After tapping [START] in the pop-up box, a countdown will be displayed in the lower right corner and a beep will sound after three seconds, indicating that recording has started.
Step 3. When you want to end recording, tap the red icon in the bottom right corner and the hidden menu at the top of the screen will open automatically, tap [Stop Screen Recording] to end recording.
For more information about OBDSTAR X300 Classic G3 please follow www.obd2shop.co.uk
Oznake: obdstar x300 classic g3
utorak, 28.05.2024.
OBDSTAR X300 Classic G3 Manual: Transfer Files Using USB Flash Drive
This post will guide you on how to transfer files using a USB flash drive on your OBDSTAR X300 Classic G3 Key Programmer.
Procedure:
Step 1. Insert the USB flash drive into the USB port of your device.
Step 2. Expand the hidden menu at the bottom of the desktop and select [ES File Explorer] to open it. In the left menu, select [Local] > [Home]. The block under the Internal Storage block is for USB storage.
Step 3. Open [Internal Storage], select any folder (or open the folder to select files) and hold. An empty circle will appear under each file, and function buttons such as copy, cut, delete, and rename will appear at the bottom right. Select the folder (or file) you want to transfer, the circle under the selected folder will be marked with a checkmark and turn green, then tap [Copy].
Step 4. Go back to the Home tab, then select the storage for the USB you inserted.
Step 5. Open the [Usb Storage] folder and all the folders in the USB drive will be displayed (See example below). Paste the copied folder (or file) to the desired location.
Step 6. After everything is done, just pull out the USB flash drive.
For more information about OBDSTAR X300 Classic G3 please follow www.obd2shop.co.uk
Oznake: obdstar x300 classic g3
subota, 11.05.2024.
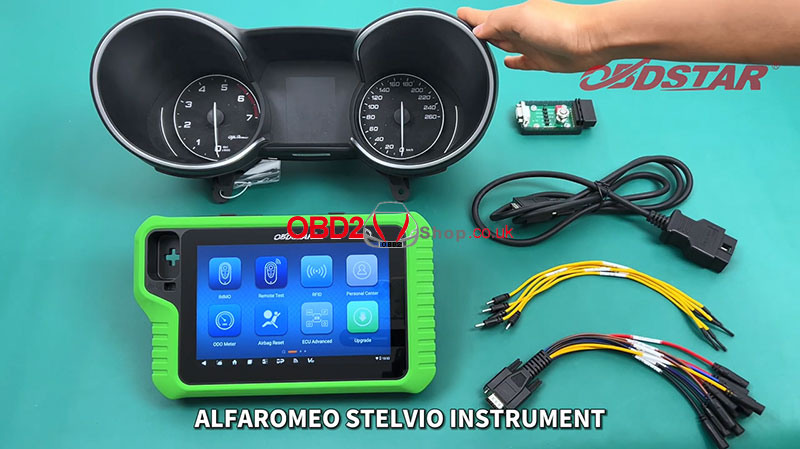
Alfa Romeo Stelvio Instrument ECU Unlock via OBDSTAR X300 Classic G3
This post will guide you on unlocking the used instrument ECU for Alfa Romeo Stelvio using the OBDSTAR X300 Classic G3 key programmer.
The tools we need:
Alfa Romeo Stelvio Instrument
X300 Classic G3
P004 Adapter
Main Cable
P004 ECU Clone Jumper
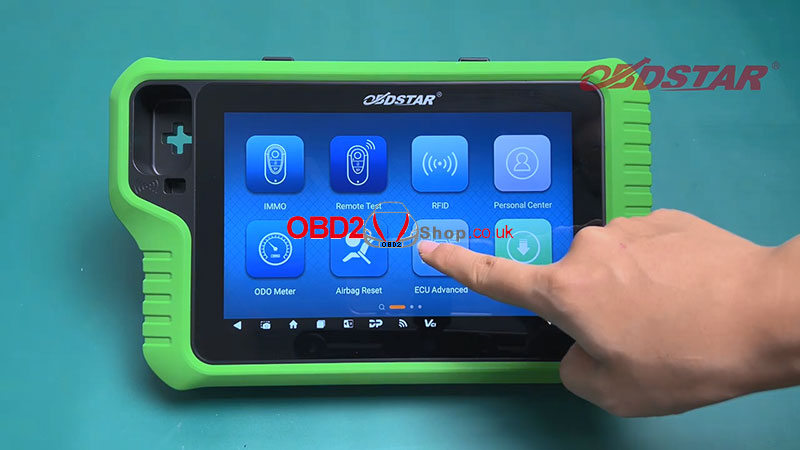
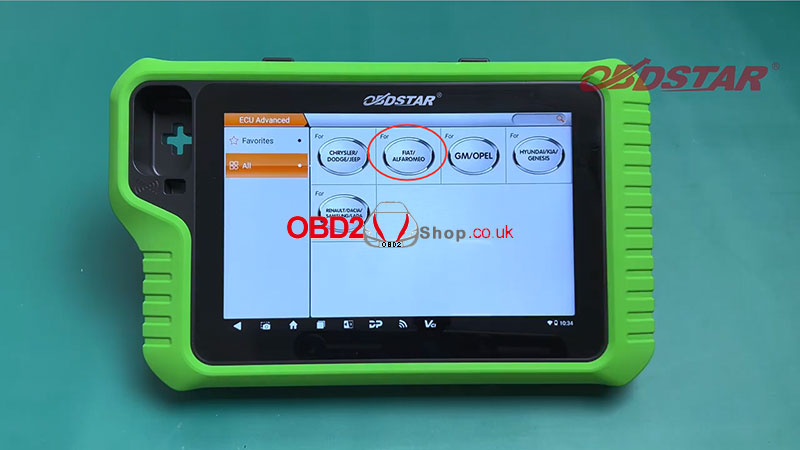
Procedure:
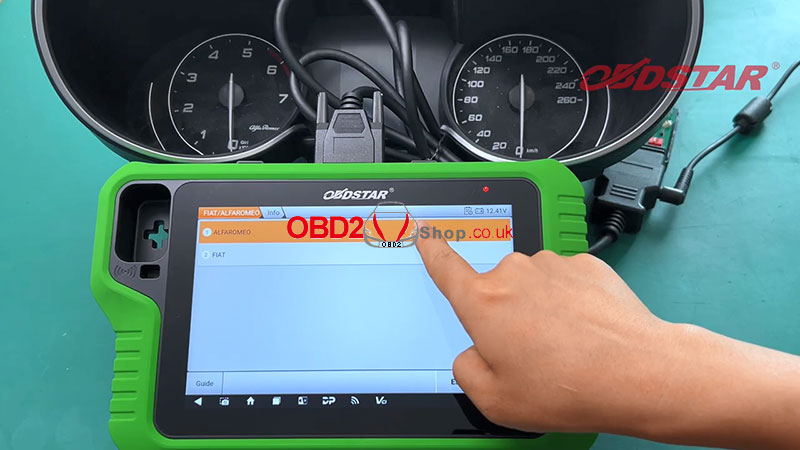
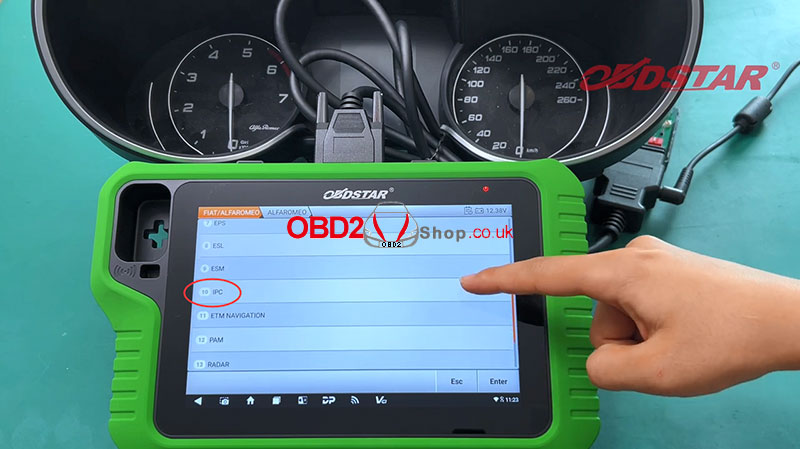
First, we select [ECU Advanced] >> [FIAT/ALFARMEO] >> [FIAT/ALFARMEO V30.04] >> [ALFARMEO] >> [IPC]
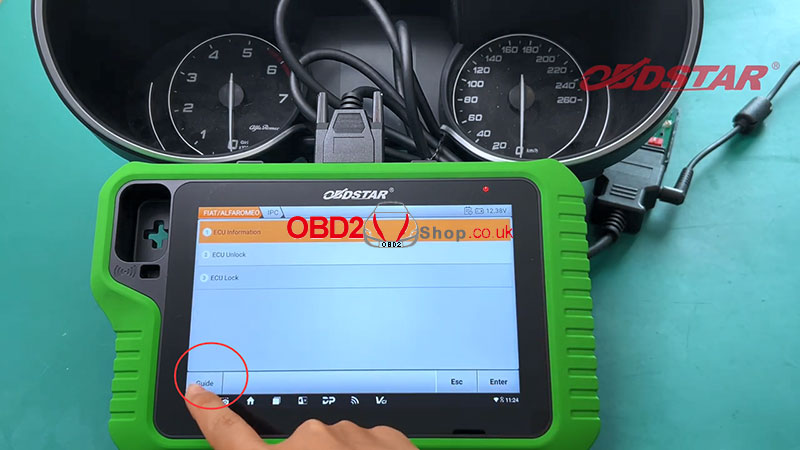
Click [Guide] in the lower left corner of the X300 Classic G3 tablet, and carefully read the development background and operation methods.
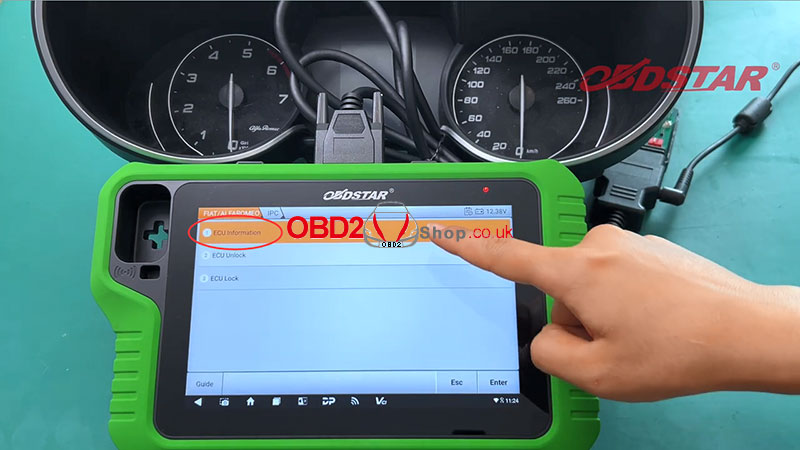
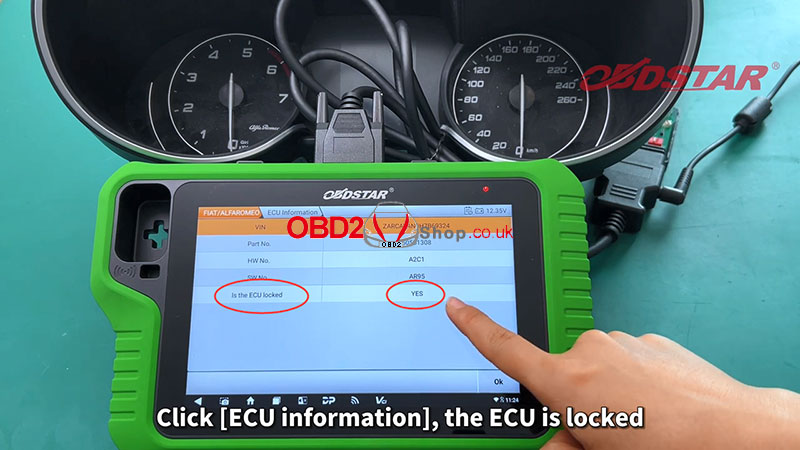
Then click [Back] to return to the previous interface, and select [ECU information] to view the information, we can see that ECU is locked here.
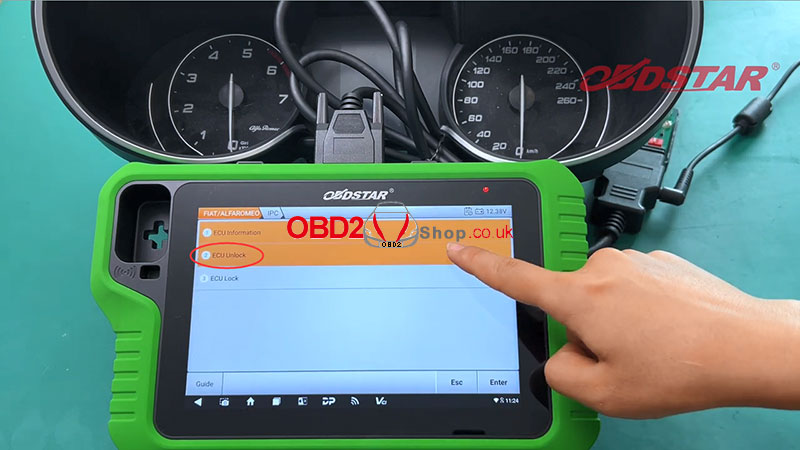
Then we select [ECU Unlock] to unlock.
Information:
This function is available by connecting the server, please ensure the internet connection is normal.
We click "OK" to continue.
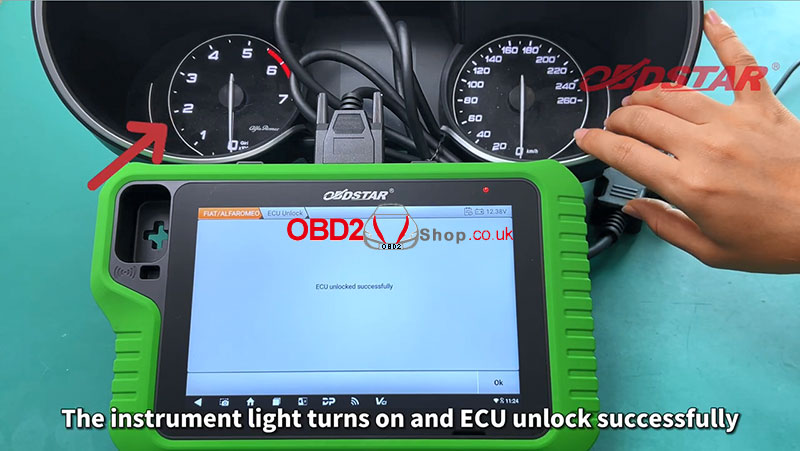
The instrument light turns on and the ECU unlocked successfully.
Video Guides:
https://youtu.be/b0y80urcd2Y
www.obd2shop.co.uk
Oznake: obdstar x300 classic g3
utorak, 07.05.2024.
How to register and update OBDSTAR X300 Classic G3
This post will guide you on how to register and update your OBDSTAR X300 Classic G3 Programmer.
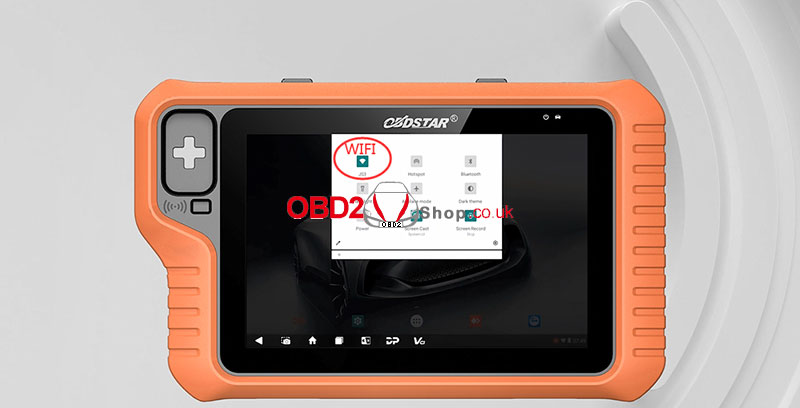
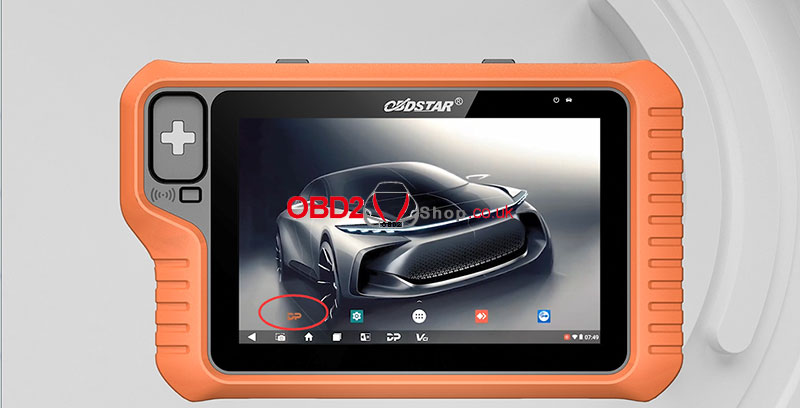
Connect the power supply, connect to the network.
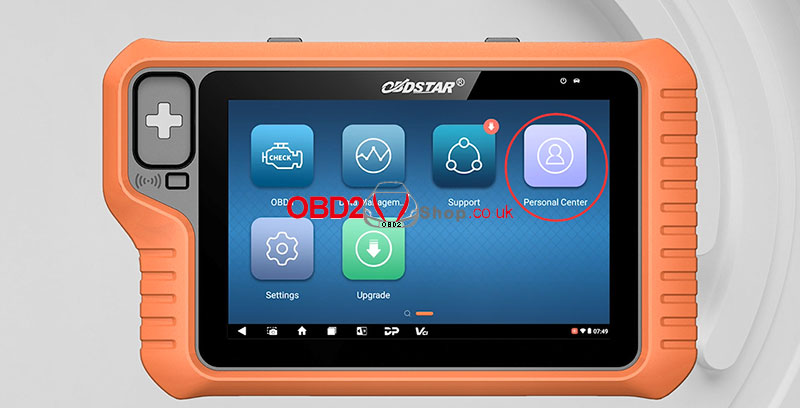
Select [DP] in the lower left corner of the tablet, and select [Personal Center] to enter the user login page.
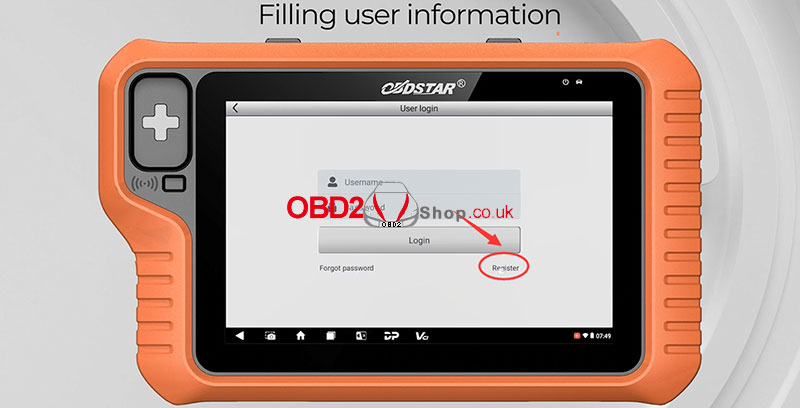
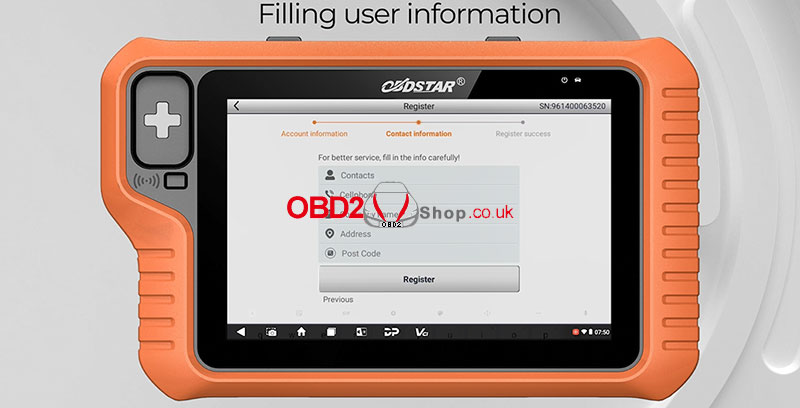
Select [Register] to fill in relevant information.
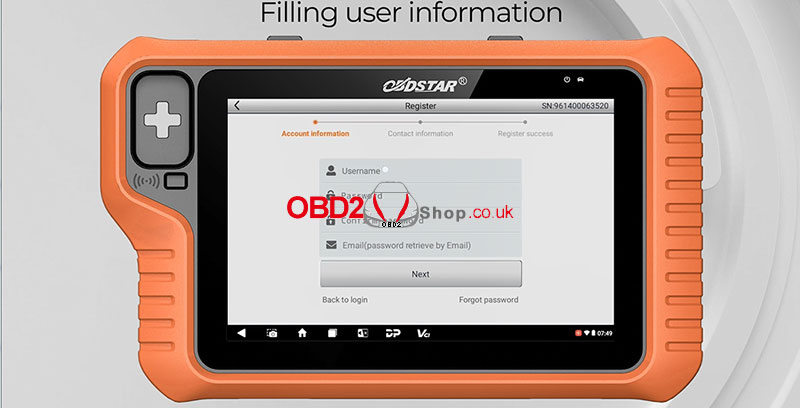
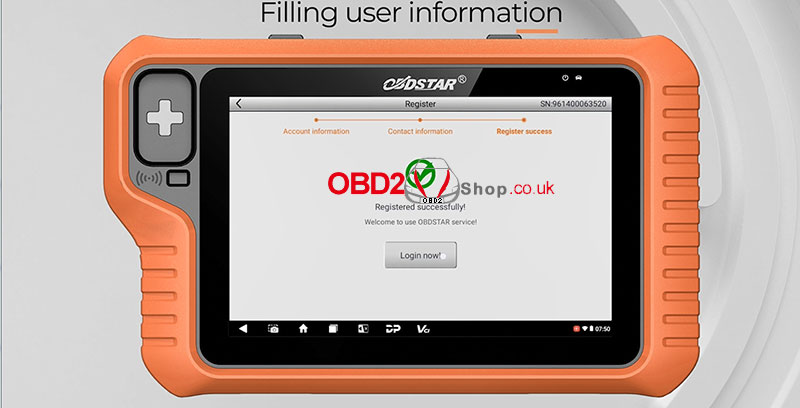
Registration is successful, select [Login now!].
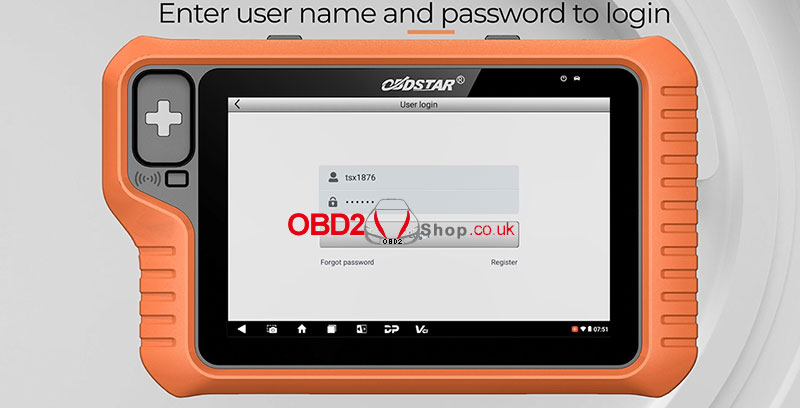
Enter your user name and password to login.
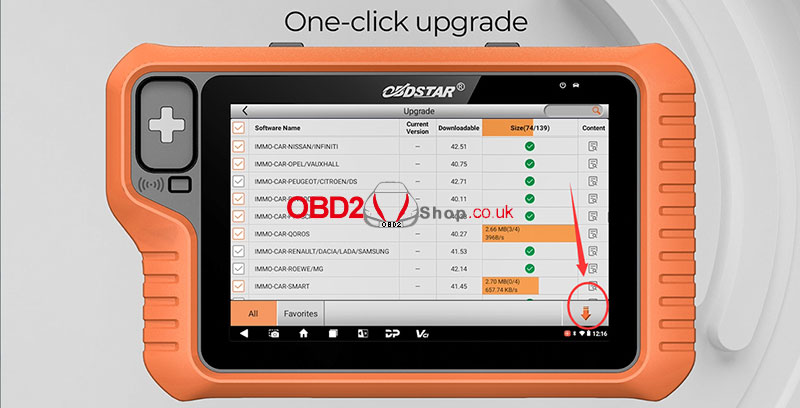
Then return to the previous interface and select [Upgrade] to update the software.
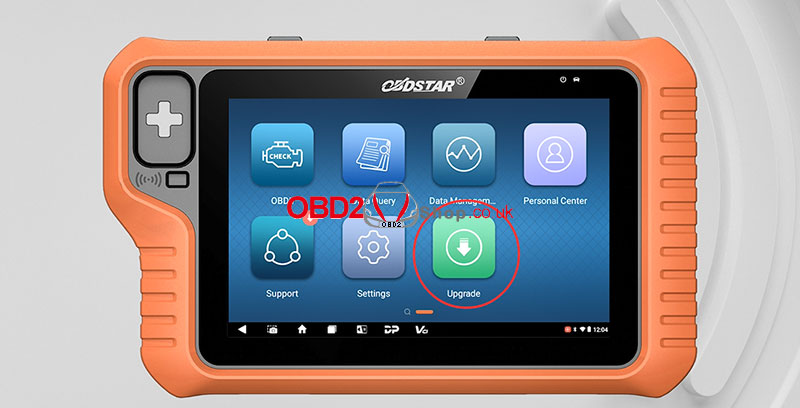
Done!
Video guides:
https://youtu.be/xDLO9t7J2hk
www.obd2shop.co.uk
Oznake: obdstar x300 classic g3

| < | siječanj, 2026 | |||||
| P | U | S | Č | P | S | N |
| 1 | 2 | 3 | 4 | |||
| 5 | 6 | 7 | 8 | 9 | 10 | 11 |
| 12 | 13 | 14 | 15 | 16 | 17 | 18 |
| 19 | 20 | 21 | 22 | 23 | 24 | 25 |
| 26 | 27 | 28 | 29 | 30 | 31 | |
Svibanj 2026 (1)
Siječanj 2026 (19)
Prosinac 2025 (22)
Studeni 2025 (21)
Listopad 2025 (20)
Rujan 2025 (21)
Kolovoz 2025 (8)
Srpanj 2025 (13)
Lipanj 2025 (9)
Svibanj 2025 (12)
Travanj 2025 (10)
Ožujak 2025 (12)
Veljača 2025 (14)
Siječanj 2025 (8)
Prosinac 2024 (6)
Studeni 2024 (6)
Listopad 2024 (4)
Rujan 2024 (7)
Kolovoz 2024 (14)
Srpanj 2024 (12)
Lipanj 2024 (10)
Svibanj 2024 (13)
Travanj 2024 (12)
Ožujak 2024 (11)
Veljača 2024 (2)
Siječanj 2024 (10)
Prosinac 2023 (8)
Studeni 2023 (6)
Listopad 2023 (7)
Rujan 2023 (9)
Kolovoz 2023 (6)
Srpanj 2023 (10)
Lipanj 2023 (4)
Veljača 2023 (8)
Siječanj 2023 (14)
Prosinac 2022 (13)
Studeni 2022 (14)
Listopad 2022 (18)
Rujan 2022 (9)
Kolovoz 2022 (16)
Srpanj 2022 (11)
Lipanj 2022 (14)
Svibanj 2022 (13)
Travanj 2022 (12)
Ožujak 2022 (12)
Veljača 2022 (13)
Siječanj 2022 (10)
Srpanj 2021 (1)
Dnevnik.hr
Gol.hr
Zadovoljna.hr
Novaplus.hr
NovaTV.hr
DomaTV.hr
Mojamini.tv