OBD2 tools on OBD2shop.co.uk https://blog.dnevnik.hr/obd2shop
srijeda, 25.09.2024.
How to Make an Extension Cable for Godiag GT106 Plus
As we all know, a fuel injector test may require longer wires to assist with the testing. This article will show you how to make an extension cable for the Godiag GT106 Plus power cord.
Tools Required:
1pc x GT106 Plus Power Cord with Fuse
2pcs x Clamps
2pcs x Rubber Protective Cover
1pc x Extension Cable
1pc x Automatische Abisolierzange
1pc x Isolierband
Steps:
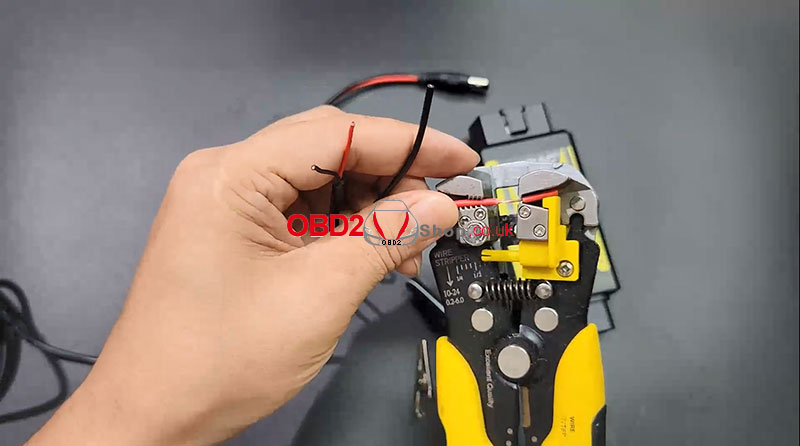
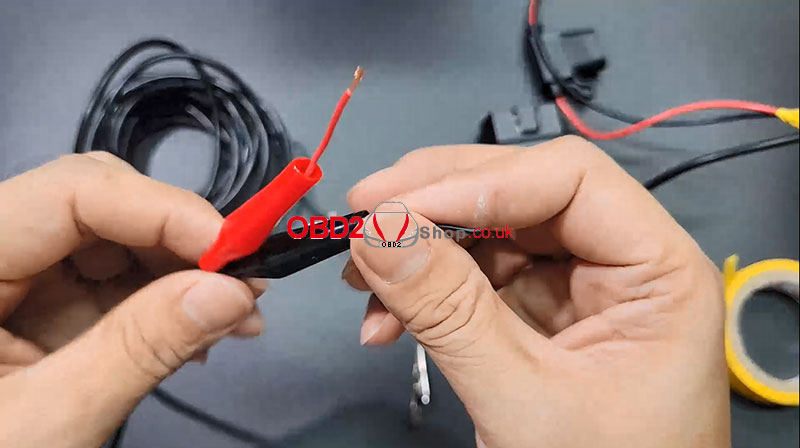
1. Use the automatische abisolierzange to peel off one end of the GT106 Plus power cord and the extension cable.
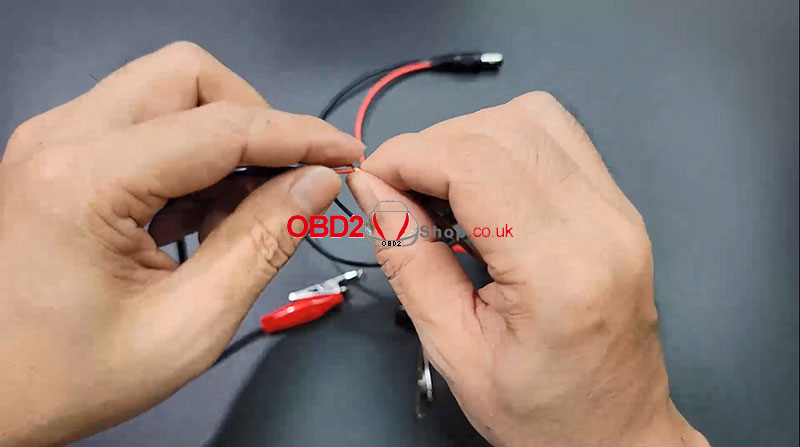
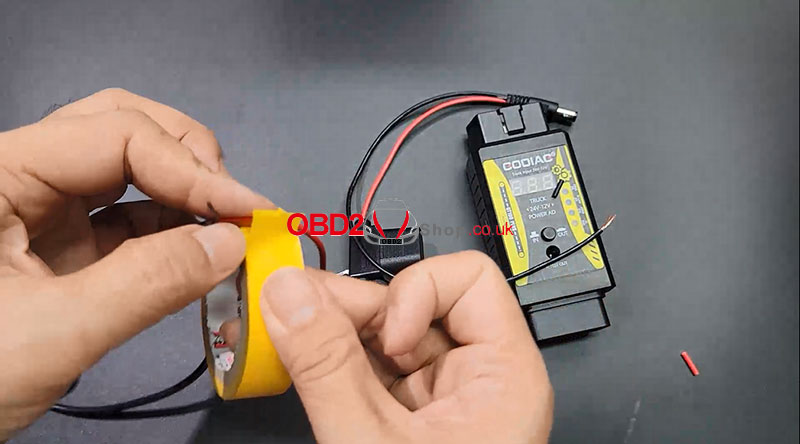
2. Connect the GT106 Plus power cord's red wire and the extension cable's red wire, and then fix them with an isolator band. Both black wires are connected in the same way.
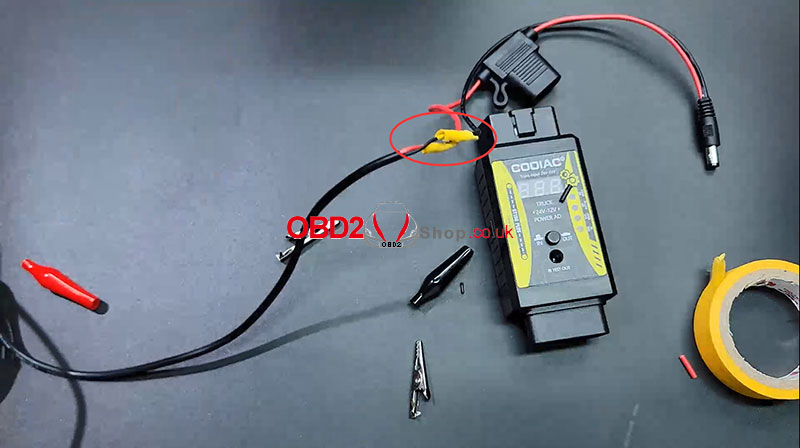
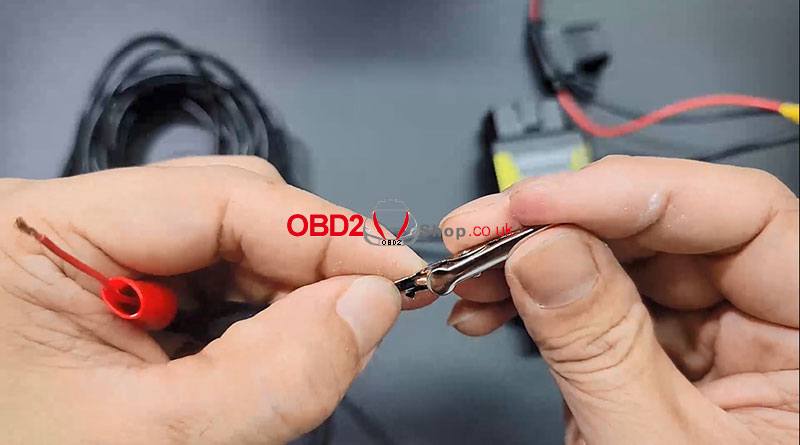
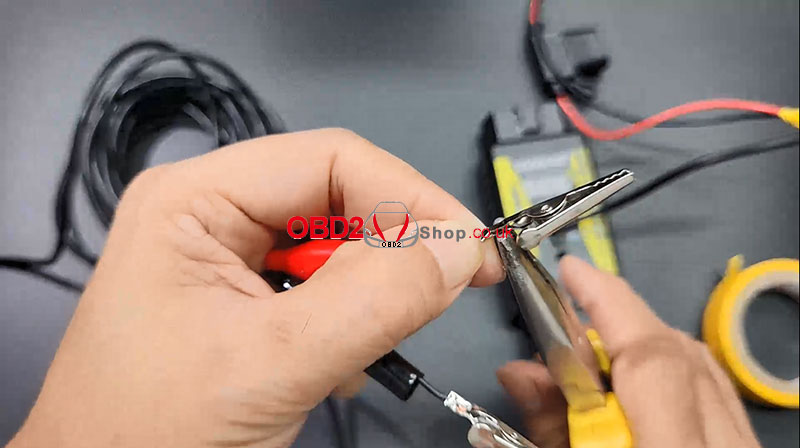
3. Connect the other end of the extension cable to the clip.
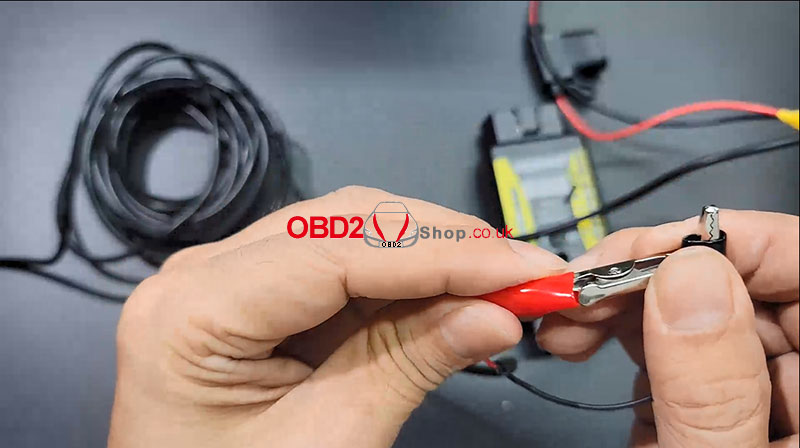
First, put on the rubber protective cover, then connect the wire to the clip like this, clamp it, and finally put the rubber protective cover on the clip.
Click on the video below to view the full tutorial:
https://youtu.be/2Gai9PdfZ-U
www.obd2shop.co.uk
Oznake: godiag gt106 plus
ponedjeljak, 23.09.2024.
Yanhua Mini ACDP Module 34 VW MQB49 1404 5C Mileage Correction
This is a tutorial on how to use Yanhua Mini ACDP 2 + Module 34 to do VW MQB system 1404 5C chip model instrument mileage correction.
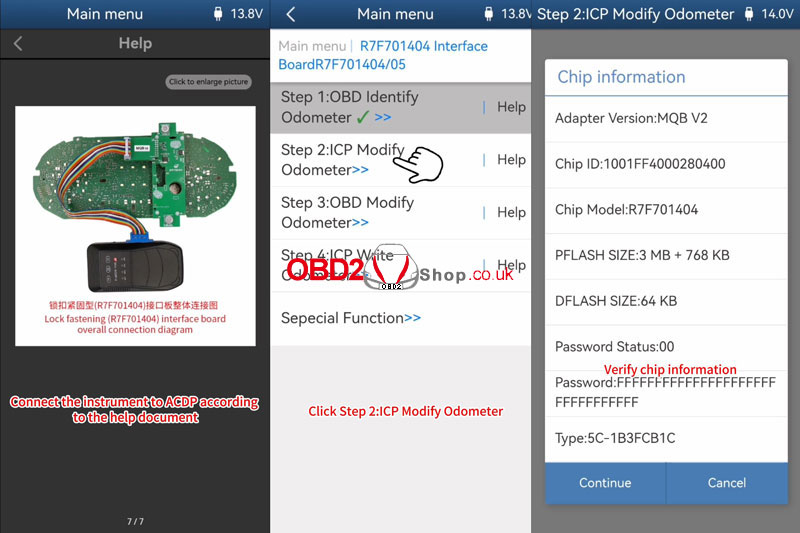
Step1. Identify Odometer
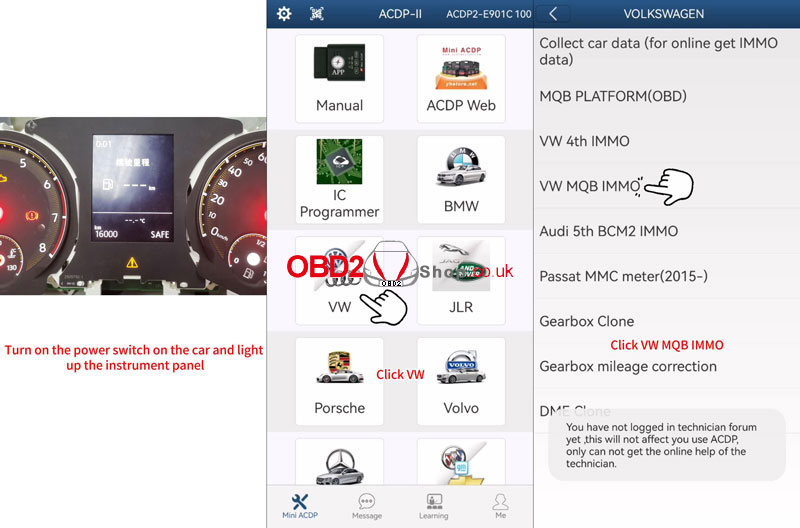
1) Turn on the power switch and light up the instrument panel to record the original mileage: 16000km.
2) Connect the Mini ACDP programmer to OBD.
3) Open Mini ACDP APP:
* Make sure the ACDP device has been bound.
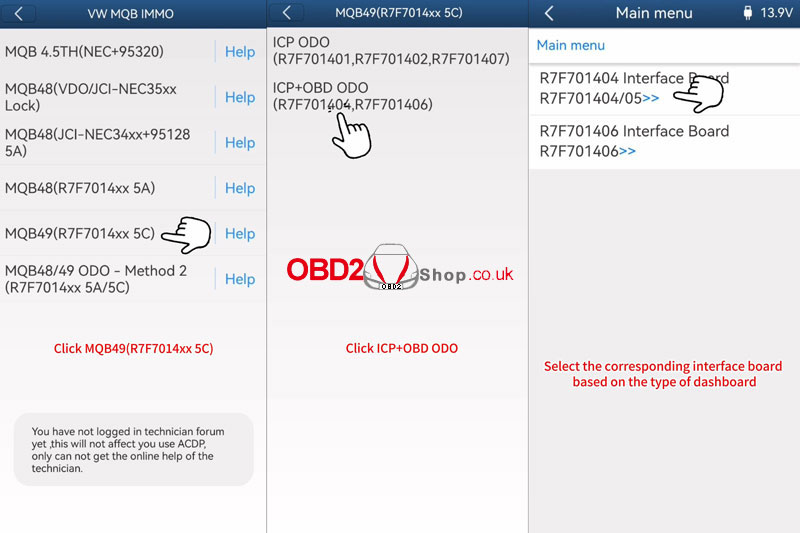
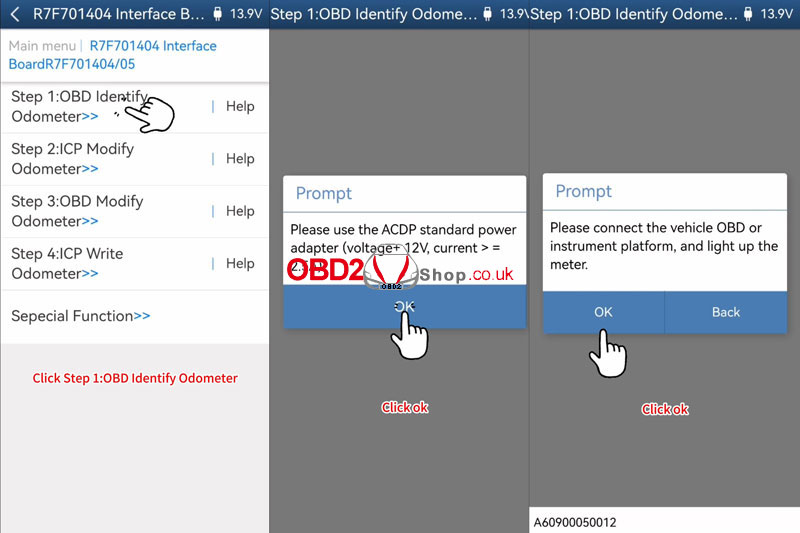
VW >> VW MQB IMMO >> MQB49(R7F7014xx 5C) >> ICP+OBD ODO(R7F701404, R7F701406) >> R7F701404 Interface Board R7F701404/05 >> OBD Identify Odometer
Please use the ACDP standard power adapter(voltage+ 12V, current > = 2.5A)
Please connect the vehicle OBD or instrument platform, and light up the meter.
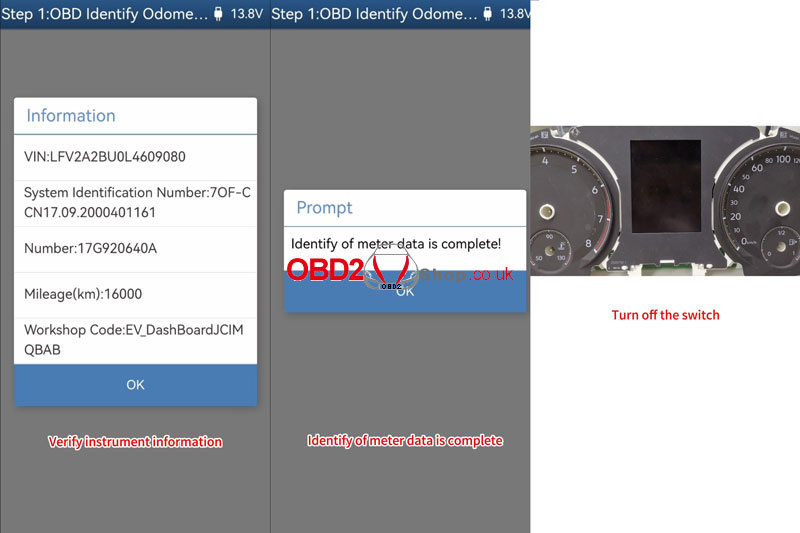
Verify the instrument information.
The identification of meter data is complete!
Step2. ICP Modify Odometer
Turn off the switch. Remove the instrument panel.
Click the help of Step 2, connect the instrument to ACDP according to the diagram.
Make sure the ACDP programmer is connected to the APP.
ICP Modify Odometer >> OK
Please connect the ACDP and the meter.
Verify chip information.
Reading DFLASH...
Reading PFLASH...
Reading BOOT...
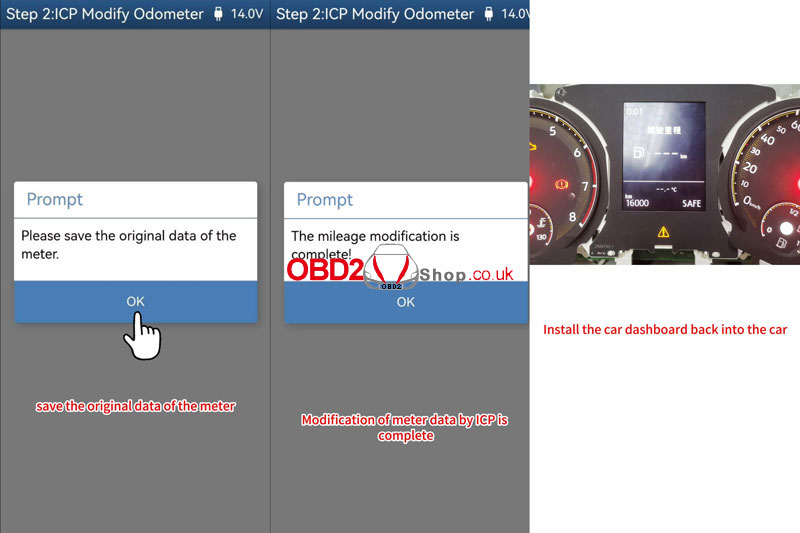
Please save the original data of the meter.
Data will be written, please make sure that the ACDP and meter are connected.
The chip is being erased, please wait...
The mileage modification is complete!
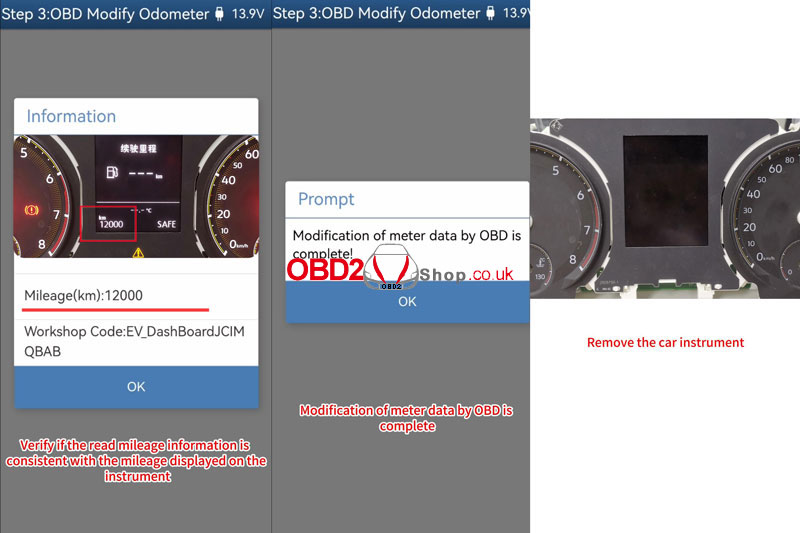
Step3. OBD Modify Odometer
Install the car dashboard back into the car.
Connect the ACDP programmer to the car OBD or dashboard test platform.
Make sure the ACDP programmer is connected to the APP.
OBD Modify Odometer >> OK >> OK
Verify instrument information.
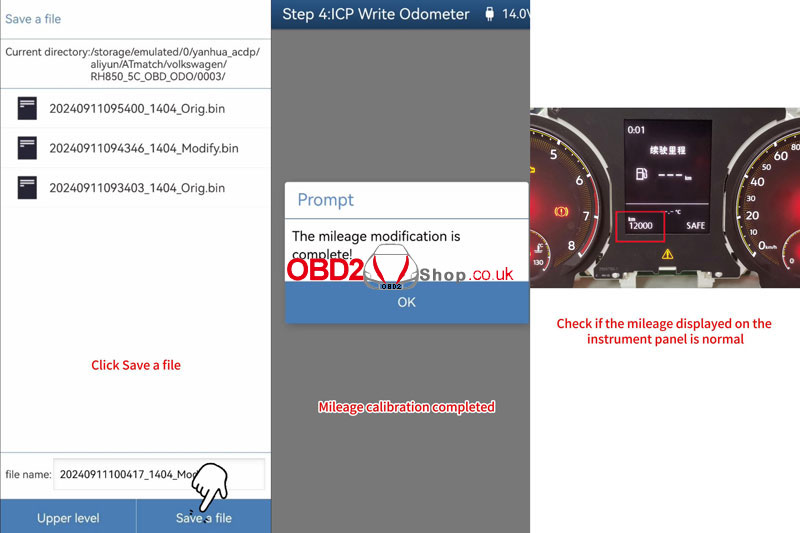
Click on the mileage to modify the target mileage: 12000km
Please confirm if the mileage information is consistent, click OK.
Modification of meter data by OBD is complete!
Remove the car instrument.
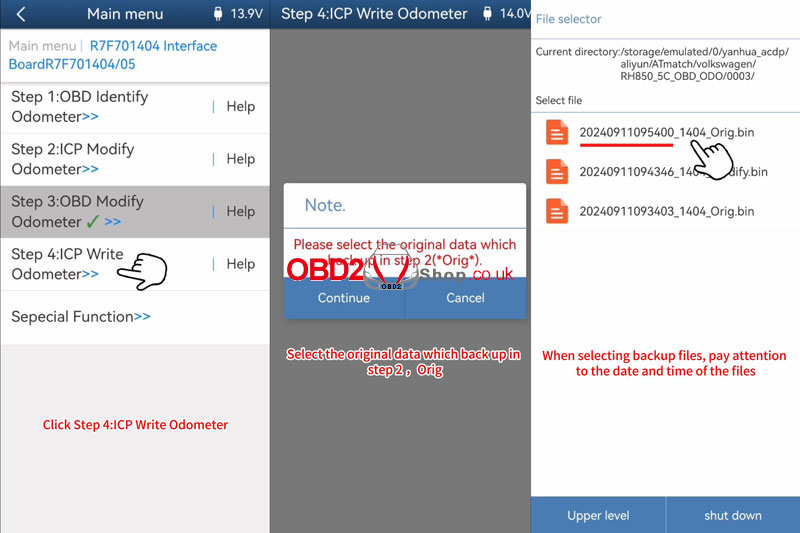
Connect the instrument to ACDP properly.
Make sure the ACDP programmer is connected to the APP.
ICP Write Odometer >> OK >> OK
Verify chip information.
Please select the original data that is backed up in step 2.
Please save the revised mileage data.
Data will be written, please make sure that the ACDP and meter are connected.
Writing DFLASH, please wait...
The mileage modification is complete!
Install the instrument panel into the car, and turn it on the instrument panel.

www.obd2shop.co.uk
Oznake: yanhua acdp moudle 34
srijeda, 18.09.2024.
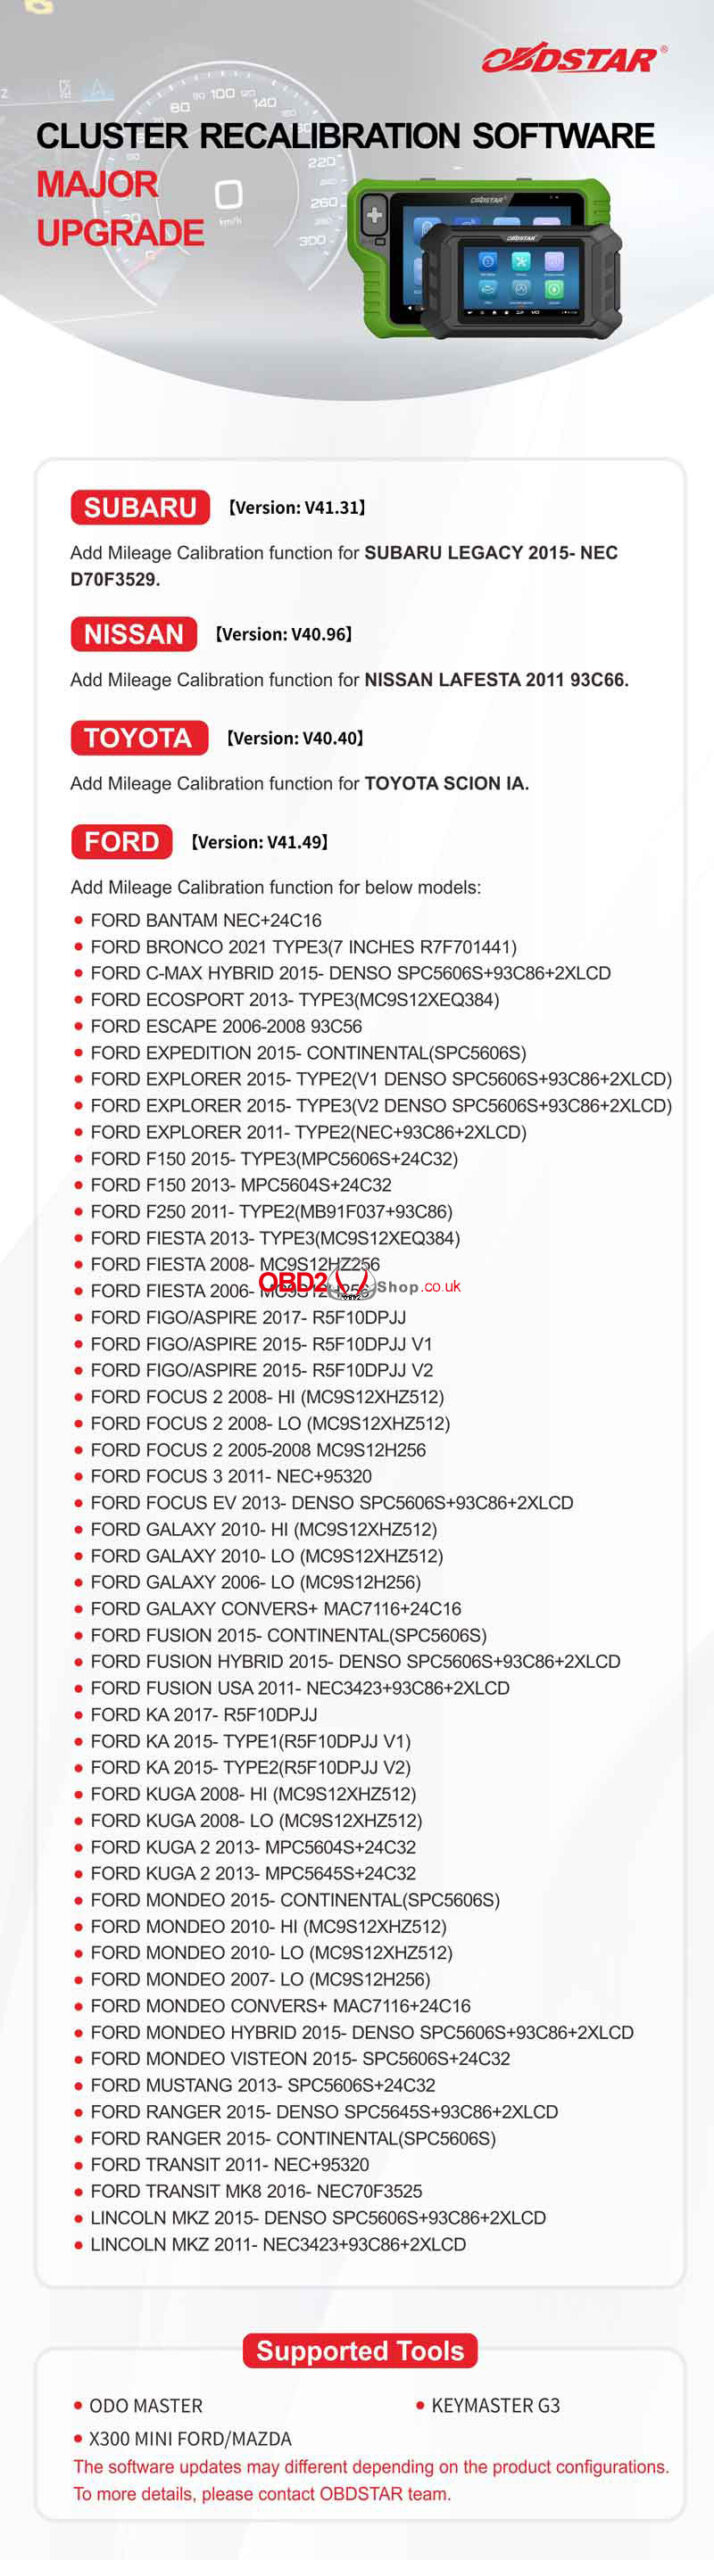
OBDSTAR Cluster Recalibration Software Upgrade in Sep.
OBDSTARCluster Recalibration Software Major Upgrade was released in September. The upgrades include Subaru, Nissan, Toyota, and Ford. Now it's available on OBDSTAR ODO Master, X300 Classic G3&X300 MINI Ford/Mazda. Please keep your device up to date with the latest features.
Update Content:
SUBARU Version: V41.31
Add mileage calibration function for SUBARU LEGACY 2015- NEC D70F3529
NISSAN Version: V40.96
Add mileage calibration function for NISSAN LAFESTA 2011 93C66.
TOYOTA Version: V40.40
Add mileage calibration function for TOYOTA SCION IA.
FORD Version: V41.49
Add mileage calibration function for the below models:
FORD BANTAM NEC+24C16
FORD BRONCO 2021 TYPE3(7 INCHES R7F701441)
FORD C-MAX HYBRID 2015-DENSO SPC5606S+93C86+2XLCD
FORD ECOSPORT 2013-TYPE3(MC9S12XEQ384)
FORD ESCAPE 2006-2008 93C56
FORD EXPEDITION 2015-CONTINENTAL(SPC5606S)
FORD EXPLORER 2015-TYPE2(V1 DENSO SPC5606S+93C86+2XLCD)
FORD EXPLORER 2015-TYPE3(V2 DENSO SPC5606S+93C86+2XLCD)
FORD EXPLORER 2011-TYPE2(NEC+93C86+2XLCD)
FORD F150 2015-TYPE3(MPC5606S+24C32)
FORD F1502013-MPC5604S+24C32
FORD F2502011-TYPE2(MB91F037+93C86)
FORD FIESTA 2013-TYPE3(MC9S12XEQ384)
FORD FIESTA 2008-MC9S12HZ256
FORD FIESTA 2006-MC9S12H256
FORD FIGO/ASPIRE 2017-R5F10DPJJ
FORD FIGO/ASPIRE 2015-R5F10DPJJ V1
FORD FIGO/ASPIRE 2015-R5F10DPJJ V2
FORD FOCUS 2 2008-HI(MC9S12XHZ512)
FORD FOCUS 2 2008-LO(MC9S12XHZ512)
FORD FOCUS 2 2005-2008 MC9S12H256
FORD FOCUS 3 2011-NEC+95320
FORD FOCUS EV 2013-DENSO SPC5606S+93C86+2XLCD
FORD GALAXY 2010-HI(MC9S12XHZ512)
FORD GALAXY 2010-LO(MC9S12XHZ512)
FORD GALAXY 2006-LO(MC9S12H256)
FORD GALAXY CONVERS+MAC7116+24C16
FORD FUSION 2015-CONTINENTAL(SPC5606S)
FORD FUSION HYBRID 2015-DENSO SPC5606S+93C86+2XLCD
FORD FUSION USA 2011-NEC3423+93C86+2XLCD
FORD KA 2017-R5F10DPJJ
FORD KA 2015-TYPE1(R5F10DPJJ V1)
FORD KA 2015-TYPE2(R5F10DPJJ V2)
FORD KUGA 2008-HI(MC9S12XHZ512)
FORD KUGA 2008-LO (MC9S12XHZ512)
FORD KUGA 2 2013-MPC5604S+24C32
FORD KUGA 2 2013-MPC5645S+24C32
FORD MONDEO 2015-CONTINENTAL(SPC5606S)
FORD MONDEO 2010-HI (MC9S12XHZ512)
FORD MONDEO 2010-LO (MC9S12XHZ512)
FORD MONDEO 2007-LO(MC9S12H256)
FORD MONDEO CONVERS+MAC7116+24C16
FORD MONDEO HYBRID 2015-DENSO SPC5606S+93C86+2XLCD
FORD MONDEO VISTEON 2015-SPC5606S+24C32
FORD MUSTANG 2013-SPC5606S+24C32
FORD RANGER 2015-DENSO SPC5645S+93C86+2XLCD
FORD RANGER 2015-CONTINENTAL(SPC5606S)
FORD TRANSIT 2011-NEC+95320
FORD TRANSIT MK8 2016-NEC70F3525
LINCOLN MKZ 2015-DENSO SPC5606S+93C86+2XLCD
LINCOLN MKZ 2011-NEC3423+93C86+2XLCD
www.obd2shop.co.uk
Oznake: obdstar update
ponedjeljak, 16.09.2024.
LAUNCH Creader Elite 2.0 Add 2005 Ford F150 Key in 3 Mins
Today I will program a new key for the 2005 Ford F150 truck with LAUNCH Creader Elite 2.0 FGC scanner. This is a perfect scanner, really cheap and easy to use.
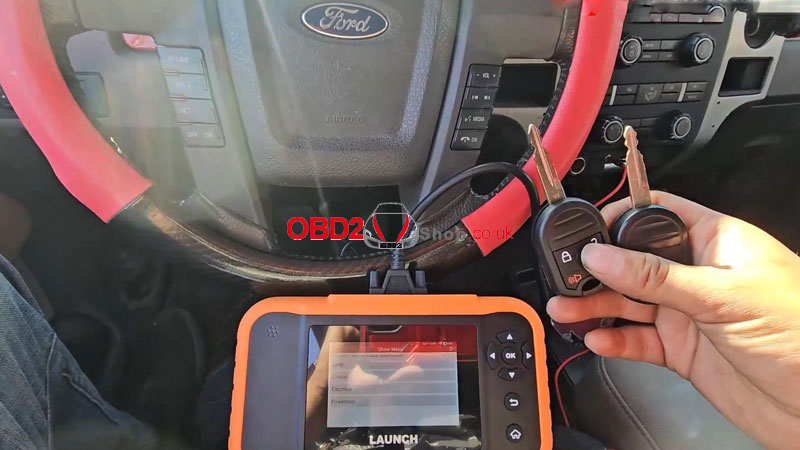
Step1. Program Key Fob Manually
1. Open the ignition switch 8 times and hear those cycles.
2. Press the UNLOCK button on the key twice.
The key fob should be programmed.
Step2. Program Key Chip
Turn the ignition on to keep the light flashing.
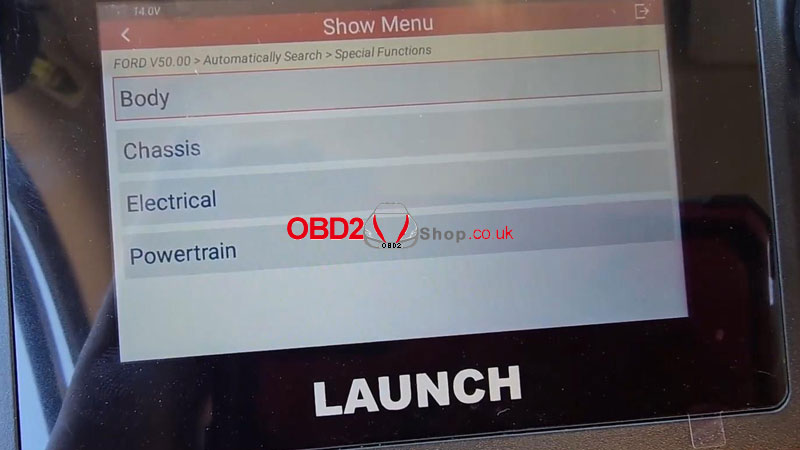
Connect the Creader Elite 2.0 to car OBD.
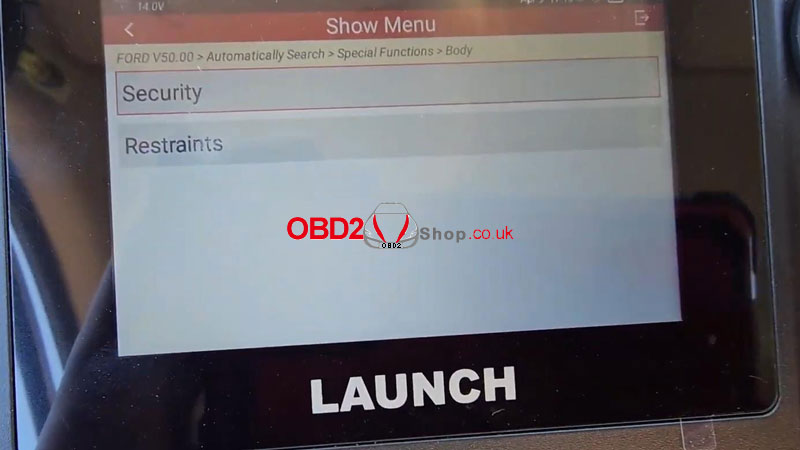
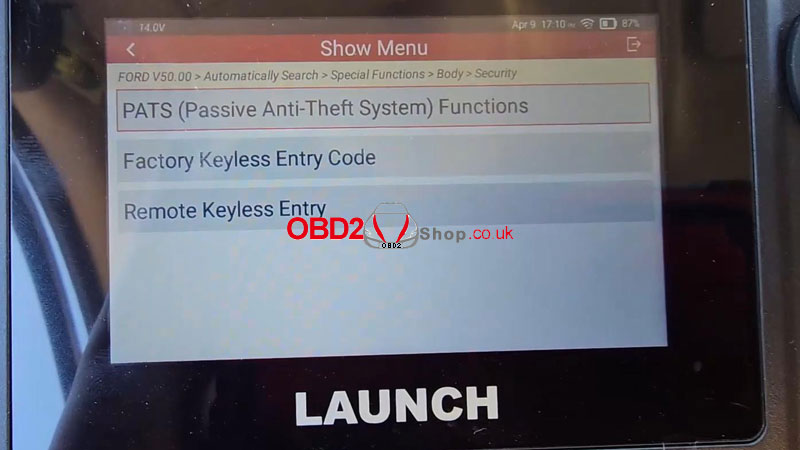
After automatically searching the car model, let's press
Special Functions >> Body >> Security >> PATS(Passive Anti-Theft System) Functions >> OK
Turn on the ignition.
This procedure will take 10 minutes.
Press Yes to continue.
Operation in progress, please wait...
Security access granted.
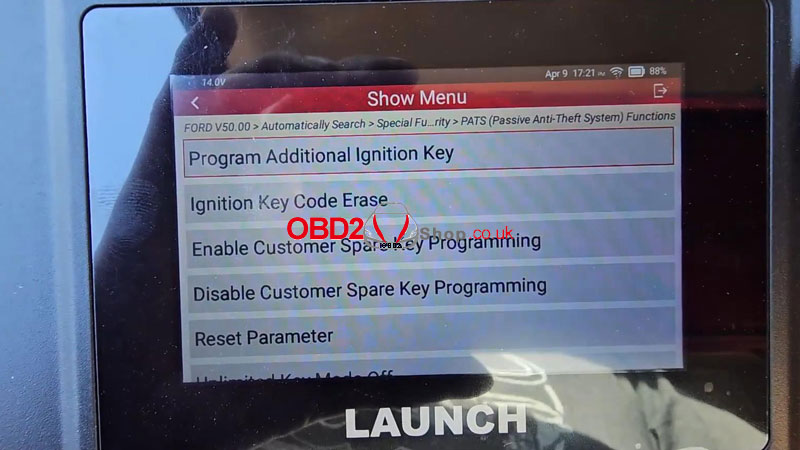
Press "Program Additional Ignition Key".

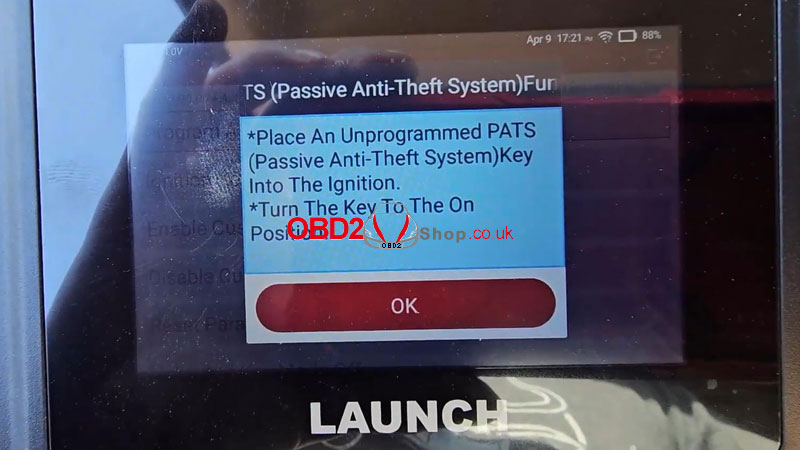
Place an unprogrammed PATS(Passive Anti-Theft System)Key into the ignition.
Turn the key to the ON position.
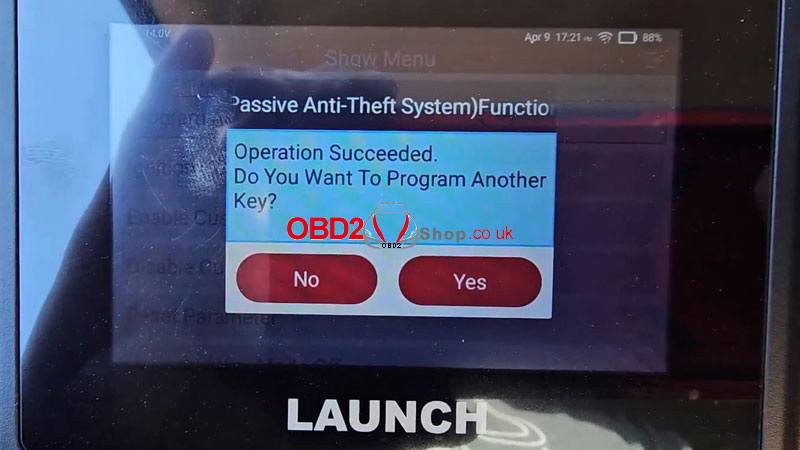
This operation has been successfully performed.
Operation succeeded.
Let's check the new key, it can work normally.
Quick done.
www.obd2shop.co.uk
Oznake: launch creader
srijeda, 11.09.2024.
How to Convert Truck 24V K-Line to 12V by GODIAG GT106 PLUS?
GODIAG GT106 PLUS is an adapter that can convert heavy truck diagnostic interface from 24V to 12V. With it, we can use the LAUNCH vehicle equipment for truck diagnosis. Converting the truck's 24V K-Line communication protocol to 12V K-Line can prevent the LAUNCH diagnostic head from burning.

Following is the tutorial on how to convert truck K-line from 24v to 12v.
As we can see, the Launch- x431 diagnostic tool requires 9-18 voltage.
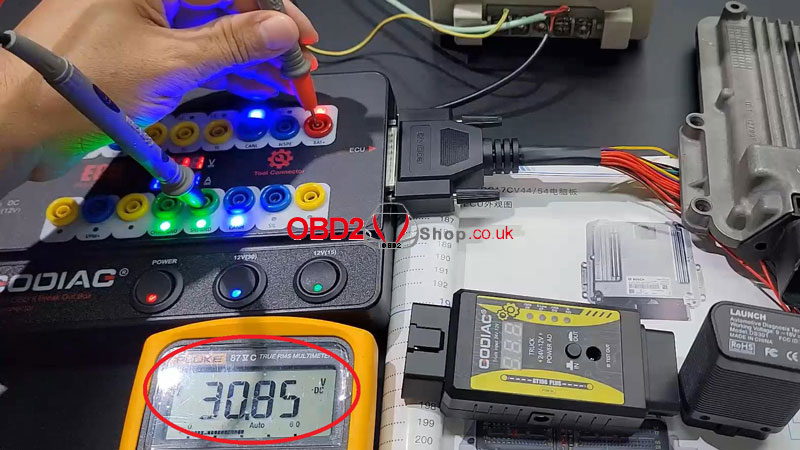
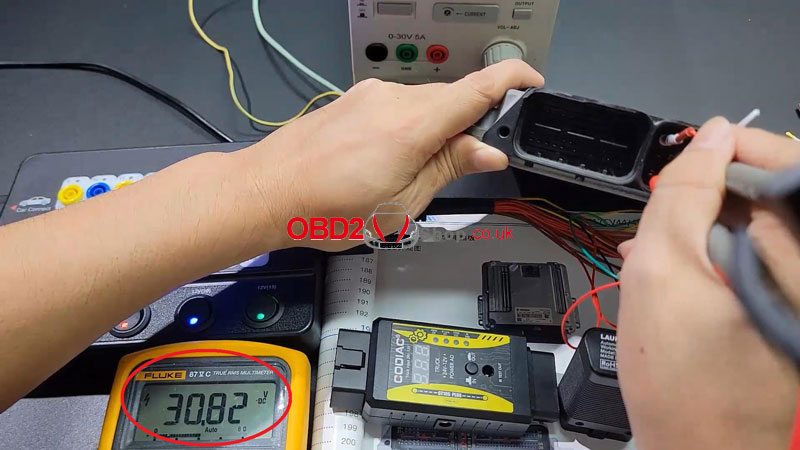
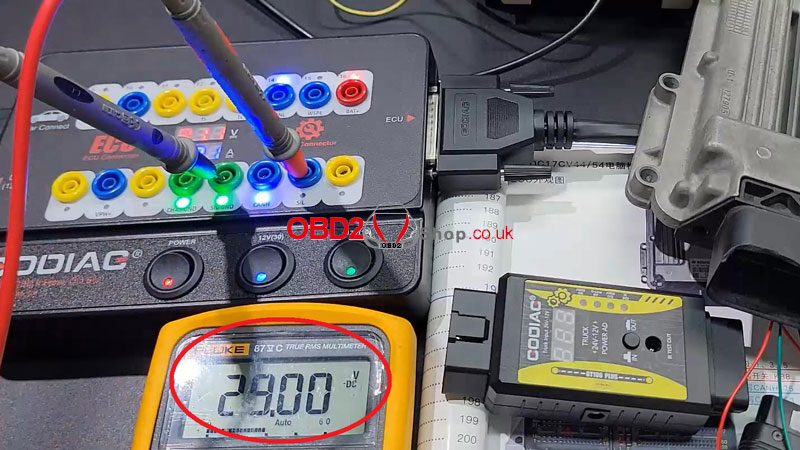
Connect ECU &GODIAG GT100 to test the voltage.
The voltage from GT100 is 30V;
The voltage from the ECU is 30V.
The K-Line voltage is 29V.
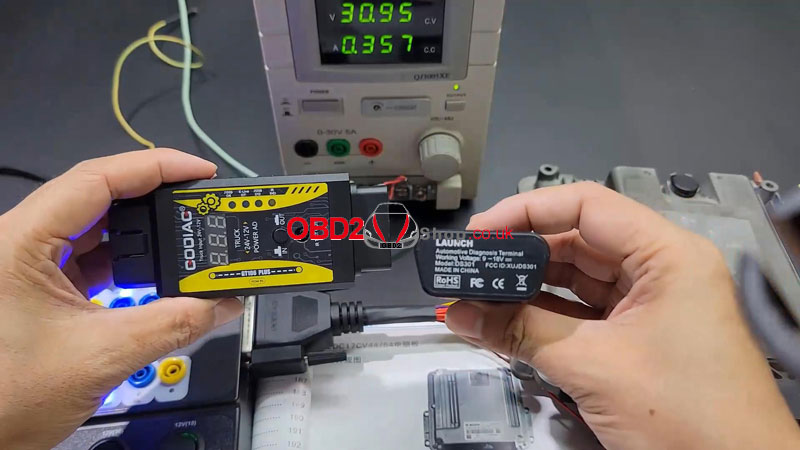
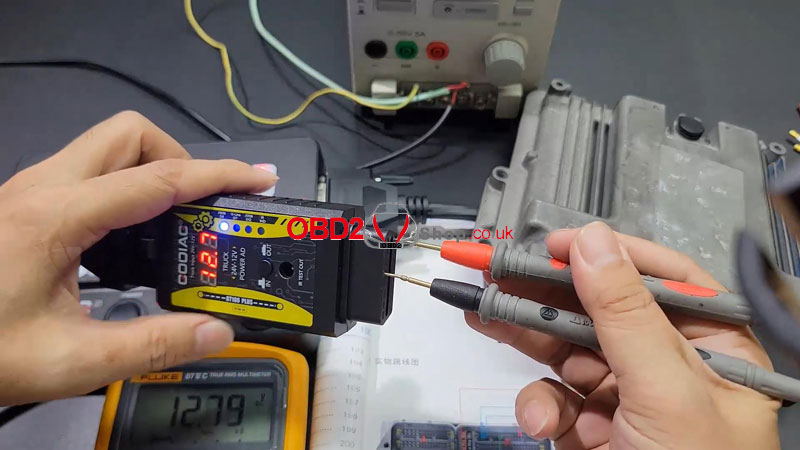
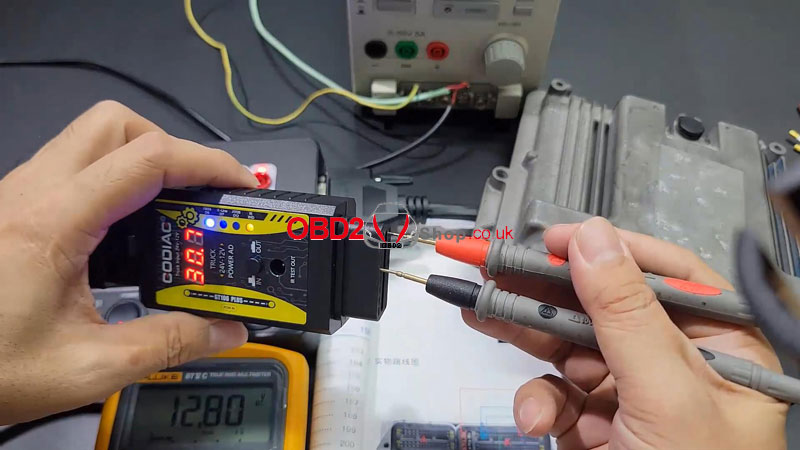
Connect GT106 PLUS to GT100 for a test.
Its output voltage is 12.7V and its input voltage is 30.7V.
So that we can plug the Launch-x431 tool safely.
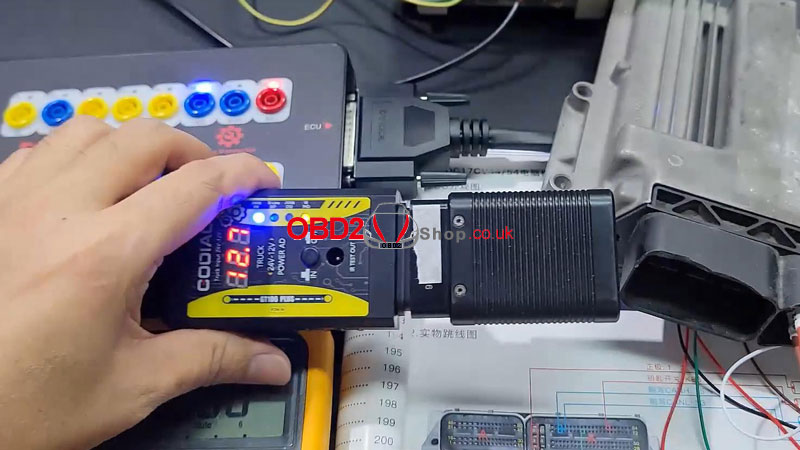
Now we can diagnose the truck ECU.
Exactly a useful and easy tool.
www.obd2shop.co.uk
srijeda, 04.09.2024.
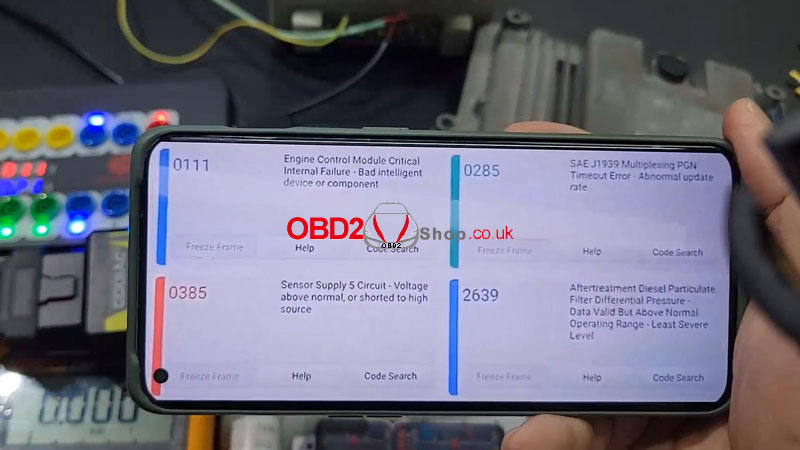
Xhorse BIM TOOL PRO Fixed BMW Motorcycle Tire Pressure Monitor DTC
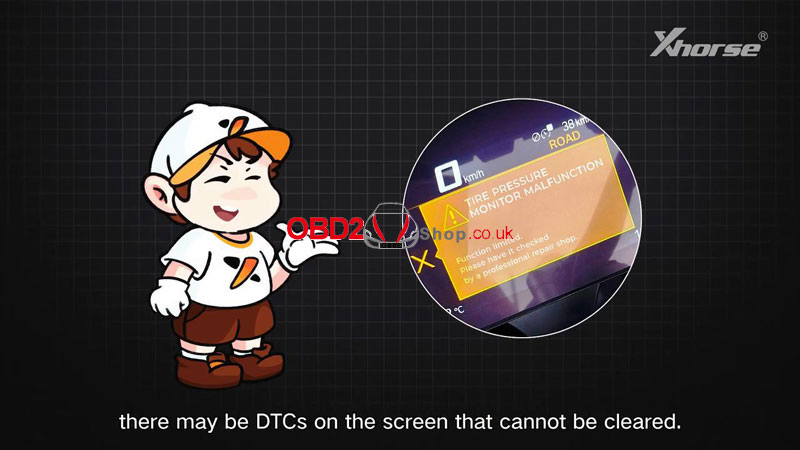
When trying the 4D and 8A key programming for BMW motorcycles on Key Tool Plus or VVDI2, we may occasionally meet the DTCs on the screen that cannot be cleared. In case where "Tire Pressure Monitor Malfunction" appears after key programming of BMW motorcycles, we can resolve the problem by VVDI BIMTOOL PRO or BIM TOOL with the following steps.
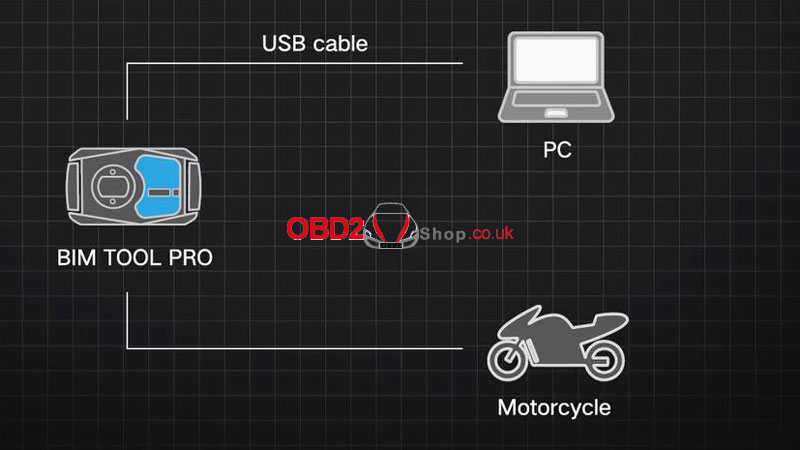
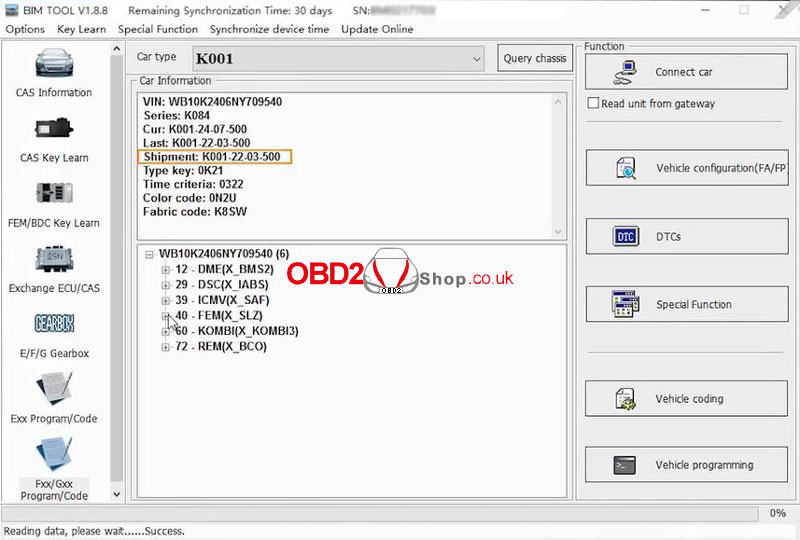
1. Connect BIMTOOL PRO
Connect BIMTOOL PRO to both the computer & the motorcycle's OBD port.
Launch the BIMTOOL PRO software.
Fxx/Gxx Program/Code >> Auto detect >> Connect car

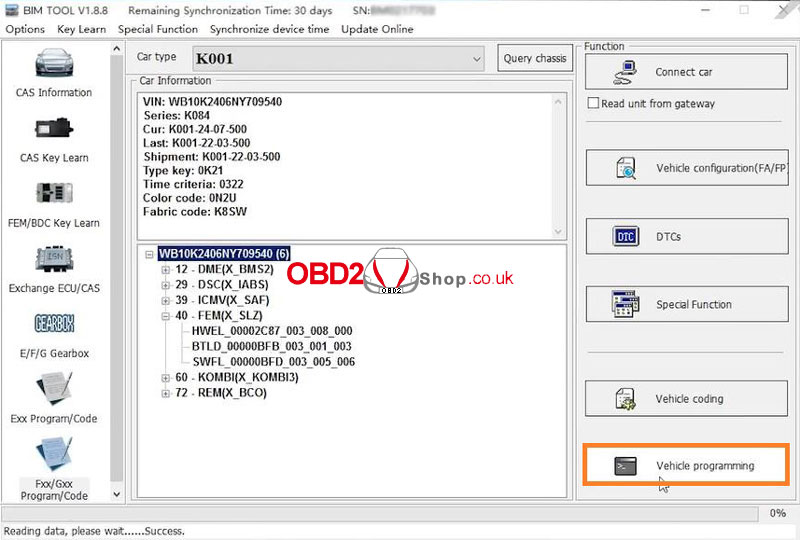
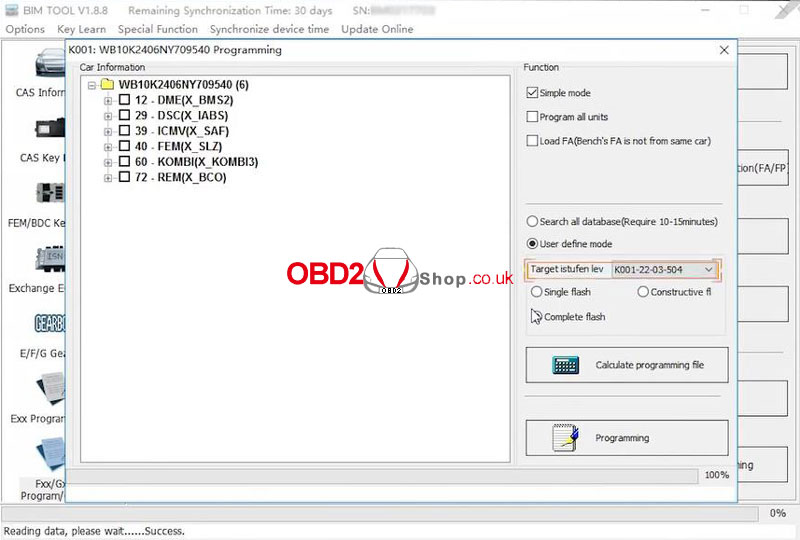
2. Programming
Click "Vehicle Programming".
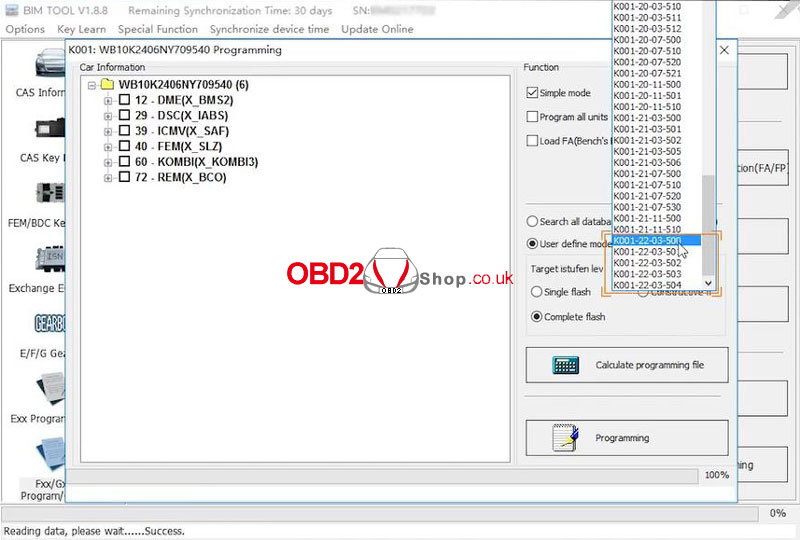
Note:
The "target istufen lev" should be the same as the "Shipment date".
If there's no shipment data available, choose the latest date.
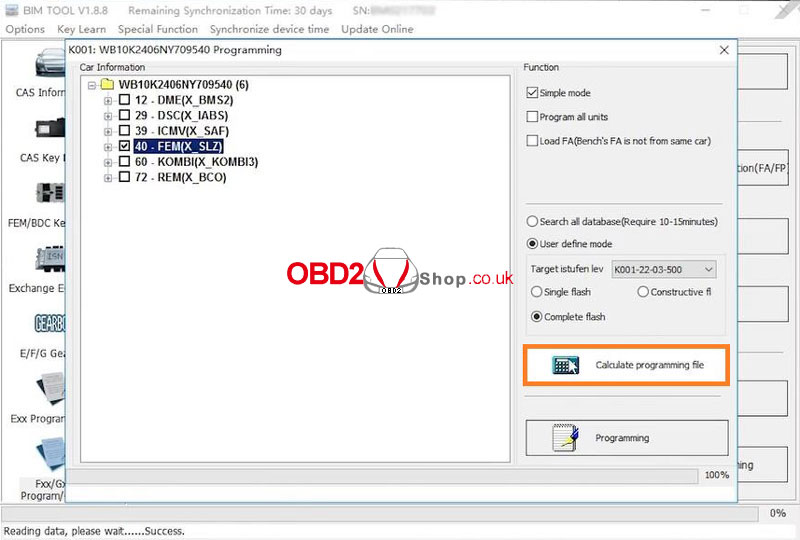
40 - FEM[X_SLZ] >> Calculate programming file
We already calculated the new programming file! You also can select another version to program!
Press YES to use the system calculate program version.
The calculation is completed.
Gray areas indicate the current module version information.
Orange areas indicate the programmable version information.
Click "Programming" to proceed.

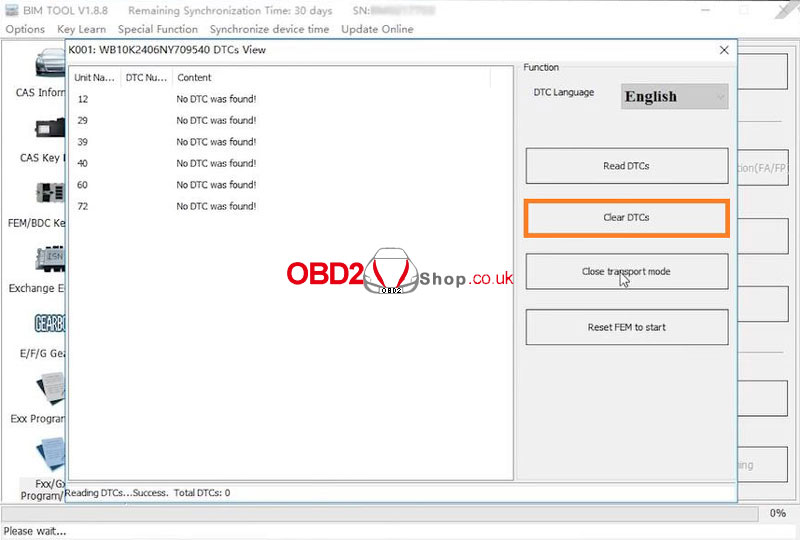
3. Clear DTCs
After programming is completed, read the vehicle's DTCs and clear them.
Upon clearing the DTCs, verify that the motorcycle screen no longer displays any fault codes.

www.obd2shop.co.uk
utorak, 03.09.2024.
Yanhua Mini ACDP Module 34 VW MQB 1402 5A Mileage Correction
This is a tutorial on mileage correction for the VW MQB system 1402 5A chip model instrument with Yanhua Mini ACDP 2 + Module 34.
Check the video to view the detailed operation:
https://youtu.be/QtprTeBrDD8
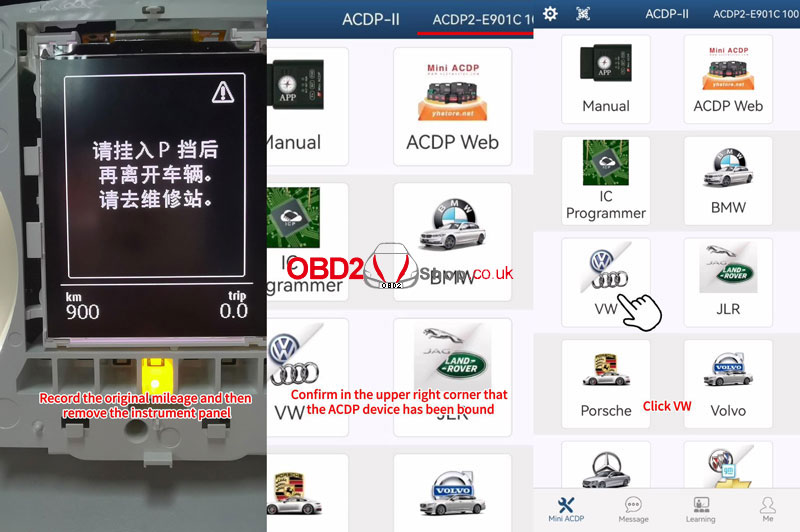
Turn on the power switch on the car and light up the instrument panel.
Record the original mileage, then remove the instrument panel.
Connect & open the Mini ACDP APP.
Make sure the upper right corner that the ACDP device has been bound.
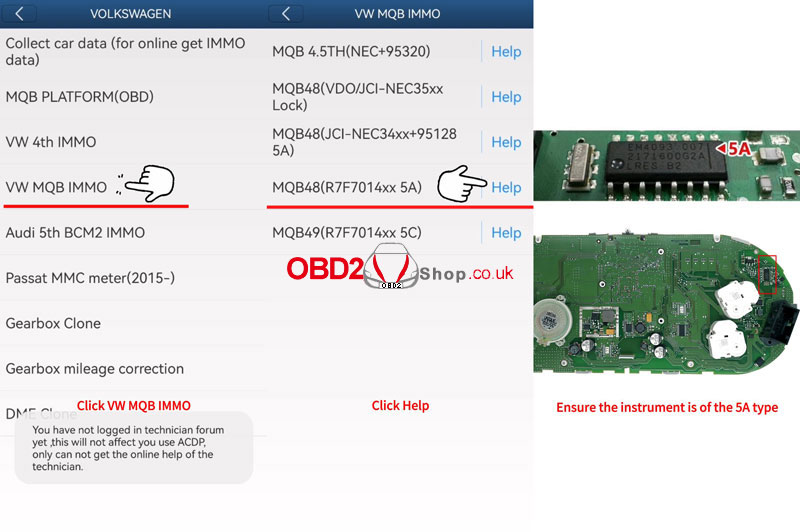
VW >> VW MQB IMMO >> MQB48(R7F7014xx 5A) >> Help
Ensure the instrument is of the 5A type.
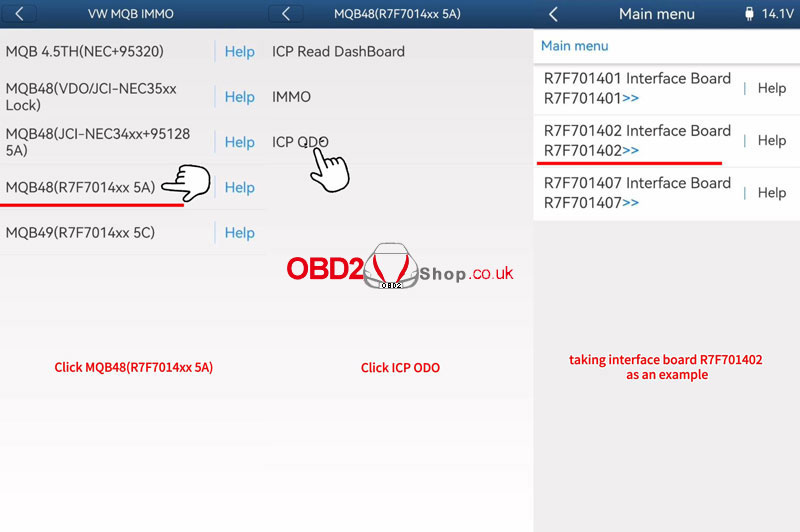
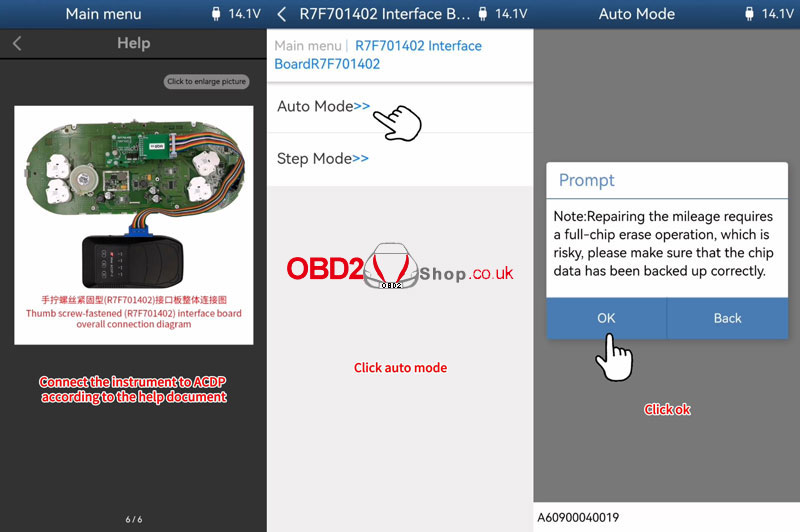
ICP ODO >> R7F701402 Interface Board R7F701402 >> Help
Connect the instrument to ACDP according to the help document.
Auto mode >> OK
Please use the ACDP standard power adapter(voltage+ 12V, current>= 2.5A)
Note:
Repairing the mileage requires a full-chip erase risky operation, please ensure the chip data has been backed up correctly.
OK >> Continue
Verify chip information, click Continue.
Click OK to save all the chip's backup data.
Verify instrument information, click Continue.
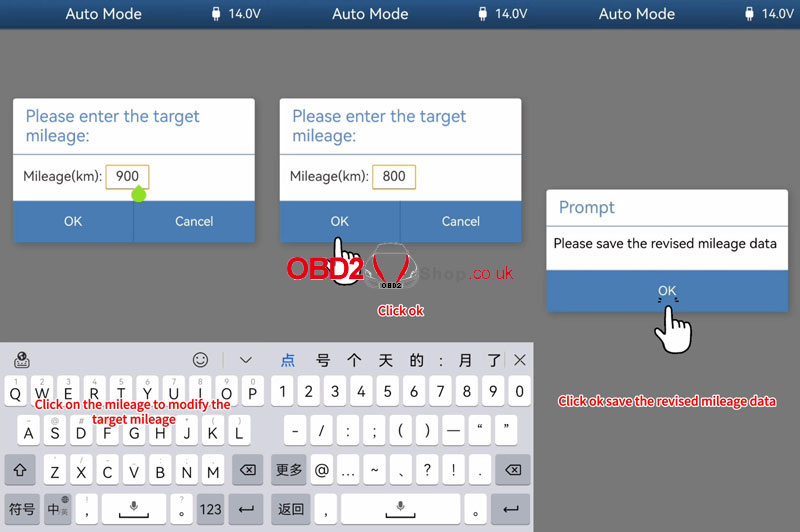
Enter the value to modify the mileage: 800km
Click OK to save the revised mileage data.
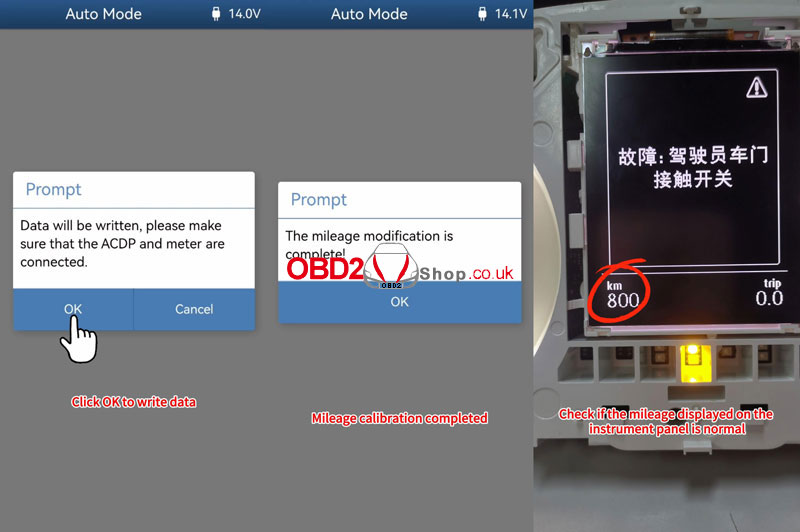
Data will be written, please make sure that the ACDP and meter are connected.
The mileage calibration is completed!
Install the instrument panel back to the car, then turn it on.
Check if the mileage displayed on the instrument panel is normal.
Done.

www.obd2shop.co.uk
Oznake: acdp module 34

| < | rujan, 2024 | > | ||||
| P | U | S | Č | P | S | N |
| 1 | ||||||
| 2 | 3 | 4 | 5 | 6 | 7 | 8 |
| 9 | 10 | 11 | 12 | 13 | 14 | 15 |
| 16 | 17 | 18 | 19 | 20 | 21 | 22 |
| 23 | 24 | 25 | 26 | 27 | 28 | 29 |
| 30 | ||||||
Svibanj 2026 (1)
Siječanj 2026 (19)
Prosinac 2025 (22)
Studeni 2025 (21)
Listopad 2025 (20)
Rujan 2025 (21)
Kolovoz 2025 (8)
Srpanj 2025 (13)
Lipanj 2025 (9)
Svibanj 2025 (12)
Travanj 2025 (10)
Ožujak 2025 (12)
Veljača 2025 (14)
Siječanj 2025 (8)
Prosinac 2024 (6)
Studeni 2024 (6)
Listopad 2024 (4)
Rujan 2024 (7)
Kolovoz 2024 (14)
Srpanj 2024 (12)
Lipanj 2024 (10)
Svibanj 2024 (13)
Travanj 2024 (12)
Ožujak 2024 (11)
Veljača 2024 (2)
Siječanj 2024 (10)
Prosinac 2023 (8)
Studeni 2023 (6)
Listopad 2023 (7)
Rujan 2023 (9)
Kolovoz 2023 (6)
Srpanj 2023 (10)
Lipanj 2023 (4)
Veljača 2023 (8)
Siječanj 2023 (14)
Prosinac 2022 (13)
Studeni 2022 (14)
Listopad 2022 (18)
Rujan 2022 (9)
Kolovoz 2022 (16)
Srpanj 2022 (11)
Lipanj 2022 (14)
Svibanj 2022 (13)
Travanj 2022 (12)
Ožujak 2022 (12)
Veljača 2022 (13)
Siječanj 2022 (10)
Srpanj 2021 (1)
Dnevnik.hr
Gol.hr
Zadovoljna.hr
Novaplus.hr
NovaTV.hr
DomaTV.hr
Mojamini.tv