OBD2 tools on OBD2shop.co.uk https://blog.dnevnik.hr/obd2shop
petak, 09.01.2026.
ECU Data Read and Write Using Launch X431 ECU & TCU Programmer
This article explains how to use the Launch X431 ECU & TCU Programmer to read and write ECU data step by step. By following this guide, you can safely back up and restore ECU EEPROM and Flash data using bench mode.
Step 1: Get Related ECU Information
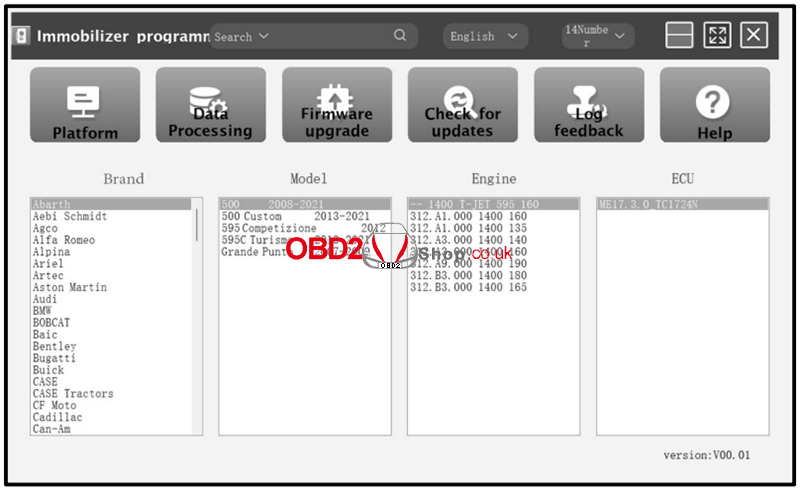
1. As shown in Figure 1, select the target ECU by navigating through:
Brand ’ Model ’ Engine ’ ECU.
Select the corresponding ECU type based on the vehicle information.
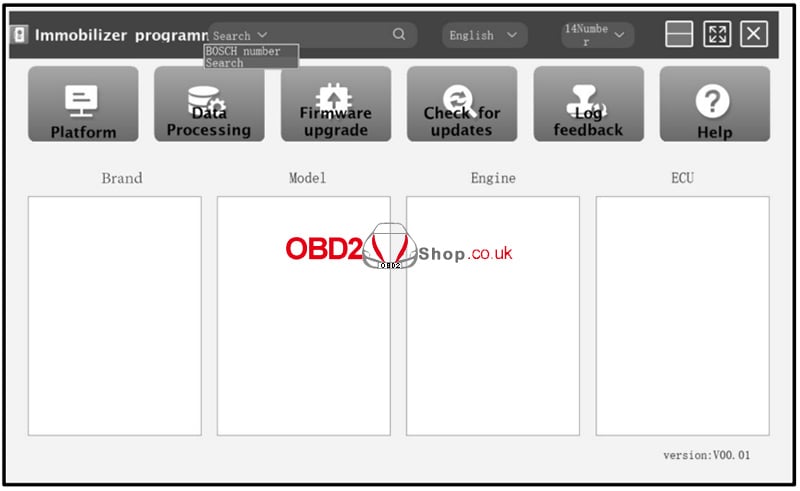
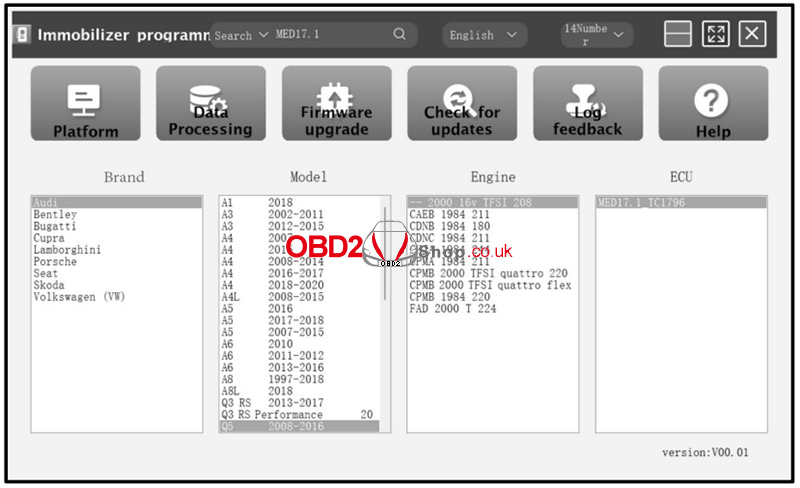
2. Alternatively, you can search directly using the search box. Enter relevant information such as Brand, Bosch ID, or ECU type.
For example, search for the MED17.1 ECU to quickly locate the engine model, as shown in Figures 2 and 3.
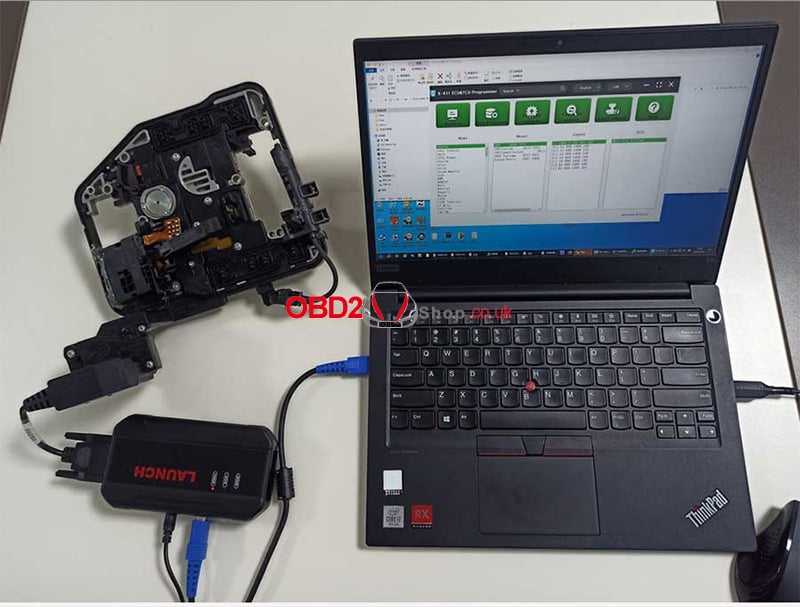
3. Click the Direct Connection Diagram to view the ECU wiring diagram.

4. Refer to the wiring diagram and use the BENCH mode cable together with the appropriate adapter cable to connect the ECU to the Launch X431 ECU & TCU Programmer.
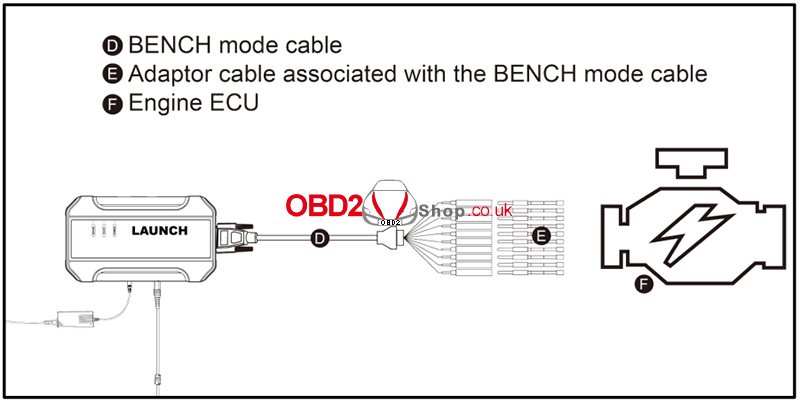
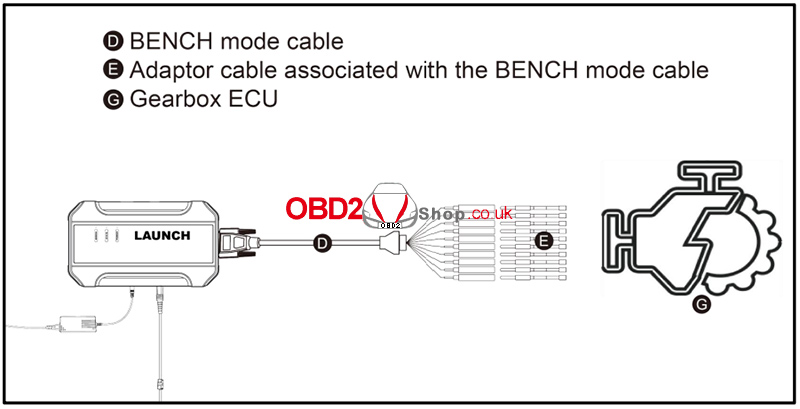
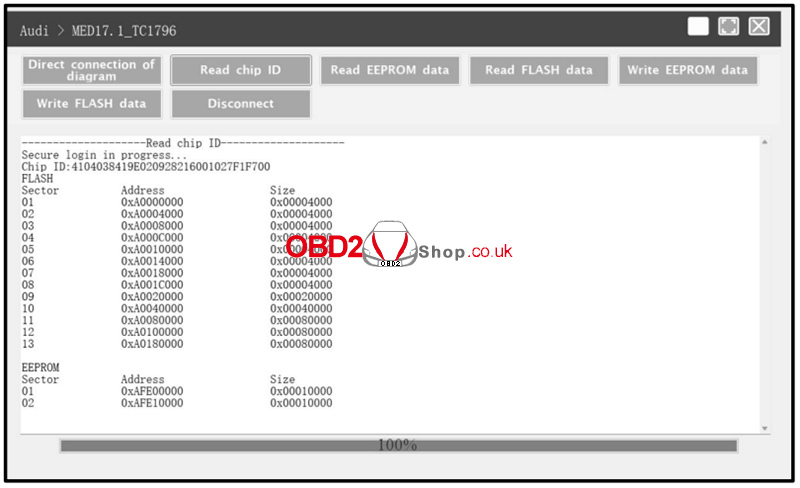
5. Once the connection is completed, click Read Chip ID to identify the ECU and confirm communication.
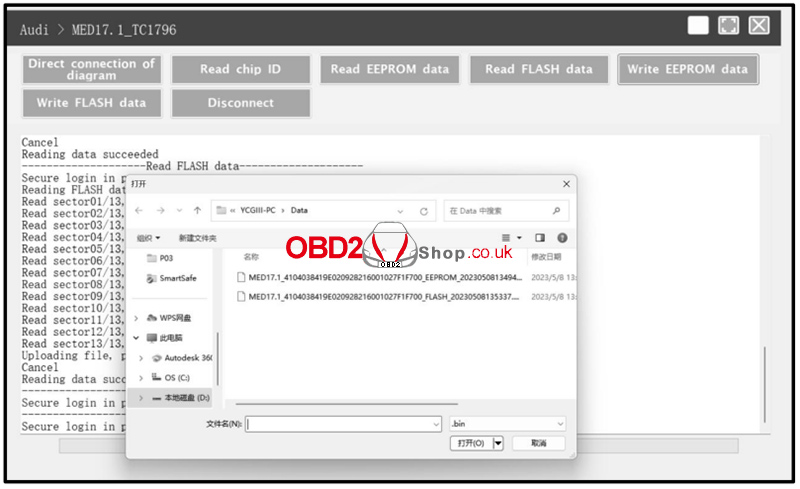
Step 2: ECU Data Read and Write Operations
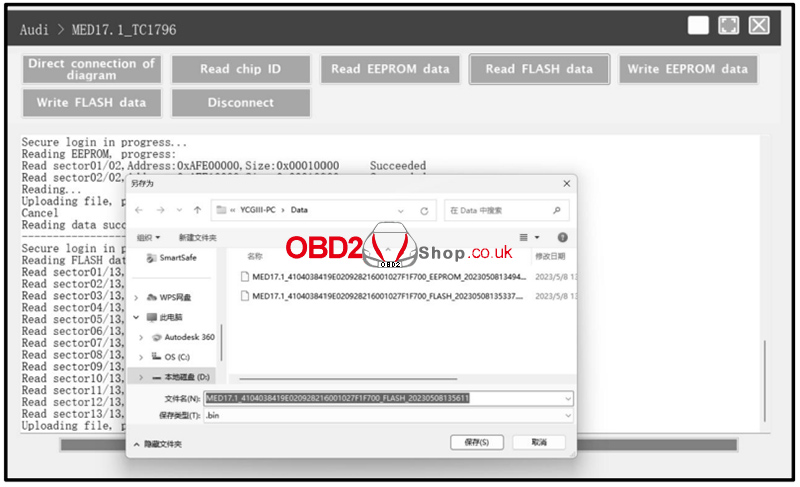
1. Click Read EEPROM Data to back up the EEPROM data and save the file to your device.
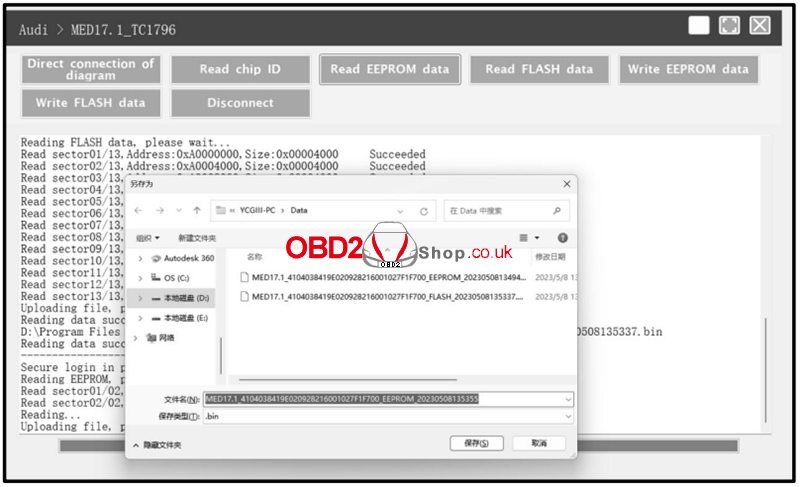
2. Click Read Flash Data to back up the Flash data and save it securely.
3. To restore data, click Write EEPROM Data and select the corresponding EEPROM backup file.

4. Click Write Flash Data and choose the appropriate Flash backup file to complete the data restoration process.
Conclusion
Using the Launch X431 ECU & TCU Programmer, you can efficiently perform ECU data reading and writing through bench mode. Always ensure correct wiring based on the connection diagram and back up all original data before writing to the ECU to avoid potential risks.
For more professional automotive diagnostic tools and guides, visit:
www.obd2shop.co.uk
Oznake: launch x431 ecu tcu tool
nedjelja, 04.01.2026.
Launch X-431 ECU & TCU Programmer Software Setup Guide
This article will guide you step by step through downloading, installing, connecting, and activating the Launch X-431 ECU & TCU Programmer software on your computer.
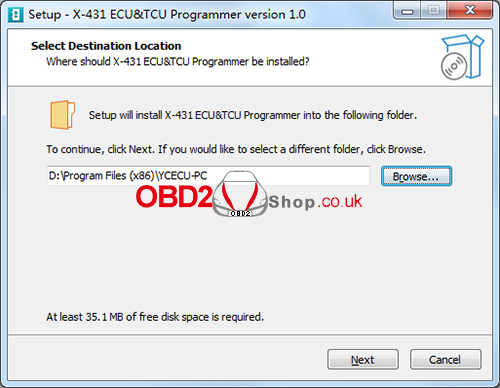
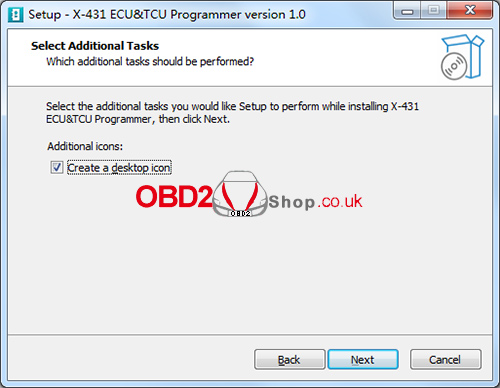
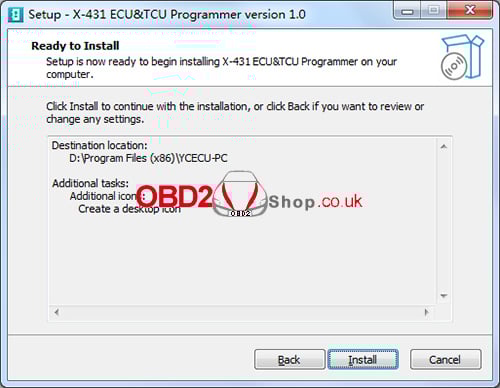
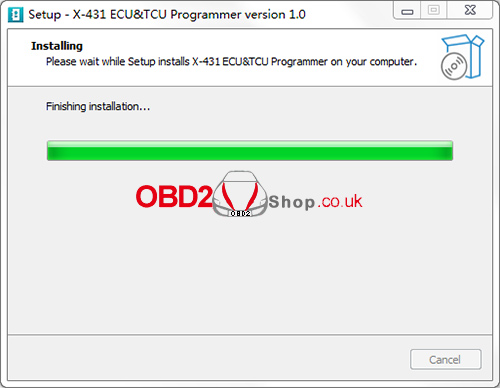
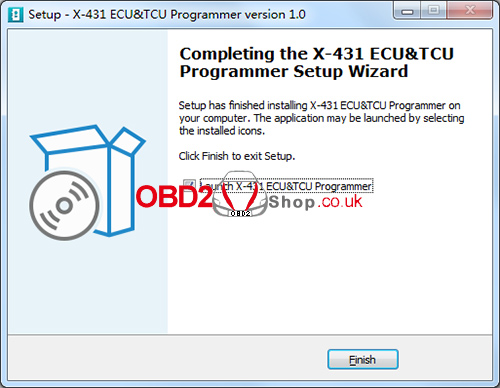
Step 1: Download and Install the Software
Begin by visiting the official website and clicking the download link for the X-431 ECU & TCU Programmer. Follow the on-screen instructions to complete the installation on your computer.
Download Link:
https://en.cnlaunch.com/products-detail/i-243.html#pro_download


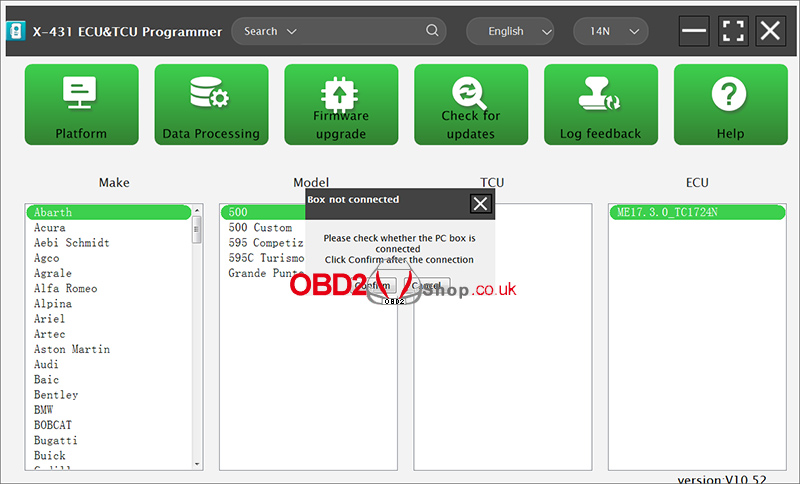
Step 2: Connect the ECU & TCU Programmer to the Computer
After installation, launch the software. If the device is not connected, the software will display a message saying [Box not connected].
Use a USB cable (Type-A to Type-B) to connect the X-431 ECU & TCU Programmer to your computer. Once connected properly, the software should recognize the device automatically.
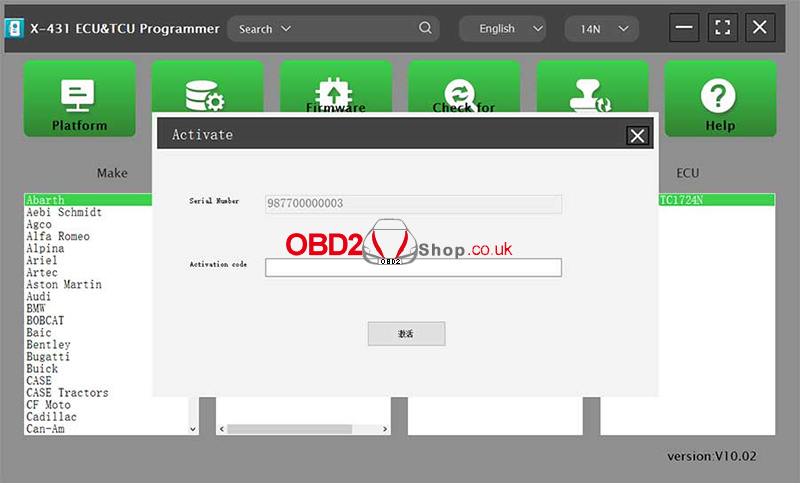
Step 3: Software Activation
When using the software for the first time, it will automatically enter the activation interface.
After the X-431 ECU & TCU Programmer is connected, the system will detect and display the device serial number. To complete activation, enter the activation code, which can be found on the envelope included with the X-431 ECU & TCU Programmer, and scrape the coating area to obtain the activation code.
Once the activation is successful, the device and software will be ready for use.
Conclusion:
By following the steps above—downloading the software, connecting the programmer, and completing activation—you can quickly set up the Launch X-431 ECU & TCU Programmer and begin ECU and TCU programming tasks efficiently.
For more diagnostic tools, programming devices, and technical guides, visit www.obd2shop.co.uk.
Oznake: launch x431 ecu tcu tool

| < | siječanj, 2026 | |||||
| P | U | S | Č | P | S | N |
| 1 | 2 | 3 | 4 | |||
| 5 | 6 | 7 | 8 | 9 | 10 | 11 |
| 12 | 13 | 14 | 15 | 16 | 17 | 18 |
| 19 | 20 | 21 | 22 | 23 | 24 | 25 |
| 26 | 27 | 28 | 29 | 30 | 31 | |
Svibanj 2026 (1)
Siječanj 2026 (19)
Prosinac 2025 (22)
Studeni 2025 (21)
Listopad 2025 (20)
Rujan 2025 (21)
Kolovoz 2025 (8)
Srpanj 2025 (13)
Lipanj 2025 (9)
Svibanj 2025 (12)
Travanj 2025 (10)
Ožujak 2025 (12)
Veljača 2025 (14)
Siječanj 2025 (8)
Prosinac 2024 (6)
Studeni 2024 (6)
Listopad 2024 (4)
Rujan 2024 (7)
Kolovoz 2024 (14)
Srpanj 2024 (12)
Lipanj 2024 (10)
Svibanj 2024 (13)
Travanj 2024 (12)
Ožujak 2024 (11)
Veljača 2024 (2)
Siječanj 2024 (10)
Prosinac 2023 (8)
Studeni 2023 (6)
Listopad 2023 (7)
Rujan 2023 (9)
Kolovoz 2023 (6)
Srpanj 2023 (10)
Lipanj 2023 (4)
Veljača 2023 (8)
Siječanj 2023 (14)
Prosinac 2022 (13)
Studeni 2022 (14)
Listopad 2022 (18)
Rujan 2022 (9)
Kolovoz 2022 (16)
Srpanj 2022 (11)
Lipanj 2022 (14)
Svibanj 2022 (13)
Travanj 2022 (12)
Ožujak 2022 (12)
Veljača 2022 (13)
Siječanj 2022 (10)
Srpanj 2021 (1)
Dnevnik.hr
Gol.hr
Zadovoljna.hr
Novaplus.hr
NovaTV.hr
DomaTV.hr
Mojamini.tv