Xhorse VVDI Key Tool Plus Adjust BMW CAS3+ E92 Mileage
31.05.2022.Xhorse VVDI Key Tool Plus Pad is able to do BMW CAS3+ E92 mileage correction via EEPROM dump successfully. This is provided by Xhorse fan, please noted do not adjust mileage for illegal purpose.
Check full video:
https://www.youtube.com/watch?v=C_i99-A8xJg
Operation Procedure:
1. Backup Key Info
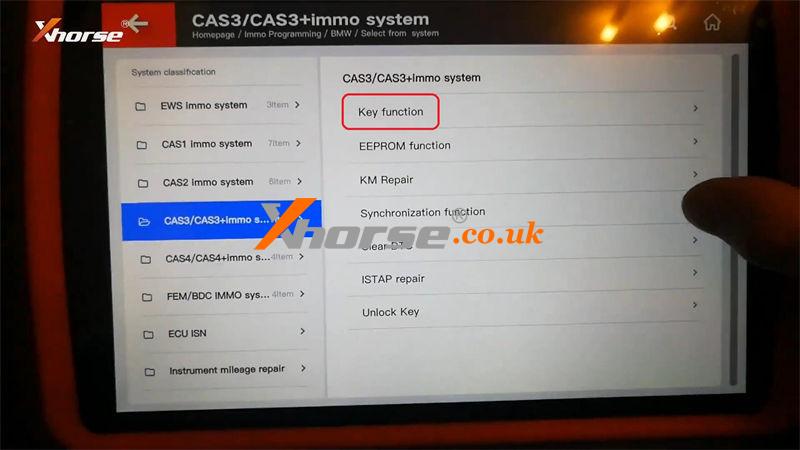
Immo programming >> BMW >> Select from system >> CAS3/CAS3+ immo system >> Key function >> Start programming >> Generate key via OBD >> Read key information
Add keys: please inset the ignition key into ignition switch and connect the vehicle and device well.
All keys lost: please insert a blank key into ignition switch and connect the vehicle and device.
Click "YES" to add key.
Cllick "NO" to all key lost.
Press "No".
Confirm key info, press "Yes".
The dealer key should be taken away from ignition switch.
If key is keyless, please move it out of car.
If there's no key ignition, continue anyway.
Press "OK".
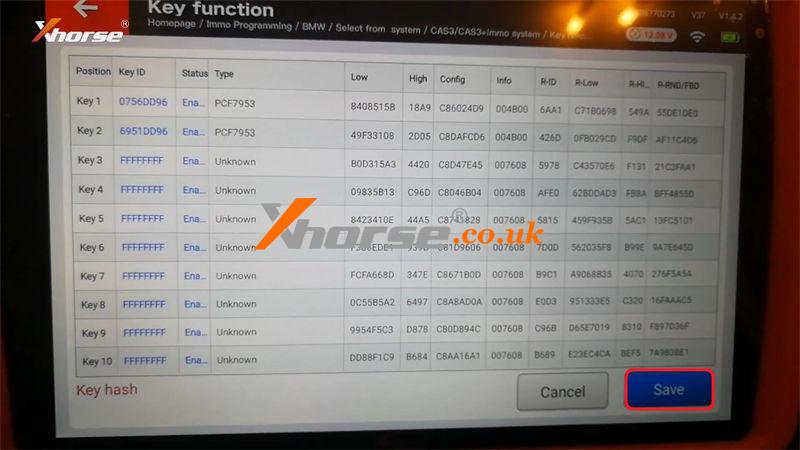
Reading key success.
Save key file.
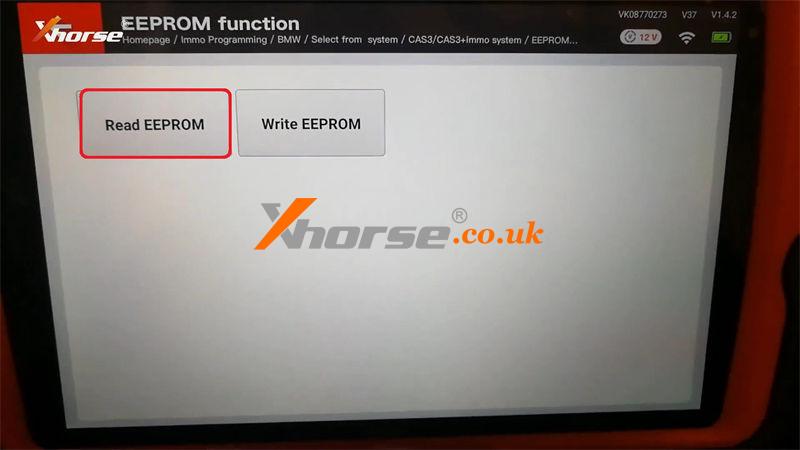
2. Read & Save EEPROM
Go back to
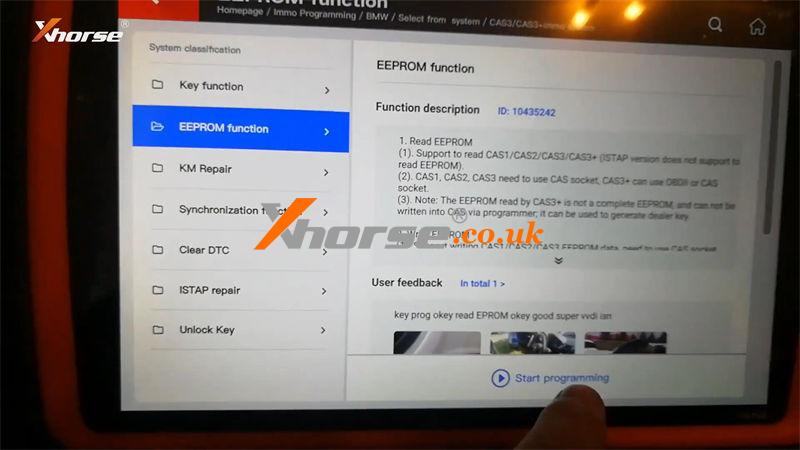
EEPRM function >> Start programming >> Read EEPROM
The dealer key should be taken away from ignition switch.
If key is keyless, please move it out of car.
If there's no key in ignition, continue anyway.
Press "OK".
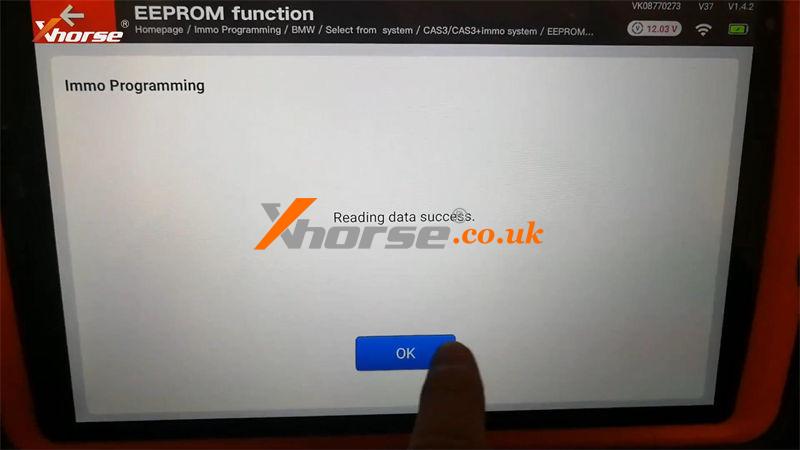
Current EEPROM is not the whole EERPOM.
Please read and save it then continue.
Reading data success.
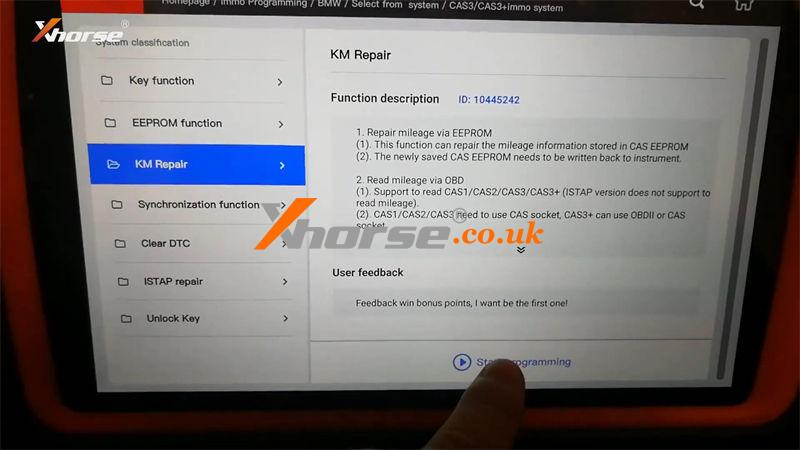
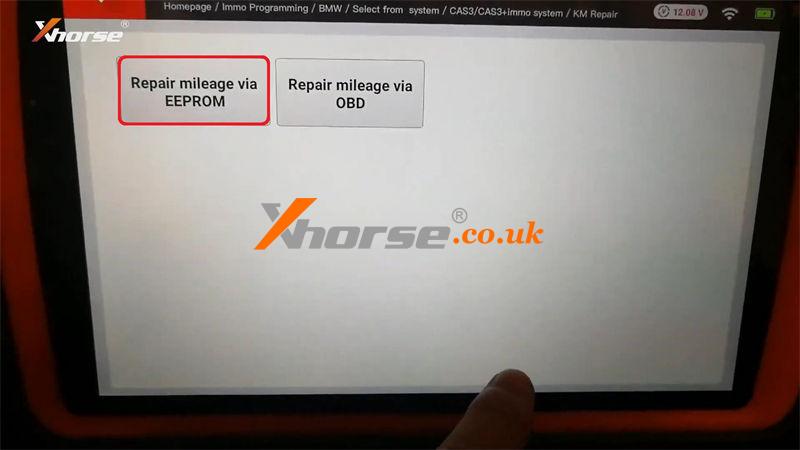
3. Mileage Adjustment via Dump
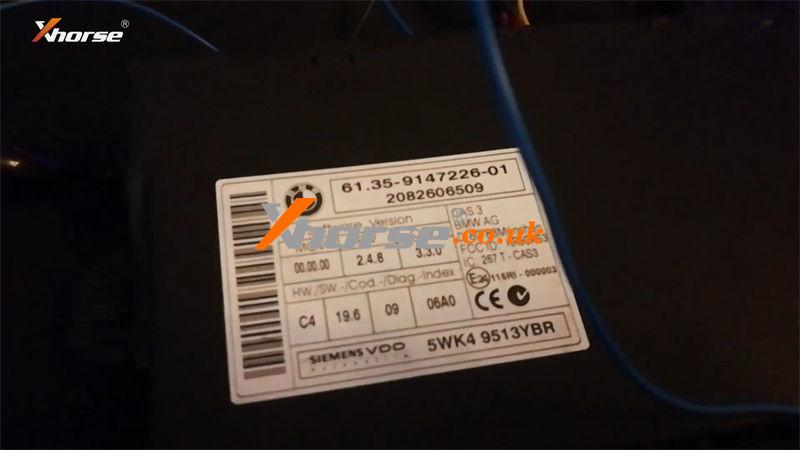
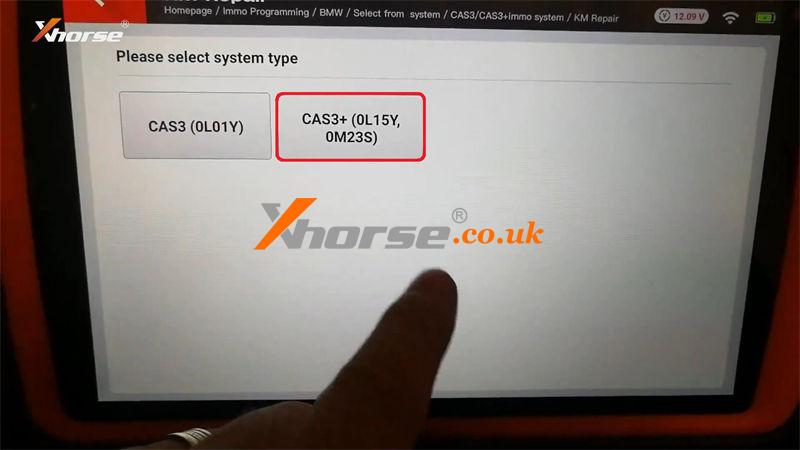
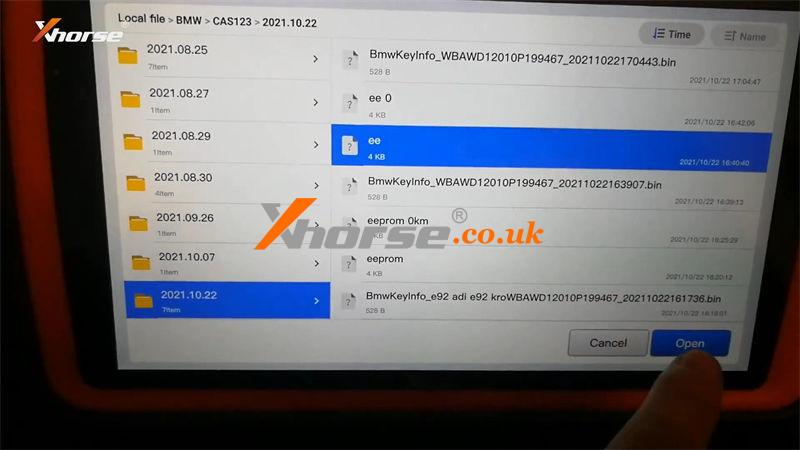
KM repair >> Start programming >> Repair mileage via EEPROM >> CAS3+(0L15Y, 0M23S) >> Load EEPROM dump file
Warning: KM re-calibration only use for repair car KM after exchange new dashboard!
Press "Yes" to continue.
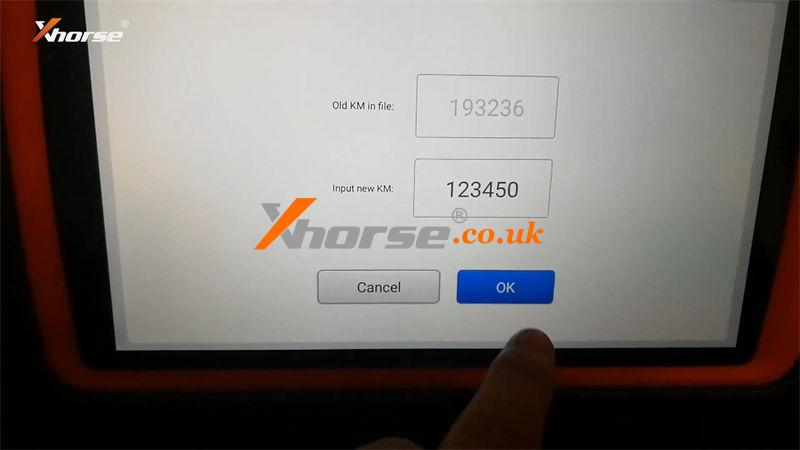
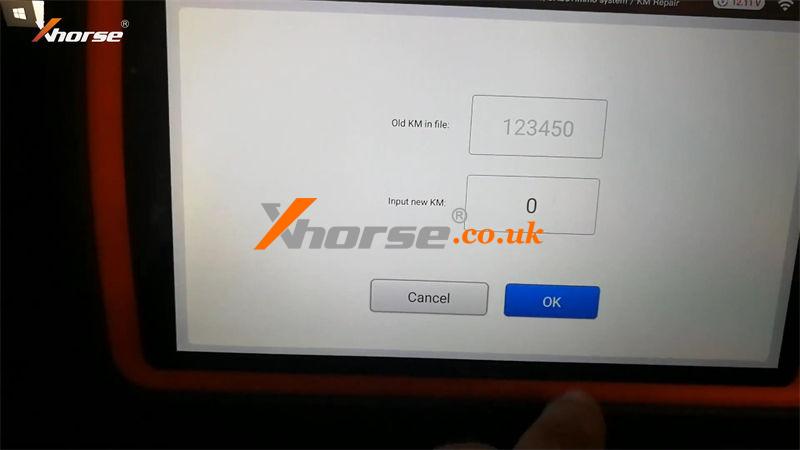
Old KM: 193236
Input new KM: 123450
OK >> OK
Save the new KM file.
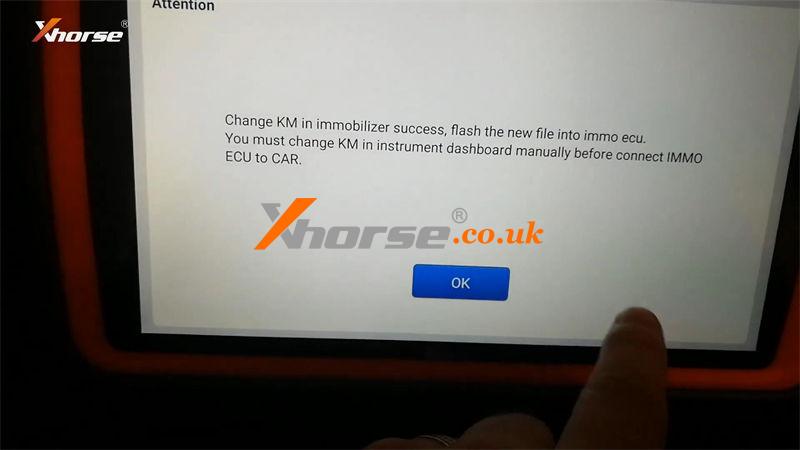
Change KM in immobilizer success, flash the new file into IMMO ECU.
You must change KM in instrument dashboard manually before connect IMMO ECU to car.
Repeat operations to check new mileage.
It has became to 123450km.
Done.
This is using VVDI Key Tool Plus to perform BMW CAS3+ E92 odometer correction OK.
www.xhorse.co.uk
Oznake: vvdi key tool plus
komentiraj (0) * ispiši * #
Xhorse VVDI Mini Key Tool + Super Chip Generate Toyota 8A
26.05.2022.How to generate Toyota 8A transponder with Xhorse VVDI Mini Key Tool + XT27 Super Chip? This is a quick tutorial to show how easy it can do.
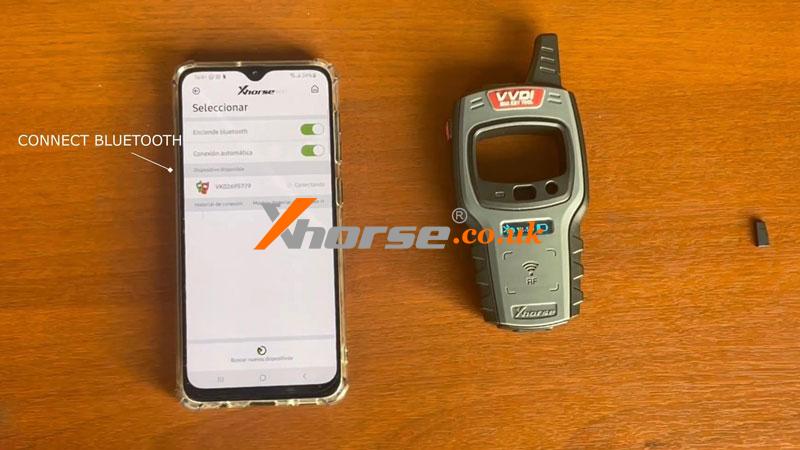
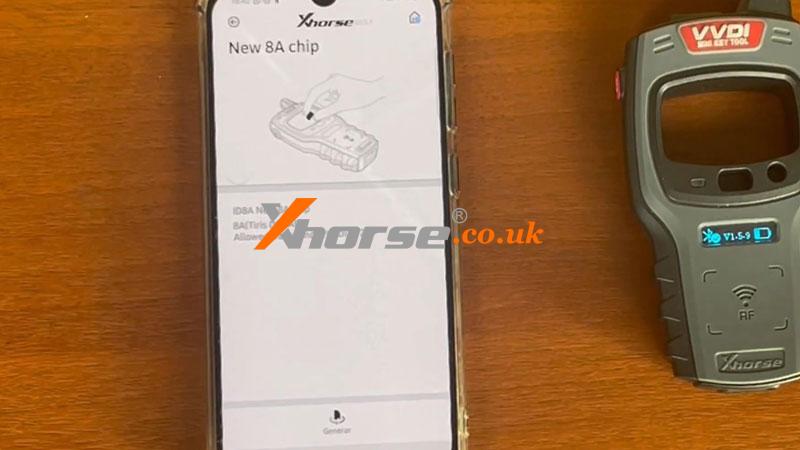
Step1. Open Xhorse app on a smart phone, and connect to VVDI Mini Key Tool via Bluetooth.
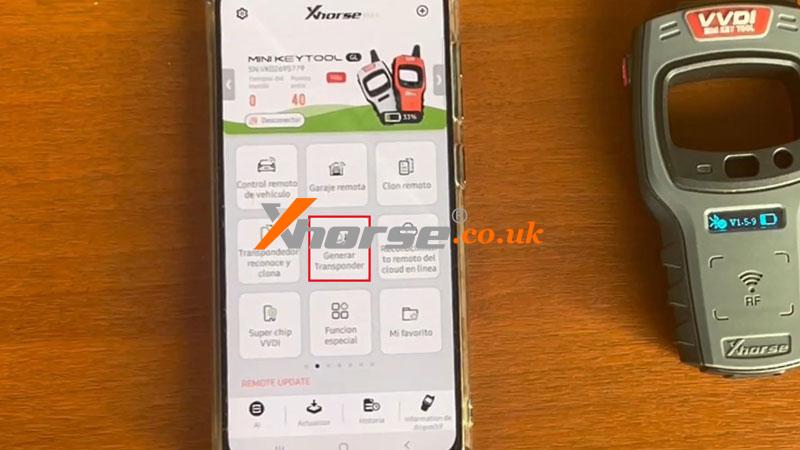
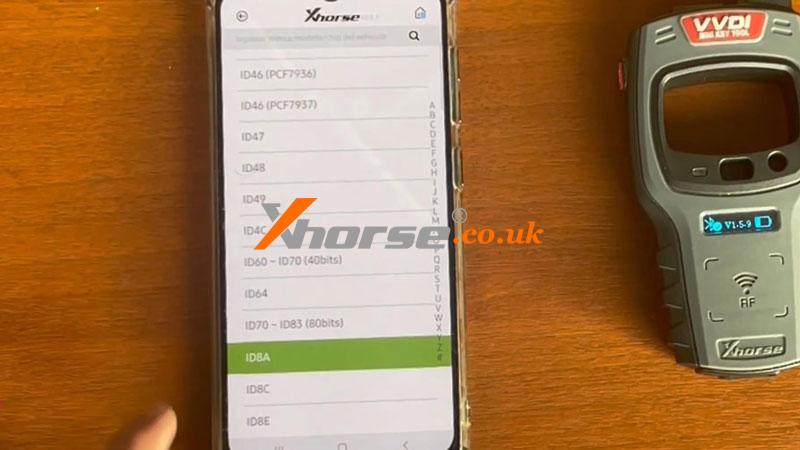
Step2. Go to Generate transponder >> ID8A >> New 8A chip
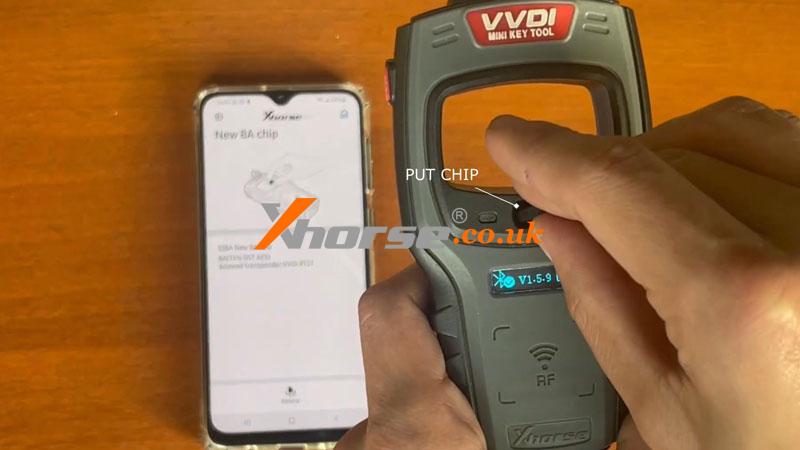
Put VVDI Super Chip into Mini Key Tool chip coil.
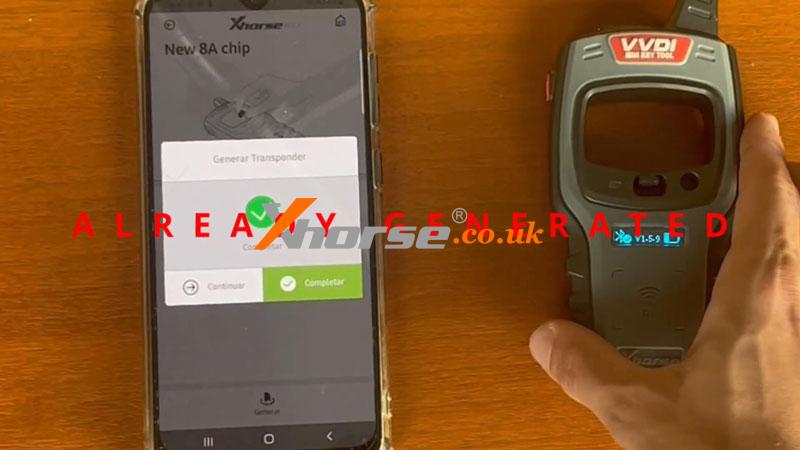
Press "Generate".
Completed!
Toyota 8A chip has been successfully generated in a matter of seconds.
Read also:
How to change super chip type with Xhorse VVDI MINI Key Tool?
http://blog.xhorse.co.uk/how-to-change-super-chip-type-with-xhorse-vvdi-mini-key-tool/
Oznake: vvdi mini key tool
komentiraj (0) * ispiši * #
Solution: Xhorse VVDI Key Tool Max Calculate Failed Error:9B
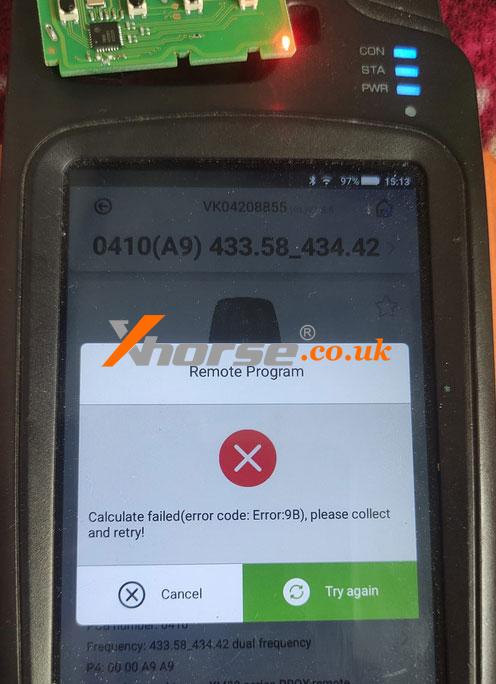
17.05.2022.Problem: I've followed the instructions to program a XM38 Universal Smart Key with Xhorse VVDI Key Tool Max programmer. But it fails all the time, and came out an attention: "Calculate failed(error code: Error:9B), please collect and retry!" Any ideas?
Solution
The reason why caused the issue is because of incorrect version. Please noticed to use same version of VVDI Key Tools & remote keys when programming.
For examples, use a GL version Key Tool Max to program a GL version remote key. In this case, the remote maybe a Chinese version remote. Users should pay attention to buy the correct version of VVDI Remotes.
Another tip to note: Most failed problems are due to wrong key model. Users should follow the instructions to program the correct key model.
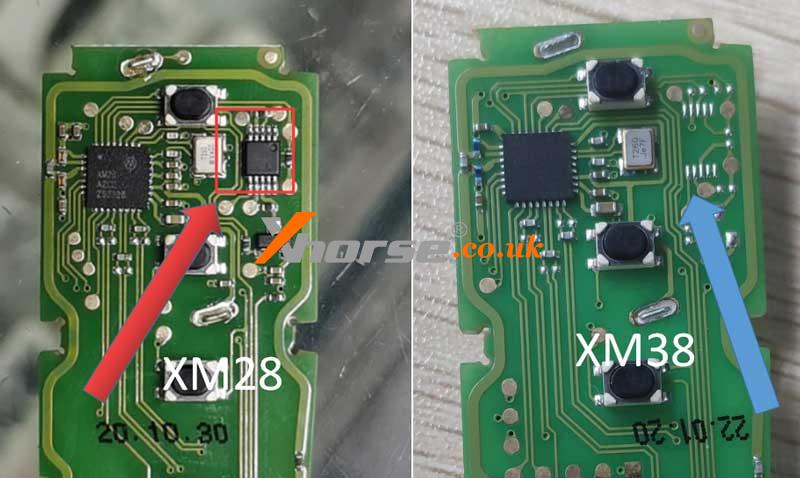
In this case, XM38 key model is correct as required. But many users may make the mistake of buying a different model, such as XM28. Since both can program Toyota remotes.
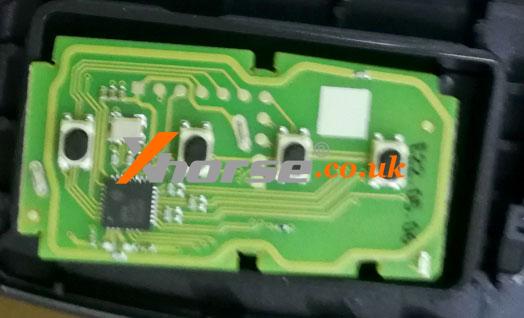
1. How to distinguish XM28 or XM38 remote?
Red arrow: XM28 circuit board has a chip & pins in marked position.
Blue arrow: XM38 circuit board does not.
2. What's different between XM28 & XM38?
XM28 does not support 0410, 0010(A9/AA) chip remote.
XM38 can support all Toyota remotes.
Technical support
www.xhorse.co.uk
Oznake: vvdi remote key, vvdi key tool max
komentiraj (0) * ispiši * #
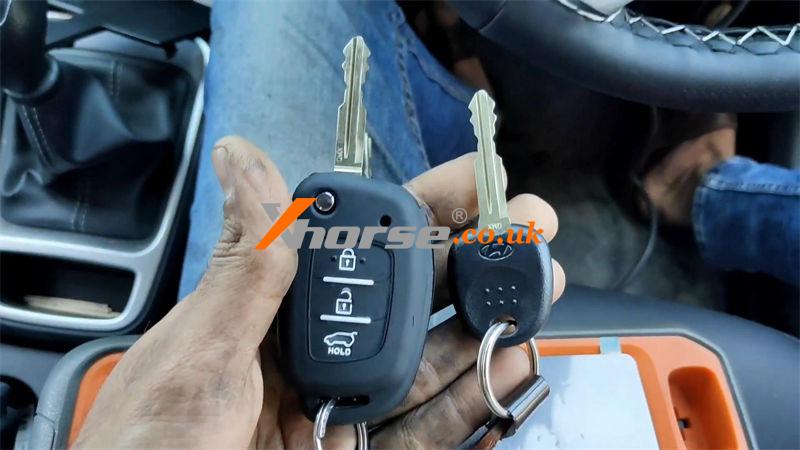
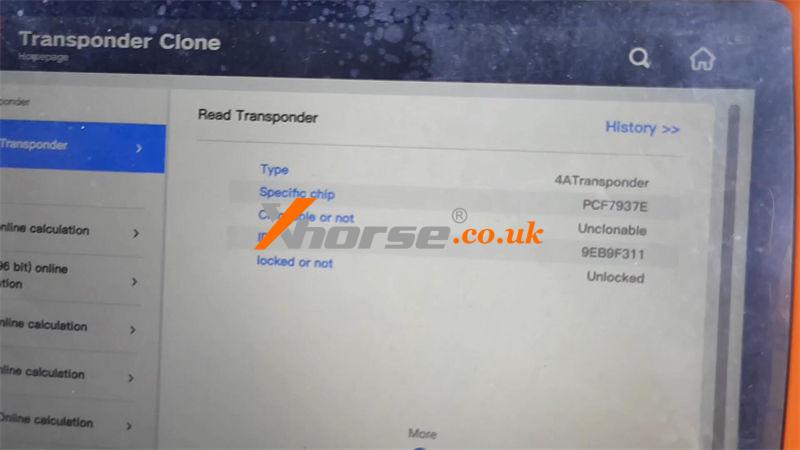
Xhorse VVDI Key Tool Plus Add Hyundai Venue 4A Remote Key
06.05.2022.Xhorse VVDI Key Tool Plus Pad can add Hyundai Venue 4A chip smart remote keys by OBD. It requires getting 6-digit passwords before operation. Following is the procedure step by step.
Program Remote
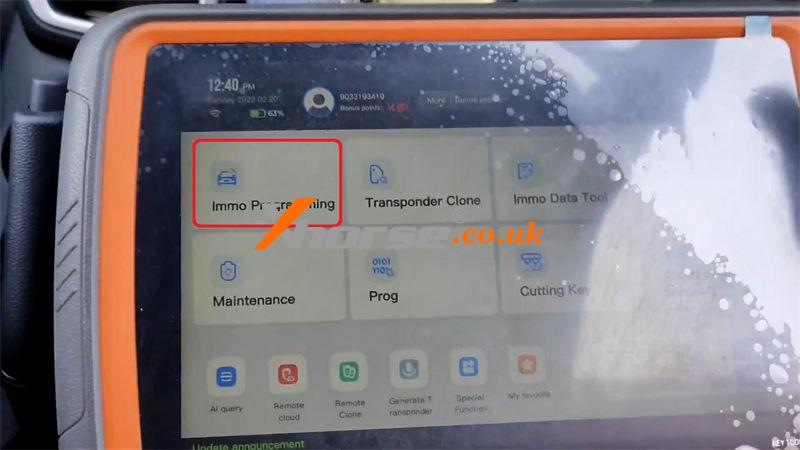
Connect VVDI Key Tool Plus with OBD, go into
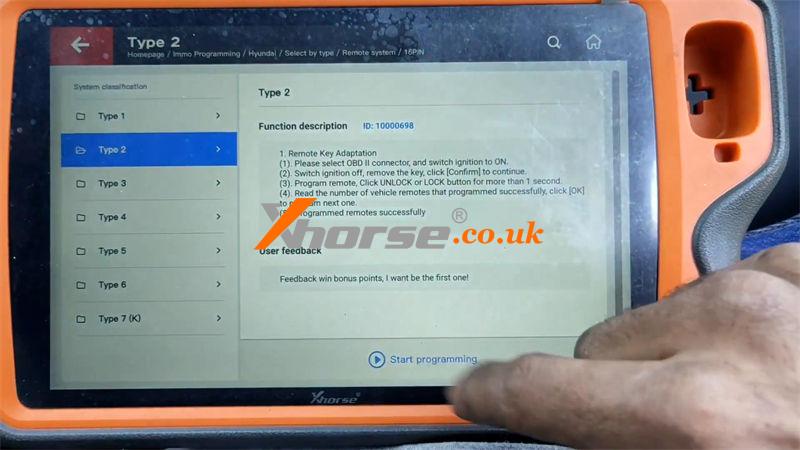
Immo programming >> Asia >> Hyundai >> Select by type >> Remote system >> 16PIN >> Type 2 >> Start programming >> Remote key adaptation
Choose OBDII interface, turn on ignition switch ON.
Switch ignition off, remove the key, click "OK" to continue.
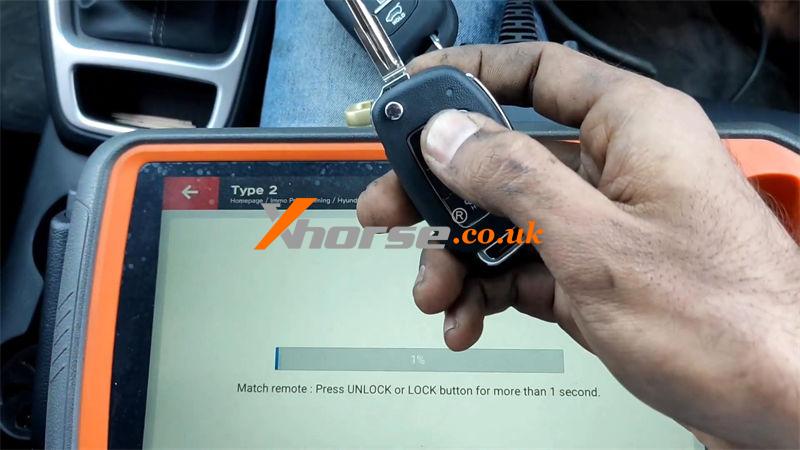
Press UNLOCK or LOCK button for more than 1s.
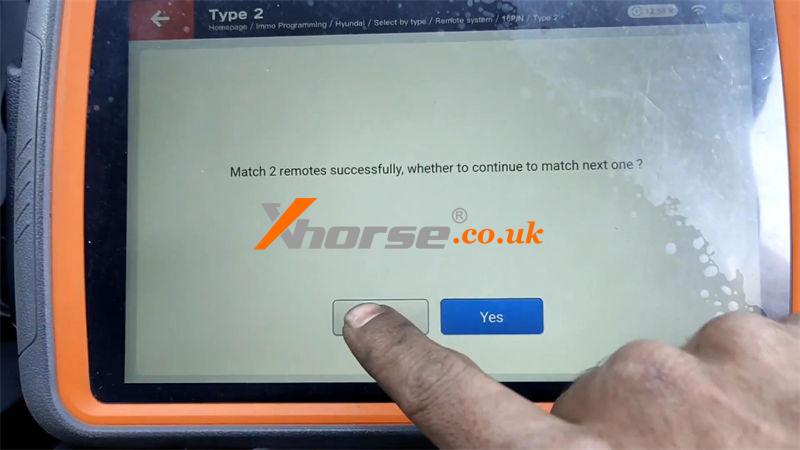
Match 1 remote successfully.
Click "Yes" to match next one.
Click "No" to complete.
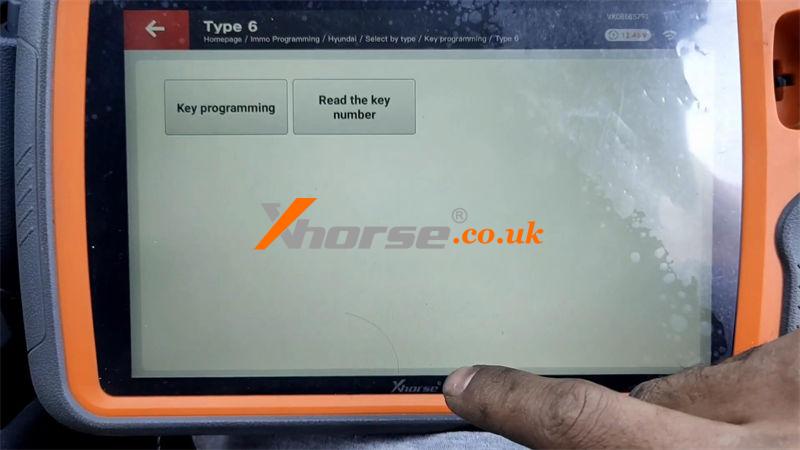
Add New Key
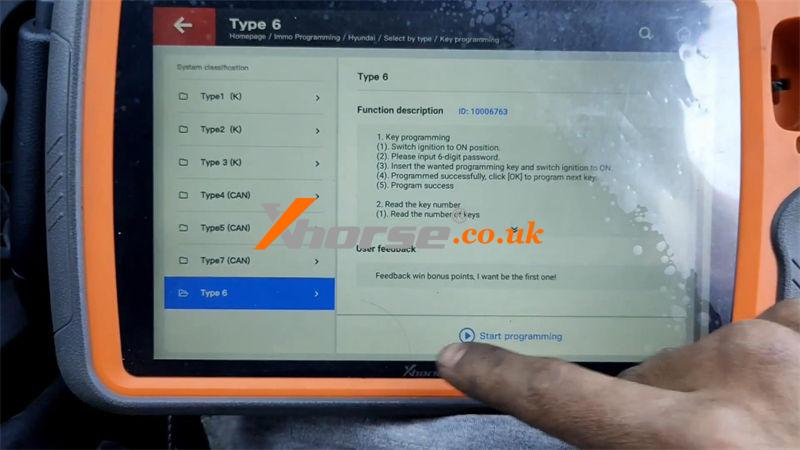
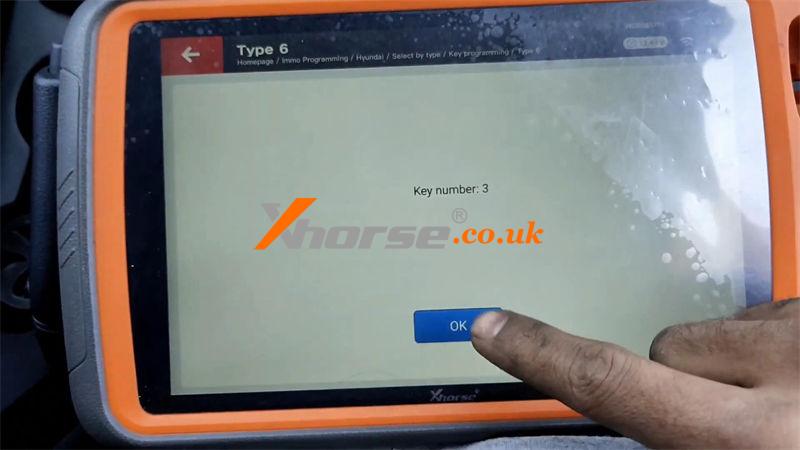
Immo programming >> Hyundai >> Select by type >> Key programming >> Type6 >> Start programming
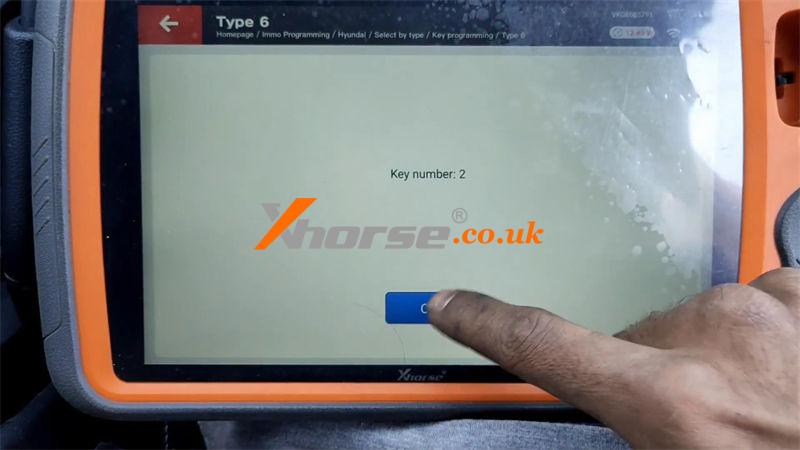
Read key number, it's 2.
Exit to click "Key programming".
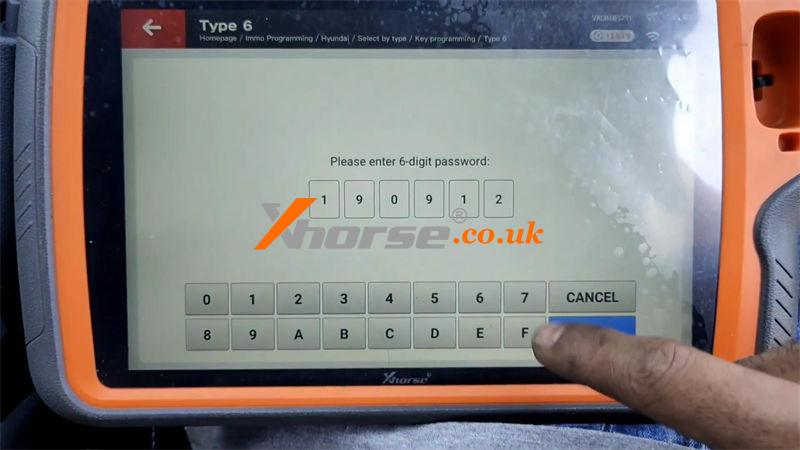
Turn the ignition switch to ON.
Enter 6-digit password: 190912
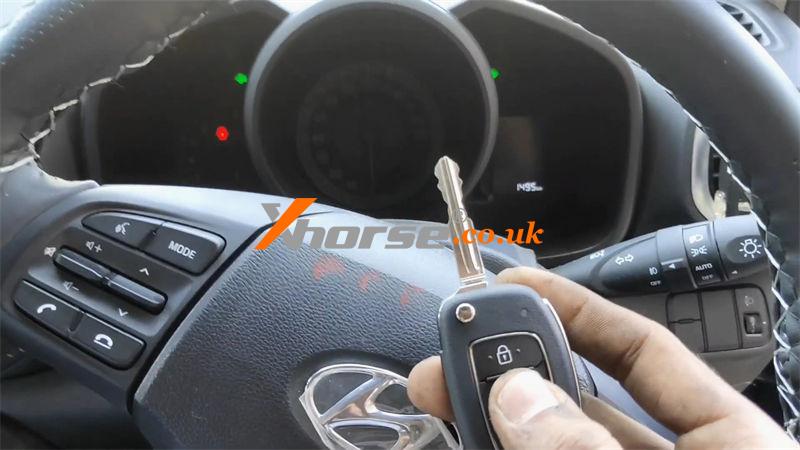
Insert key to be programmed and switch ignition ON.
Matched successfully.
Click "Yes" to match next one, "No" to complete.
Read key number, it's 3 now.
Test the keys, all can work normally.
Done.
VVDI Key Tool Plus programming tutorials on more cars to be updated...
http://blog.xhorse.co.uk/xhorse-vvdi-key-tool-plus-add-hyundai-venue-4a-remote-key/
Oznake: xhorse vvdi key tool plus
komentiraj (0) * ispiši * #
