(Solution) Xhorse Key Reader can not recognize the key error
30.07.2022.If your Xhorse key reader cannot recognize any keys, try the following methods to fix it.
Step 1. Update your device again.
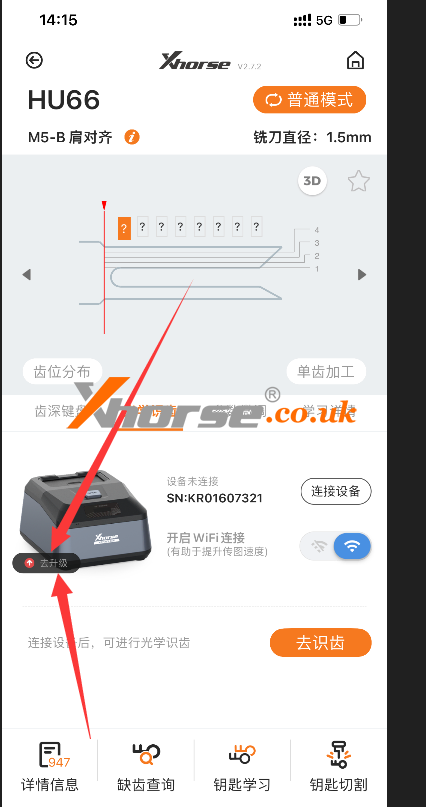
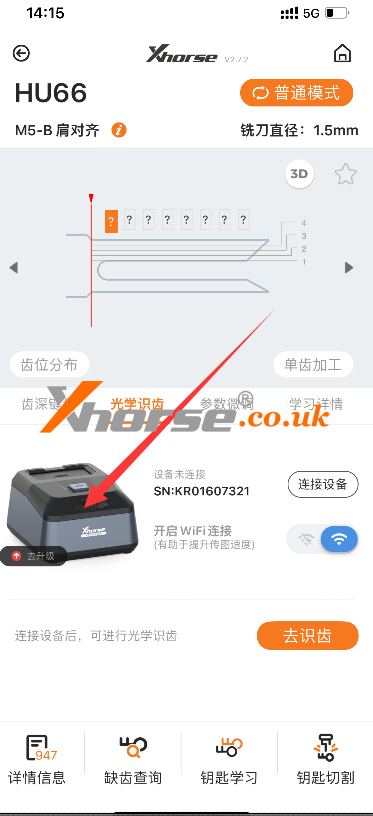
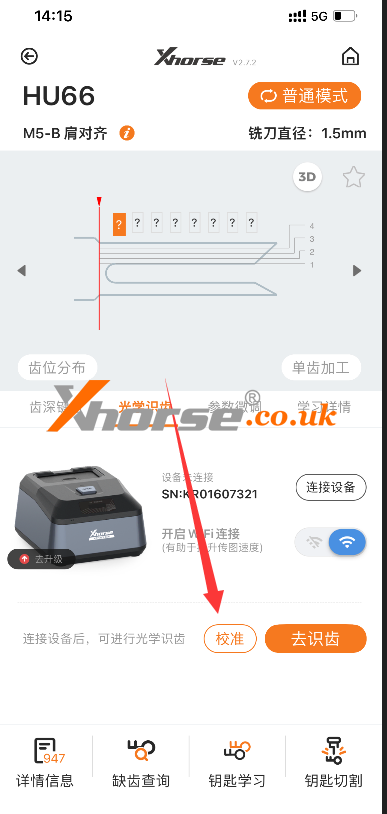
Step 2. Connect your device, click on the optical recognition icon and calibration will appear, then calibrate the device.
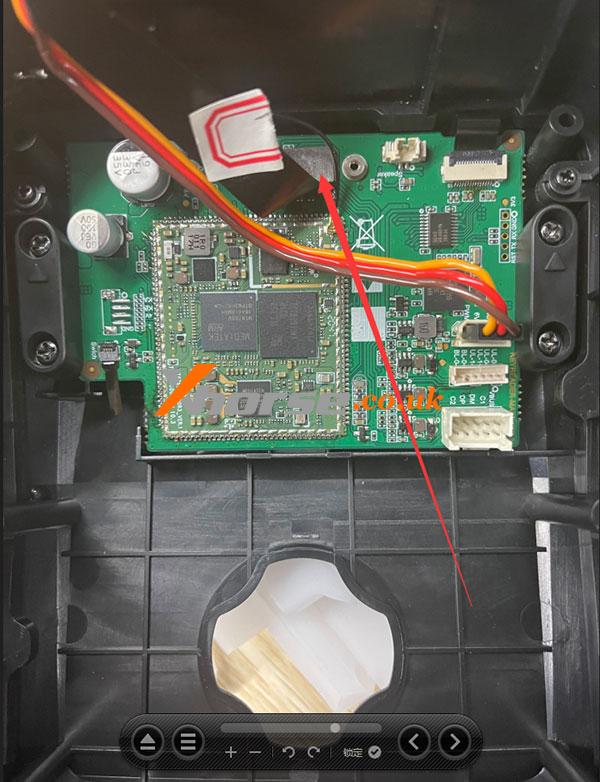
If the above operations still fail to make the key reader recognize the key, open the device to see if the cable is firmly connected or reconnect it.
For more technical services, please follow http://blog.xhorse.co.uk/
Oznake: xhorse key reader
komentiraj (0) * ispiši * #
How to replace the Xhorse Dolphin XP005L screen
29.07.2022.This article will guide you on how to replace the screen on your Dolphin XP005L machine.
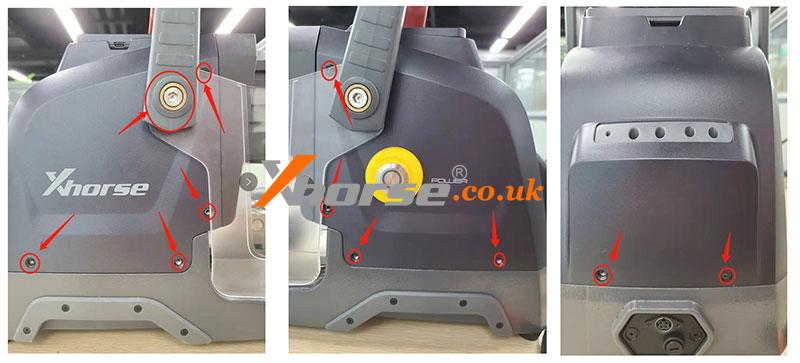
1. Take out the screws to remove the back and handle from the xp005l.
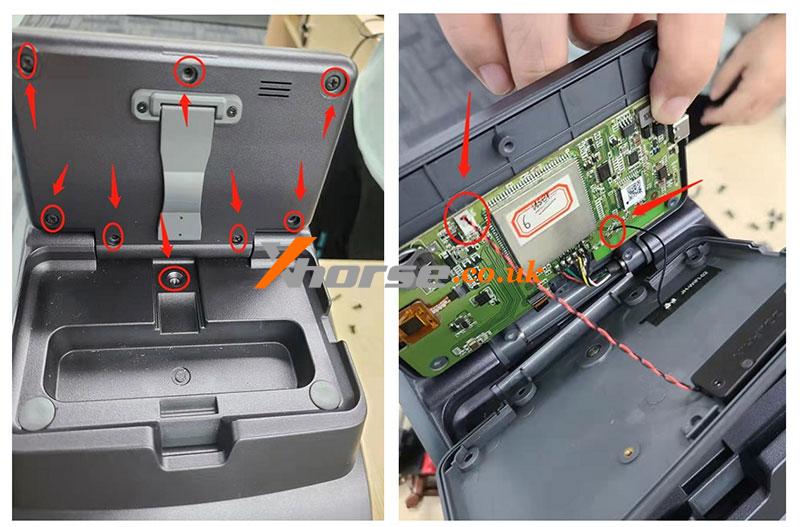
2. Take out those screws and disconnect the cables as shown in the picture, to remove the back from the screen.
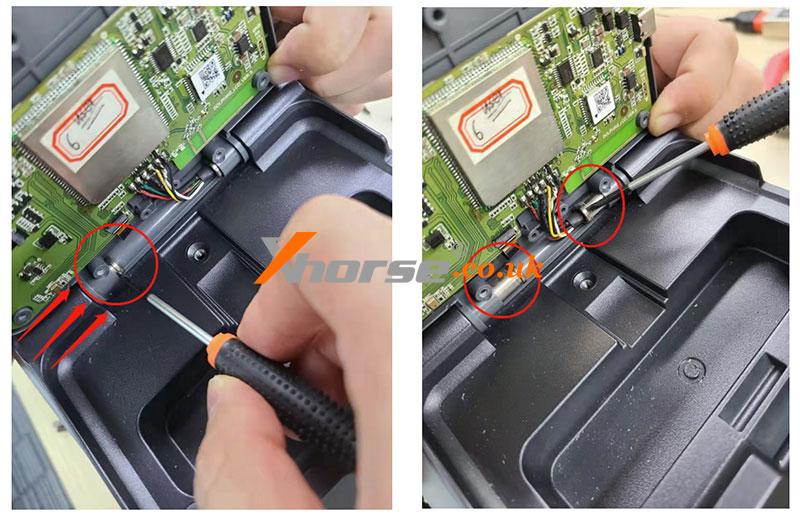
3. Use the flat head screwdriver to push out the holder used to fix the screen, to remove the screen from the back case of Dolphin xp005L.
4. Remove the plastic plug from the screen cable with sharp pliers as the picture shows, to remove the whole screen and cable from the xp005l.
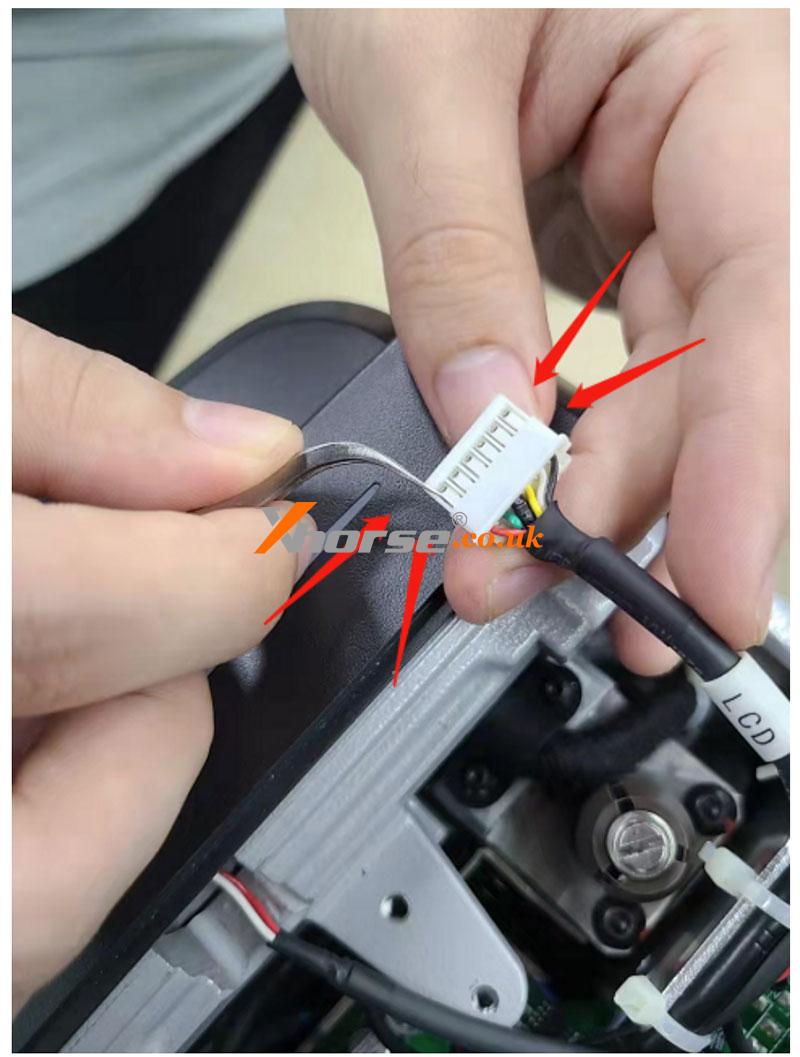
Tips: Take a picture of that socket before removing it, all pins should be exactly the same position as before when you put it back.
Hope it helps you!
For more technical services, please follow http://blog.xhorse.co.uk/
Oznake: xhorse dolphin xp005l
komentiraj (0) * ispiši * #
Xhorse Remote Tester Work on 868Mhz Frequency, Possible?
26.07.2022.In general, Xhorse Remote Tester only has 2 frequency test range: 300Mhz-320Mhz & 434Mhz. Is it possible to change the Xhorse tester to work on 868Mhz? It actually can. Follow the tip below to learn how to do.
How to change Xhorse tester to work on 868Mhz?
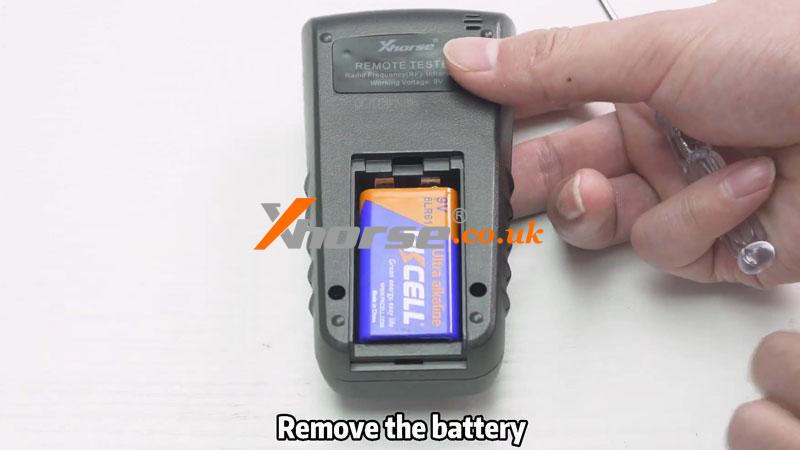
1. Remove battery from remote tester.
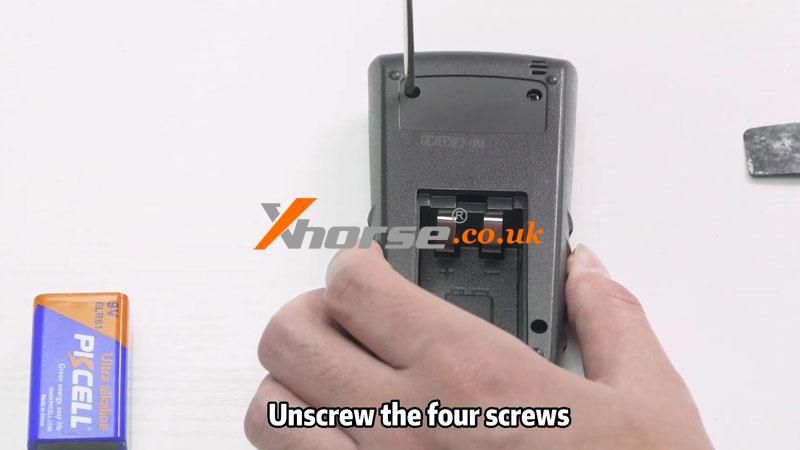
2. Unscrew the 4 screws on backside of tester.
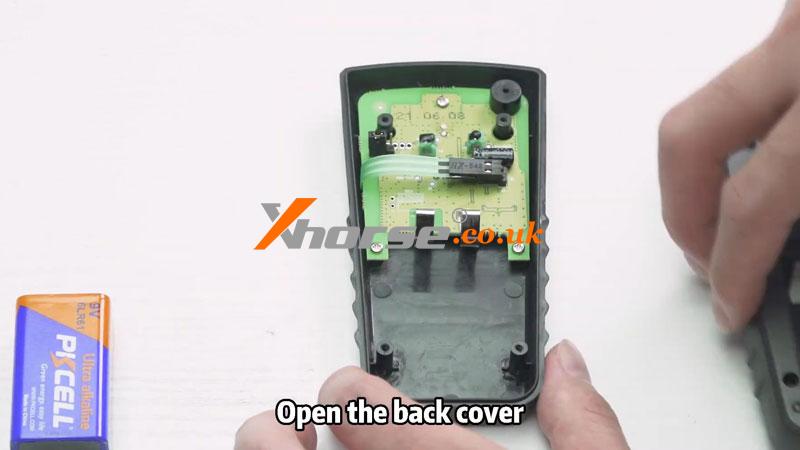
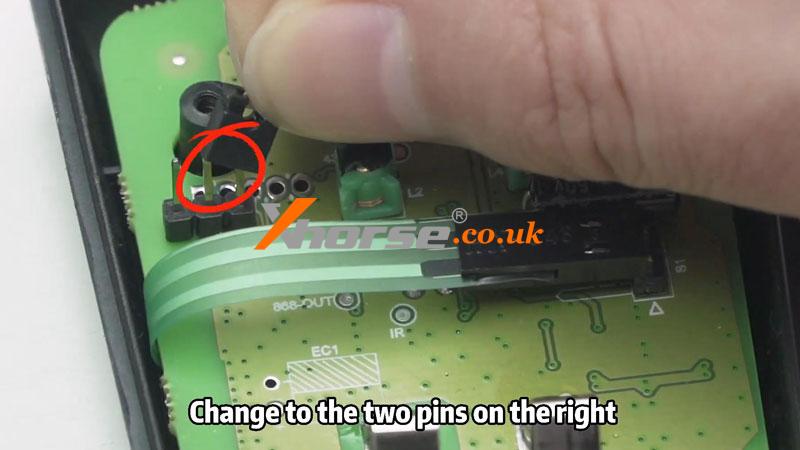
3. Open back cover, find the jumper cap position on device board. Change the jumper cap from left 2 pins to right 2 pins.
4. Assemble remote tester to have a try.
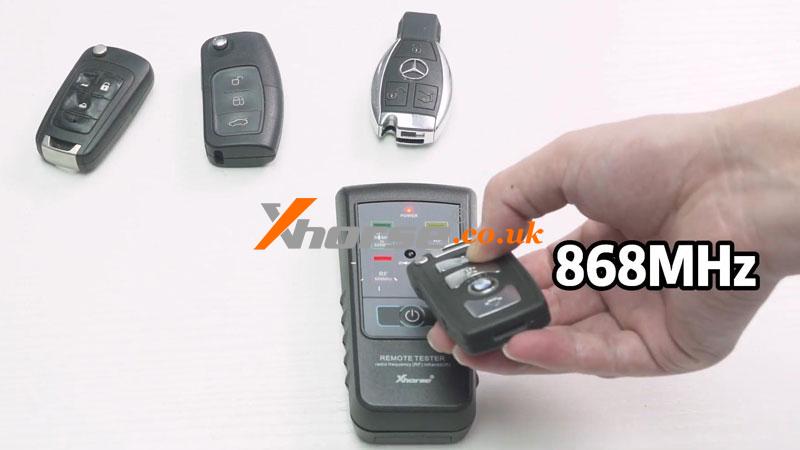
The Xhorse Frequency Tester can now detect 868MHz frequency.
Very easy and done.
Hope this is helpful.
Technical support
www.xhorse.co.uk
Oznake: xhorse remote tester
komentiraj (0) * ispiši * #
VVDI Key Tool Plus Update: Even More Capable in Toyota Models
21.07.2022.VVDI Key Tool Plus Latest Update: Even More Capable in Toyota Models!
Non-Smart Key
• 4D/4D+: Support clone, add key via OBD, all key lost via OBD
• 8A: Support clone, add key via OBD, all key lost (non-smart key adapter needed)
Smart Key
• 4D/4D+: Support add key via OBD, all key lost via OBD
• 8A(88): Support add key via OBD, all key lost (disassembling to read EEPROM)
• 8A(A8): Support add key via OBD, all key lost (smart key adapter needed for some models)
• 8A(A9): Support add key via OBD, all key lost (smart key adapter needed)
• 8A(AA): Support add key via OBD (smart key adapter needed or password calculation), all key lost via OBD (smart key adapter needed)
• 4A: Support add key via OBD (smart key adapter needed or password calculation), all key lost via OBD (smart key adapter needed)

Xhorse offers ongoing updates and more models on the way...
https://www.xhorse.co.uk/
Oznake: vvdi key tool plus pad
komentiraj (0) * ispiši * #
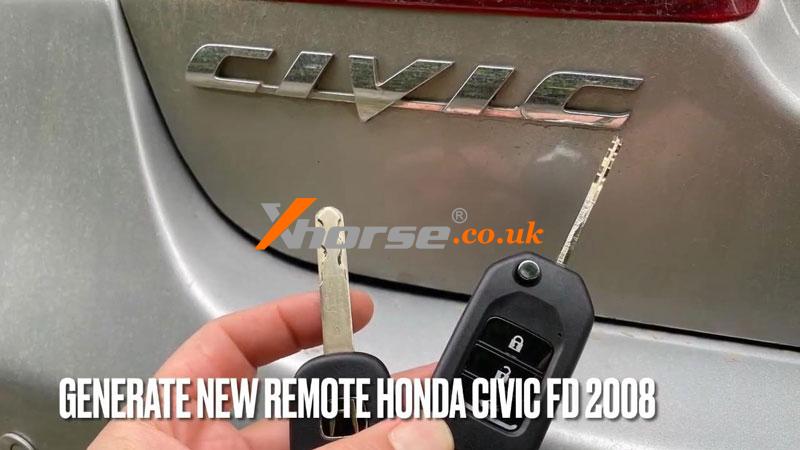
Xhorse VVDI Key Tool Max Adds Honda Civic FD 2009 Key
19.07.2022.One customer had lost Honda remote and only have a normal key. So following I'll program a new remote for Honda Civic FD 2009 with Xhorse VVDI Key Tool Max + MINI OBD Tool key programmer.
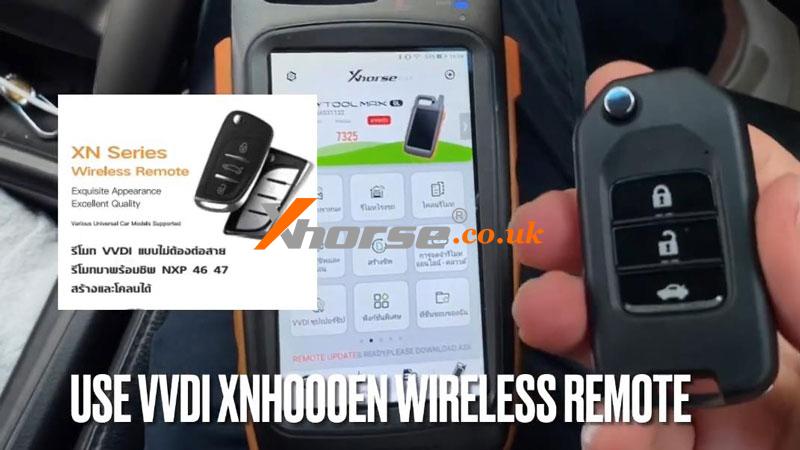
1. Generate Remote
Plug MINI OBD Tool into OBD, and connect to VVDI Key Tool Max.
Put a XNHO00EN Wireless Remote into key slot, let's start:
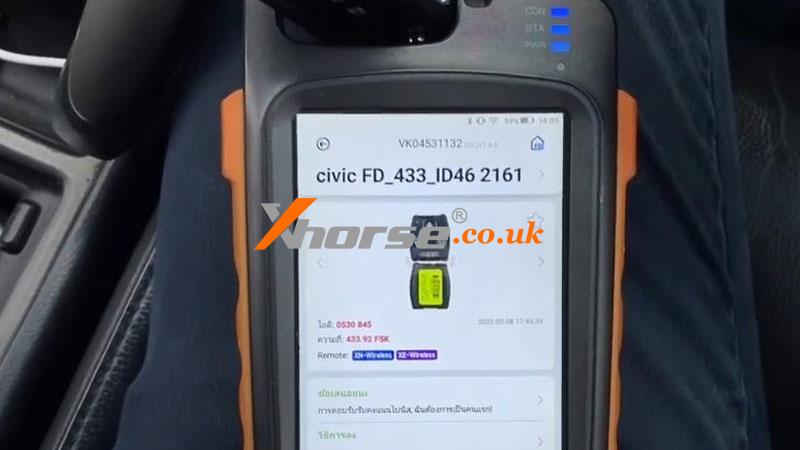
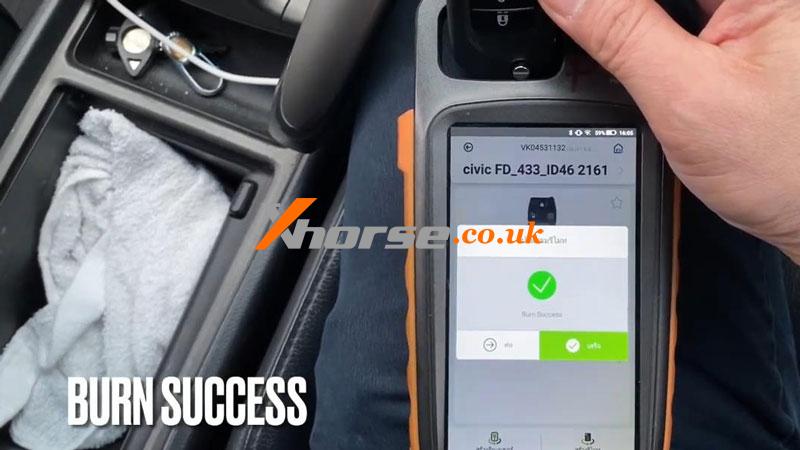
Vehicle remote >> Honda >> Civic FD >> Civic FD 433 ID46 2161 >> Generate remote
Burn success.
2. Add a Key
Turn ignition on with working key.
Go to MINI OBD menu.
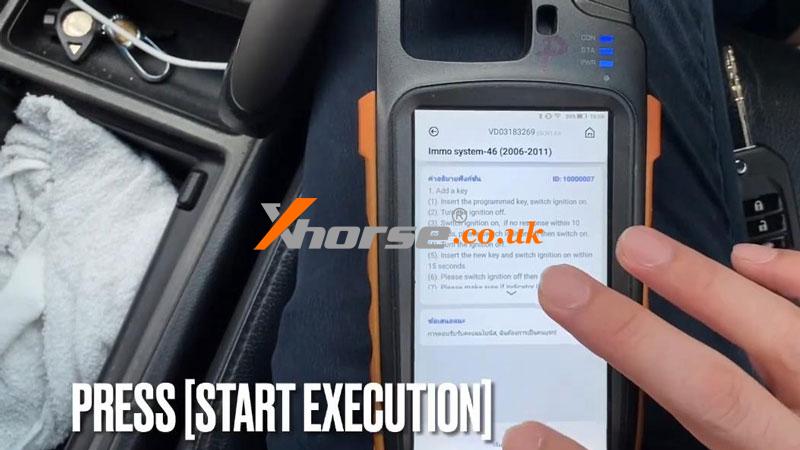
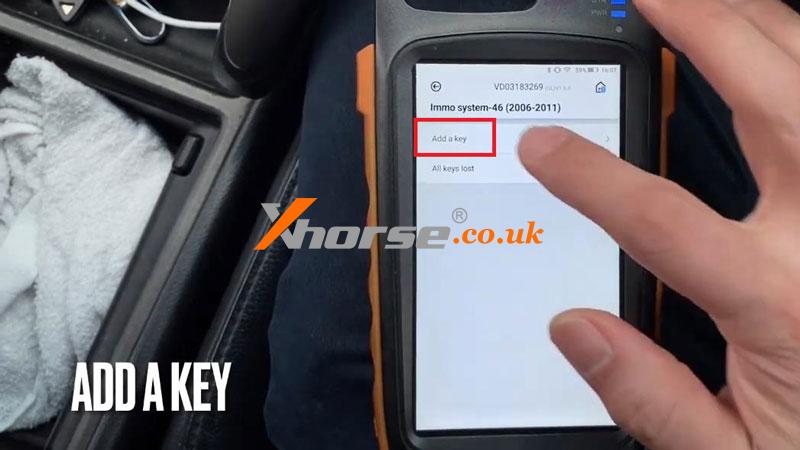
IMMO programming >> Honda >> Civic >> IMMO system-46(2006-2011) >> Start execution >> Add a key
Turn off ignition switch.
Insert the working key, switch ignition on.
Turn off ignition switch.
Turn on the ignition switch.
If no response within 10s, please turn off/on the ignition again.
Turn off ignition switch.
Insert the new key and switch ignition on within 15s.
Turn off ignition switch.
Switch ignition on.
Turn off ignition switch.
Switch ignition on.
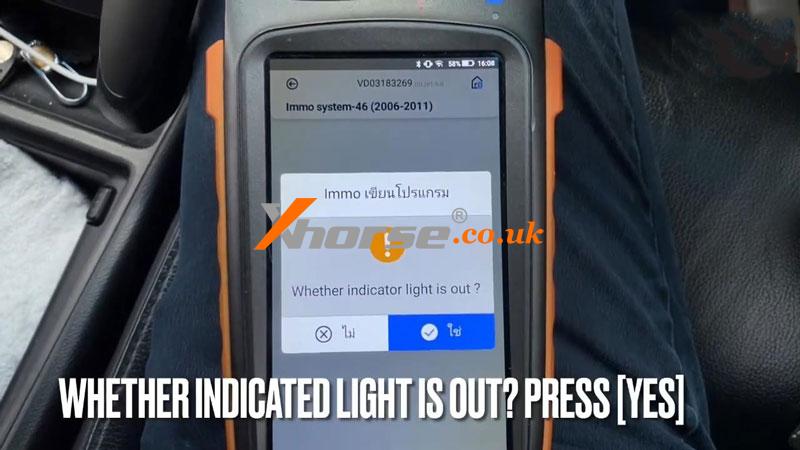
The security light has gone off now. Press "Yes".
Turn off ignition switch.
Switch ignition on.
Program completed.
3. Test Key
New remote can start the car, and remote does work.
Done.
This is how to add Honda Civic FD 2009 key with VVDI Key Tool Max successfully.
www.xhorse.co.uk
Oznake: vvdi key tool max, mini obd tool
komentiraj (0) * ispiši * #
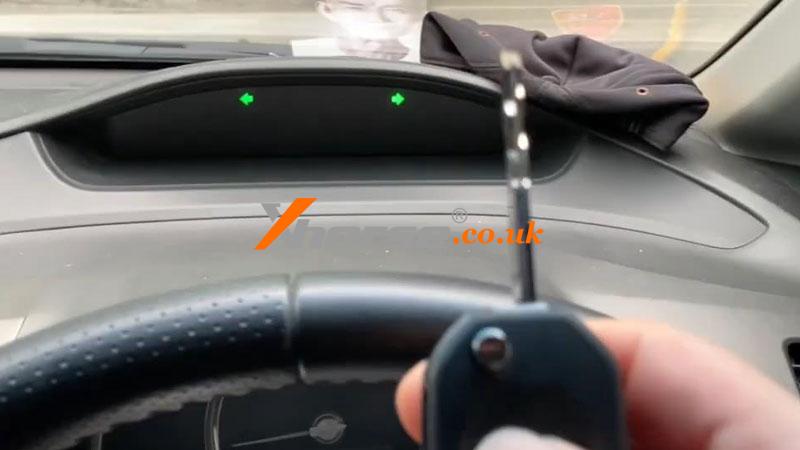
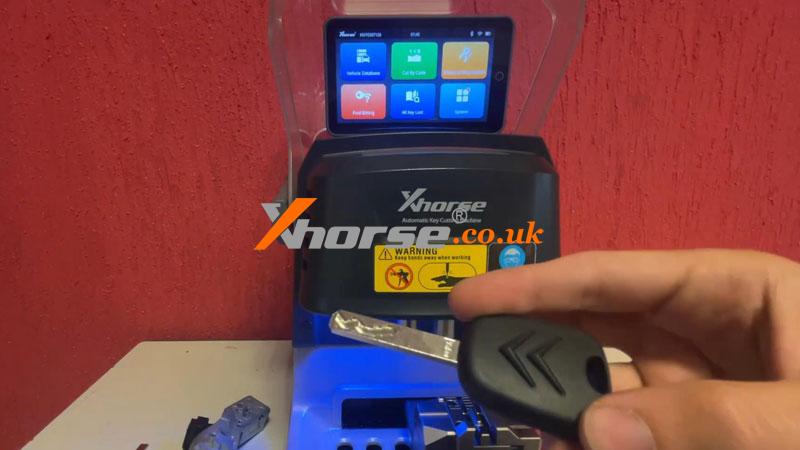
Xhorse Dolphin XP005L Copy a Citroen VA2T Key Success
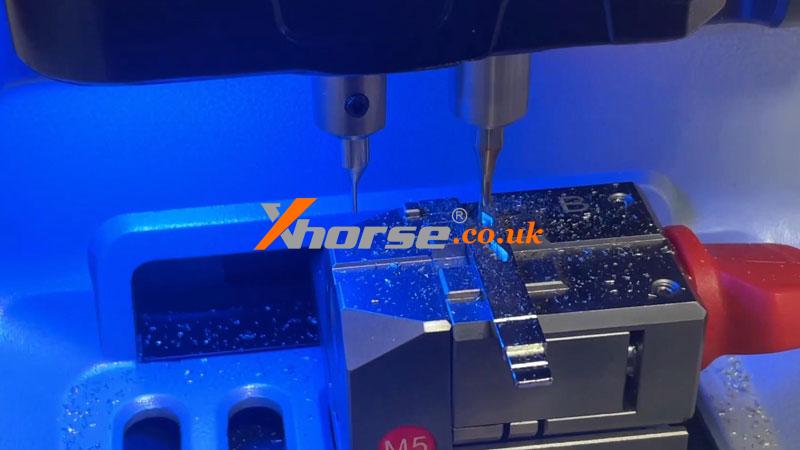
12.07.2022.Xhorse Dolphin XP005L Key Cutting Machine is able to copy a Citroen VA2T key in minutes successfully. By decoding an original key to cut a new key, this is very simple. Following I'm gonna show how to do.
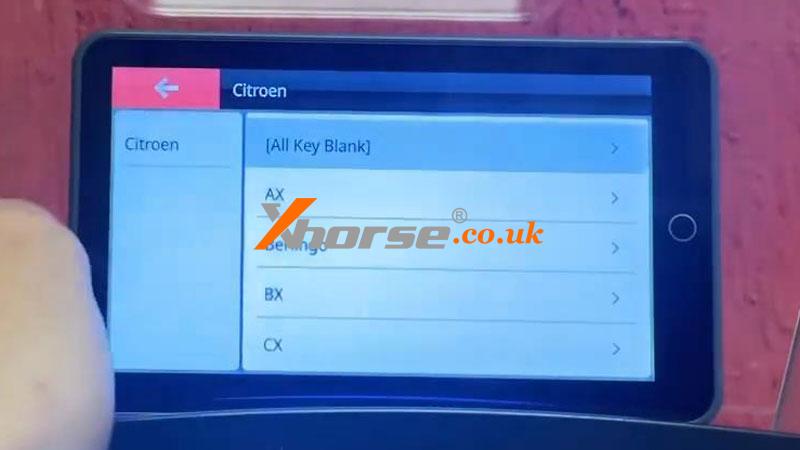
Procedure
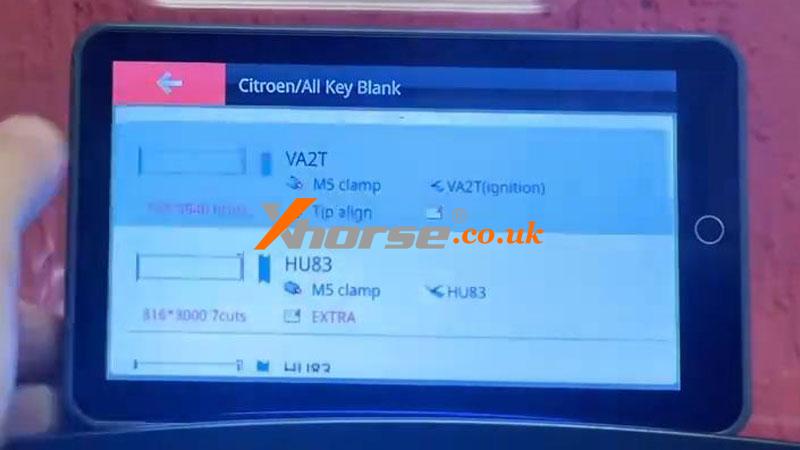
Vehicle database >> Citroen >> All key blank >> VA2T
Rotate M5 clamp to side B.
Put the original key tip align 2nd position.
OK >> Decode key
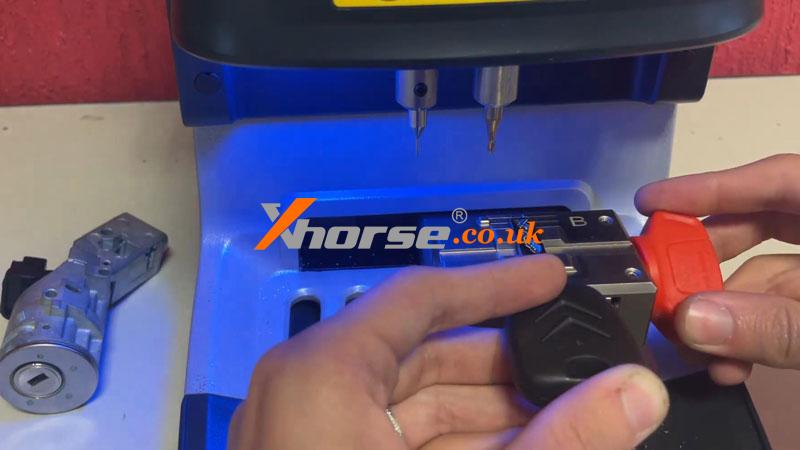
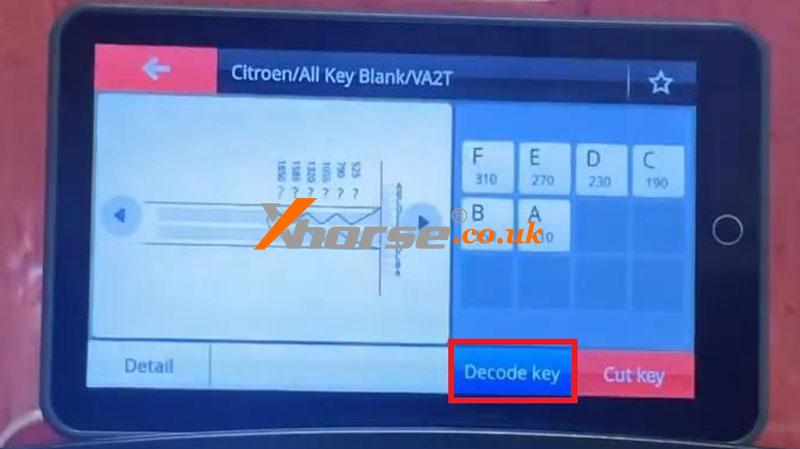
Dolphin 2 starts reading the key...
Wait until decoding completed.
You'll find key bitting have been read out on screen.
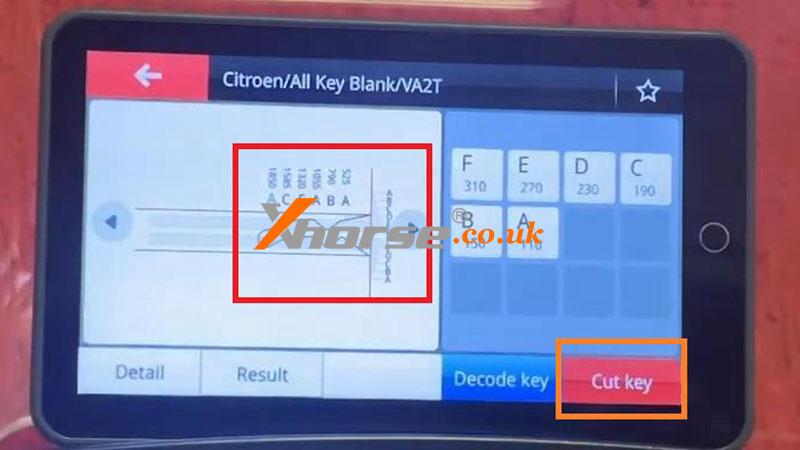
Remove the original key, and change to a new key blank.
Press "Cut key >> Cut".
Dolphin 2 will start working again, this time it's cutting key...
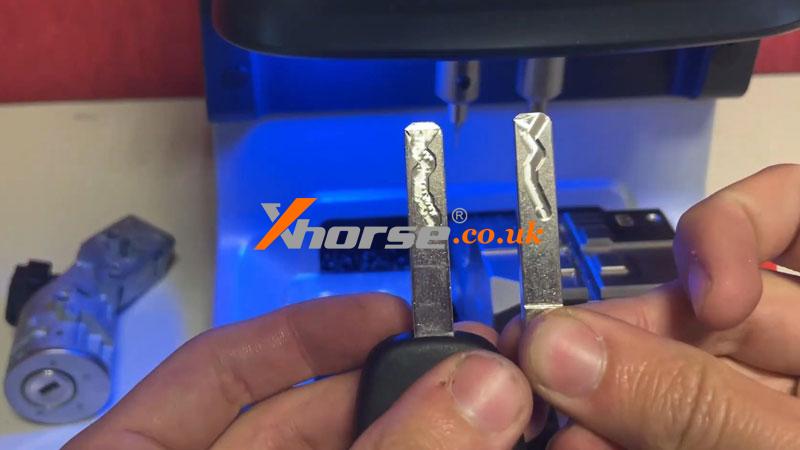
Turn over the key once cutting side was done.
Just repeat same operation to cut the second side.
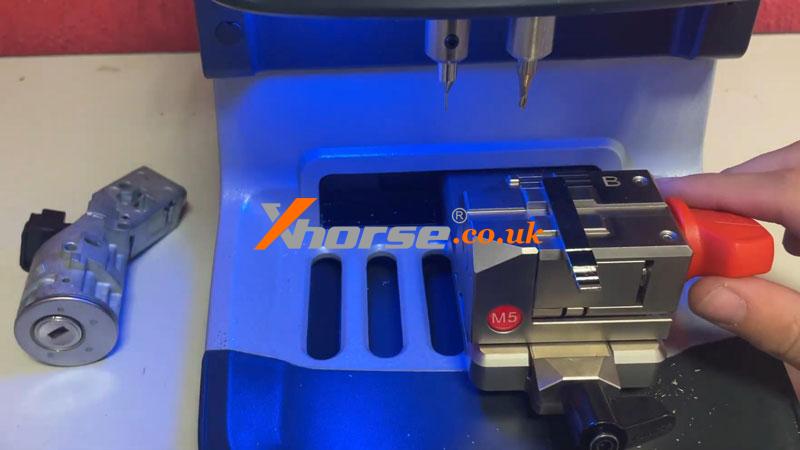
Clean and take out the key when both sides were completed.
As you can see, it's the same as the original one.
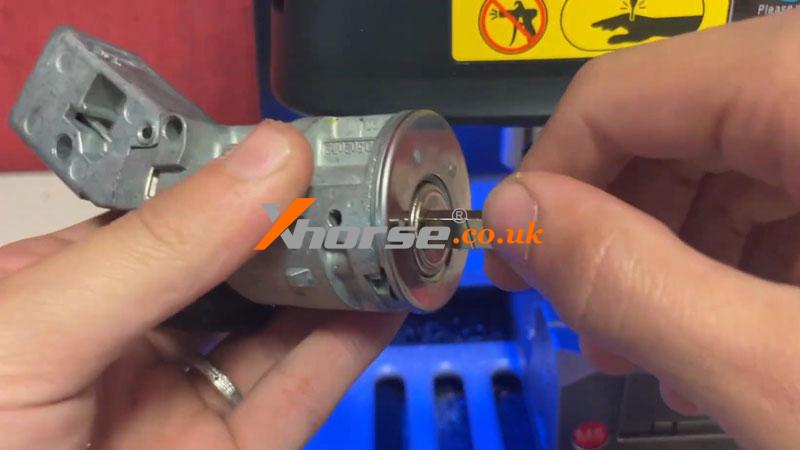
It can open the lock.
Key cutting is successful!
For more Key Cutting Machine tutorials to be updated.
www.xhorse.co.uk
Oznake: xhorse dolphin xp005l
komentiraj (0) * ispiši * #
Xhorse Key Tool Max Pro User Manual: Setting
06.07.2022.This article is a brief introduction to the "Settings" section of the Xhorse Key Tool Max Pro User Manual.
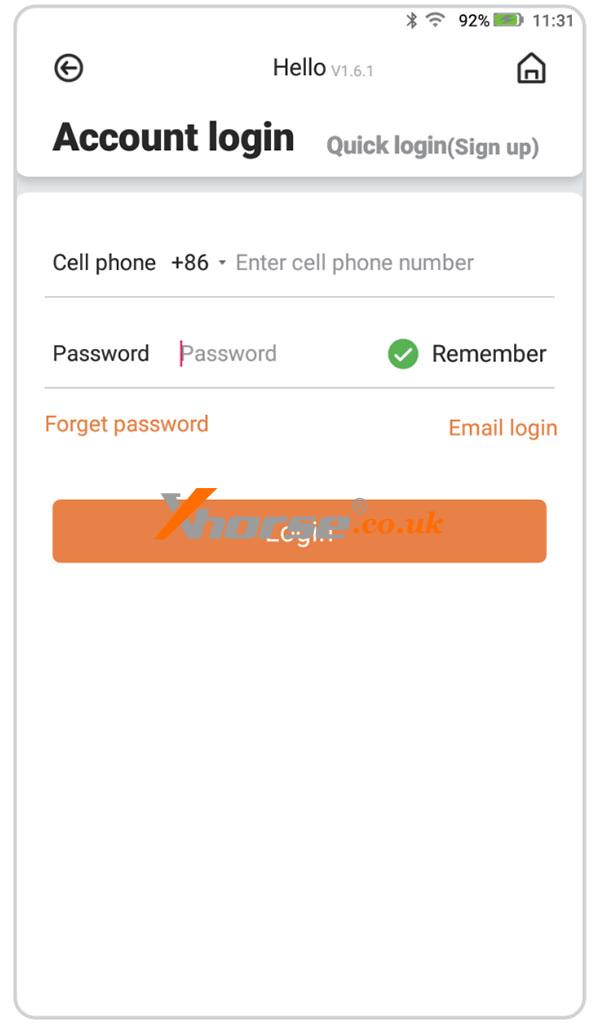
1. First Time to use
For the first time, turn on the KEY TOOL MAX PRO you need to select the language and region (the system default is China Standard Time Zone), connect to the WIFI, log in with a registered account, if you don't have an account, please register as shown in the picture.
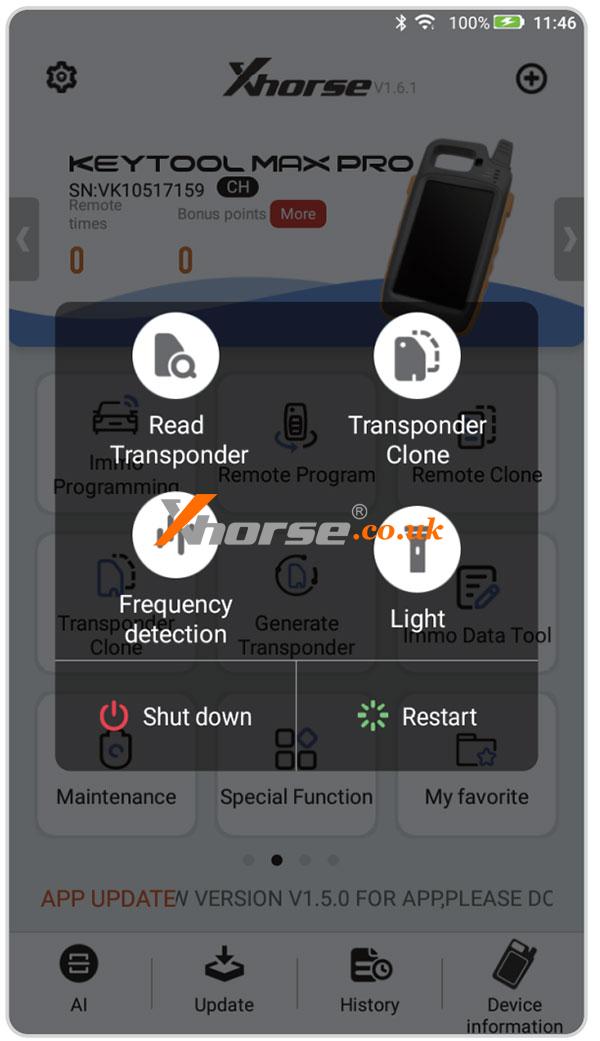
2. Power Off
` Before entering the system, press and hold the On/off button for a while, ”power off“ and "restart" will be shown on the screen, click on "power off", the device will shut down.
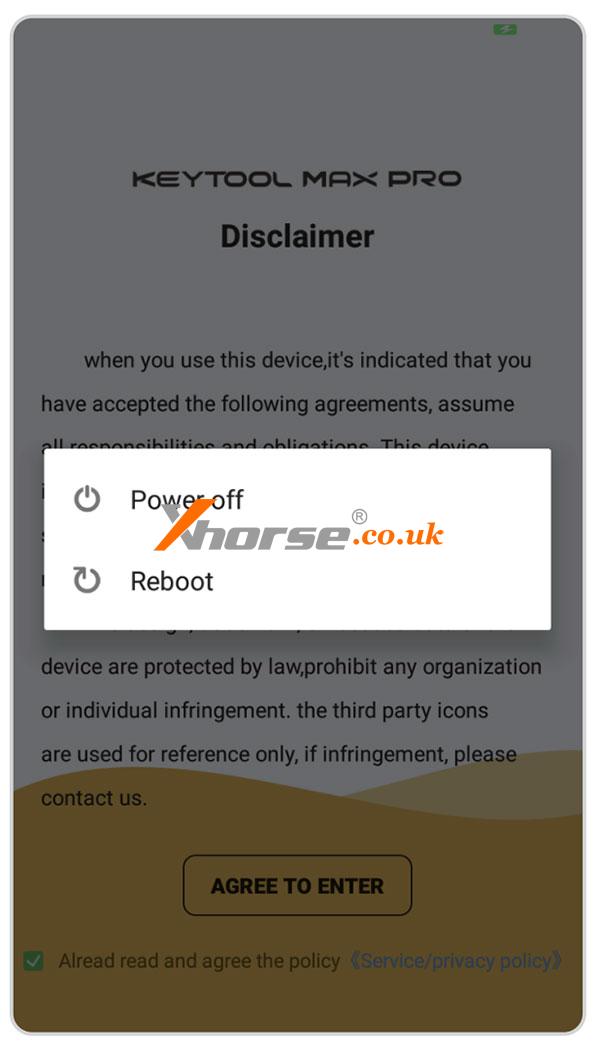
a After entering the system, press and hold the power on/off button for a while, the interface displays the following icons, click to turn off the option, and the device will shut down.
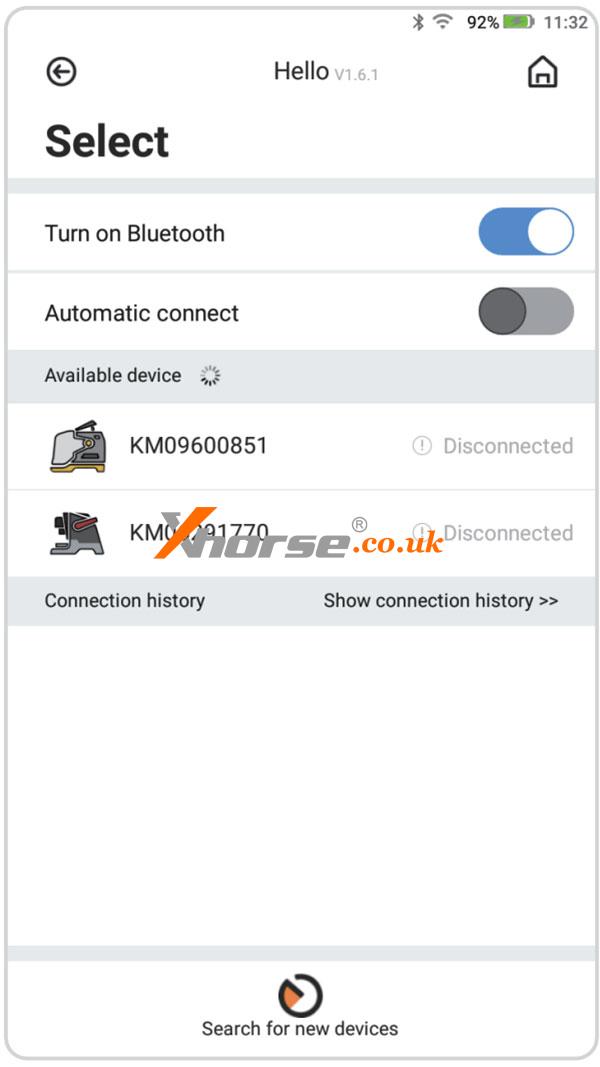
3. Connect to the key cutting machine
KEY TOOL MAX PRO can connect the key cutting machine via Bluetooth to operate: click [Select] interface, the interface displays the current connectable device, and select the device to be connected by serial number.
4. Status of the indicator
` When the device is on or charging, the POW indicator is on.
a When the device is in operation, the CON indicator is lit.
5. Reset your device
` Press the On / Off button for 12 seconds, and the device will restart automatically.
a Press the On / Off button for about 1-2 seconds, the screen displays the shutdown and restart options, and select the corresponding option to shut down or restart the device.
For more information about Key Tool Max Pro you can click https://www.xhorse.co.uk//xhorse-key-tool-max-pro.html
Oznake: key tool max pro
komentiraj (0) * ispiši * #
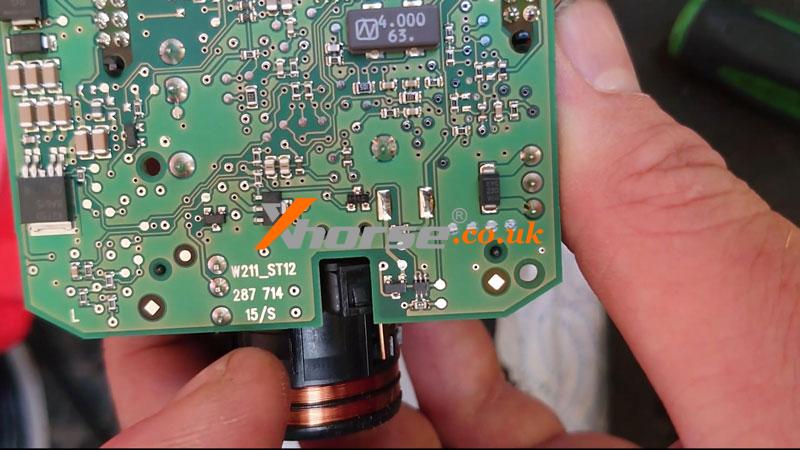
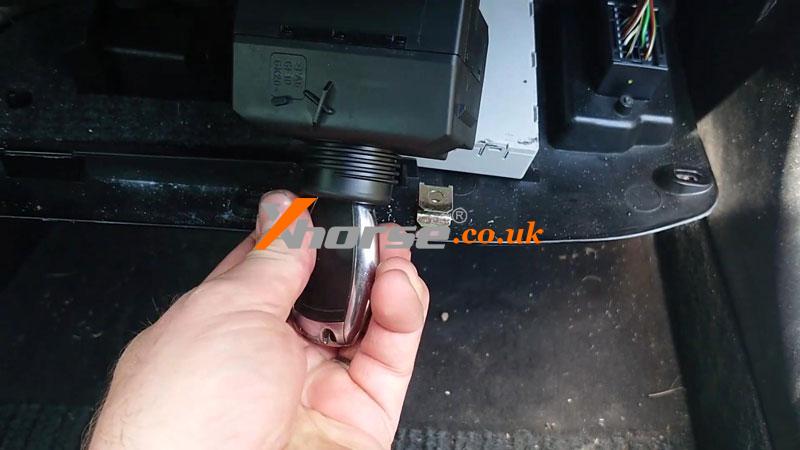
Xhorse VVDI PROG Clone Mercedes SLK R171 EIS W211
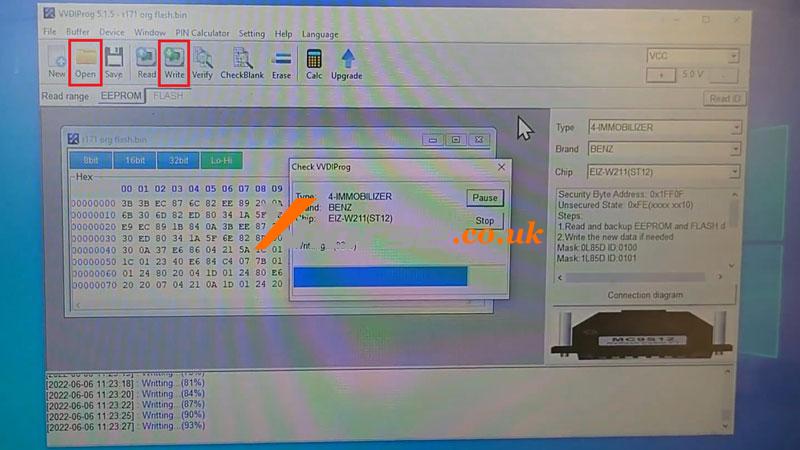
05.07.2022.Xhorse VVDI PROG is able to read & write Mercedes Benz SLK R171 EIS W211 easily. Need to remove original EIS module from vehicle and prepare a new or second-hand module to clone. Following I'm gonna show how to do.
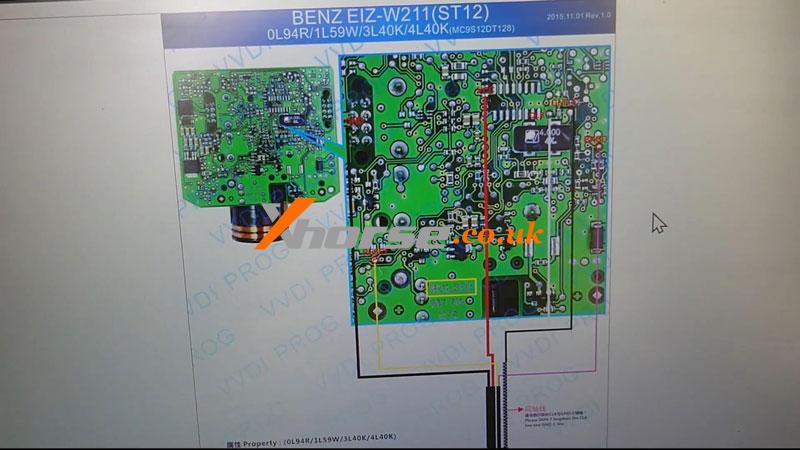
Open VVDI PROG to check connection diagram:
Type: 4-IMMOBILIZER
Brand: BENZ
Chip: EIZ-W211(ST12)
For soldering method: connect with MC9S12 Reflash Cable.
For solder-free method: connect to Benz W211 ST12 EZS Adapter.
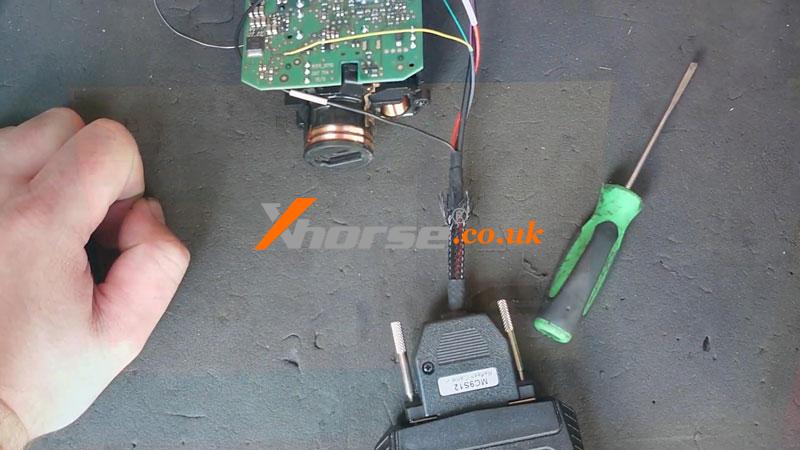
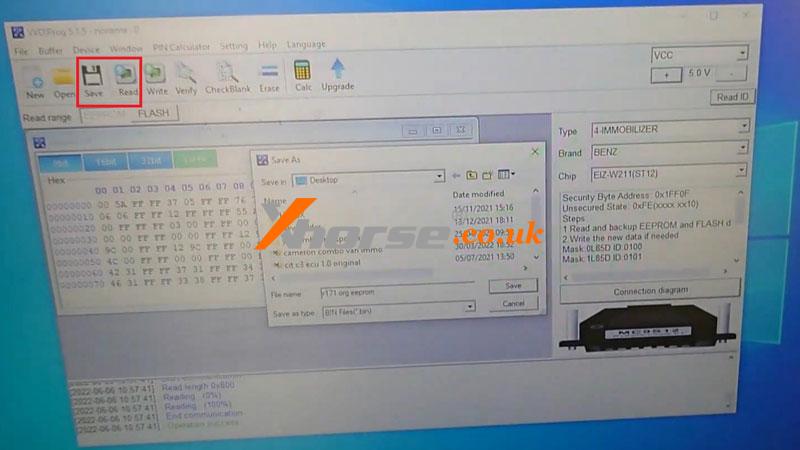
Step1. Backup EEPROM & FLASH
Connect VVDI PROG to original EIS.
Read EEPROM...
Operation success.
Save EEPROM.
Read FLASH...
Save FLASH data file.
Step2. Write to New Module
Connect VVDI PROG to a new module.
Open original EEPROM file, click "Write"...
Open original FLASH file, click "Write"...
Just wait until completed.

Install the cloned module back on vehicle for a test.
It can work.
Done.
This is how to use VVDI PROG & Reflash Cable to clone a Benz W211 EIS.
www.xhorse.co.uk
Oznake: xhorse vvdi prog
komentiraj (0) * ispiši * #
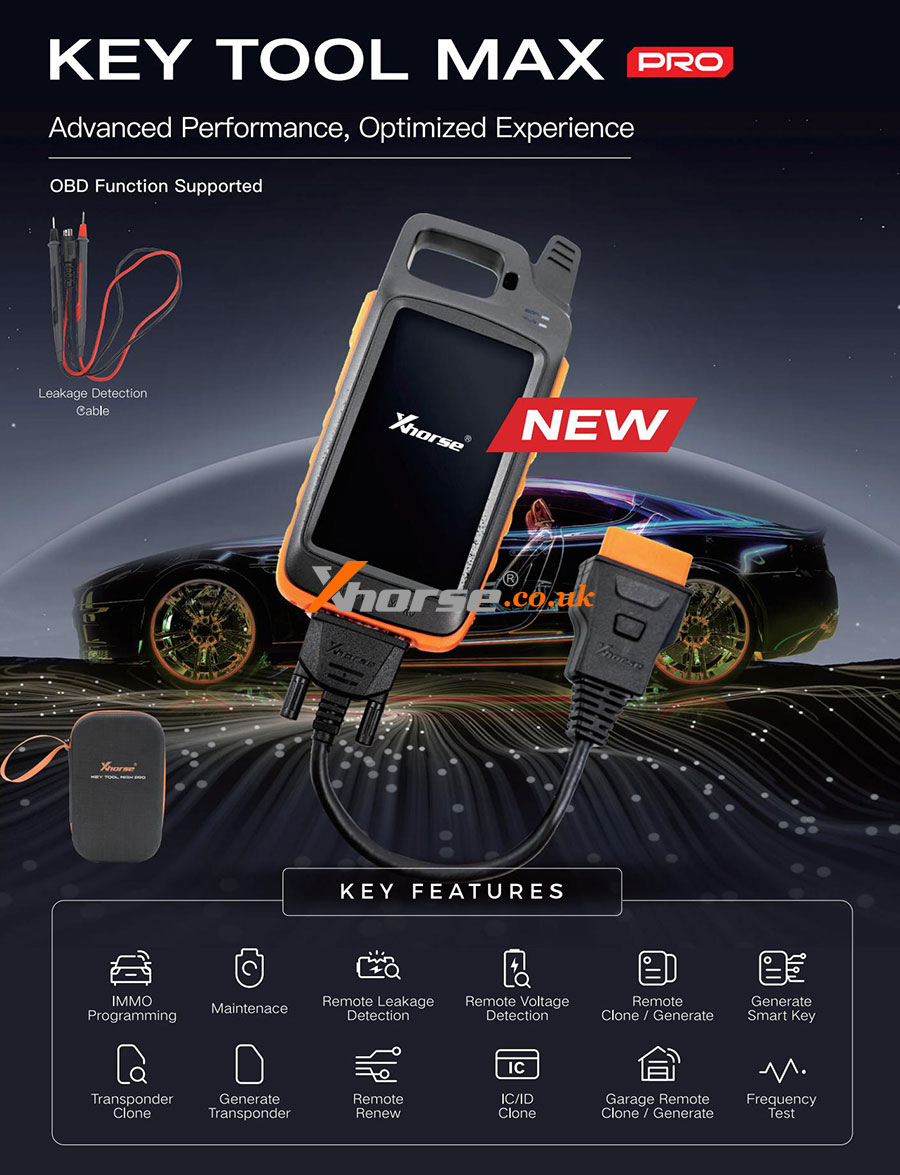
What is the difference between Xhorse Key Tool MAX Pro and Key Tool MAX?
01.07.2022.This article will lead you to understand the difference between Xhorse's new Key Tool Max Pro and Key Tool Max.
1. Firmware
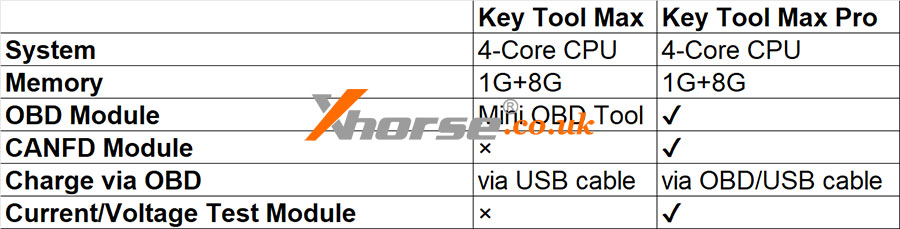
2. Software

Conclusion:
The brand new Key Tool Max Pro from Xhorse comes with all the features of the existing Key Tool Max but with much, much more!
For more technical support, please follow
http://blog.xhorse.co.uk/
Oznake: vvdi key tool max pro
komentiraj (0) * ispiši * #
