Xhorse VVDI2 + GODIAG GT110 Make VW NEC 24C32 Dealear Key
26.11.2024.This is a tutorial on how to use Xhorse VVDI2 + GODIAG VAG Test Platforms GT110 to make a dealer key for VW IMMO4 NEC 24C32 by bench.
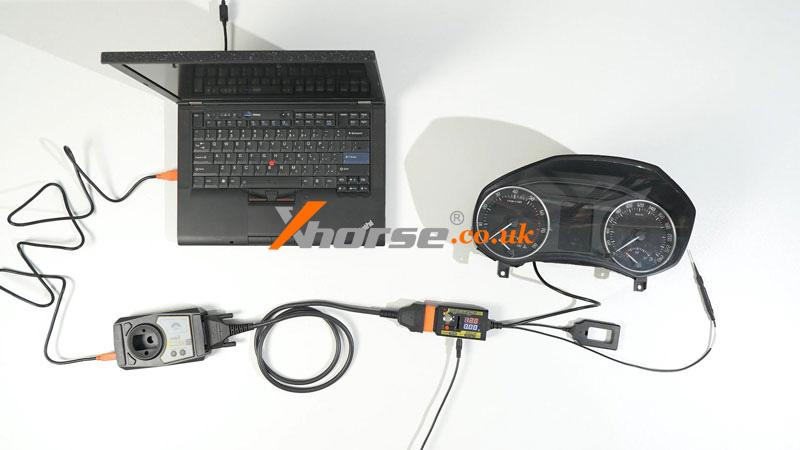
Connect VVDI2, GODIAG GT110& immo dashboard to the PC.
Power on GT110, and press the red button.
We can see the dashboard light.
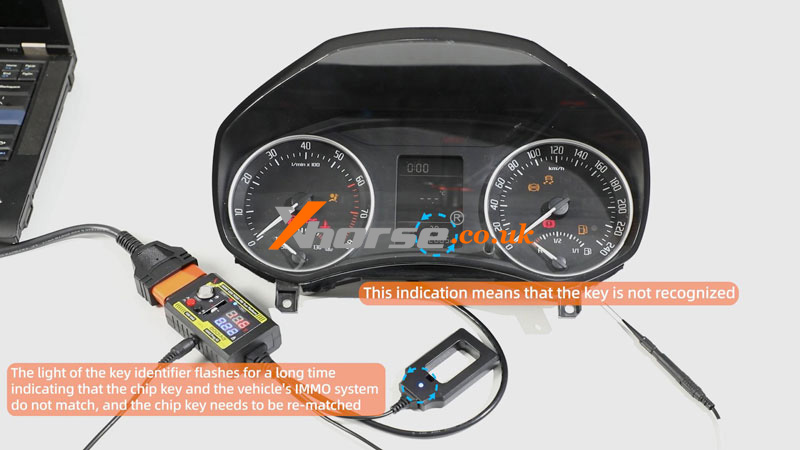
1) This indication means that the key is not recognized.
2) The light of the key identifier flashes for a long time indicating that the chip key and the vehicle's IMMO system do not match, and the chip key needs to be re-matched.
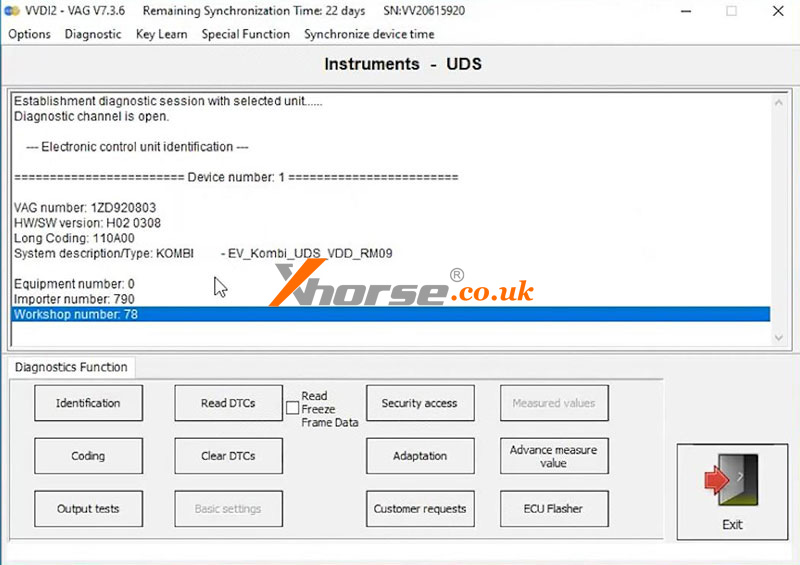
Open VVDI2 software,
VW >> Diagnostic >> Diagnostic Unit >> Instruments >> Connect >> Identification
Here we can perform read DTCs, clear DTCs, coding, security access, etc.
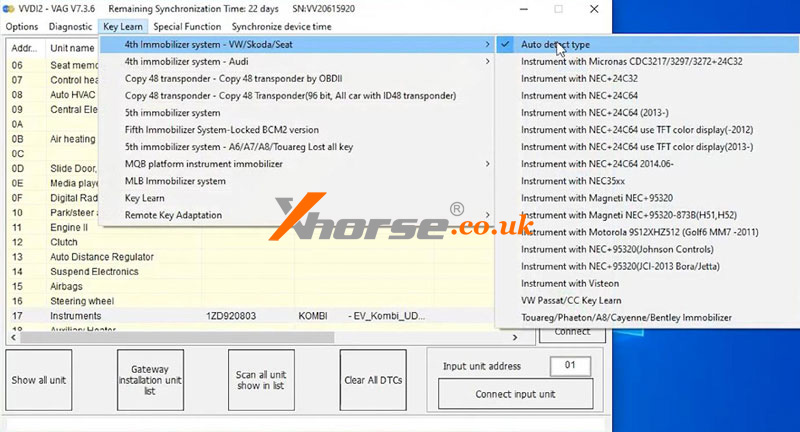
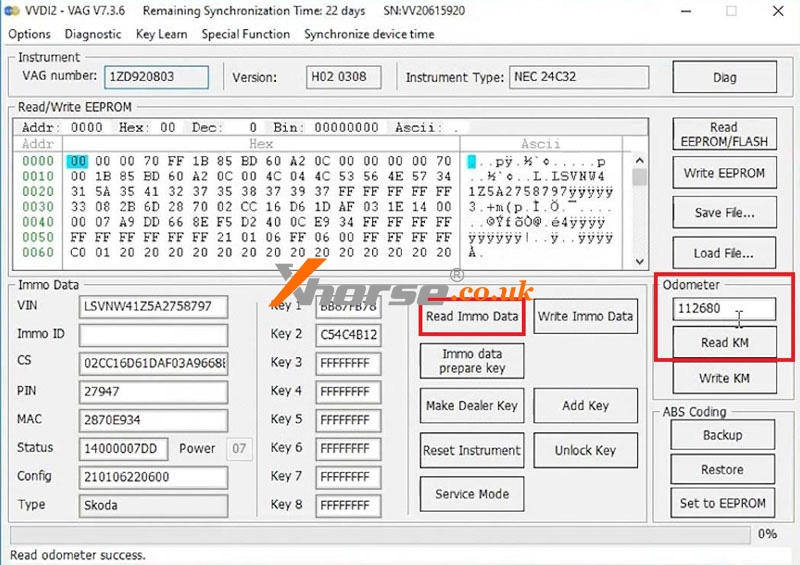
Key learn >> 4th immobilizer system - VW/Skoda/Seat >> Auto detect type >> Diag >> Read immo data >> Login Method 1 >> NEXT
I am reading Immo Data Success.
Click "Read KM".
Read odometer success, it's 112580km.
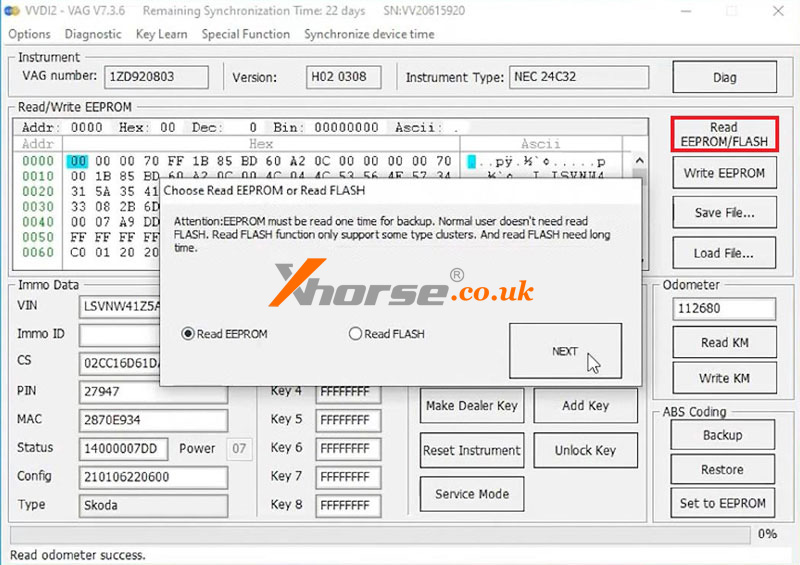
Read EEPROM/FLASH >> Read EEPROM >> NEXT >> Login Method 1 >> NEXT
Reading data success.
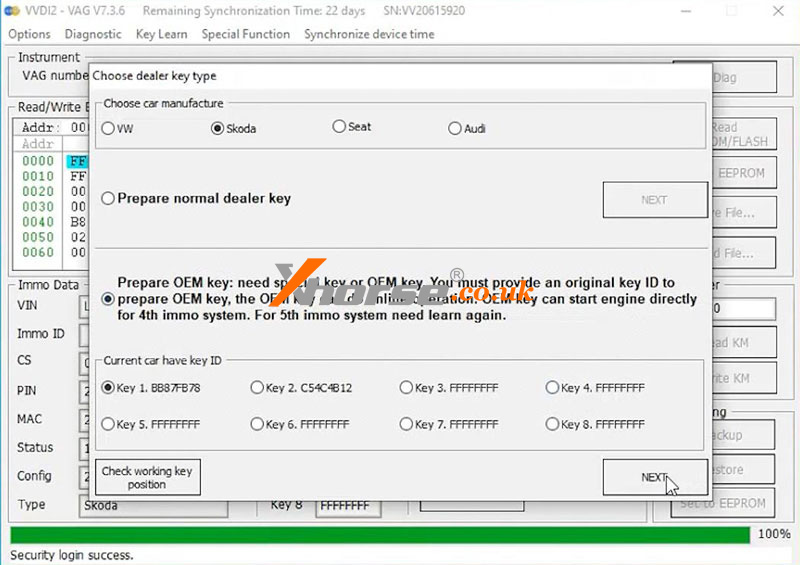
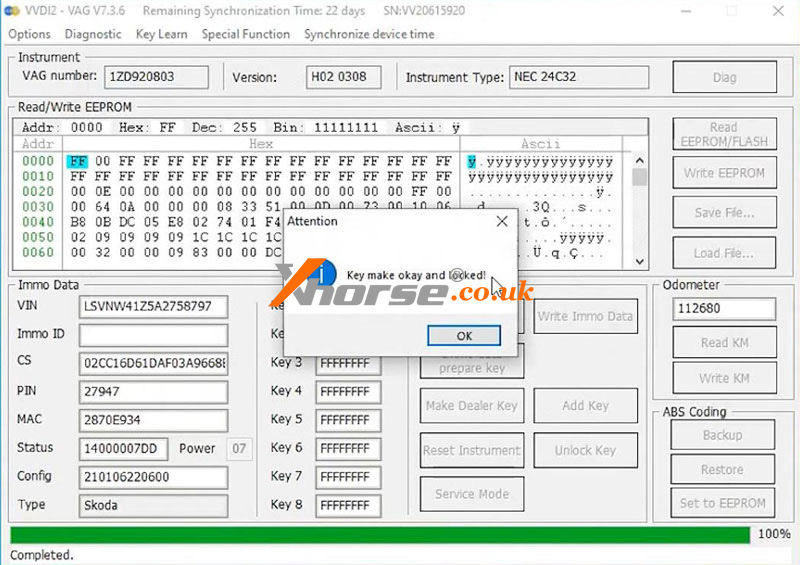
Make dealer key >> Login Method 1 >> NEXT >> Skoda
Select "Prepare OEM key: need a special key or OEM key. You must provide an original key ID to prepare the OEM key, the OEM key can do the online operation. OEM key can start the engine directly for the 4th immo system. For the 5th immo system, we need to learn again."
Key 1 >> NEXT >> Yes
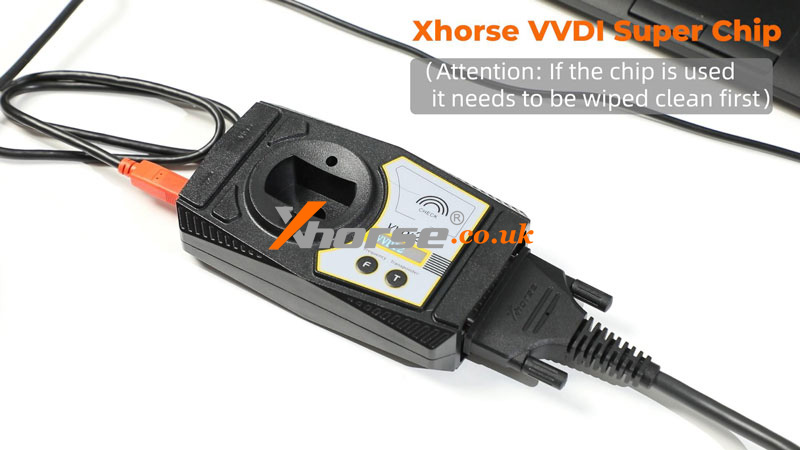
Put the VVDI Super Chip into the VVDI2 coil.
Attention: If the chip is used, it must be wiped clean first.
Key make okay and locked!
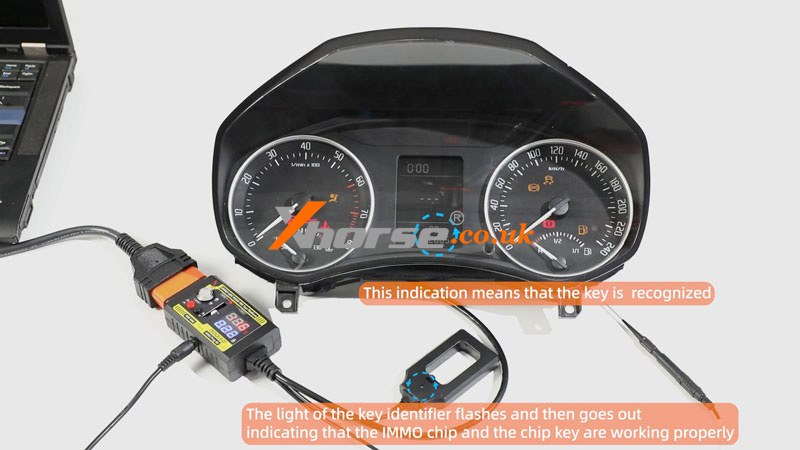
Put the super chip into the GODIAG coil for a test.
1) This indication means that the key is recognized.
2) The light of the key identifier flashes and then goes out indicating that the IMMO chip and the chip key are working properly.
Test the key on the car.
1. The light of the key identifier flashes and then goes out, indicating that the IMMO chip and the chip key are working properly.
2. The light of the key identifier flashes for a long time indicating that the chip key and the vehicle's IMMO system do not match, and the chip key needs to be re-matched.
3. The light of the key identifier does not flash which means that the vehicle's IMMO system is faulty. Please check the vehicle's IMMO system.
www.xhorse.co.uk
Oznake: xhorse multi prog
komentiraj (0) * ispiši * #
Xhorse VVDI Key Tool Plus Add 2021- BYD ID46 Key Tutorial
06.11.2024.Recently, we've received increasing demands for BYD programming due to the increasing number of BYD cars on the market. However, the method of adding a key for a BYD is different from that of other ordinary cars, which many people may have trouble with. So here, we'll go over how to add a key for a BYD with Xhorse VVDI Key Tool Plus step by step.
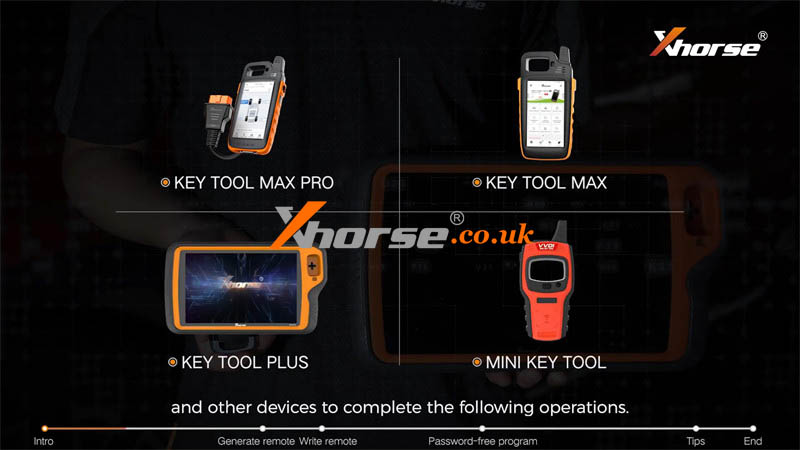
Locksmiths can also use the Key Tool Max Pro, Key Tool Max, Mini Key Tool, and other devices to complete the following operations.
There are mainly 2 systems in BYD cars.
1. One is the old system generally used in models before 2021. And when we add the key we need to write the encrypted data into the new remote.
2. The other is the new system commonly used in models after 2021 without the need to write the remote.
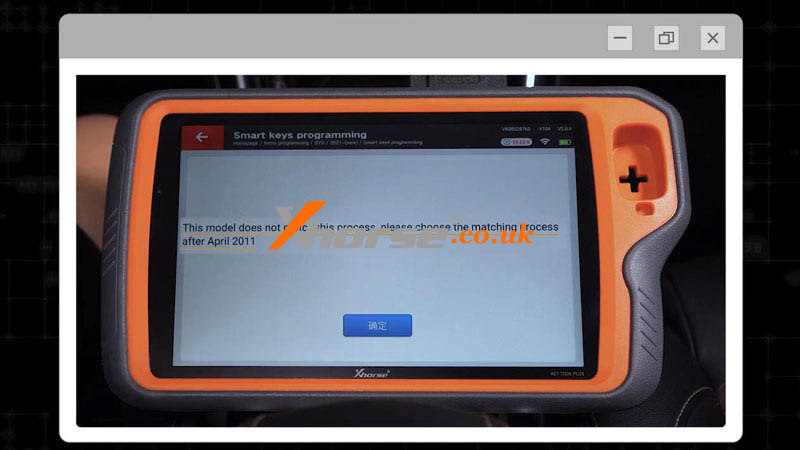
It's easy to distinguish between old and new systems.
Just find BYD, and start programming for the new system. If the system is old, Key Tool Plus will prompt that this model doesn't match this process.
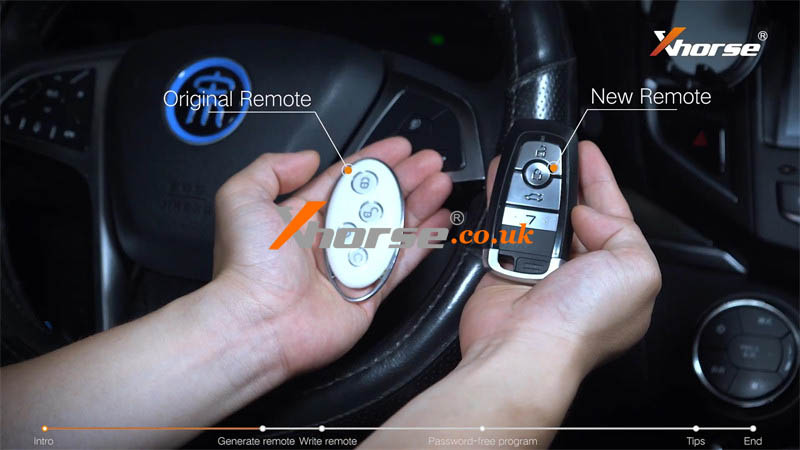
Now let's dive into adding a key for the car. This is the original remote and this is the new remote.
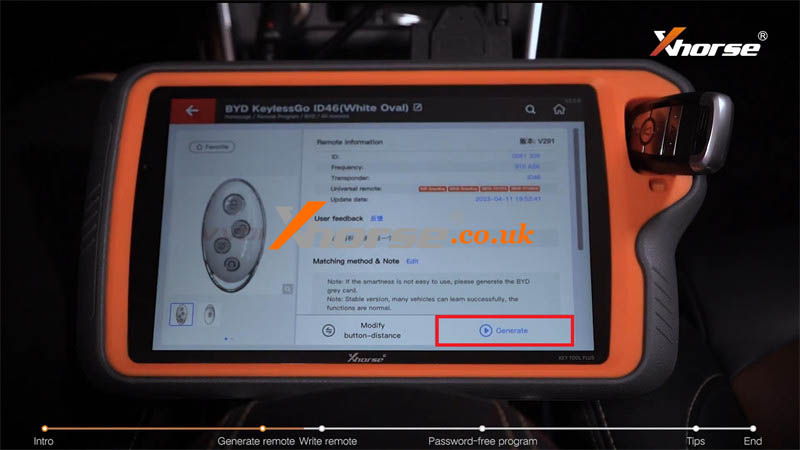
Step1. Generate Remote
Remote program >> BYD >> All remotes >> BYD KeylessGo ID46(White Oval)
Put the new key into the Key Tool Plus coil.
Press "Generate".
Burn success.
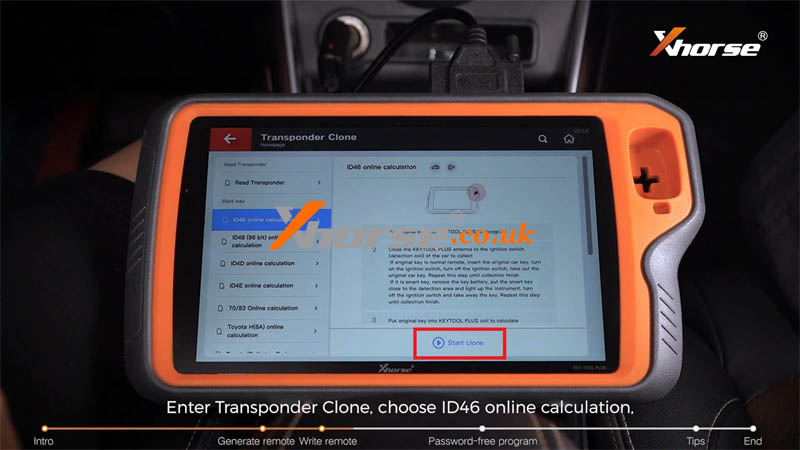
Step2. Write Data
Write the encrypted data into the new remote.
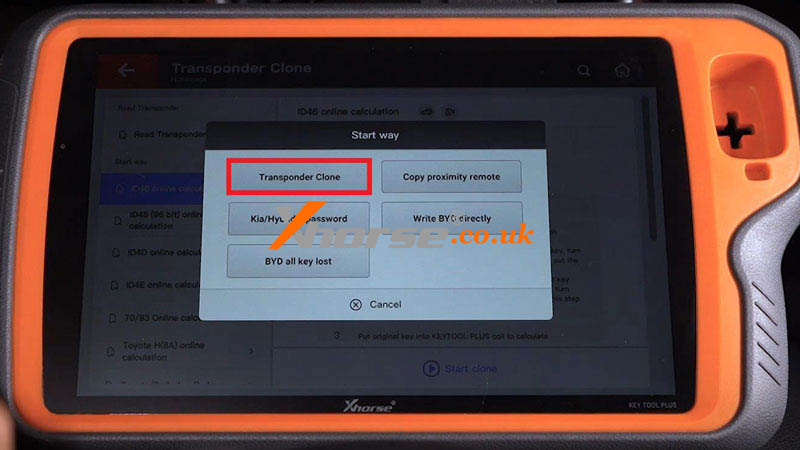
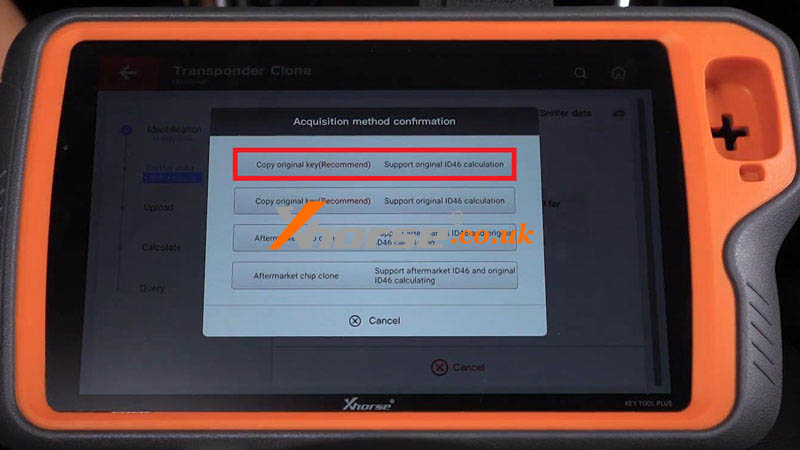
Transponder clone >> ID46 online calculation >> Start clone >> Write BYD directly
Put the original car key into the coil for identification. Then remove its battery and choose the recommended method: "Copy original key(Recommend) support original ID46 calculation."
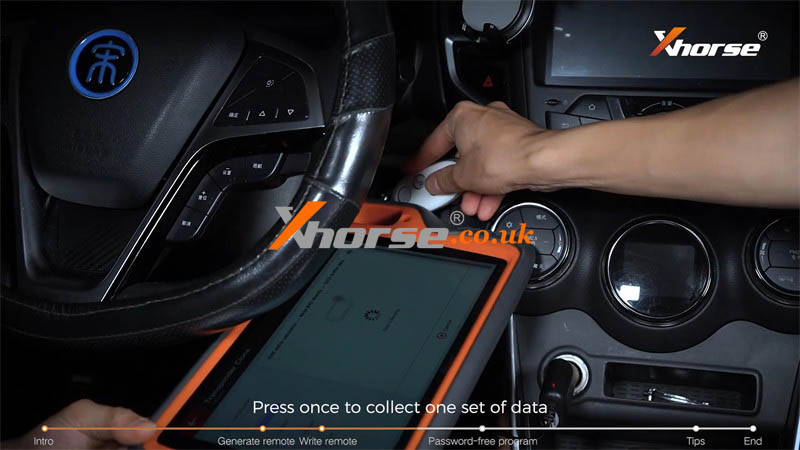
Place the Key Tool Plus coil close to the start button and use the original remote to press the start button for data collection.
Press once to collect one set of data.
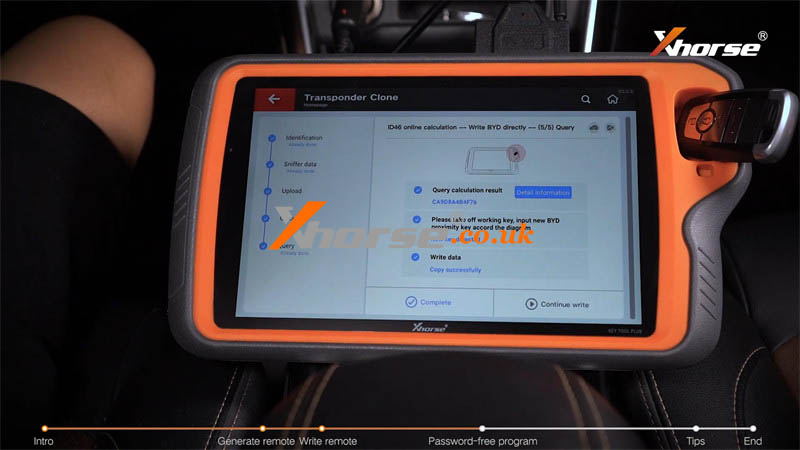
Then put the original remote into the coil for verification.
The device will automatically upload the data for calculation and obtain the encrypted data.
Next, put the new remote into the Key Tool Plus coil for data writing.

Step3. Password-free Program
Connect vehicle OBD port and tablet.
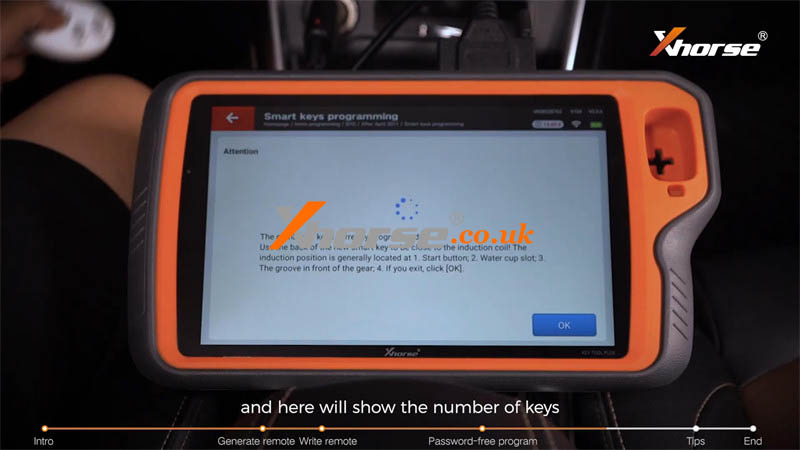
IMMO programming >> BYD >> After April 2011 >> Smart keys programming >> Start programming >> Clear program original keys or non-original key
Must have a registered smart key to operate! Press Yes to continue.
Do not press the start button! Press Confirm to continue.
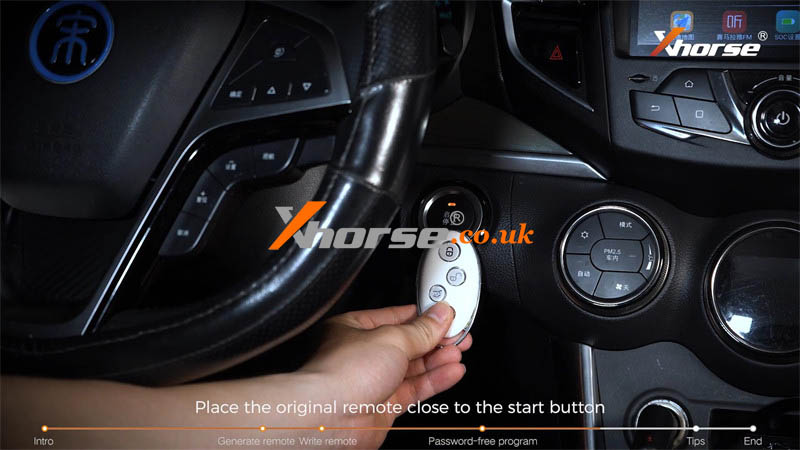
Place the original remote close to the start button and Key Tool Plus will show the number of keys.
Currently programmed is one.
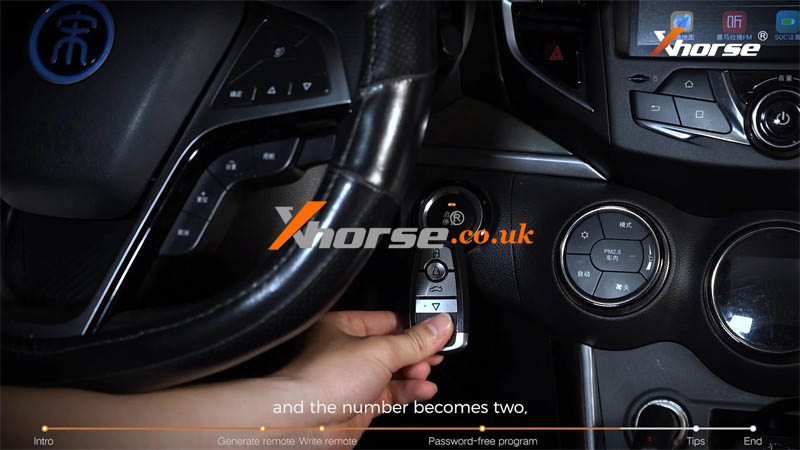
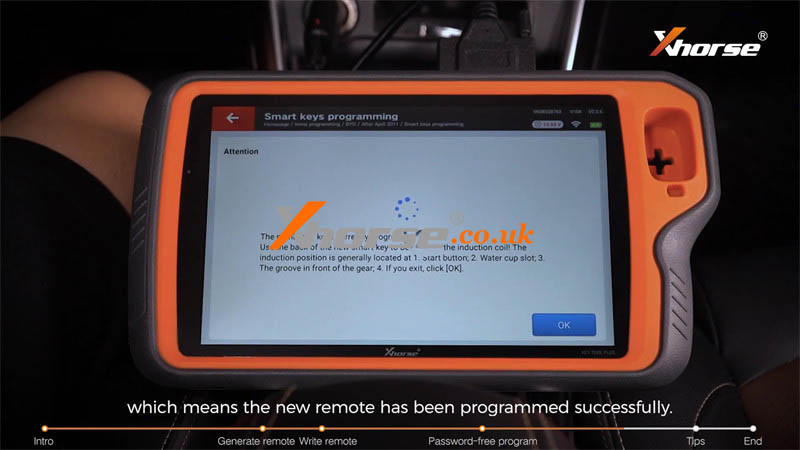
Then repeat it with the new remote, and the number becomes two, which means the new remote has been programmed successfully.
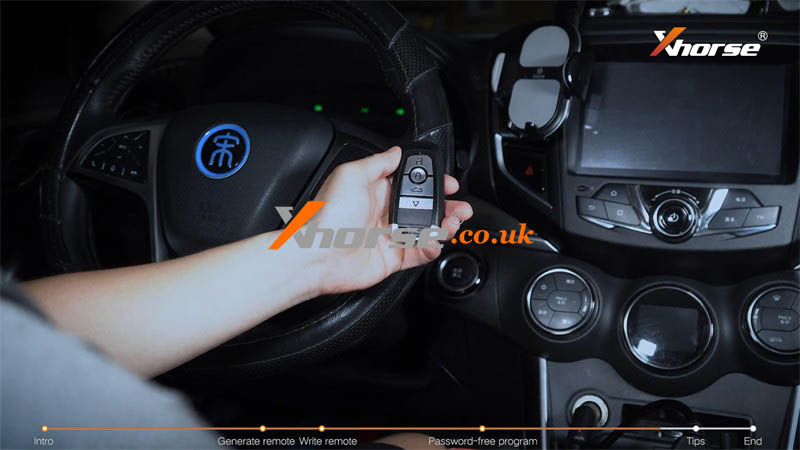
Now it can be used for emergency start, remote control, and smart function.
Let's give the remote functions a try and start the car.
All can work.

Tips to Notice
1. When collecting data, the battery of the original remote must be removed, otherwise the data will not go through the emergency channel and cannot be collected when starting the car.
2. When writing a remote, if you use an original or another special remote to add a key but it isn't sensed by the coil well, the writing will fail and the original remote will be locked. At the moment, we need to renew the original remote.
3. When programming, if the device doesn't respond when the remotes are close to the start button, we need to check the coil emergency antenna, take out the remote board, or remove the decoration of the start button.
www.xhorse.co.uk
Oznake: vvdi key tool plus
komentiraj (0) * ispiši * #
