Fixed: XHORSE Multi-Prog Menu No Display Issue
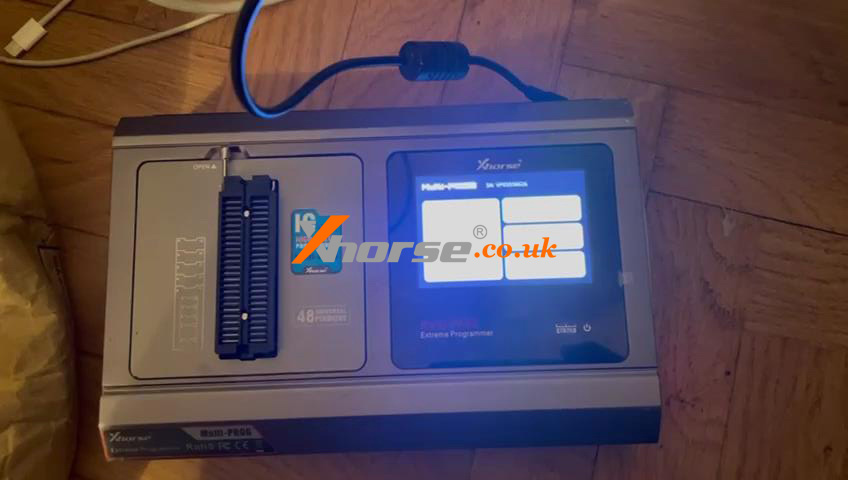
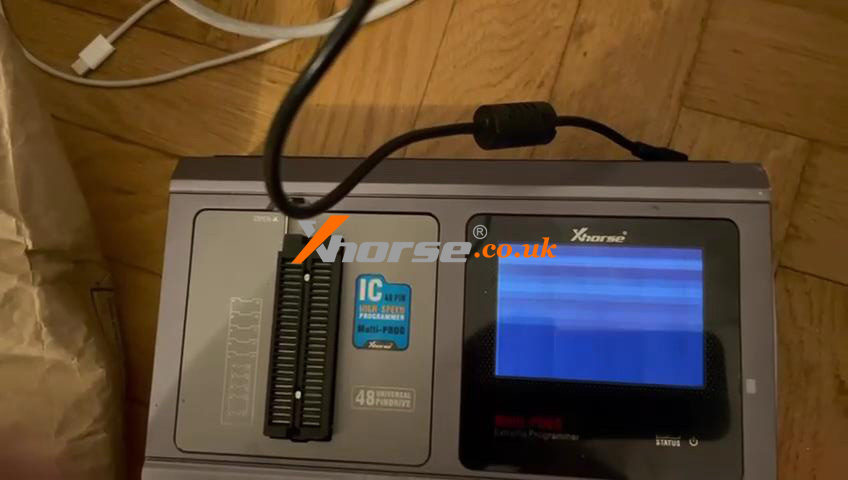
18.03.2025.Problem: The XHORSE Multi-Prog Programmer screen is blank without a menu. I can't perform any functions. What's wrong with it? Please help.
Solution
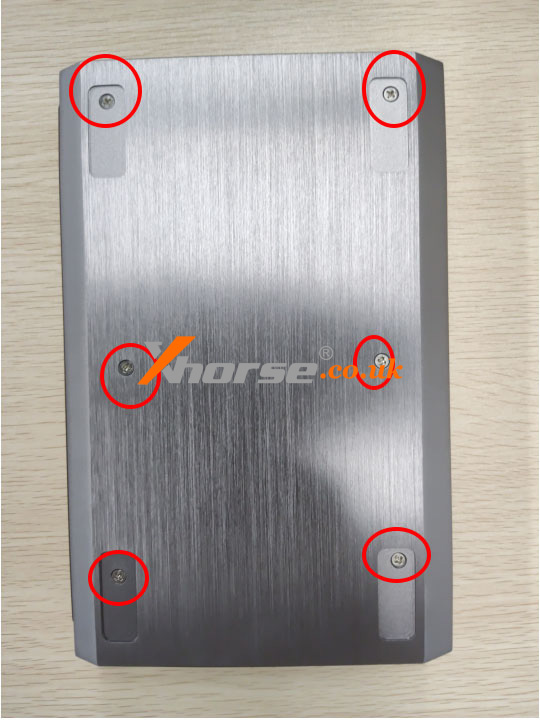
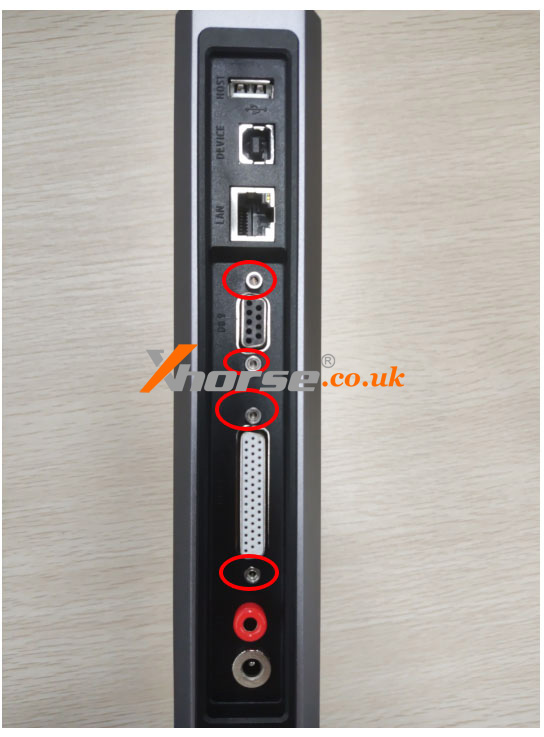
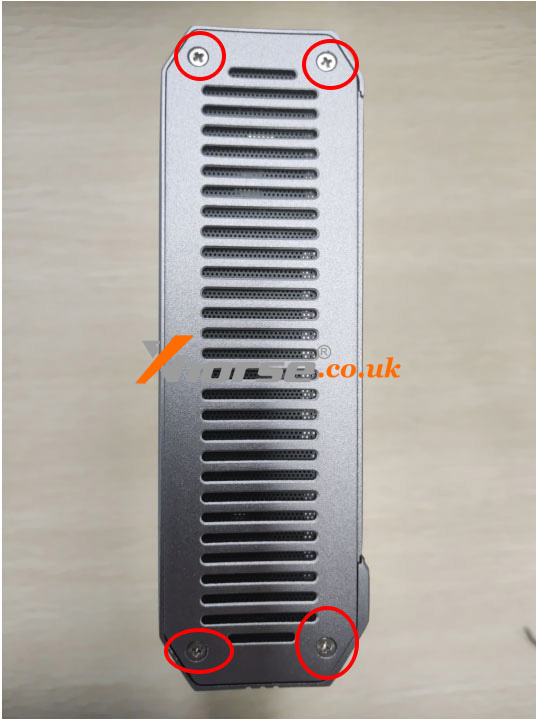
Follow the below to disassemble Multi-Prog device:
1) Remove 6 screws on the back.
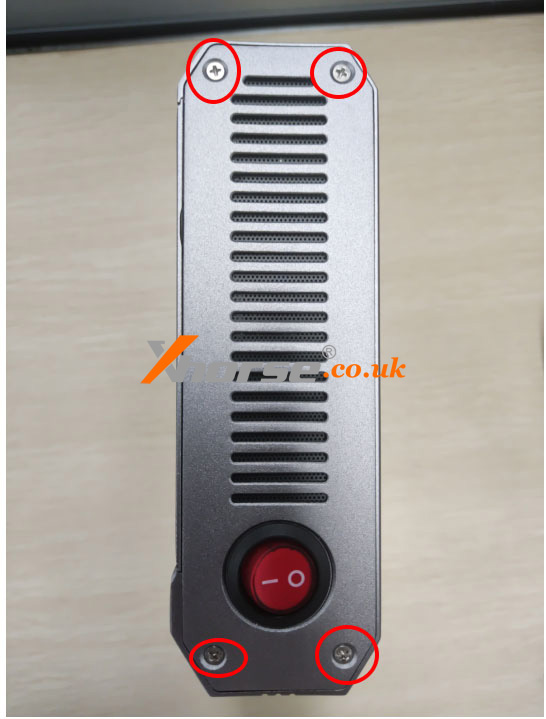
2) Remove all screws on the side.
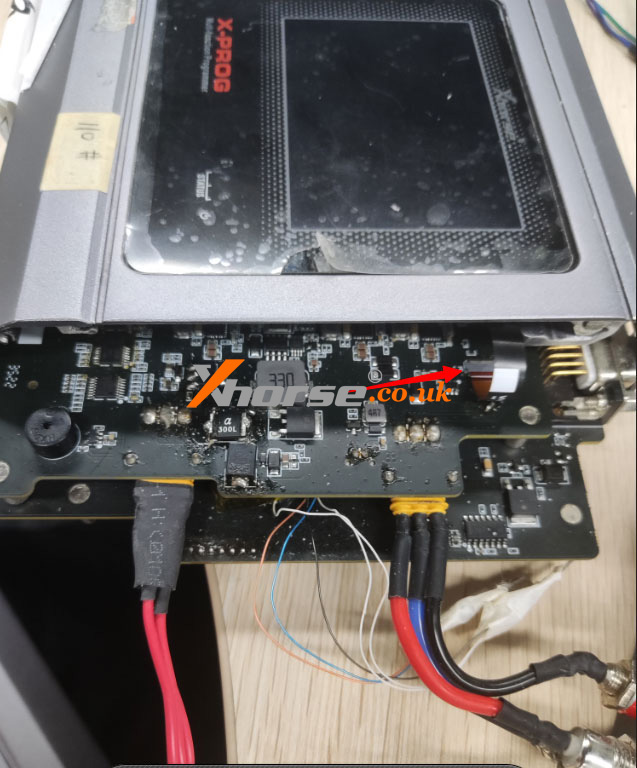
3) Remove in the direction of the arrow.
4) Disconnect and reconnect all wires to the device.
If the above steps still do not work, please contact Xhorse after-sales.
www.xhorse.co.uk
Oznake: xhorse multi prog
komentiraj (0) * ispiši * #
Xhorse VVDI2 + GODIAG GT110 Make VW NEC 24C32 Dealear Key
26.11.2024.This is a tutorial on how to use Xhorse VVDI2 + GODIAG VAG Test Platforms GT110 to make a dealer key for VW IMMO4 NEC 24C32 by bench.
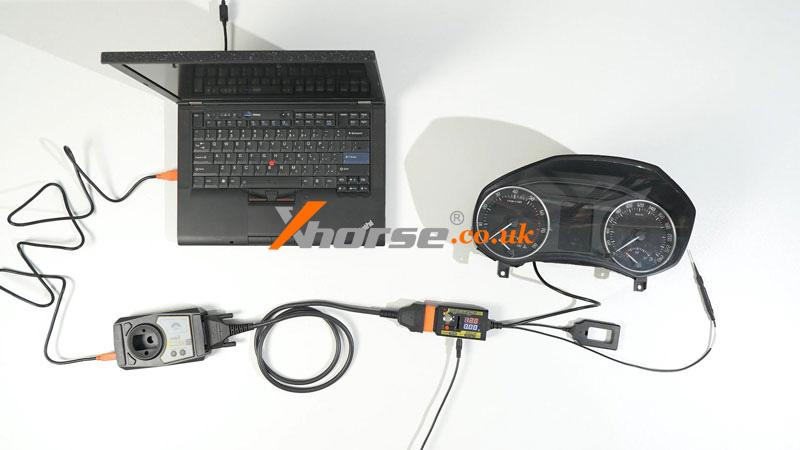
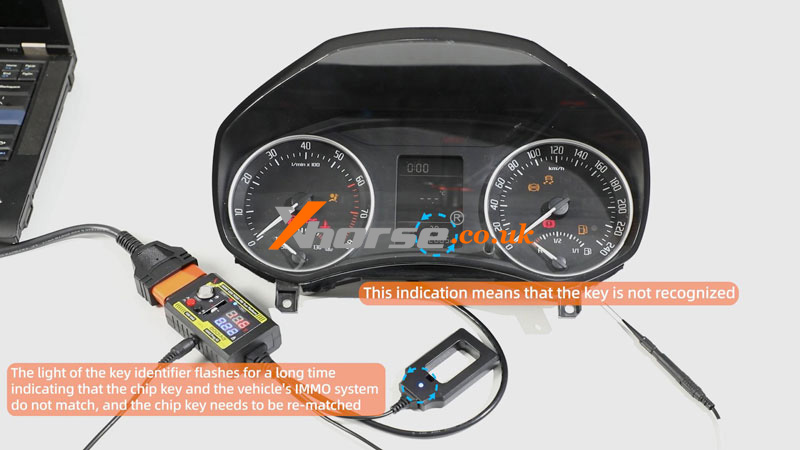
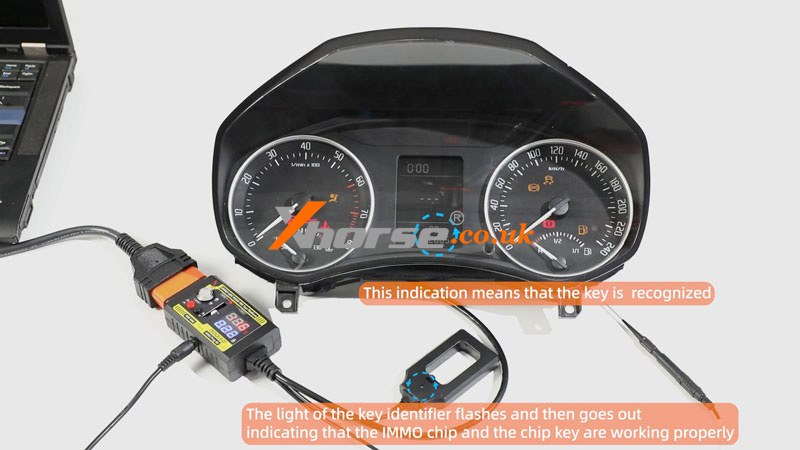
Connect VVDI2, GODIAG GT110& immo dashboard to the PC.
Power on GT110, and press the red button.
We can see the dashboard light.
1) This indication means that the key is not recognized.
2) The light of the key identifier flashes for a long time indicating that the chip key and the vehicle's IMMO system do not match, and the chip key needs to be re-matched.
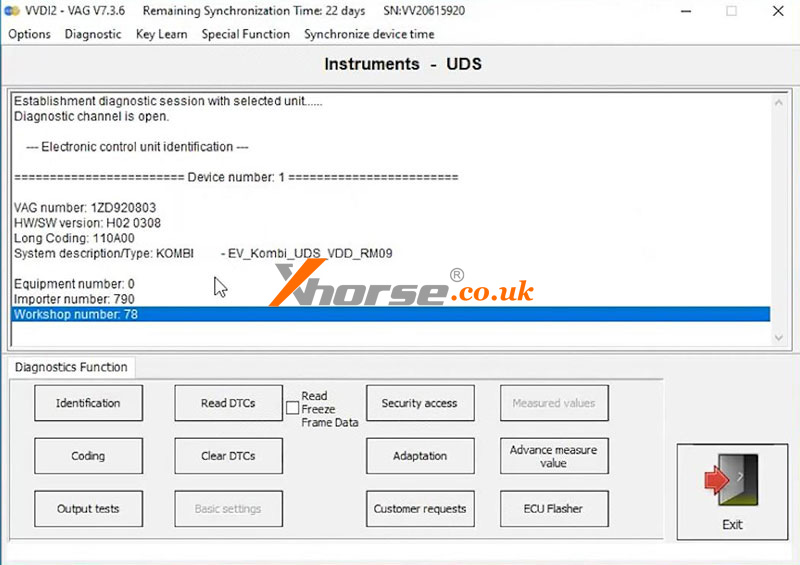
Open VVDI2 software,
VW >> Diagnostic >> Diagnostic Unit >> Instruments >> Connect >> Identification
Here we can perform read DTCs, clear DTCs, coding, security access, etc.
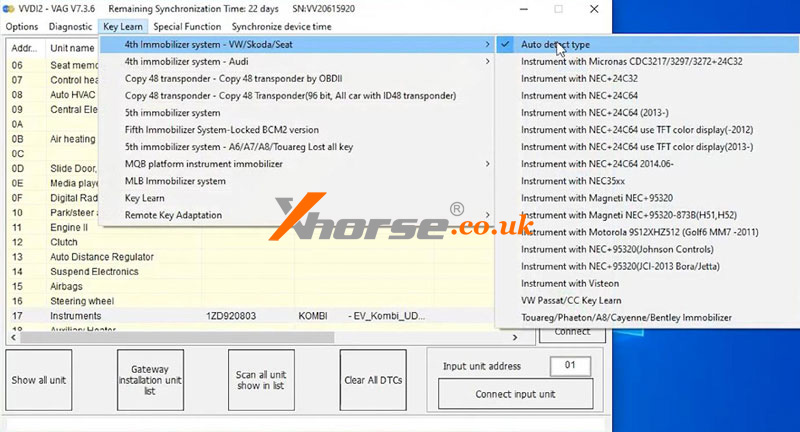
Key learn >> 4th immobilizer system - VW/Skoda/Seat >> Auto detect type >> Diag >> Read immo data >> Login Method 1 >> NEXT
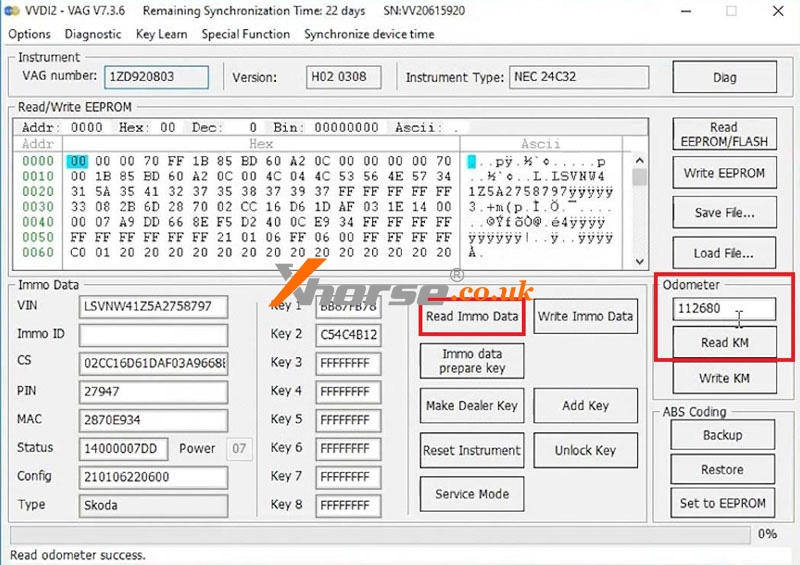
I am reading Immo Data Success.
Click "Read KM".
Read odometer success, it's 112580km.
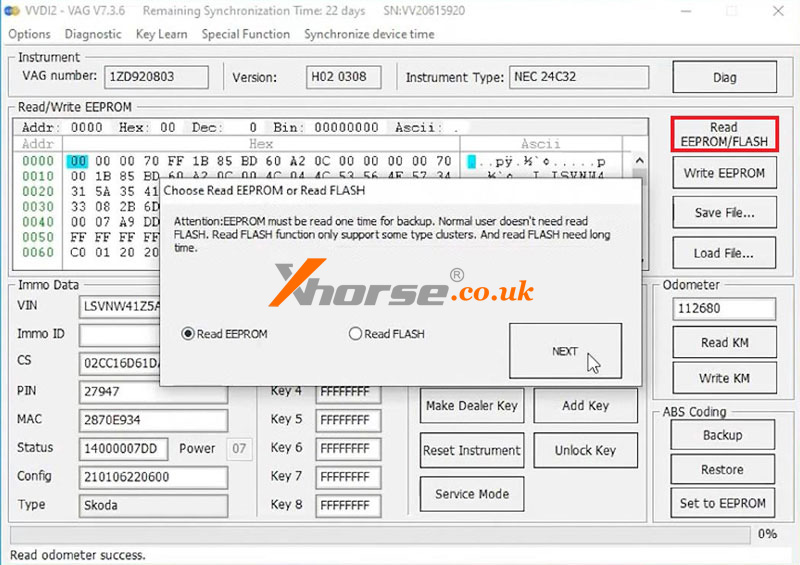
Read EEPROM/FLASH >> Read EEPROM >> NEXT >> Login Method 1 >> NEXT
Reading data success.
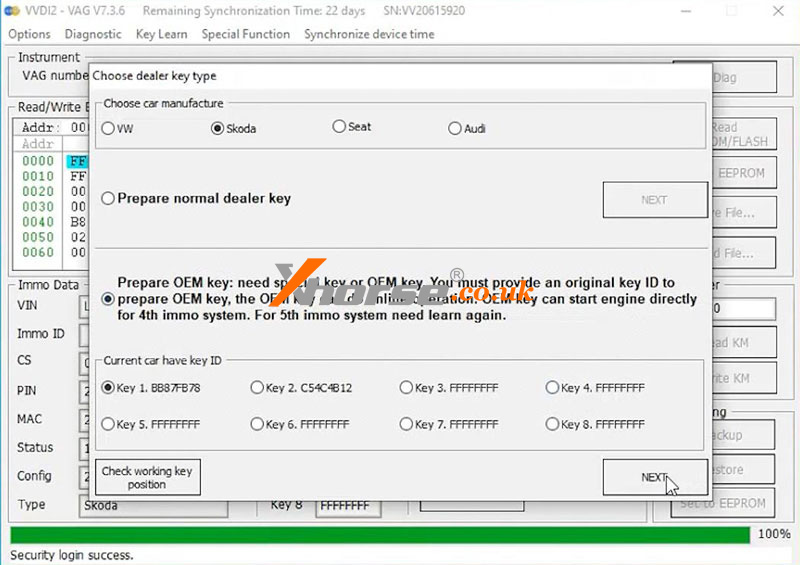
Make dealer key >> Login Method 1 >> NEXT >> Skoda
Select "Prepare OEM key: need a special key or OEM key. You must provide an original key ID to prepare the OEM key, the OEM key can do the online operation. OEM key can start the engine directly for the 4th immo system. For the 5th immo system, we need to learn again."
Key 1 >> NEXT >> Yes
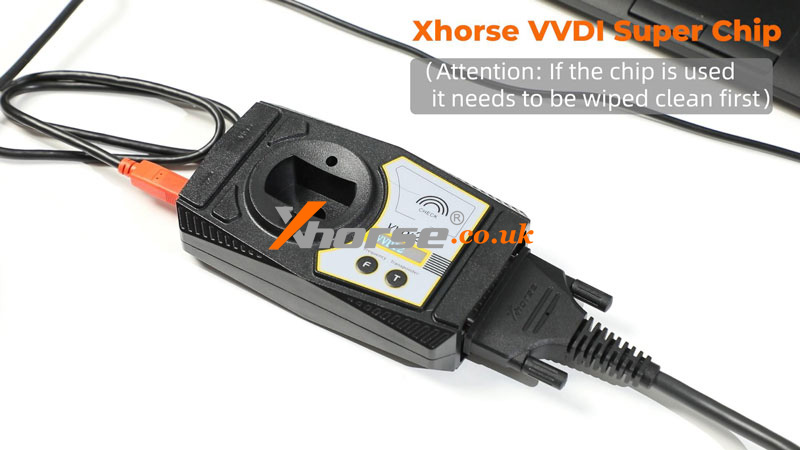
Put the VVDI Super Chip into the VVDI2 coil.
Attention: If the chip is used, it must be wiped clean first.
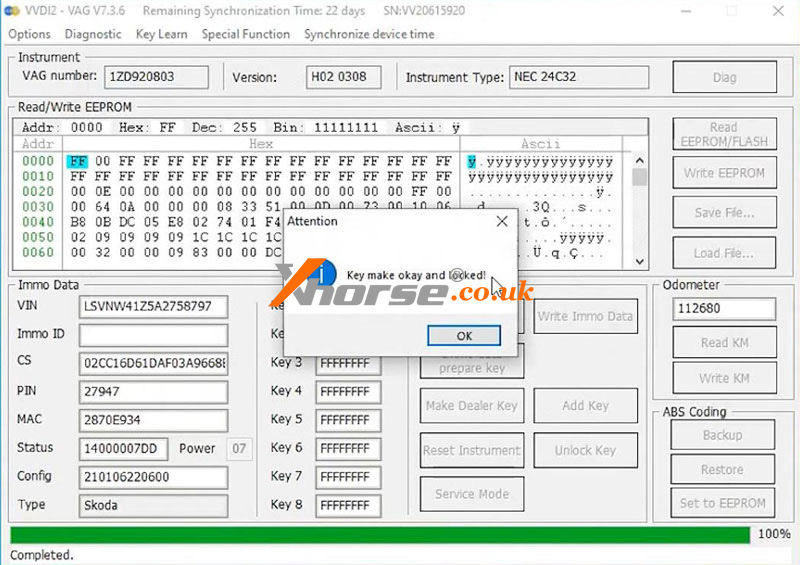
Key make okay and locked!
Put the super chip into the GODIAG coil for a test.
1) This indication means that the key is recognized.
2) The light of the key identifier flashes and then goes out indicating that the IMMO chip and the chip key are working properly.
Test the key on the car.
1. The light of the key identifier flashes and then goes out, indicating that the IMMO chip and the chip key are working properly.
2. The light of the key identifier flashes for a long time indicating that the chip key and the vehicle's IMMO system do not match, and the chip key needs to be re-matched.
3. The light of the key identifier does not flash which means that the vehicle's IMMO system is faulty. Please check the vehicle's IMMO system.
www.xhorse.co.uk
Oznake: xhorse multi prog
komentiraj (0) * ispiši * #
XHORSE Multi-Prog + Solderless Adapter Read CAS4+(5M48H) OK
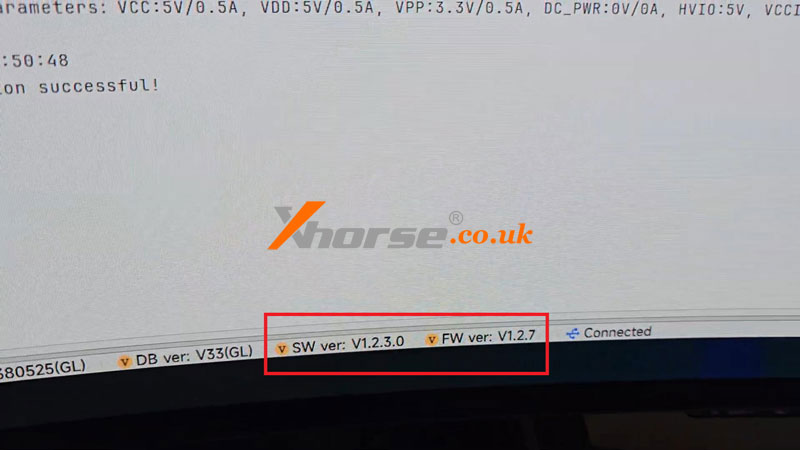
07.08.2024.The XHORSE Multi-Prog Software SW V1.2.3.0 and firmware V1.2.7 version has fixed the issue that the CAS4 Solder-Free Adapter is not working for multi-prog programmer.
FW V1.2.7 has fixed 9S12 reading issue to decode CAS4+(5M48H).
XDNP12 Solder-Free Adapter has 2 versions: V1.3 & V1.2.
The difference is that the new type adapter V1.3 has the relay inside, while the old V1.2 does not.
So the old V1.2 works perfectly while the V1.3 still needs some work.
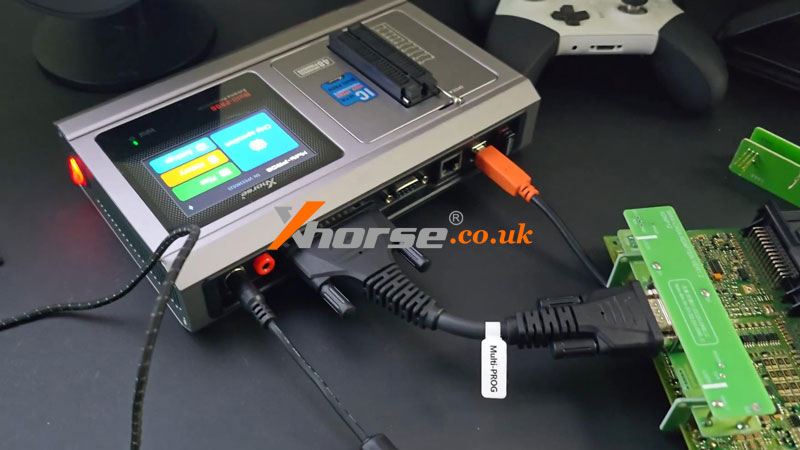
Following I'm going to demonstrate how Multi-Prog Programmer works.
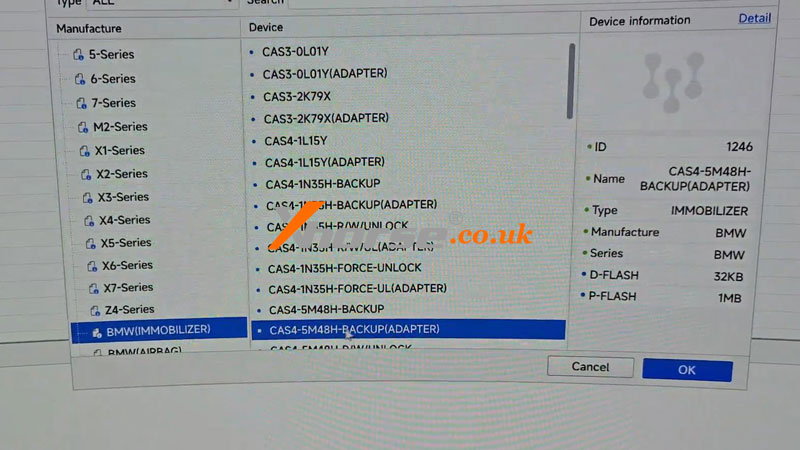
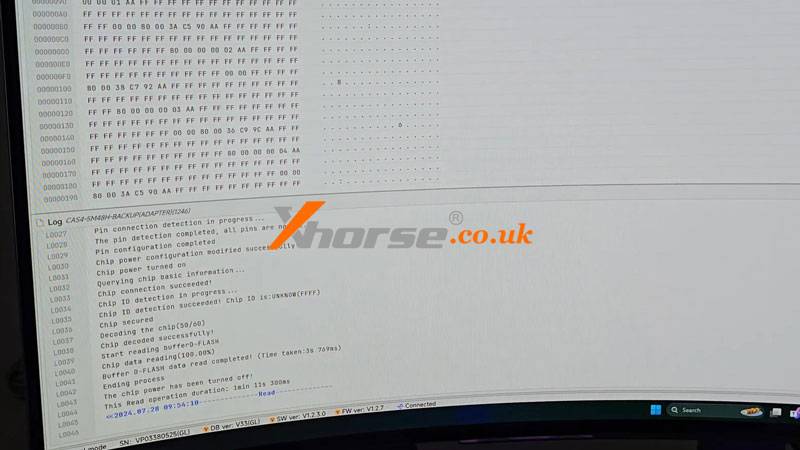
Device >> BMW(IMMOBILIZER) >> CAS4-5M48H-BACKUP(ADAPTER)
D-FLASH >> Read
Reading success.
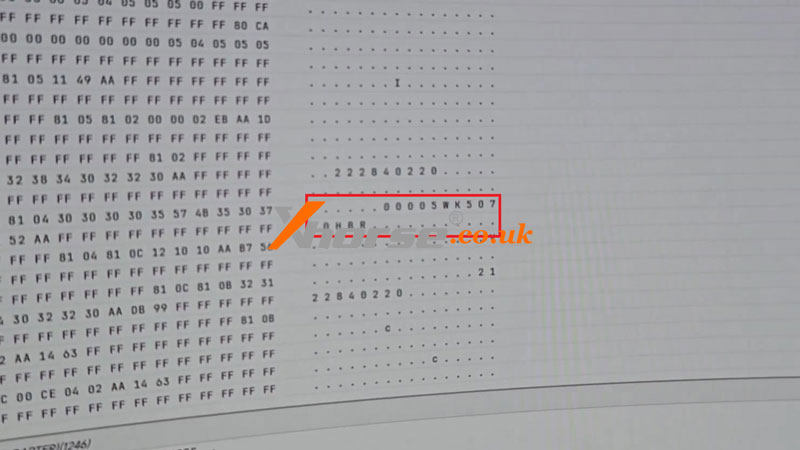
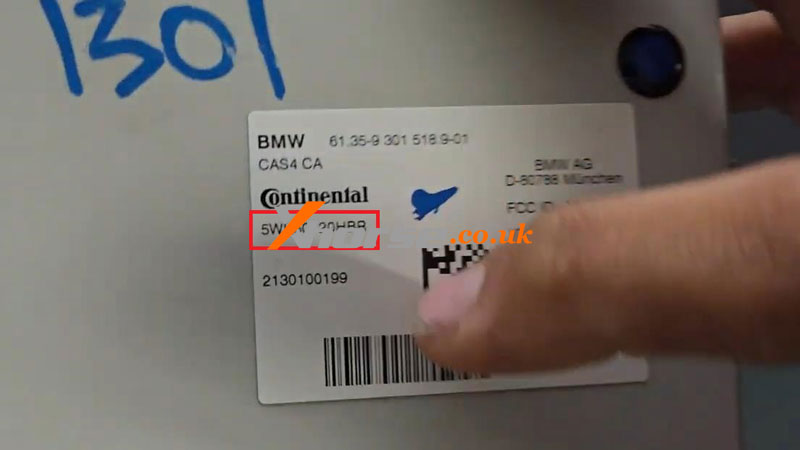
Let's check the file, all the data is right.
Like the module number 5WK50720HBR, it's all correct!
www.xhorse.co.uk
Oznake: xhorse multi prog
komentiraj (0) * ispiši * #
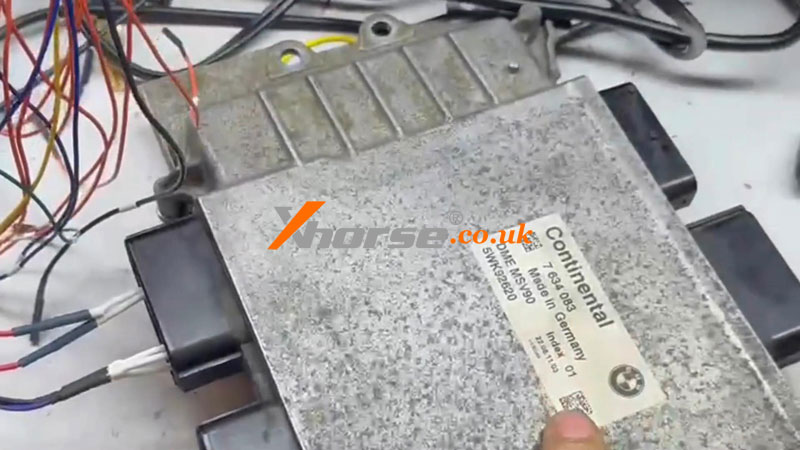
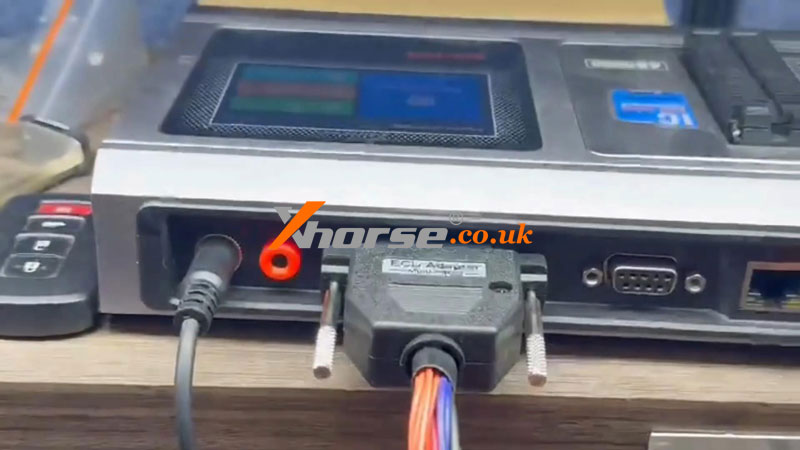
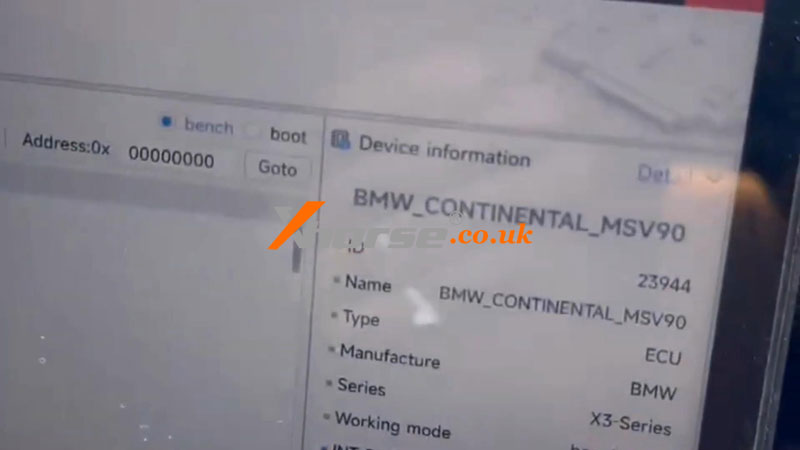
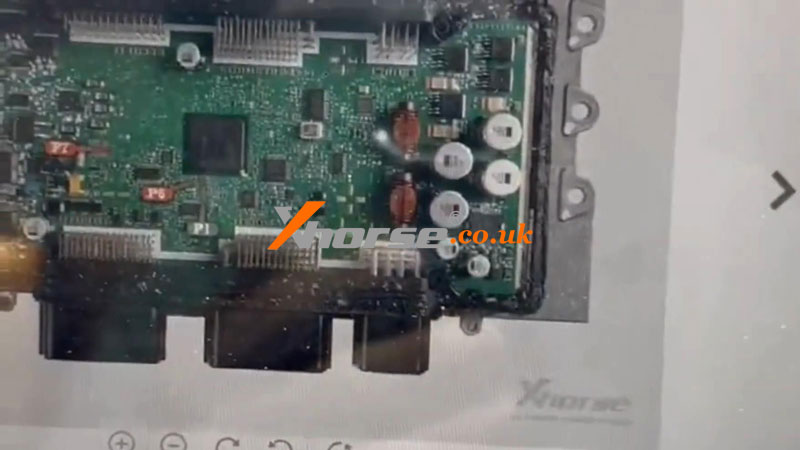
Xhorse Multi-Prog Unlock BMW X3 Continental MSV90 ECU
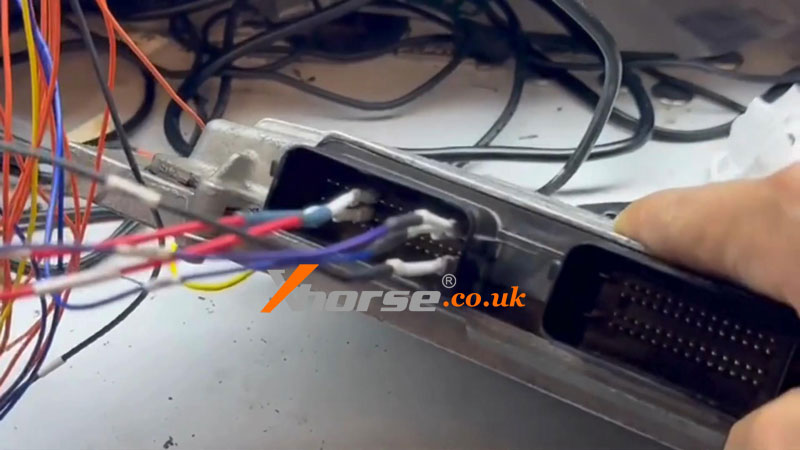
24.04.2024.Today I'm gonna show how to clone BMW X3 Continental MSV90 ECU with Xhorse Multi-Prog Programmer by bench. Here I prepared an old ECU and a new one.
Note:
Please ensure the Multi-Prog Software version is 1.44 or above.
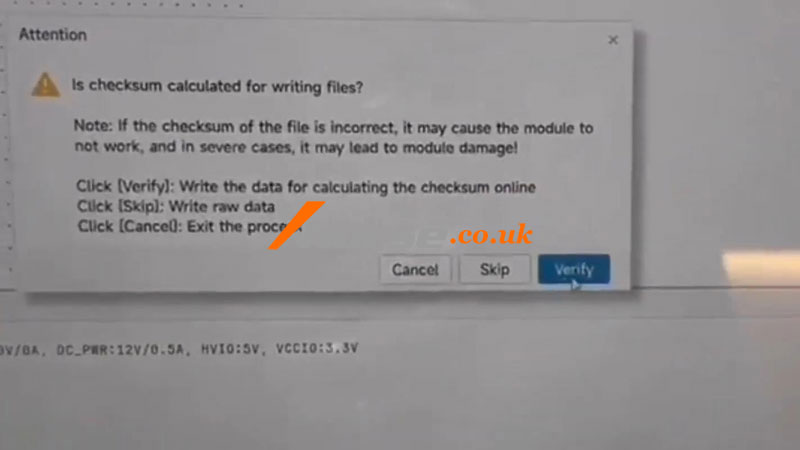
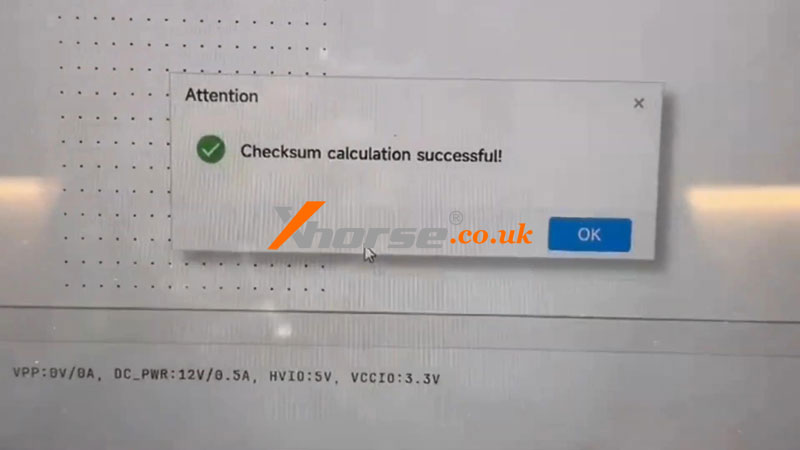
Verify file integrity before writing.
Open Multi-Prog software,
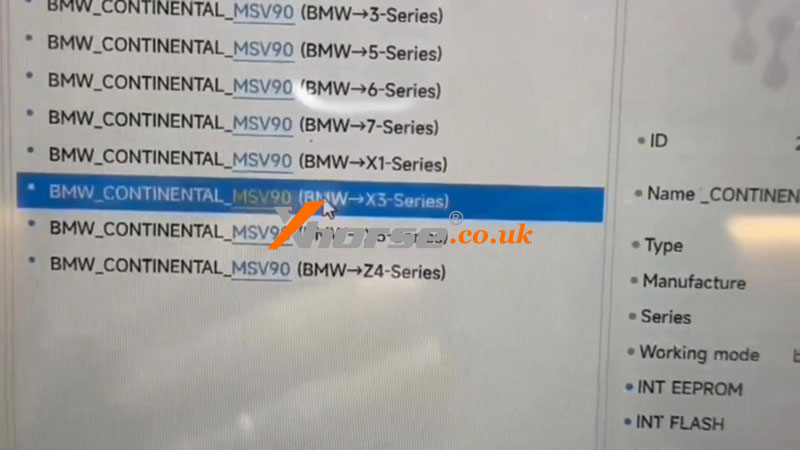
Device >> BMW_CONTINENTAL_MSV90(BMW -> X3 Series)
Follow the wiring diagram to connect Multi-Prog & ECU.
Read the EEPROM data file.
Read the FLASH data file.
Open and then verify to ensure the file's integrity.
Write info to the new ECU.
All >> Immobilizer
Write the serial number of the new ECU.
Device >> BMW_CONTINENTAL_MSV90(BMW -> X3 Series)
Select BENCH to write the info without removing the ECU.
Click EEPROM to write the file.
Click FLASH to write the file.
Open >> Write
Wait until the percentage until 100%...
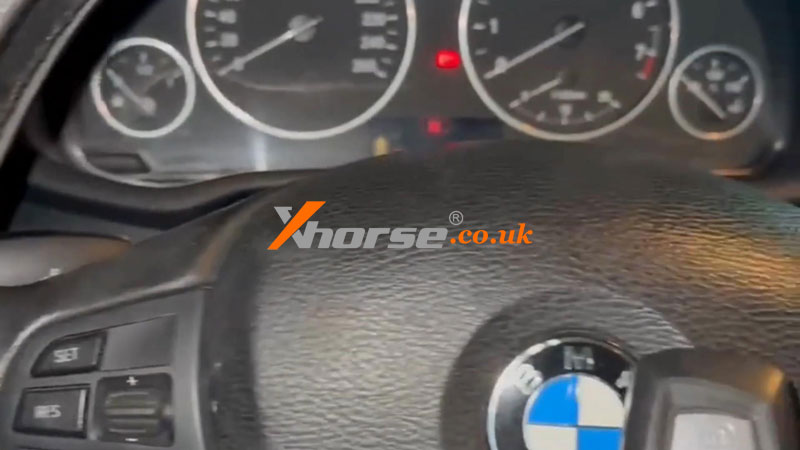
Starting the car.
Connect the new ECU to the car.
Start the car successfully.
www.xhorse.co.uk
Oznake: xhorse multi prog
komentiraj (0) * ispiši * #
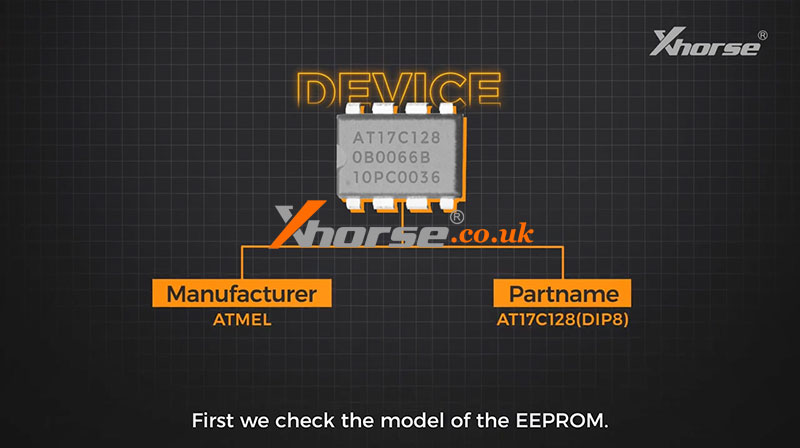
How to use Xhorse Multi-prog to read and write EEPROM
18.03.2024.This post will guide you on how to use Xhorse Multi-prog Programmer to read and write EEPROM.
First, we check the model of the EEPROM.
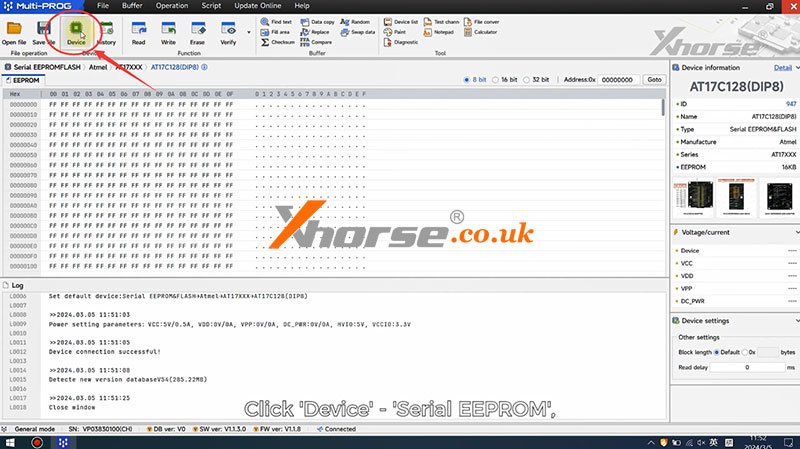
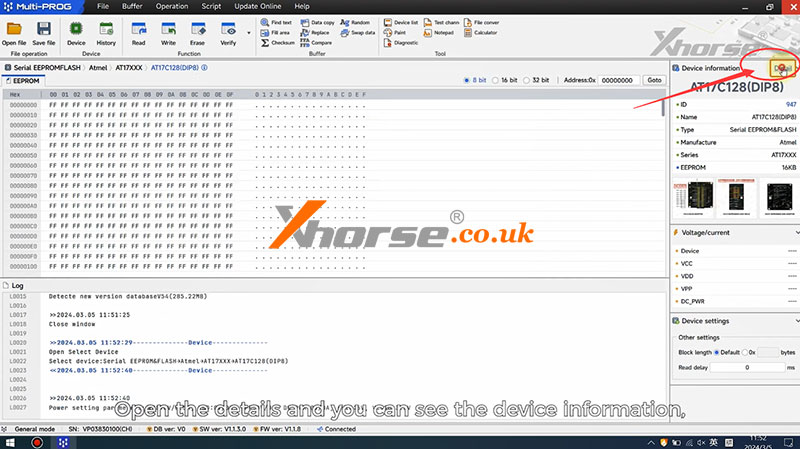
Then we open the Multi-prog software.
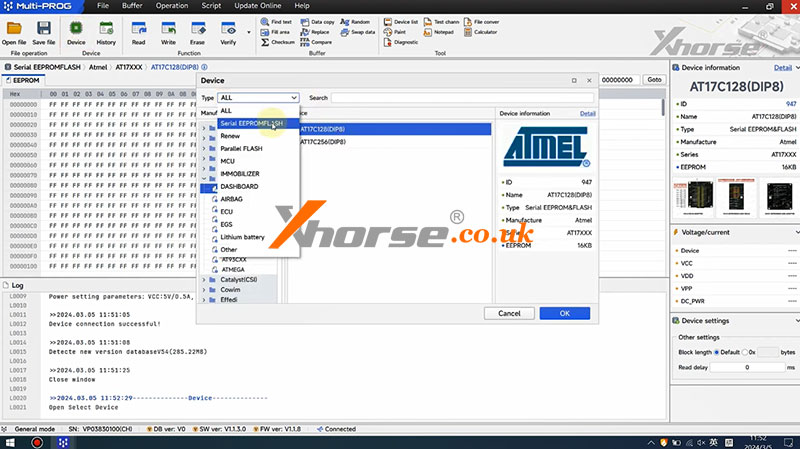
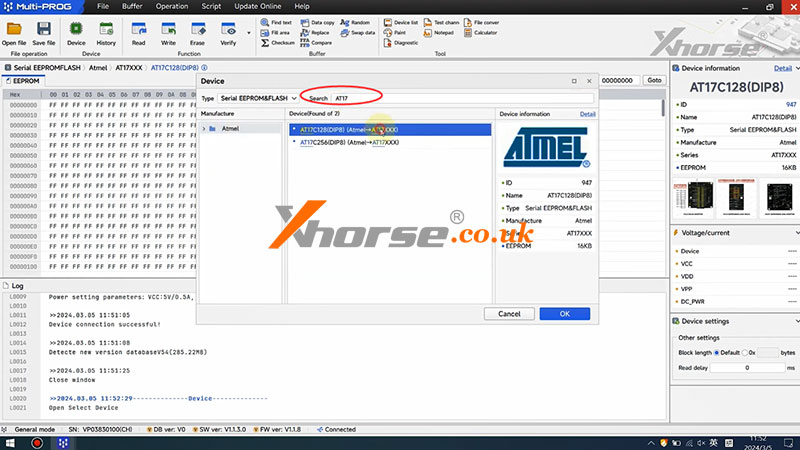
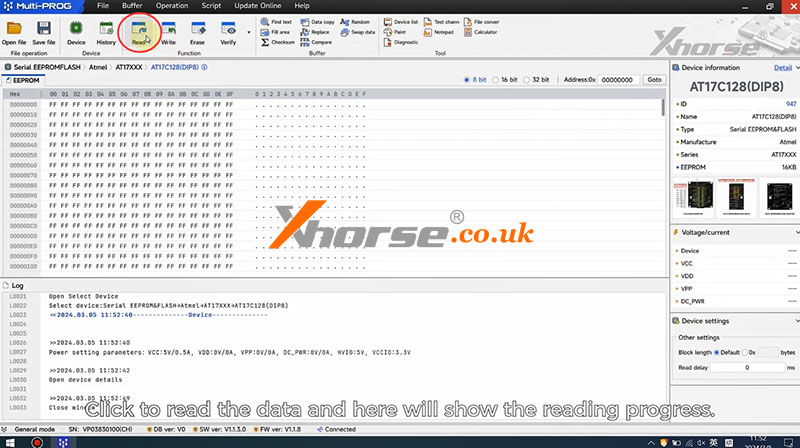
Click "Device">>"Serial EEPROM&FLASH", and enter the model number.
Open the "Details" and you can see the device information, important prompt, and adapter information.
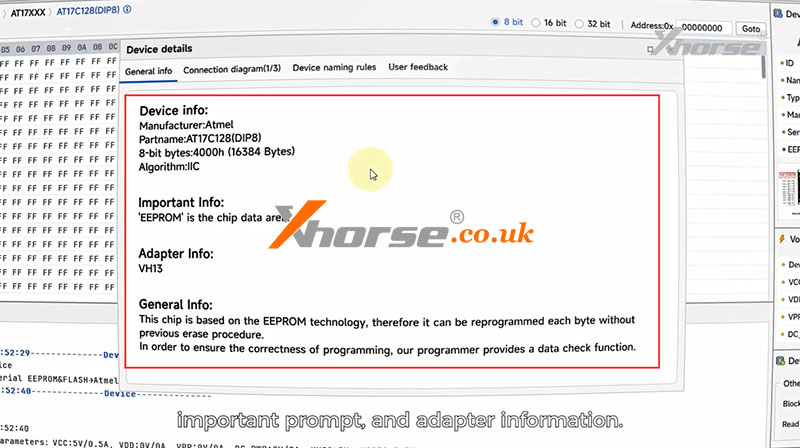
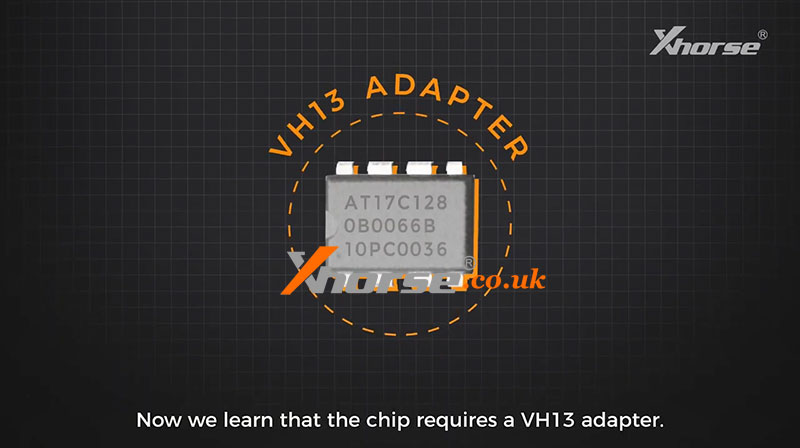
Now we learn that the chip requires a VH13 adapter.
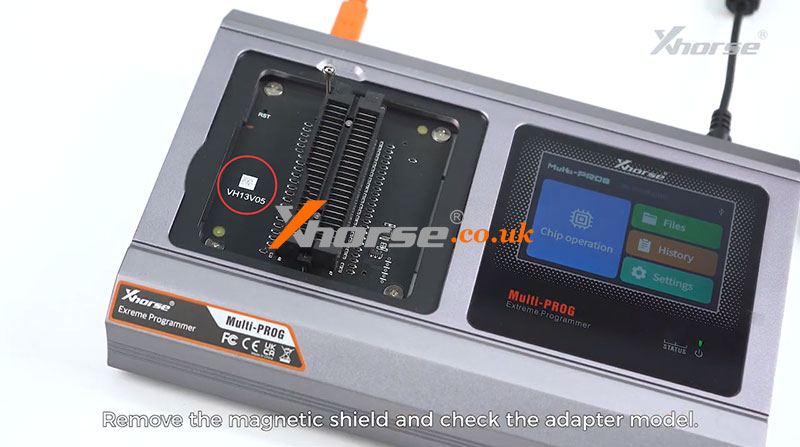
Remove the magnetic shield and check the adapter model.
Confirm that it is a VH13 adapter and put the shield back.
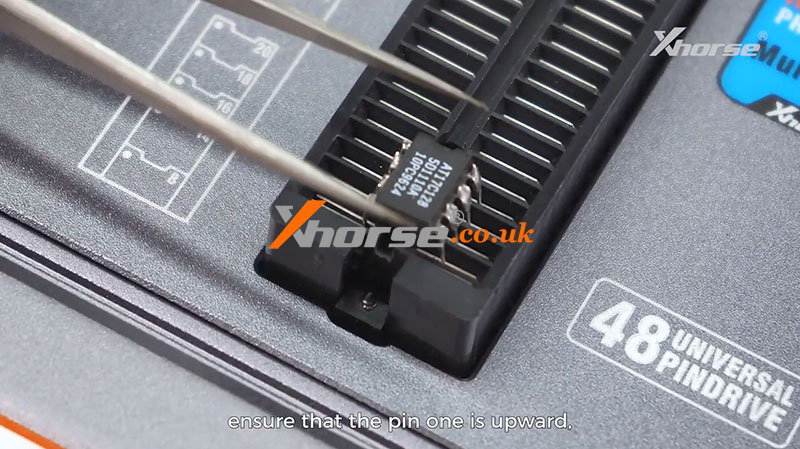
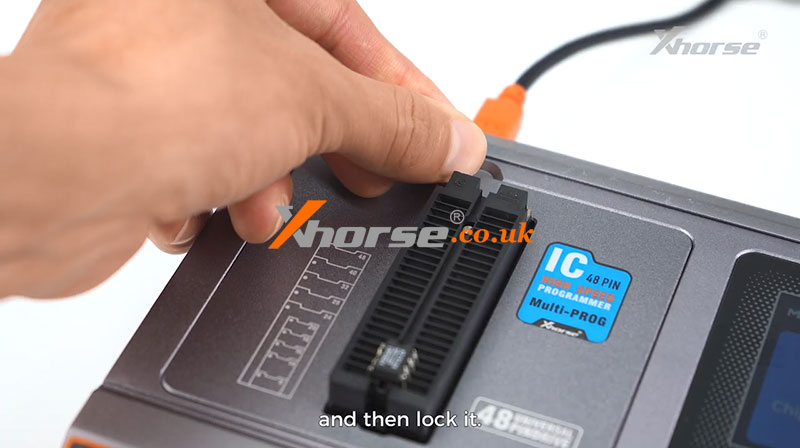
Place the chip aligned at the bottom, ensure that the pin one is upward, and then lock it.
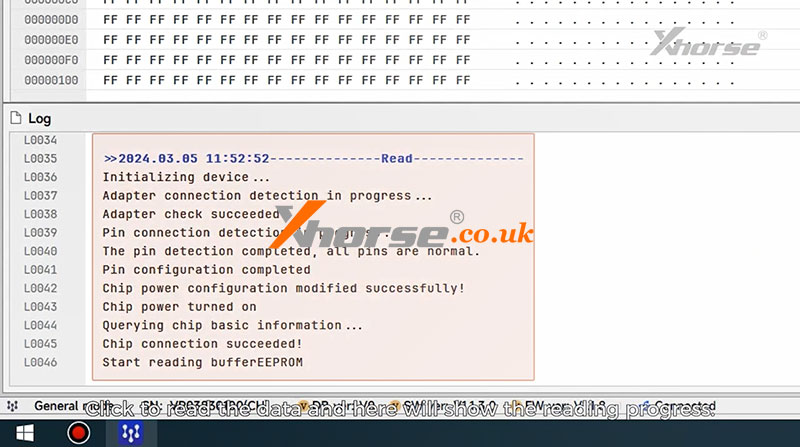
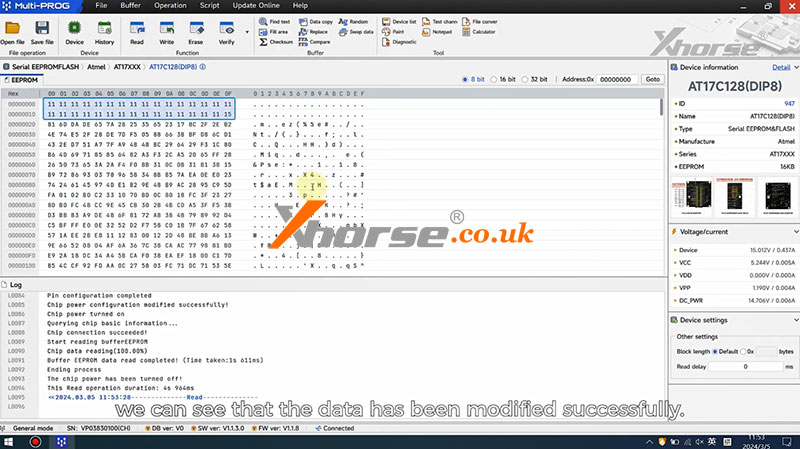
Click to read the data and here will show the reading progress.
It's successful.
We can modify the data just like this and click here to write it in.
When we read the data again, we can see that the data has been modified successfully.

For more details, please refer to the video below:
https://youtu.be/_CiGx94dqTs
www.xhorse.co.uk
Oznake: xhorse multi prog
komentiraj (0) * ispiši * #
