Pinout: Xprog Peugeut 307 MCH68912 Mask 3K91D
ponedjeljak , 25.06.2018.Look here: Xprog-m programmer is confirmed to work no issues with Peugeut 307 MCH68912 Mask 3K91D
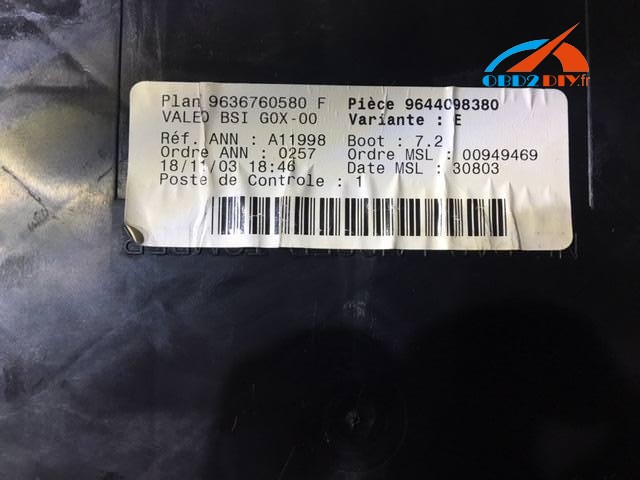
Car and BSI:
Peugeut 307
Valeo BSI as MCU MCH68912 Mask 3K91D
ECU programming tool: Xprog-m
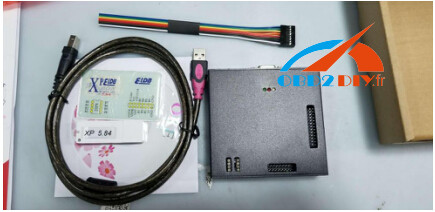
Source: http://www.obd2diy.fr//x-prog-box-ecu-programmeur-xprog-m-avec-usb-dongle.html
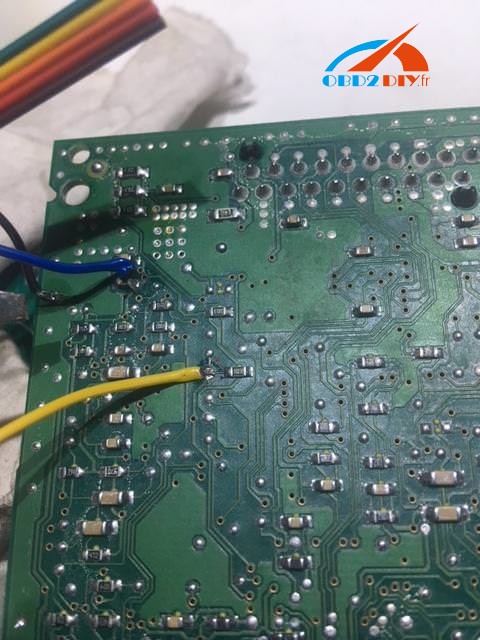
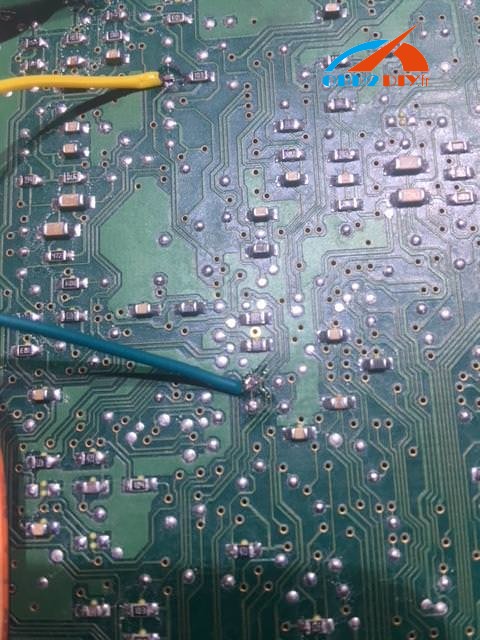
Pinout:

Connection:
komentiraj (0) * ispiši * #
How to use VVDI MB to program Mercedes W221 all keys lost?
vvdi mb bga tool benz key programmer tool programs Mercedes W221 all keys lost in 5steps.
Used renew EIS - keyless go.
Guide:
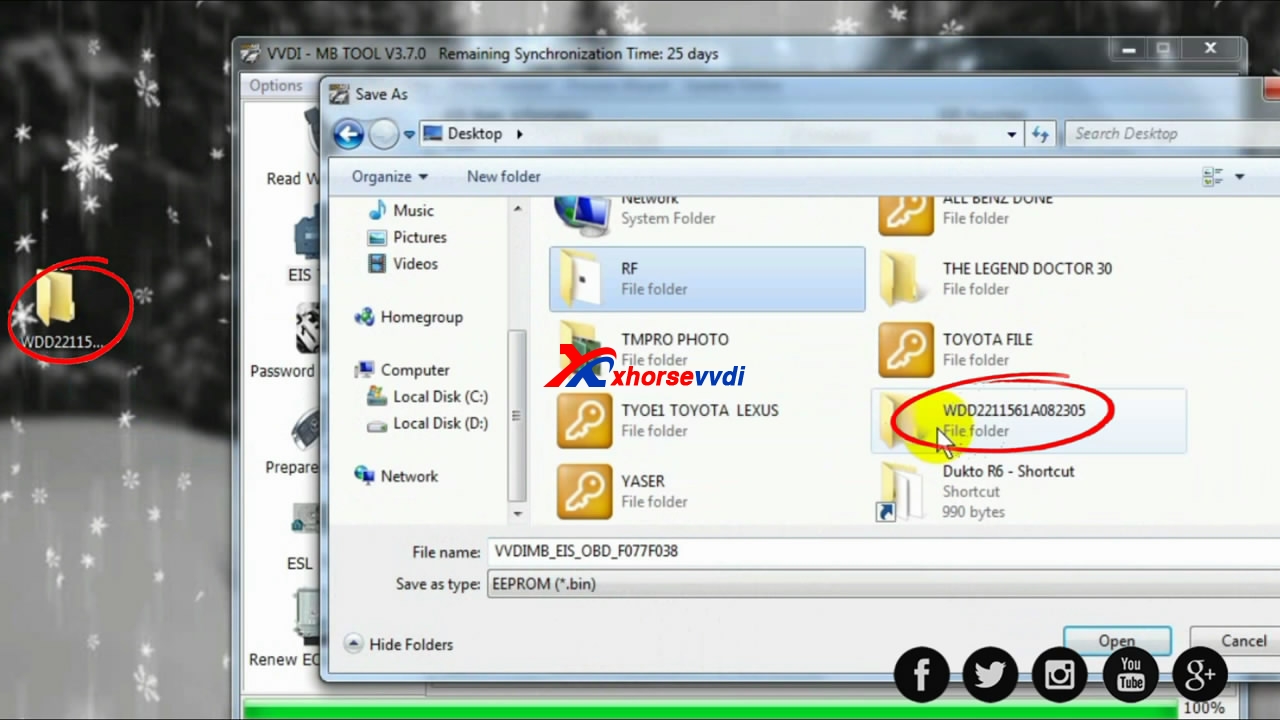
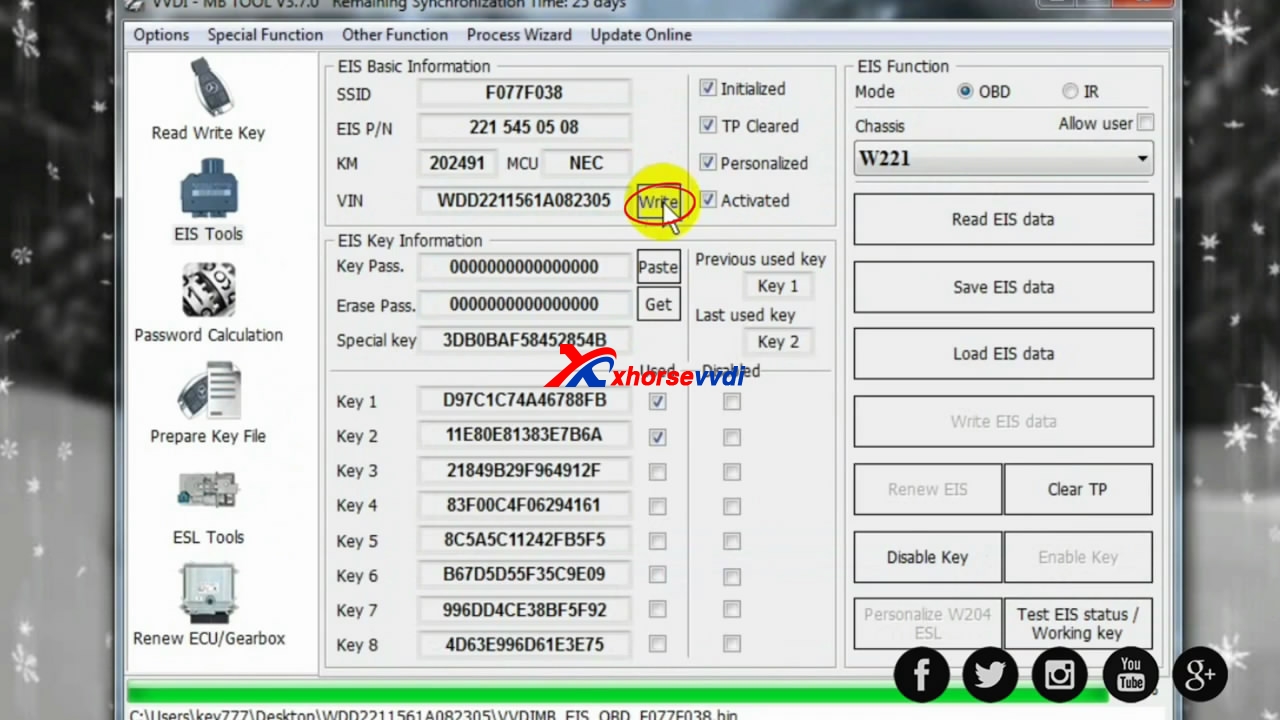
Step 1. Read original "EIS" data without reading password and save data to new file with vin number.
Connection to device, please wait...

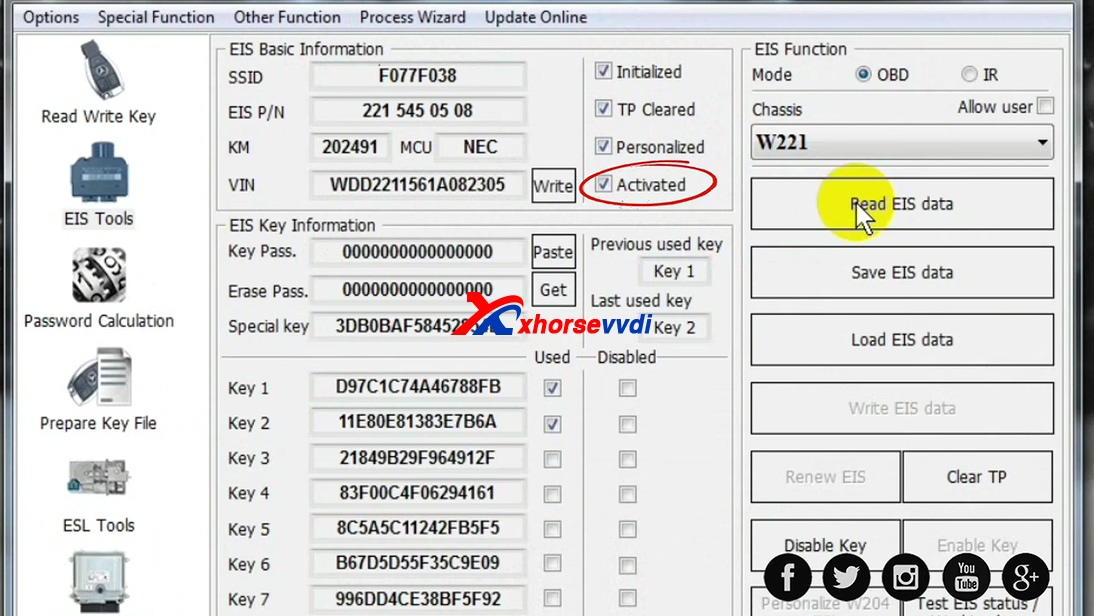
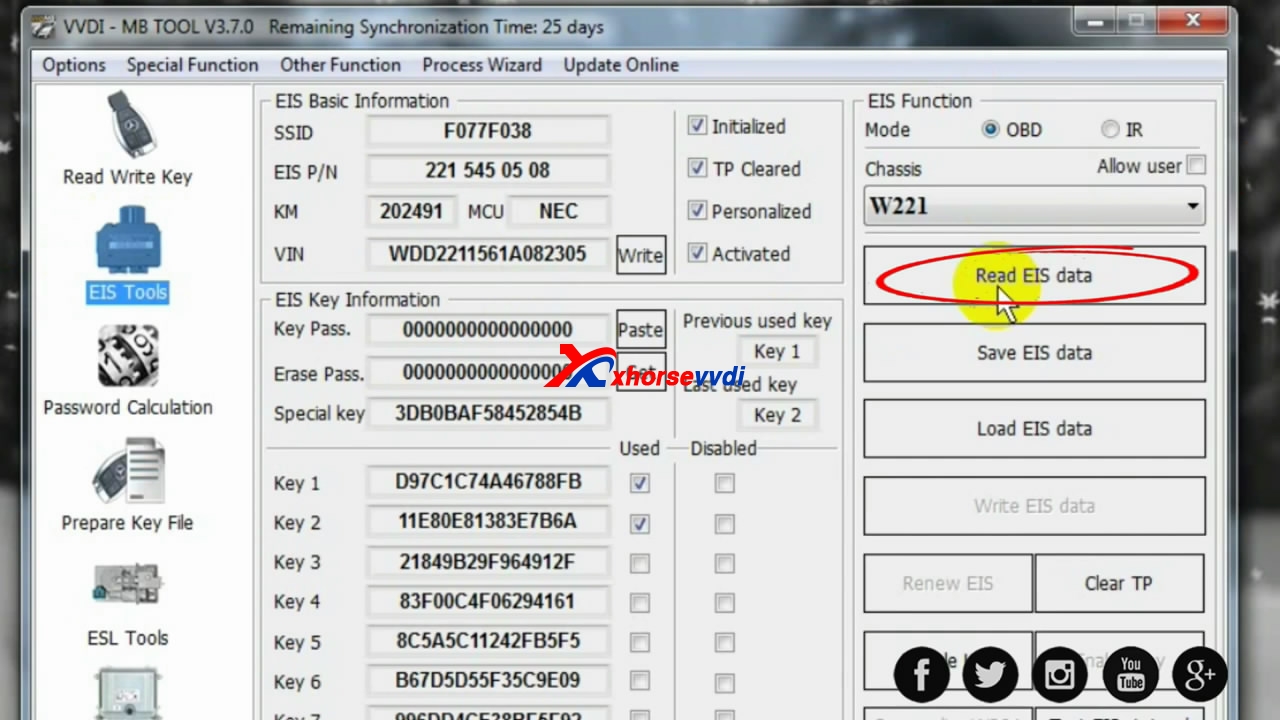
Read EIS data
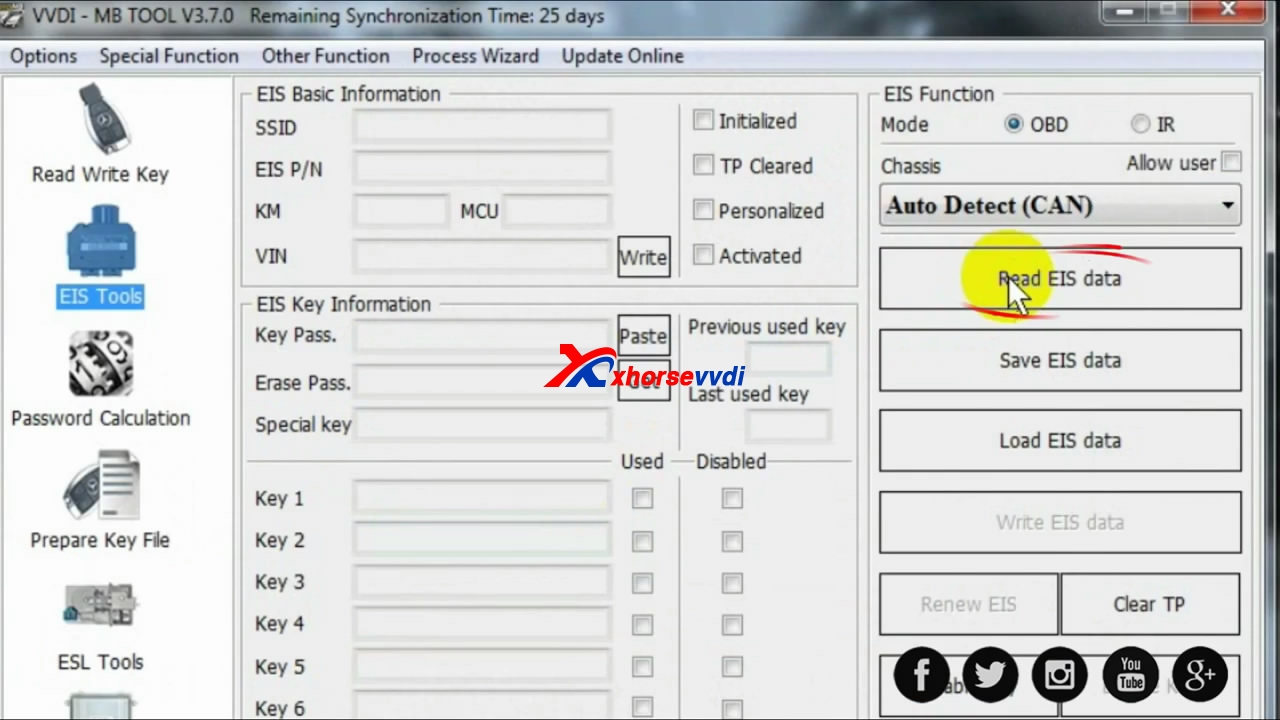
Copy VIN, ensure it's activated.
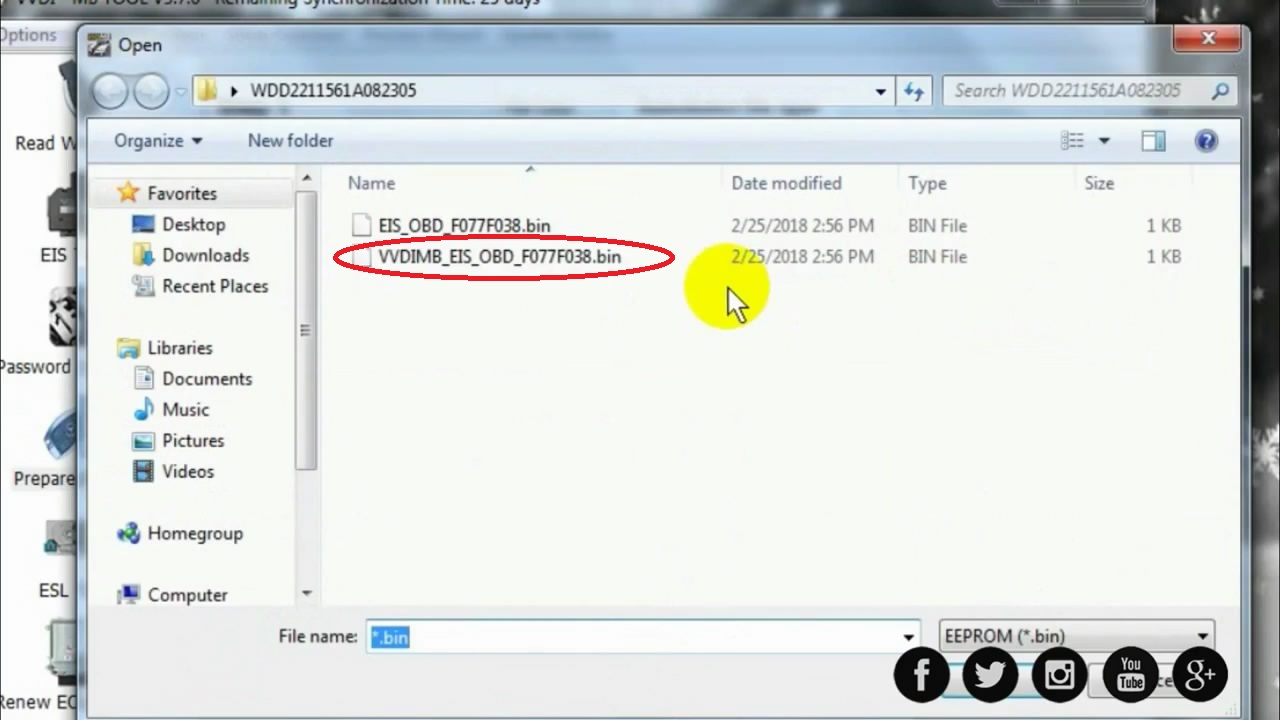
Create a new folder named as the VIN number.

Click on "Save EIS data".
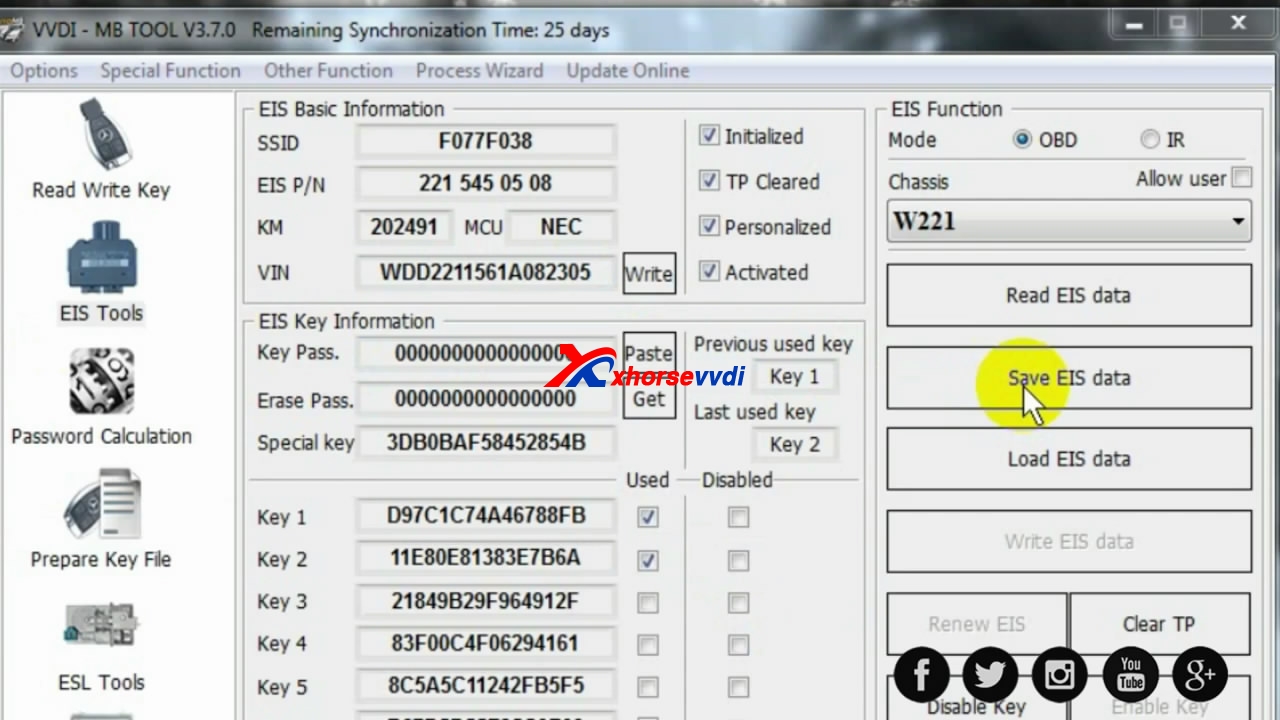
Save to the desktop to the folder in the name of VIN.
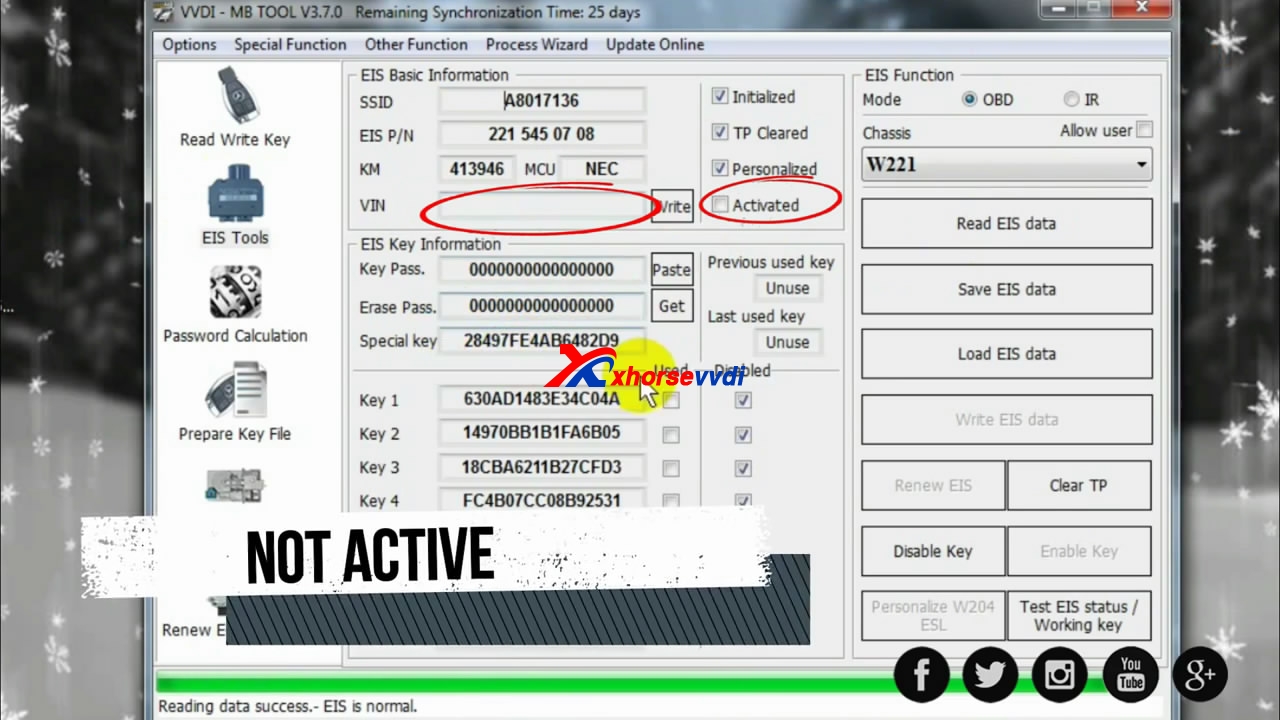
Step 2: Connect new/ renew "EIS".
Click on "Read EIS data".
You can see the VIN box is blank, it's not activated.
Click on "Load EIS data".
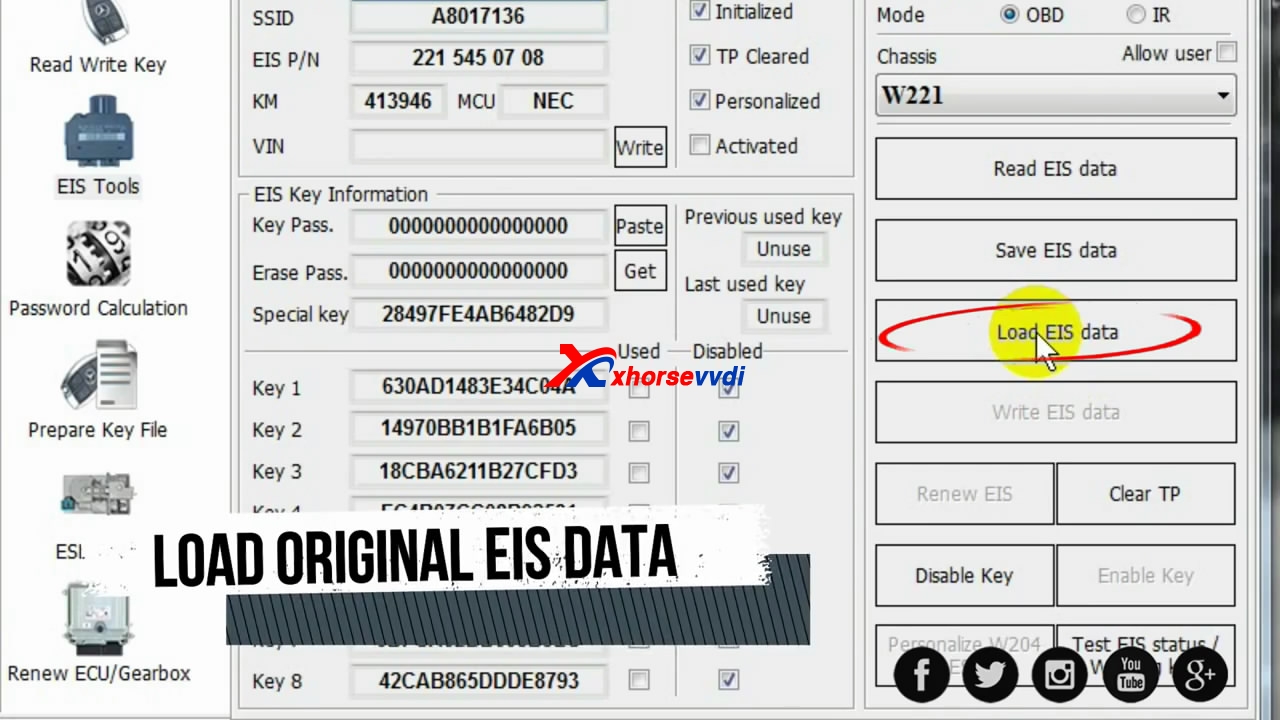
The VIN box is activated, click on "Write".
Click Yes.
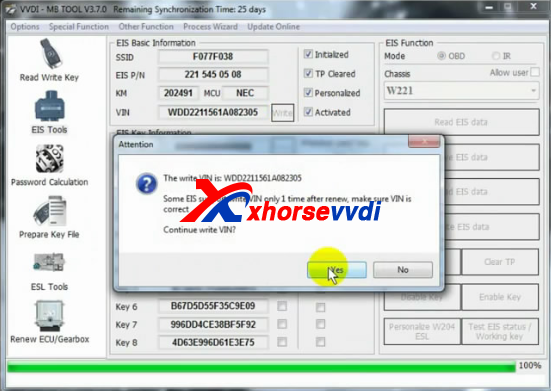
Write VIN success.
Connect "IR".
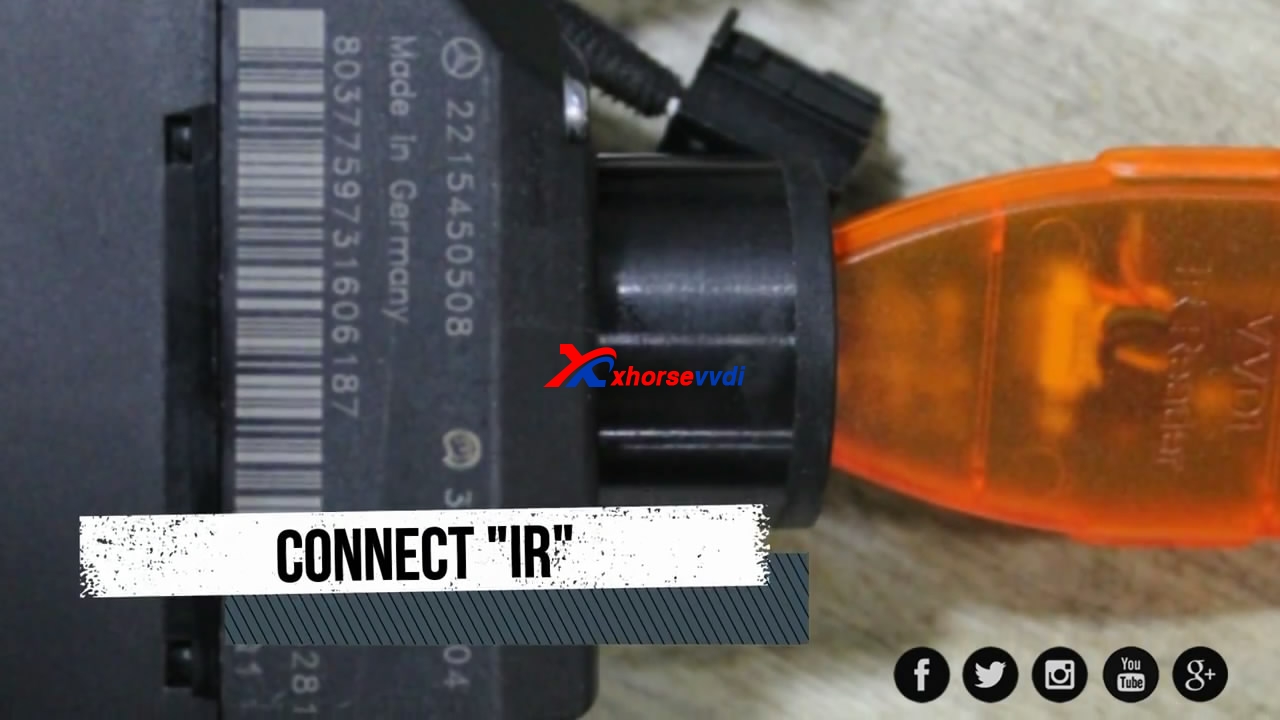
Tick on "IR"
Click on "Write EIS data".
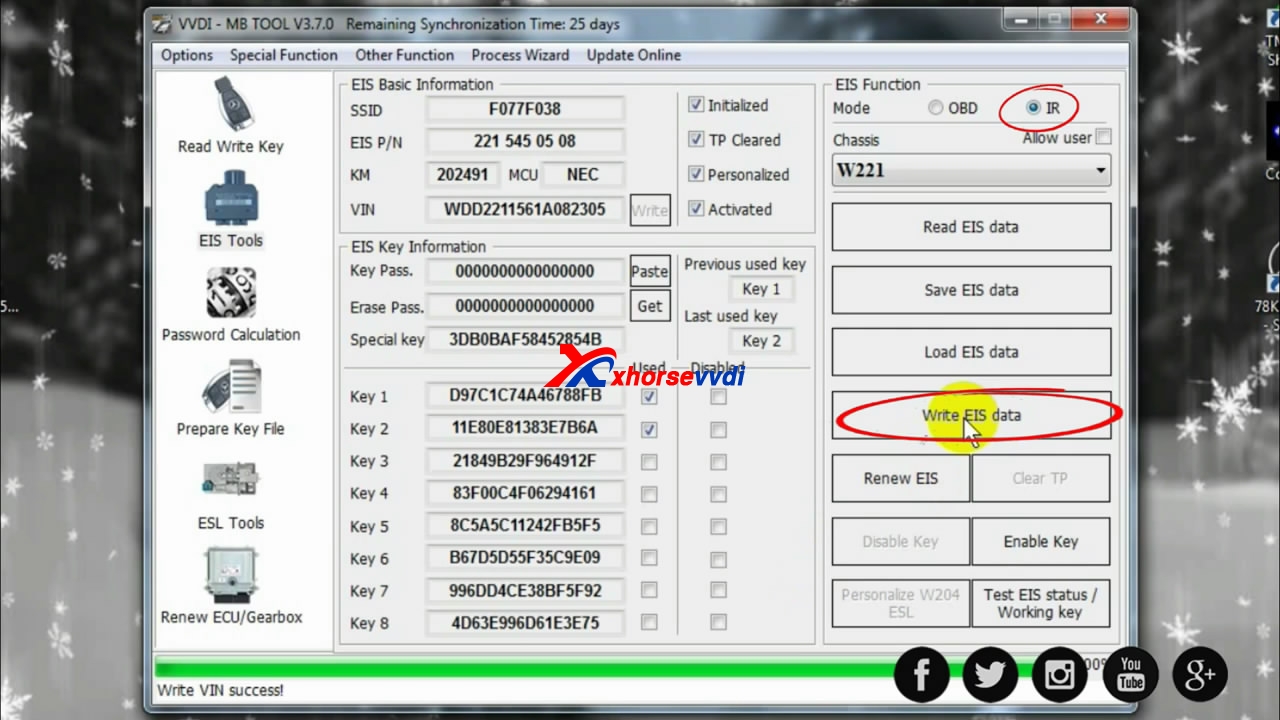
Click "Yes".

Click "Yes".

Writing data, please wait...
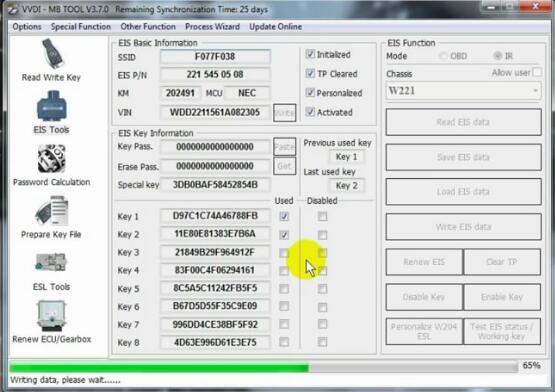
Writing data success.
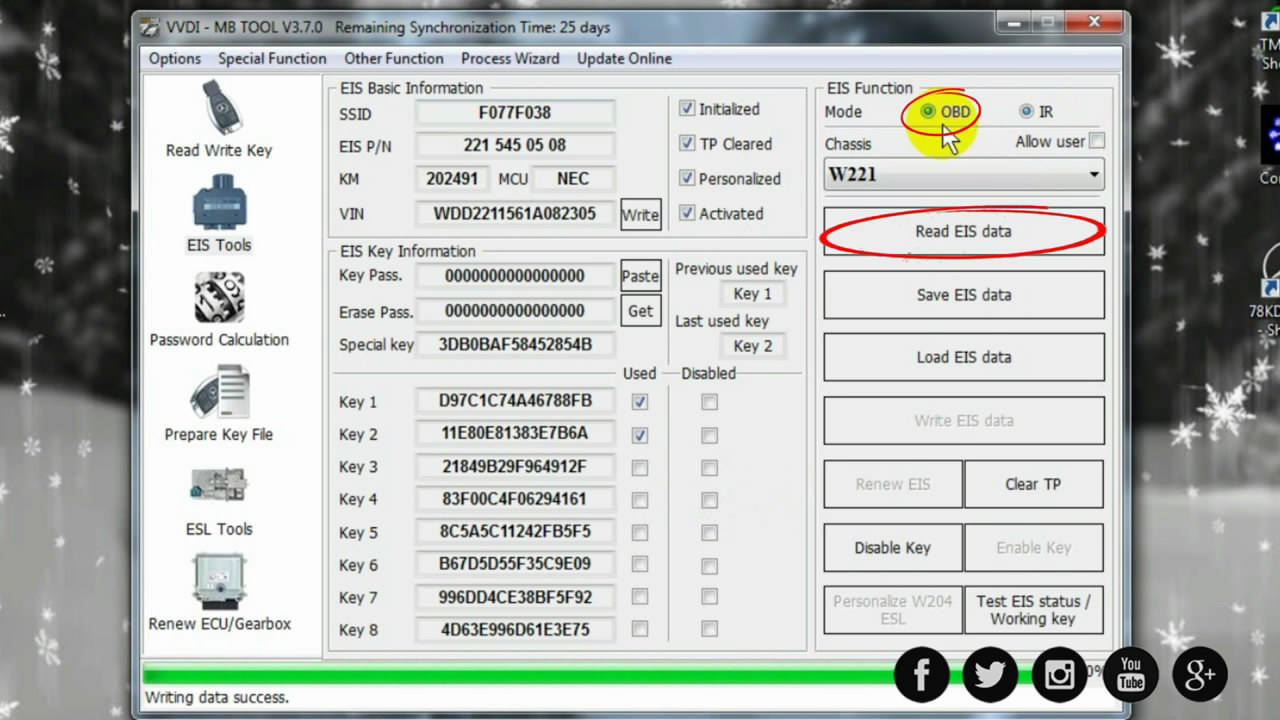
Tick on "OBD" then "Read EIS data".
Reading data success, EIS is normal.
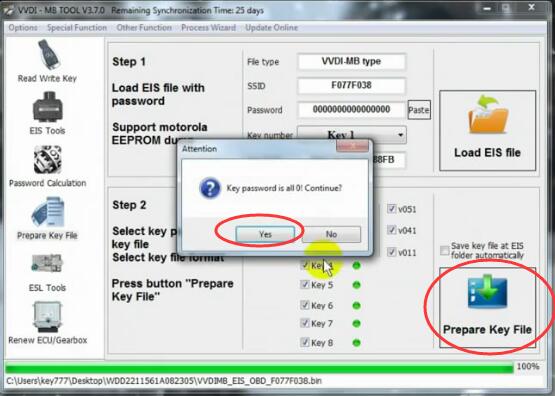
Step 3: Prepare key.
Click on "Prepare key file", then "Yes".
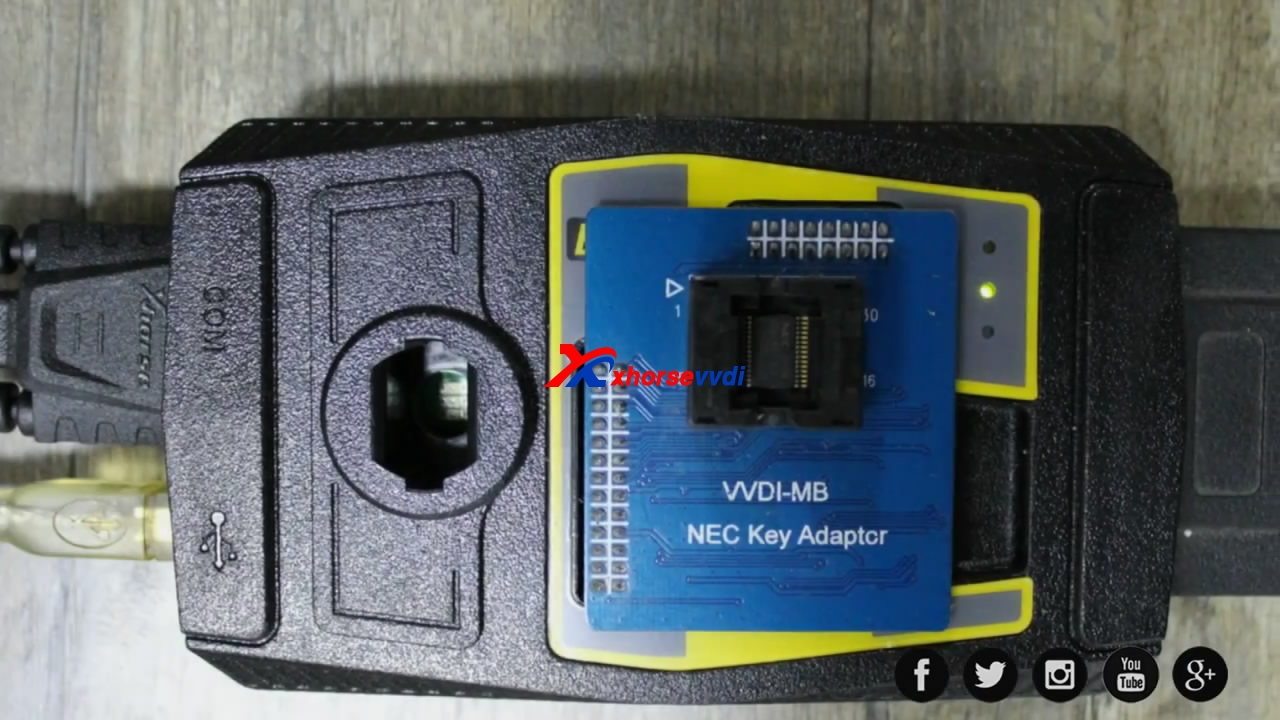
Step 4: Move "NEC" of remote and put in adapter VVDI "NEC" and renew.
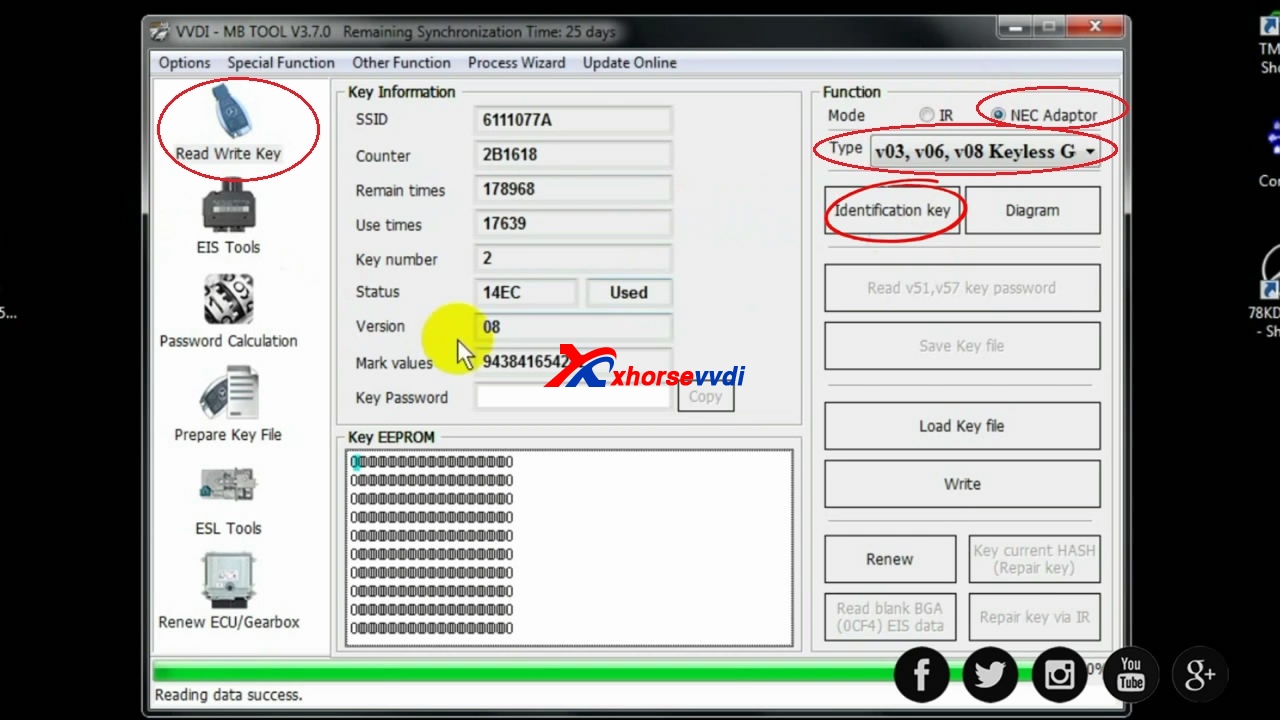
Click on "Read write key", then "NEC adaptor", then "V03 v06 v08 keyless Go", then "Identification key"
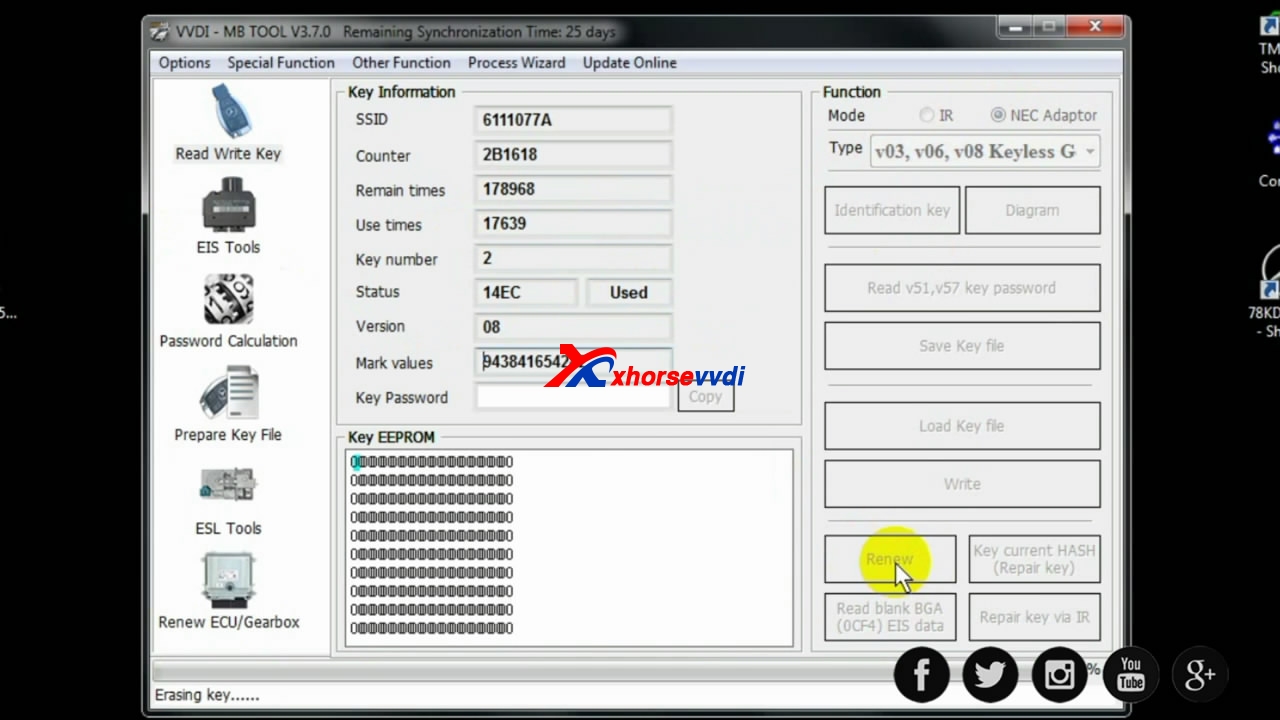
Click on "Renew"
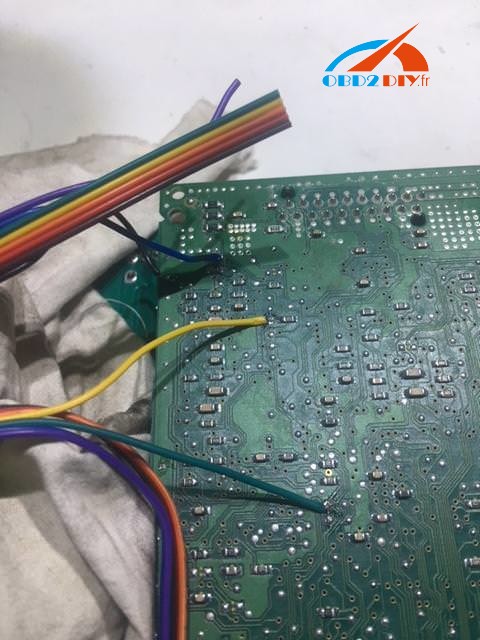
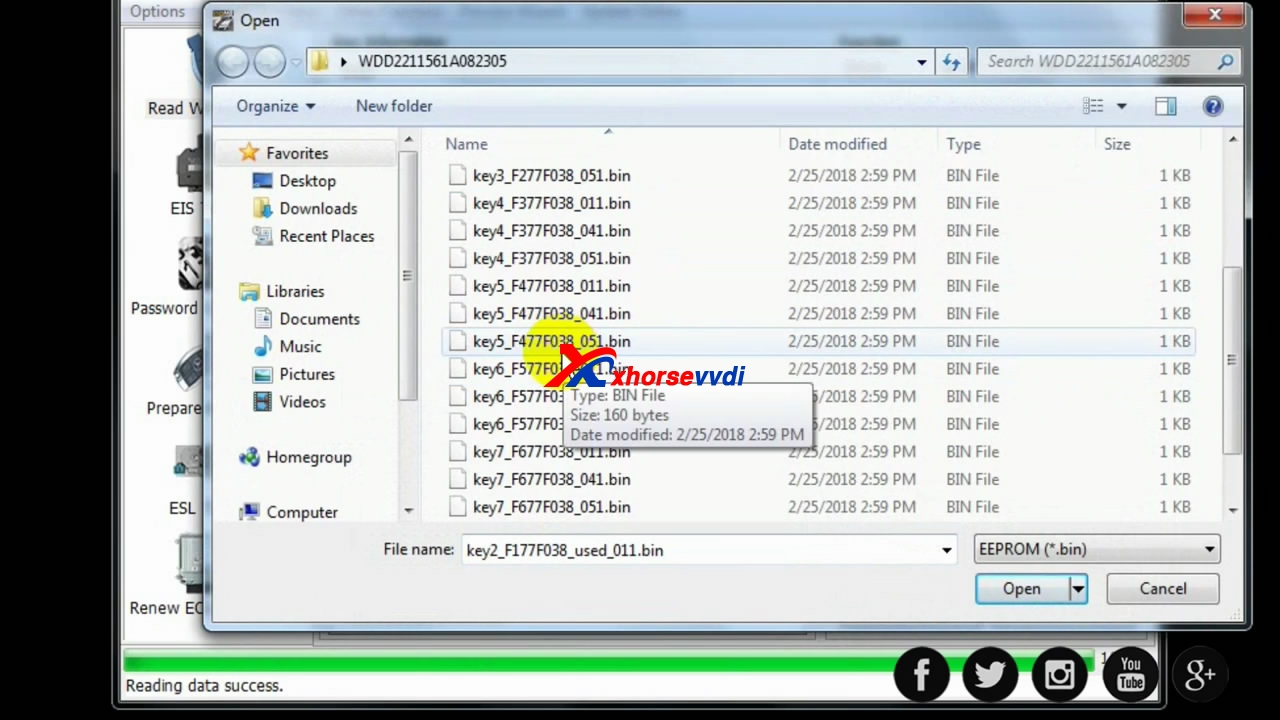
Step 5: Attach "NEC" to "PCB" and program remote key "IR".

Load key file


Writing data, please wait...

Reading data success.
Done
You can start car now.
www.xhorsevvdi.com
komentiraj (0) * ispiši * #
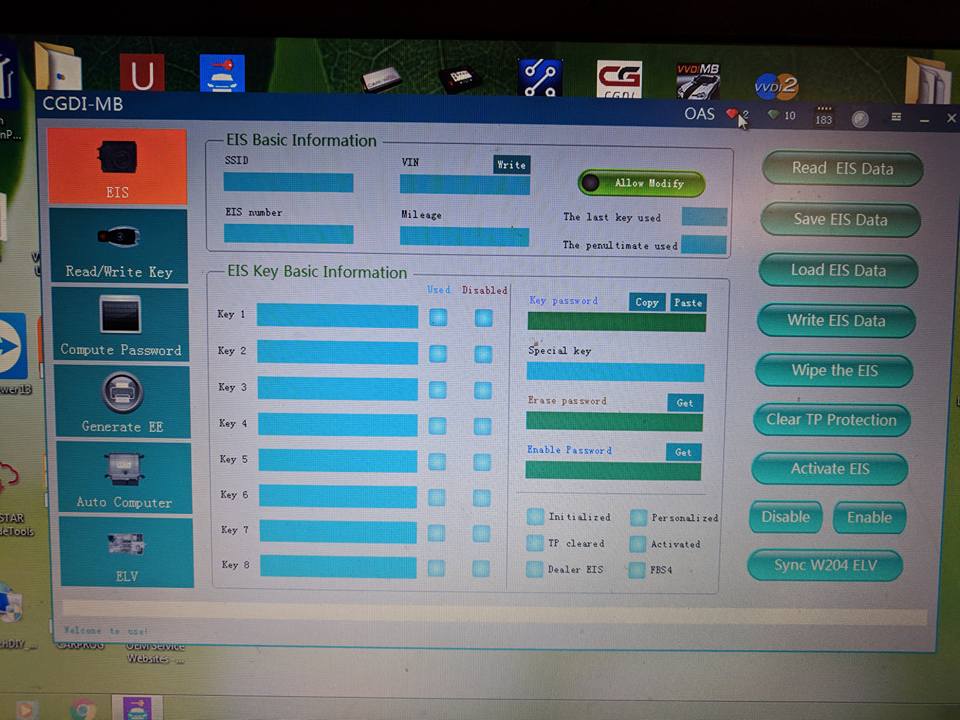
Confirmed! CGDI MB can OBD correct odometer for Mercedes
srijeda , 13.06.2018.CGDI MB Prog updated: (04-06-2018)
- Add direction lock simulator function: support direction lock simulator to unlock with one click, write data by one click, read password by one click;
- Add the direct writing direction lock password function, needn't to wipe out the data of the lock before synchronize ;
- AddOBD odometer correctionfunction, currently supports meter type:
C(W204)/GLK(X204)/CLK(207)/E(W212)/SLS(197)/CLS(W218)
R-Class(W251)/GL(X164)/ML(W164),
E-Class(W211)/CLS(W219),
S-Class(W221)/CL(216),
C-Class(W203)/CLK(W209),
SLK(R171); - Add gateway EE/FLASH OBD direct reading and writing operations, currently supports gateway types:
C_Class_W204, E_Class_W211, E_Class_W212, CLK_X204, CLK_W207, SLS_W197, CLS_W218
M_Class_W164, R_Class_W251, SLK_R171, GL_X164,
S_Class_W221, CL_W216 - Add non-HC05 lock format file, original data type save function, then modify the Mercedes lock data with one click;
6. Fixed the problem that a few BE keys could not be read after they were written;
7. Add a button to clear the DTC function;
8. Fix the problem that some of the geared computers cannot be wiped out;
CGDI MB is working perfect:
http://www.obd2diy.fr//cgdi-prog-mb-benz-key-programmer-plus-eis-elv-test-line.html
Tech support from http://www.obd2diy.fr/
komentiraj (0) * ispiši * #
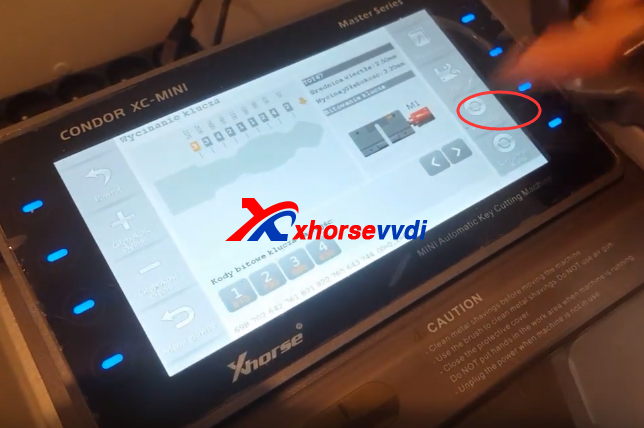
Condor XC-MINI and VVDI Key Tool Toyota G Cloning Steps
Condor XC-MINI Automatic Key Cutting Machine cut new Toyota Key,then use VVDI Key Tool Clone G key.This blog is about the Condor XC-MINI and VVDI Key Tool Toyota G Cloning Steps.
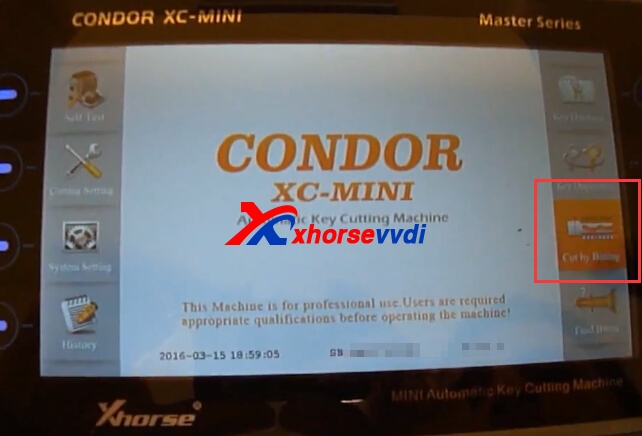
Part one:Condor MINI Cut Toyota TOY47 key
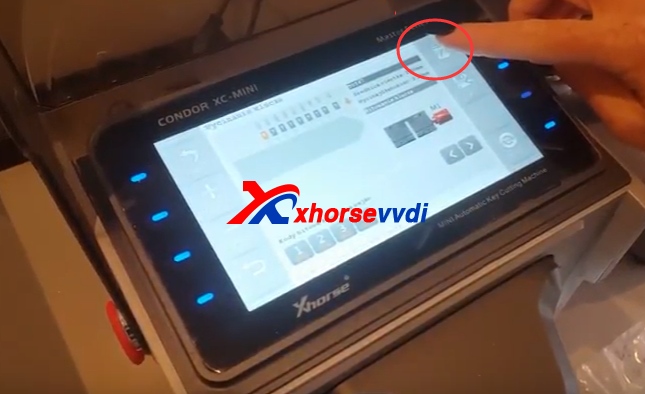
1.Start Condor mini key cutting machine,choose "cut by bitting"
2.Choose detailed Toy47 key type.
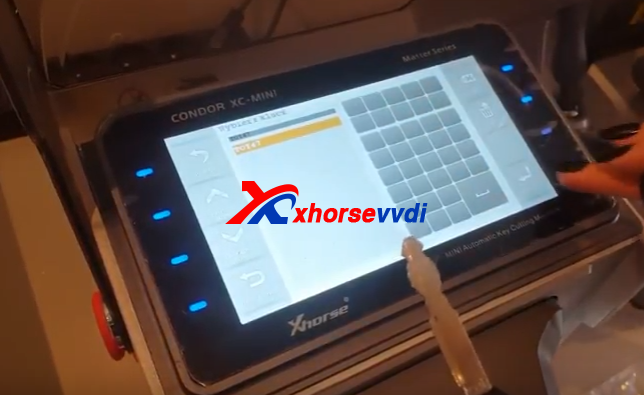
3.Put the original key on clamp,tighten it.
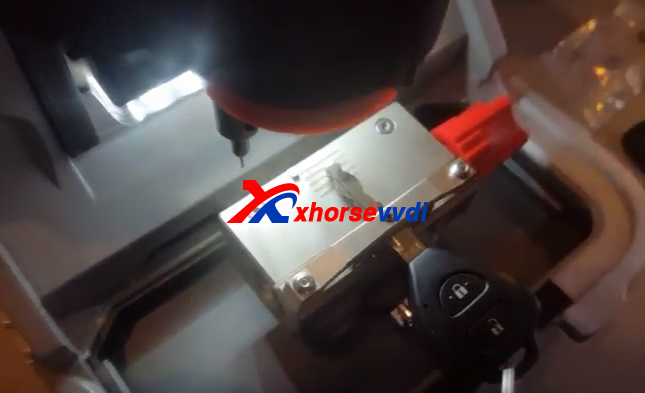
4.Press "Key Decode",then start to decode.
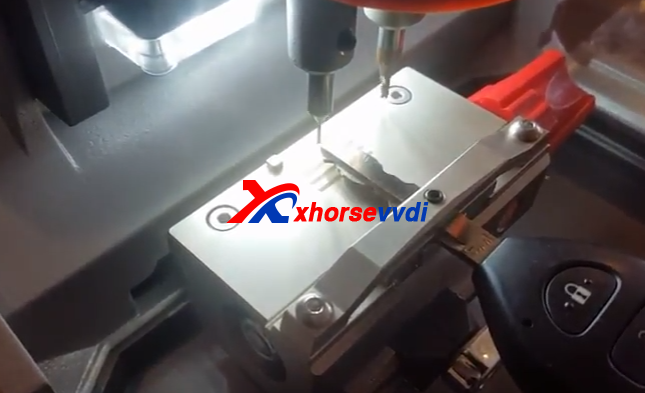
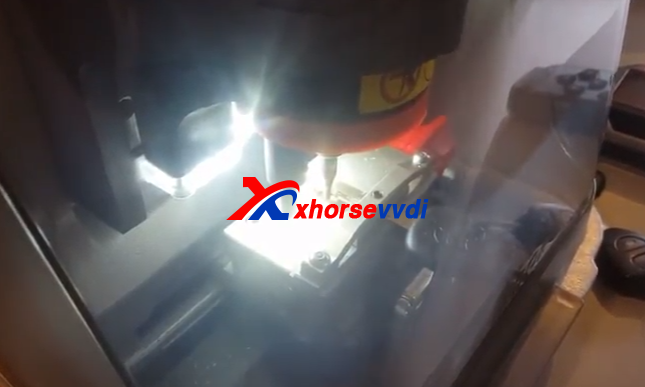
5.After decode,put the new key blade on the clamp.
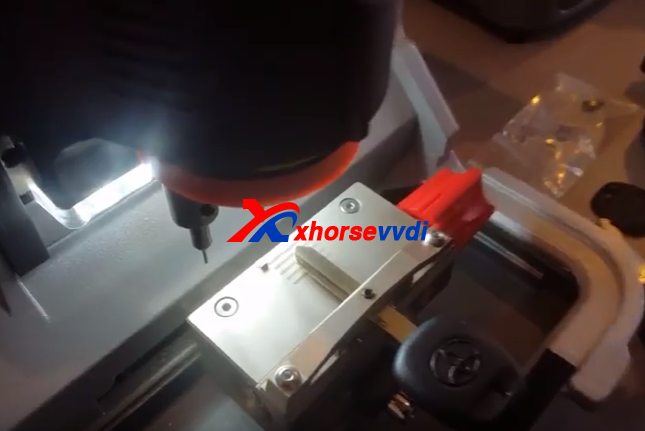
6.Cut new key
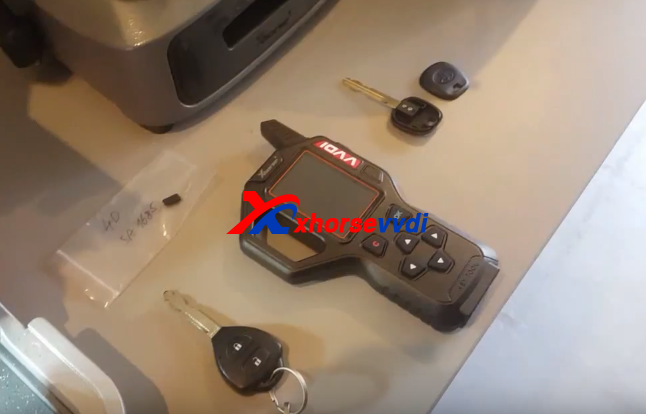
Part Two:VVDI Key Tool Toyota G Clone
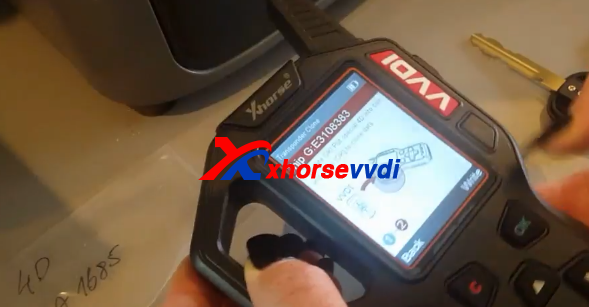
1.VVDI Key Tool,choose "Transponder Clone" function.
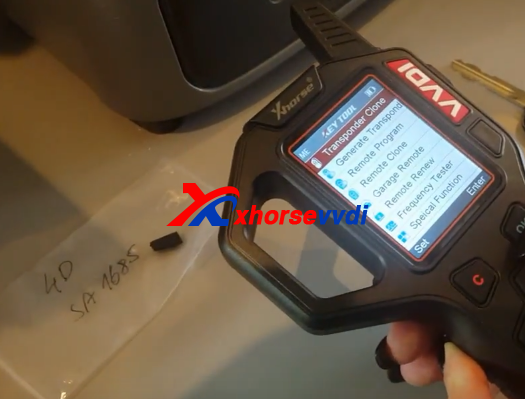
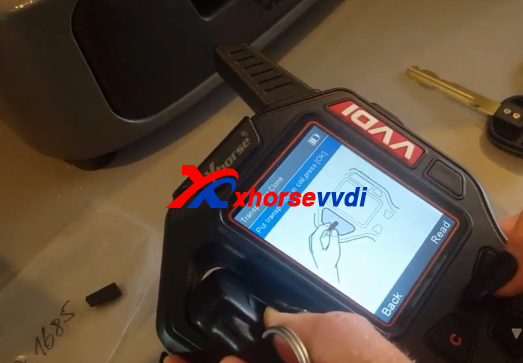
2.Put the original key to read.
3.Put the chip to write.
4.Write success.
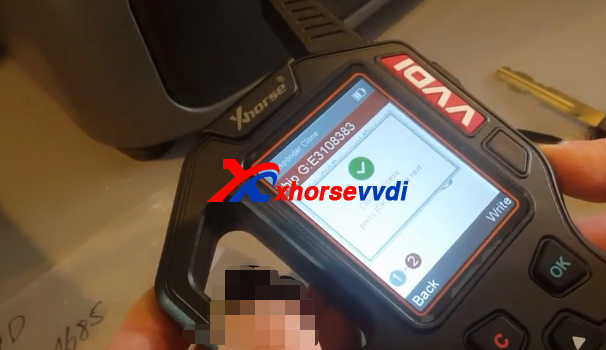
5.Put the chip into new Toyota key.End.
komentiraj (0) * ispiši * #
Foxwell NT301 Review
If you are looking for a best OBD2 scanner, you need to check out Foxwell NT301 OBD2 and EBOD Code Reader. This OBD2 scanner is no ordinary OBD2 device. It’s compatible with any car: SUV, light-duty truck or a minivan manufactured worldwide from 1996 and . It is multilingual menu options and DTCs definitions help read or erase DTC or engine fault codes as well as I/M readiness. The Foxwell scanner also provides on-screen DTCs definitions and has a built-in DTCs look up library to help you accurately determine why the check engine light turned on in your car.

- Best Function: All OBD2 Protocol, Multi language
- Foxwell NT301 Design
- User Rating
Foxwell NT301 Function
Foxwell NT301 OBDII code reader has a large color LCD display to make navigation very simple and easy. The tool is protected by a rubber surround to absorb any minor shock from use. The unit does not require any batteries to operate. All you need to do is plug scanner into your car’s OBD2 (DLC) port and it will power up using the car’s battery. You can then start the vehicle to read any trouble codes or pending codes. If there are trouble codes, you can use this tool to erase the code. Of course you should fix the issue or else the code will return.

The Foxwell OBD2 code reader has red-yellow-green LEDs, along with a built-in speaker, to help read the emissions’ monitor status which will help get your vehicle ready for your car’s emissions test. The device also helps you catch any intermittent problems with your vehicle and confirm repairs during a drive cycle. Not many OBD2 devices offer this feature.
The code reader has an automatic VIN acquisition and decoding capability to make it easier for you to read the manufacturer’s specific codes and enhance mode $06 data. You can also easily read freeze frame data, clear codes and reset monitors.

The Foxwell NT301 is an advanced engine fault sensor it will not read faults from other parts of your car, if you have warning lights for ABS or airbags, this will not be able to see them nor remove the warnings. This is stated in the product description and we thought best to highlight this. We didn’t have an ABS or airbag warning so didn’t need to test for this.
What this is perfect for is checking how your engine is running, we have a little bit of crud in the top of our engine where we add new oil, this is due to the previous owner only doing short distances and we wanted to see if anything would come up and nothing has, which is great. We’ve since changed oil filter, oil and do nothing but big miles in our little car now.
Check Best Price Foxwell NT301
Foxwell NT301 Pros and Cons
Pros of Foxwell NT301
- Great looking device which will show you all your engine fault codes.
- Can clear engine fault codes using this diagnostic tool.
Cons of Foxwell NT301
- Doesn’t show and cant cancel error codes for everything, only engine faults
- A lot of buttons which it may not need, some others are a lot simpler to use and do just as much
- Instructions are poor, don’t really instruct, only show you what you’re already looking at it.
Foxwell NT301 Features
One main key feature of the Foxwell NT301 OBD2 code reader is its emission reading capabilities. Today, when you go to have your car inspected, one of the key tests the mechanic will run is on your car’s emissions. They do this by hooking the vehicle up to an OBD2 service device to read codes—reading emissions is not something done anymore.
Foxwell NT301 OBD2 makes it very easy for you to test your emissions system—before you go in for the test—to see if you will pass or fail the inspection. It will also alert you of any problems, so you know what you need to do to have your car serviced prior to getting inspected.

Another nice feature of the Foxwell NT301 is the DTCs Lookup tab on the OBD2 device main screen. With many OBD2 devices, you can get a read-out of codes—but not necessarily what the codes mean. Foxwell NT301 OBD2 offers a DTCs Lookup that allows you to put in the code you get after a vehicle test, and learn what it means. For instance, if one of your car’s sensors was malfunctioning, you would receive a code. Going to the DTC lookup, you put in the code, and the reader tells you which sensor is malfunctioning. You can then fix the part yourself, if you’re handy, or bring your car to a mechanic or a friend who can do the work for a favor, or at least a lower price. (For some, this feature alone helps pay for the Foxwell NT301 Code Reader.)
Besides the OBD2 Code Reader, you get a disk with the software that downloads your OBD2 Code Reader data, and keeps your reader updated on the latest codes. We downloaded the software and then connected our Foxwell OBD2 device using the USB cord which comes in the box. This is a nice feature, especially for the car enthusiasts who want to stay on top of their vehicle’s health. If you do use this feature, I would recommend deleting the last reports on your Code Reader after you download them to the computer.
Conclusion
The Foxwell NT301 OBD2 scanner is a valuable tool for today’s car enthusiast. It keeps you informed of your vehicle’s health, is easy to use, and helps monitor your vehicle’s emissions. The Foxwell NT301 also provides a tremendous amount of data on your car when compared to other OBD2 Code Readers or scanners, which you can easily manage through the desktop tool.
However, the Foxwell NT301 OBD2 Code Reader might be intimidating to consumers who are not comfortable around cars, or intimated by working on an engine. To use the device successfully, you so need to get comfortable with reading and understanding the codes your OBD2 device generates.
komentiraj (0) * ispiši * #
(06.2018) Renault CAN Clip 178 Multilingual Download: Testing
petak , 08.06.2018.Free download Renault CAN Clip 178 diagnostic interface:
https://mega.nz/#!EGgWiK4Y!HCsSj5UcsaD75ch4IFlhLcMKxNAz_rIUdLBfHgnbTx8
Testing by real pros; you’re taking unknown risks before the final test result from pros
Also you can download tested CANCLIP 176 software for sake of security:
http://www.obd2diy.fr//can-clip-pour-renault-v151-logiciel-cd.html
Renault CAN Clip - the latest diagnostic tool for vehicles of Renault. It contains all the latest diagnostic technology and information base to address all requirements.
O.S.: Windows Vista, Windows 7, Windows 8, Windows 8.1, Windows 10
- CPU: Intel/AMD 2 GHz or higher
- RAM: 1 GB of system memory
- Hard Drive: 5 GB of available space
- Optical Drive: DVD-ROM
- Required Hardware: Renault CAN Clip Diagnostic Interface
- Renault CAN Clipbest quality: with chip AN2135SC AN2136SC
http://www.obd2diy.fr//renault-can-clip-diagnostic-interface.html
- Renault CAN Clip best price: 89 euro
http://www.obd2diy.fr//renault-can-clip-diagnostic-interface.html
GOOD TO KNOW:
- Howto choose a good Renault CANCLIP china clone:
http://blog.obd2diy.fr/2017/07/27/why-should-i-buy-renault-can-clip-with-yellow-boards/
- How to use Renault CAN CLIP for diagnostic and reprogramming:
http://obd2-diag.blogspot.com/p/renault-can-clip.html
- How to install Renault CLIP software on Windows 7 (YouTube)
https://www.youtube.com/embed/1dwg59BCSOQ
Renault CAN CLIP Tech Support: http://www.obd2diy.fr/
komentiraj (0) * ispiši * #
How to update Lonsdor K518ise KPROG2 adaptor kernel
Upgrade process for Lonsdor K518ise KPROG2 adaptor kernel:
After the APK of lonsdor K518ise device is upgraded to V1. 6.0 version, the adaptor requires to
be installed new kernel beforehand. Please refer to below operations
Step 1: Connect the device to the specified adaptor and plug in 12V power, as shown
below

Step 2: Start up the device, and input password to enter home screen. Click"Update
firmware "button in below red box

Step 3: The following interface appears, click"Install Adaptor"in below red box.

Step 4: It skips to the below interface, click"OK" to continue.

Steo 5: It skips to below interface. You will see the progress indicator moving
rightwards. When downloading is completed, click OK"and exit. The adaptor kernel
is installed successfully.

komentiraj (0) * ispiši * #
PSA odometer correction, Digiprog 3 V4.94 or PSA BSI V1.2
srijeda , 06.06.2018.How to pick up a proper mileage correction tool for PSA group Peugeot or Citroen has been questioned among Peugeot and Citroen owners/mechanics. The top two respected PSA mileage correction tool are PSA BSI and DigiProg 3. What’s the difference between the two?
PSA BSI V1.2 is the business tool for Peugeot and Citroen. It can be used to read and write eeprom of BSI, programming new KM BSI and so on. It works on new Peugeot and Citroen models

PSA BSI V1.2 odometer correction tool vehicle list:
Peugeot 307 from 2005-…
Peugeot 308
Peugeot 407
Peugeot 607 from 2006 -…
Peugeot 807 from 2006 -…
Peugeot Partner III
Peugeot C8 from 2006 -…
Citroen C2 2009…
Citroen C3 II
Citroen C4
Citroen C4 Picasso
Citroen C5 II
Citroen C6
Citroen Berlingo III
Lancia Phedra from 2006- …
Fiat Ulysse from 2006-…
You need to do dash and BSI, you’d better to have digiprog III (current V4.94 software) and good soldering skills.
DigiProg 3 V4.94: PSA group Peugeot & Citroen model list
Peugeot:
Peugeot 508/508 new version
Peugeot 106 diagnostic
Peugeot 206 Jaeger Programming via Micro
Peugeot 206 M2002 NEC All new modules Programming via chip
Peugeot 306 VDO Cluster diagnostic
Peugeot 307 chip programming via Box & Tacho
Peugeot 307 HC12 Programming via Micro
Peugeot 406 Jaeger Programming via Micro
Peugeot 406 Sagem Programming via chip
Peugeot 406 Valeo Box Programming via Box & Cluster
Peugeot 406 VDO Cluster diagnostic
Peugeot 406 VDO 2000/2001 Cluster +BCU
Peugeot 407 Programming via Tacho & BSI
Peugeot 607 VDO Programming via Box +Cluster
Peugeot 806 Jaeger /Magneti Mareli Programming via Micro
Peugeot 807 Programming via Tacho & BSI
Peugeot Boxer Programming via chip
Peugeot Partner Programming via chip
Citroen
Citroen DS3 93C66 new Version DS4 24C16
Citroen C3/DS3 new versions
Citroen Jumper 2007
Citroen: DS3 C3 C66 cas3: hc12x new version
Citroen C3 Programming via Tacho& Box
Citroen C5 Programming via Box& Cluster
Citroen C5 2003 Programming via chips
Citroen C8 Programming via Tacho& BSI
Citroen New Saxo Diagnostic
Citroen Picasso NEC Tacho &Box via Micro& Chip
Citroen Relay Van Chip 95040 Programming via chip
Citroen Xsara 2000/2002 NEC Programming via chips BSI& Tacho
Citroen Belingo 2003/2004 Programming via cluster &BSI
Citroen Belingo HC08 Tacho Programming via Micro
Citroen C3 programming via chip
Citroen C5 New software programming via cluster & BCM
Citroen Evasion Programming via chip
Citroen Relay Programming via chip
Citroen Xantia Programming via chip
Citroen Xsara Programming via chip
Citroen Xsara Programming via BCU & Tacho
Ceci est du support technique du site Web OBD2 Outil de diagnostic:PSA odometer correction, Digiprog 3 V4.94 or PSA BSI V1.2
komentiraj (0) * ispiši * #
VXDIAG Multi Tool DAS Tested on Mercedes B-Class 245: Success!
100% Tested! VXDIAG Multi Tool MB and BMW 2 in 1 interface works perfect with Xentry/DAS!
Here you go.
Video record of the test:
https://www.youtube.com/embed/LSD0IqhrVz0
Test with images:
Connection to VXDIAG Muti Tool MB


File->Benz registration: Run Startkey center and copy Device data to a new Notepad

Copy Hardware ID to XENTRY Developer Keygen v2.19
Setup the expiration date
Then generate a Startkey


Copy the Startkey to Startkey center and save it

Run Save and OK

Open Control Panel->Network and Internet-> Network and Sharing Center
Change adapter settings
Check the Local Area Connection

Open VX Manager
Information

Configure

Exit
Open DAS
F2, F2, F2...


Car: B class, series 245 turbo


Coding checks CGW

Quick test via DAS


Input km: 252412


Job’s done!
Have fun with VXDIAG Multi Tool for MB and BMW 2 in 1
this is from blog.chinacardiags.com: VXDIAG Multi Tool DAS Tested on Mercedes B-Class 245: Success!
komentiraj (0) * ispiši * #
