Creative devices and apps review
25.12.2023., ponedjeljak
Whats best drawing pad for Inkscape?
Inkscape is a free but powerful vector graphics editor, and for the best performance, you'll want a pen tablet that can handle its requirements smoothly. It is very hard to create or design with a mouse and a keyboard. But drawing tablets allow you to create freehand digital art the same way you would with a pencil and paper. If you are a designer or illustrator looking for the best drawing pen tablet for Inkscape, you may be confused as there are so many different brands, models, and types on the market. Which one is the best suits your needs or budget? What do these drawing tablet features mean? That's why we've made this article, to ensure you get the best option for you. In this post, we'll go into the realm of tablets and take into account a variety of variables, such as display vs non-screen, pressure sensitivity, performance, software compatibility, and brand, to assist you. What is Inkscape?
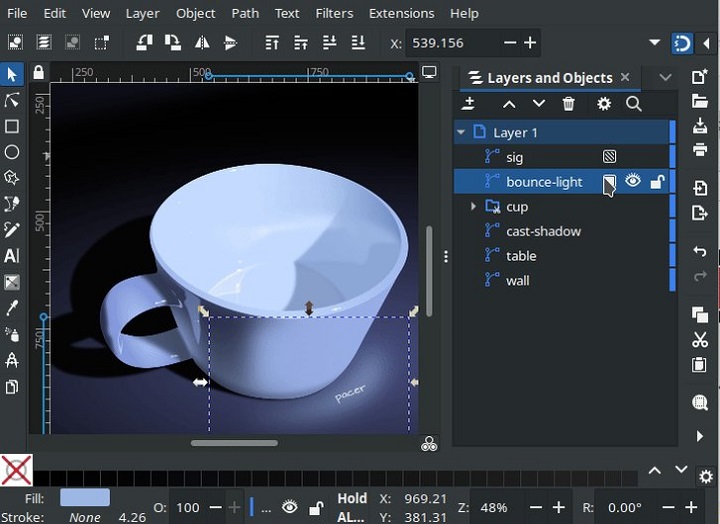
Inkscape is a great free and open source program for creating vectors (scalable graphics that won't blur when you resize them). It offers a stable, transparent, consistent and easy-to-customize user interface, along with a wide variety of vector editing and designing tools. Your basic toolset includes creating straight lines, freehand lines, shapes, 3D boxes, Bezier curves, spirals, text editing, and so much more. You can add layers, color fills, and even effects to your drawing such as blurs, bevels, shadows, textures, glows, and so on. Additionally, it includes an extension-based approach that makes it simple to add new features, and there are several incredible ones available. The many effects and advanced, industry-grade options available in Inkscape are numerous. such as alpha blending, cloned objects and markers. It comes with multiple gradients and helps you create complex combinations too. The items you create in Inkscape are in the SVG file format, but you can also export in PNG, OpenDocument Drawing, DXF, sk1, PDF, EPS, and PostScript. Because Inkscape is compatible with several formats, and you can transform your designs with 3D effects, filters, pixelation, blurring and more. You can use it to create a business card, logos, online graphics, user interface, poster, paper scrapbooking, flyer, or just to practice your skills. Is Inkscape as good as Adobe Illustrator?
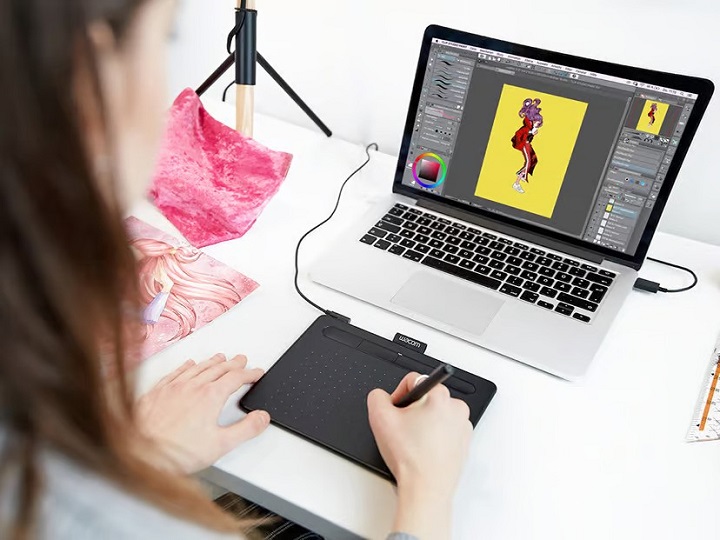
Inkscape offers a completely free way to create vector images, while Adobe Illustrator is really expensive with Subscription model. Although not quite as feature-rich as Illustrator cc, lacks polished look, Inkscape is still exceptionally full-featured and considered as a popular alternative application to Illustrator. The main disadvantage of Inkscape is that it does not support CMYK colours for print, It's RGB only. However you can export a design as a PDF from Inkscape, and then manually change the colors to CMYK using other free programs like Scribus. Plus, since the software is open-source, it has a thriving user community. Along with that large community, comes many helpful Inkscape tutorials. The designers familiar with Adobe illustrator can efficiently operate this tool. Once you get past the steep learning curve and outdated interface, you'll master this excellent software to creat stunning artwork. Why get a Drawing Tablet for Inkscape? A drawing pad with pen is essentially replaces a mouse while you are working with graphic design application like Inkscape. Mouse might be faster initially but the pen tablet has some innate advantages, which once mastered can speed up your workflow very much. A digital stylus mimics the feel of a traditional pen or a brush. You have more control in moving vectors, nodes and vertices in graphics. The whole process feels faster, smoother, more accurate, natural and intuitive. Digital pens support both pressure sensitivity and tilt recognition when drawing. This means the on-screen brush will respond to whether you press or tilt the pen and adjust the brush accordingly. This gives a natural and accurate feel when painting. Certain tools like the Freehand Lines tool or the Calligraphic and Brush Strokes tool in Inksape become easier to use if you have a tablet. Also, the very common task of tracing a drawing to convert it into digital is easier. A tablet can also save you time and effort, as you can switch between different tools or menus with the hotkeys, This seems like the better choice for efficiency. Getting from one corner of the screen to the oposite one with precision is way faster than with a trackpad / mouse and it's always in one wrist move. Not only will drawing with a mouse produce worse results, it is also very hard on your wrists. In contrast, a tablet can reduce the risk of strain or injury on your wrist, hand, and arm, as you can adopt a more ergonomic posture and movement. How to choose the best drawing tablet for Inkscape? While every tablet may have comparable benefits, not all tablets are created equal—so which tablet is best for drawing & designing in Inkscape? You need to focus on several key features and functionalities before buying, such as tablet type, tablet size, pressure sensitivity, tilt sensitivity, stylus pen, brand, price and more. 1. Types of tablets There are three different kinds of tablets suitable for creative work: pen tablets, pen displays, and standalone pen tablets. You'll have the opportunity to choose between a wired and wireless tablet, a screen or non-screen, when you go to purchase one. Pen Tablets without Screen
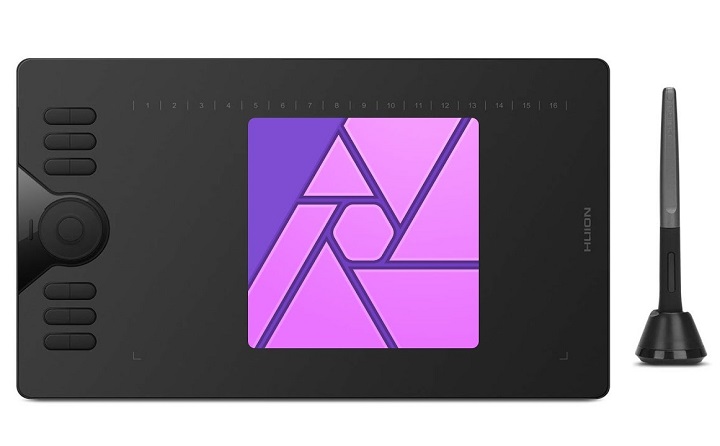
These are the most accessible and basic models, which don't include a screen, so an additional monitor would be a necessity. The active area portion of the tablet corresponds with your screen, Drawing on the tablet with your pen registers on your computer screen. It's a bit unnatural at first because of Hand-eye separation, but with time, patience and some practice, you will get used to it quickly. Compared to tablets with screen, these screenless tablets are more affordable, portable, durable and have wireless compatibility. If you want a screenless drawing pads for beginners, the Wacom Intuos, Huion Inspiroy and XPPen Deco are all good choices. Pen Display Monitors
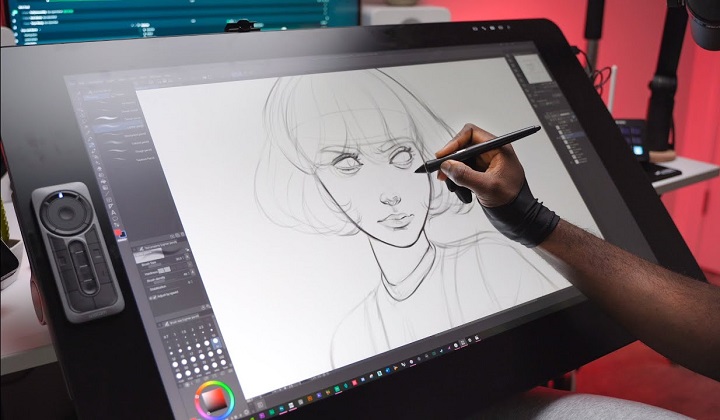
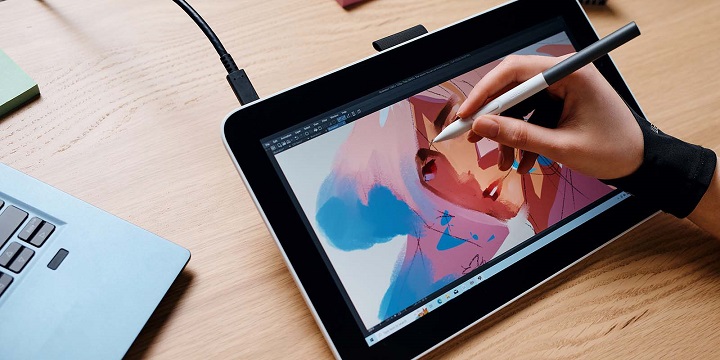
Working with the same technology as pen tablets but with the advantage of a built-in interactive display, pen displays are the favorite option of many professional artists and designers. Pen display monitors usually come in sizes range from 10-inch to larger 32-inch. You can draw directly on the screen, exactly like draw on paper, or canvas, and it feels more natural and intuitive than non-screen type. They do more expensive than non-screen tablets, still need a computer or a laptop to work and are not as portable as standalone tablets, however, they will considerably improve your working experience. Buy a decent tablet with screen, the usual recommendation is the Wacom Cintiq, Huion Kamvas or XPPen Artist. Standalone pen tablets
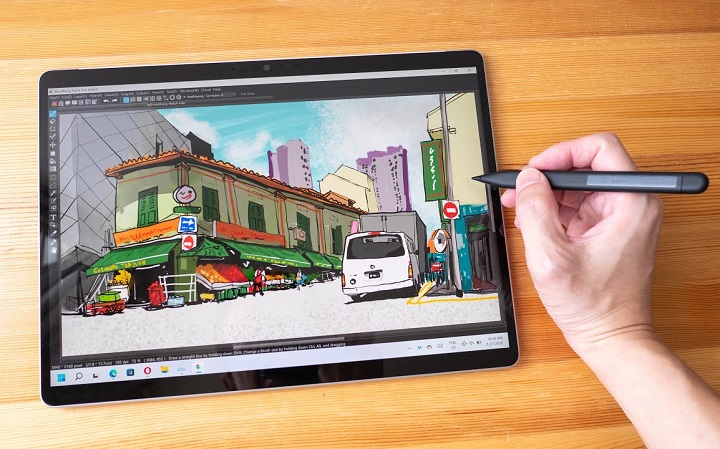
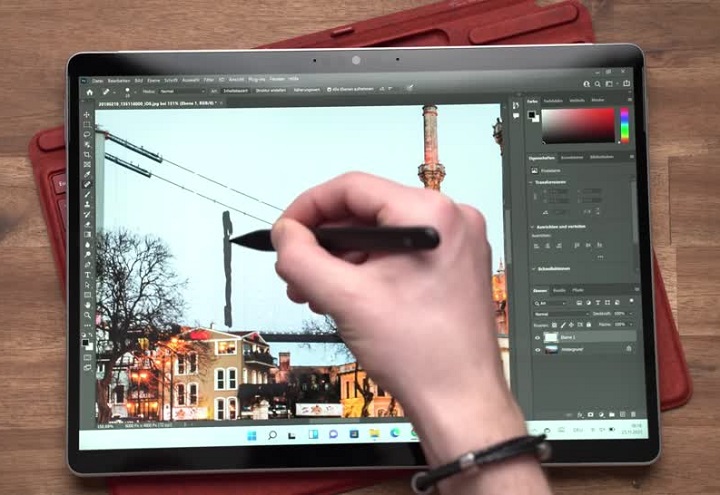
Not everyone wants a tablet as an accessory that connects to their computer. Some prefer a standalone computer drawing pad, which has powerful internals, screen and os, a decent battery life, doesn't require a computer to operate, supports pen input. If portability is your top concern, go for the standalone tablet. It's the best device to just pick up and draw anytime, anywhere. Some popular options include the Apple iPad Pro (iPadOS), Samsung Galaxy tab (Android), Microsoft Surface Pro (windows), etc. These are pretty expensive but a good option if you are earning money from your art. 2. Tablet Size Graphic tablets come in many different sizes. The active area is the portion of the device that is sensitive to signal from a stylus. Usually, the larger sizes have a larger price tag. Professionals prefer larger sizes while casual users find the smaller tablets sufficient for their needs. The size of the tablet you use is largely influenced by your drawing style. People that draw with large gestural lines need a larger tablet and vice versa. In addition, you also need to consider the size of your computer screen, working space and Portability. Larger tablets may tend to take more of your desk space and less portable. 3. Pressure Sensitivity Pressure sensitivity means that the thickness of your brush stroke will differ depending on how hard or soft you push down the stylus on the tablet surface while drawing. Generally, tablets have pressure levels starting from 4,096 all the way to 8,192. A higher level of pressure sensitivity allows for more precision and control when drawing. Ideally, you'd want to find a tablet with a 8,192 pressure range if you're buying the tablet for illustration or design work. 4. Tilt Sensitivity Tilt sensitivity on a drawing tablet refers to the ability of the tablet to detect and respond to the angle at which the stylus is held. This allows for more natural and varied brush strokes, as the tilt of the stylus can affect the width, opacity, and other characteristics of the digital brush. 5. Express keys More and more tablets are designed with Programmable buttons built into the tablet, usually on the side. Instead of manually switching between tabs and apps, or simply selecting brushes in inkscape, these hotkeys will help you save time and streamline your work process. 6. Stylus Stylus (pen) comes in two forms: battery-operated (AES) and electromagnetic resonance (EMR), but they're both designed to mimic the feel of pen on paper. The Apple Pencil, Surface slim pen 2, along with a few third-party styluses, comes with built-in lithium battery, needs to be charged. Usually, the pen is sold separately from the already-expensive tablet. Wacom, Huion, and XPPen and other professional drawing tablet brands, includes an EMR stylus with your purchase.These pens are battery-free, meaning it doesn't need to be charged. 7. Software Compatibility Inkscape runs on all 3 main desktop operating system Linux, MacOS and Windows. Thankfully, drawing tablet is designed to be used with a Windows or Mac computer, so it works seamless with Inkscape most of the time. Note, since Inkscape isn't listed on the Google Play store and Apple app store, it won't work on any iPads and android based tablets. So if you want a portable standalone drawing tablet for Inkscape, get a windows OS tablet, like microsft surface pro, Wacom MobileStudio Pro, and Huion Kamvas Studio 16. 8. Brand Wacom, Huion, and XP-Pen are top 3 popular brands of graphic tablets that are used for drawing, sketching, and digital art. Wacom is generally considered to be a high-end brand in the world of graphics tablets and they are known for their high-quality drawing experience and build quality, but they tend to be more expensive. Huion and XP-Pen are considered as budget-friendly alternatives, they provide similar functionality and drawing experience as Wacom but at a lower cost. Many users find that they offer good value for the price. Other less well-known brands include Ugee, GAOMON, Veikk, Xencelabs, Parblo, which also offer budget-friendly options for beginner artists and hobbyists. If you want a more portable device for your artwork, then one of the best tablets from the likes of Apple, Microsoft and Samsung is likely to be a better option. They offering fewer drawing-specific features but greater portability and everyday uses. How to Use a drawing tablet with Inkscape ? Here's a general process for using a graphics tablet in Inkscape: Set up your graphics tablet: Connect the tablet to your computer using a cable or wirelessly, depending on the tablet model. Install any necessary drivers or software provided by the tablet manufacturer. you can download from their official site. Configure tablet settings: graphics tablets come with customization options, such as pressure sensitivity, buttons, or tablet mapping. You can typically access these settings through the tablet's software. Configure the settings according to your preferences and the capabilities of your tablet. Launch Inkscape: Launch Inkscape and create a new document, or open an existing one. Select a drawing tool: Choose a drawing tool from the toolbar, such as the Pen tool or Pencil tool. You can also use the Brush tool or any other tool that allows you to draw or paint. With the brush or pen tool selected, you can now start drawing on the canvas using your graphics tablet. Customize brush settings: Inkscape provides various brush settings that you can customize to achieve different effects. You can adjust the brush size, shape, hardness, opacity, and other parameters using the brush options in the Control panel or the Brush panel. Practice and explore: As you gain familiarity with your graphics tablet and Inkscape, continue to practice and explore different techniques to refine your digital drawing skills. Experiment with different brushes, textures, and effects to create unique artwork. Pen Pressure not working in Inkscape ? If you're on Windows OS and use a wacom tablet or alike, The troubleshooting solutions mentioned below should work. Uninstall current wacom tablet driver and Install latest Wacom tablet driver. Open Wacom settings. In the Mapping section: Set Mode to "Pen". Then Select "Use Windows Ink". In the Pen section: Set Tip Feel somewhere medium-to-firm, to prevent maxing out pressure even with a light touch. Set the function of the pen tip to "Click". Open Inkscape, go to Edit > Input devices... Make sure your Tablet is visible in the list of input devices. If Tablet is not visible at all, close Inkscape, make sure the tablet is plugged in and functioning in other programs, then re-open Inkscape. Select "Use pressure-sensitive tablet" and click Save, Restart Inkscape. Select the Calligraphy tool (key C), From the top tool settings bar, click the icon of a down arrow pointing at a ramp. This enables pressure for this particular calligraphy preset. Is pen tablet a must for graphic design and Inkscape? Not every designer needs a graphics tablet, it's certainly an option, not a requirement. It depends on the type of work you will do in Inkscape and othe design programs. If you're interested in learning graphic design and Inkscape, start with mouse and keyboard only. A majority of the functions in Inkscape is done with that only. The tasks like web design, layout design or UI/UX design, you can do without a pen tablet. It will not make your work flow better/easier if you had one. If you plan on making illustrations, do lineart/freehand drawing, it will be extremely time taking and difficult to do so without a graphics tablet. Conclusion Using a graphics tablet with Inkscape, Gimp and Krita allows you to draw, edit, sketch, and create digital artwork with more precision and control. In fact, the suitability of drawing tablets depends on the requirements, comfort, and budget of a graphic designer. If you're traveling a lot, working on trains, and doing a lot of sketching — a standalone tablet like microsoft surface pro might work great for you. On the other hand, if you're primarily based at your desk, plus require pen tilt, and pressure — a tradition pen tablet and pen display might be a better choice. Anyone who is new to graphic design, illustration, or on budget can make use of the pen tablet without screen. If you want to step up your comfort level of drawing, a tablet with screen is the go-to choice for you. Source: https://pctechtest.com/best-drawing-tablet-for-inkscape |
23.12.2023., subota
Help choosing a Pen tablet for Affinity Designer & Photo
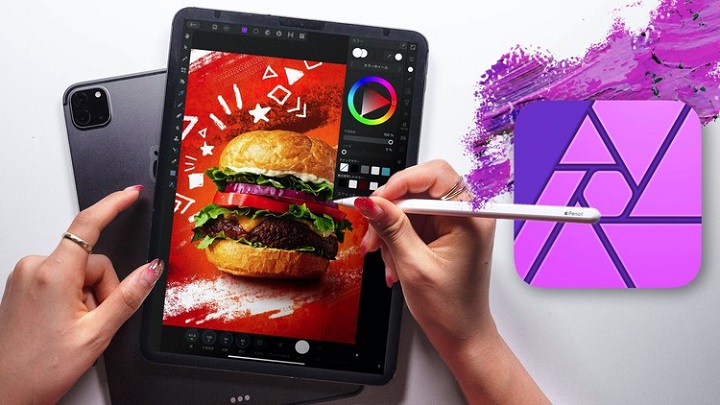
With their affordability and no subscription fees, Affinity Designer and Photo are great options for graphic designers on a budget. The main difference between the two programs is that Affinity Photo is focused on raster image editing while Affinity Designer is mainly used for vector-based design work. If you've ever tried to learn how to draw in Affinity Photo and Designer, probably you've heard about graphics tablets and that you can't really draw digitally without one. A mouse can only do so much, A graphics tablet with pen can help you organically draw over your illustrations and take your photo editing skills to the next level. Finding the best drawing tablet for Affinity Photo and Designer can be a little difficult, because of an abundance of choices available in the market. In this article, we will explore the important characteristics that are desirable if you would like to buy any tablet to be used with Affinity Photo and Designer software. What is the difference between Affinity Photo and Affinity Designer?
These are two powerful pieces of software from the same family, and share a lot of features, but they serve different purposes. Affinity Photo is a raster graphics photo editor specifically designed for digital photography, while Affinity Designer is a vector graphics editor suited to illustrations, line art, UI design and web design. In terms of features, Affinity Photo offers sophisticated image processing tools such as RAW editing capabilities, tone mapping, HDR merging, panoramic stitching and retouching tools. It also has dedicated layers and masking tools that make it perfect for advanced photo manipulation. Affinity Designer provides professional vector drawing tools with editable text paths and shapes plus support for SVG export. You'll also find awesome features like the ‘Pen Tool' to create custom curved paths, advanced path manipulation and bezier curves. Whether you choose Affinity Photo or Affinity Designer will depend on the type of work you want to do, but both are extremely powerful art software that provide all the tools necessary for professional-level results. Why get a drawing tablet for Affinity Photo and Designer ? As graphic designers we're accustomed to designing with a keyboard and mouse, but sometimes a task or design requires the precision of a freehand tool, and this is where a drawing tablet comes in handy. Precision & Sensitivity: Unlike the mouse, drawing tablets are designed to capture the subtle nuances of pressure, tilt, and direction. Both Affinity Photo and Designer applications support stylus pressure to vary a property such as stroke weight as you draw. Natural Drawing Experience: drawing tablets, especially pen displays, with natural strokes and gestures, Emulating the tactile feel of paper, these devices bridge the gap between traditional and digital mediums. A mouse can never mimic a pen or brush the way a graphics tablet can, as you have to rely on clicks and drags. Customizable Workflow: Graphics Tablets often come with customizable shortcut buttons, optimizing the design process. These can give you quick access to things like colors and rotations, if you map them to the corresponding functions in your application. Ergonomic Comfort: Long hours become less taxing with ergonomically designed pen tablets that prioritize the user's comfort. While mouse is used in one hand position that's put some strain and hurts on it, and can be get your hand cramped if used for a long time. Efficiency: A mouse uses a relative coordinate system; the pointer only moves relative to where the mouse was sitting before you pushed it. A pen tablet uses absolute coordinates by default; the cursor jumps immediately to the tablet coordinates where you land the stylus. Since graphics tablet allows you to point at any point of the screen very fast, it cannot just make you draw or retouch comfortably, but faster as well. Personalization: Modern tablets and displays allow users to adjust settings to suit their unique style and preferences. How to choose a tablet for Affinity Photo and Designer ? If you're thinking about getting a drawing tablet to use with Affinity Photo or Designer, these simple tips will help you choosing your Tablet a lot better. 1. Tablet Types You have basically three choices: a pen tablet, a pen display, or a standalone tablet. Pen Tablets without screen
Pen tablets come in the form of a thin flat surface that corresponds to a computer screen. The matching stylus or pen is used for input and to control the movement of the cursor. You look at your computer screen while drawing on the tablet surface, this takes a while to get used to, require great hand eye coordination. Non-screen graphics tablets for starers are generally more portable, durable and cost-effective than screen tablets. Tablets like Wacom Intuos, Huion Inspiroy and XP-Pen Deco series offer a range of sizes and features in this category. Drawing Tablets with screen
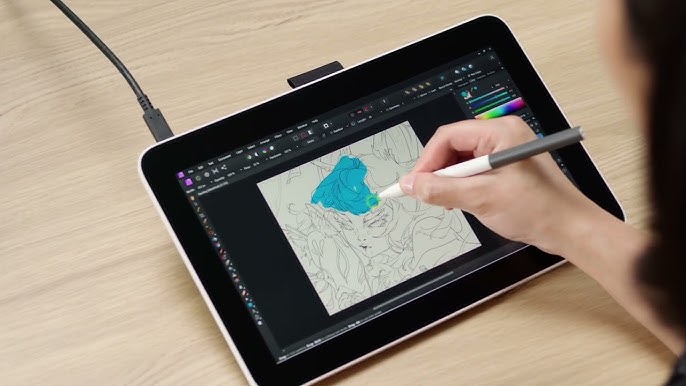
Drawing pads with screen, commonly referred to as pen displays, allow users to draw directly onto the screen. This immediate visual feedback fosters a more intuitive and natural drawing experience, mimicking traditional pen and paper. These tablets often come in various sizes, resolutions, and sensitivity levels, catering to different user preferences and professional requirements. Tablets like Wacom Cintiq, Huion Kamvas and XP-Pen Artist are popular options in this category. Standalone Pen Tablets
Both of two types above need to be plugged in a computer to work. Standalone graphics pads like ipads allow you to draw on the screen, they don't need to be attached to a computer. This type of tablet is compact, light and cordless, it's easy to hold, manipulate and portable to carry. You can use them while doing small drawing project or when on a trip. However, this device can be a little expensive for designers. 2. Tablet Size Generally a smaller tablet area needs less pen movements but more portable whereas a larger tablet area requires accordingly longer ways for the pen. However, If the tablet is too small, then it turns to get useless because you will feel a little cramped and can't work precisely. 3. Pressure sensitivity Pressure sensitivity determines how much you can vary the width of the lines you paint. This is done by applying different pressure on the tablet surface. The more pressure sensitivity a graphics tablet has. The more you will be able to vary the size of your strokes with pressure. Most modern tablets range from 4,096 to 8,192 levels of sensitivity, the more the better. 4. Tilt sensitivity Tilt Sensitivity, or Tilt recognition is a digital tablet feature that allows the device to perceive the angle of the digital pen over the tablet surface. This is pretty useful, as it allows you to create more realistic and natural brushstrokes, getting closer to the behaviour of a real pencil. 5. Stylus Pen The Apple Pencil, surface slim pen 2, along with a few third-party styluses, comes with built-in lithium battery, needs to be charged. Plus, you'll need to purchase these separately. Wacom, Huion, XP-Pen and other professional drawing tablet brands, includes a stylus with your purchase. Moreover, these pens are battery-free, so there's no charging needed and you can use them anytime, anywhere. 6. Brand One of the best brands overall for drawing tablets is the Wacom brand. Wacom specializes in tablets and provide a large range of products from items for professionals to beginners. Wacom Pen tablets are high quality but very pricy, numerous competitors have emerged over the past decade, several of whom like huion and xp-pen now offer great options that provide similar performance for much less money. As for Standalone Tablets, The leading examples fall into three main ranges: Samsung's Galaxy Tab (Android), Apple's iPad Pro and Microsoft's Surface Pro (Windows). There are alternatives, but these are the best. 7. Operating System Compatibility Affinity Designer and Affinity Photo are both available for Windows and MacOS, as well as iPadOS. There is no Android, chrome OS and Linux version. Luckily, Almost all drawing tablets are compatible with both Windows and Mac OS devices, so don't need to worry about that. Plus if you want to use a standalone tablet, you will either need to get a windows tablet (surface pro) or an iPad. How to Use drawing tablet with Affinity Photo and Designer ? After connecting the pen tablet, the correct drivers must be installed. Because it allows your computer to interact with pen tablet. Look for the drivers made for your individual model on the manufacturer's website. Restarting the computer after that is also important! The tablet should function once the drivers have been installed. For example, the cursor should move in sync with the pen's tip. The tablet driver also allows you to map whether the range of the pen input (as a mouse) is mapped to a single screen or to all screens. It also allows you to customize the buttons on the tablet. In addition, A number of Affinity tools and settings can be used to provide perfect precision when using a pen tablet. When drawing with a pen tablet, the Pen Tool, Vector Brush Tool and Pencil Tool stroke's variable width lines will automatically match the level of pressure applied. This can be controlled by adjusting the pressure sensitivity or pressure profile settings. When using the Paint Brush Tool, a number of controller options on the Brushes panel can also be adjusted to work alongside your tablet pen. Pen Pressure not working in Affinity Photo or Designer ? If you're on Windows OS, The troubleshooting solutions mentioned below should work regardless of the brand of your tablet, e.g. Wacom, Huion, XPPen, Ugee, Parblo, Veikk, Xencelabs, Gaomon, etc. 1. Disable Windows Ink Affinity Photo or designer's default settings requires Windows Ink enabled for pressure sensitivity to work. You can choose to have Affinity Photo or designer not use Windows Ink. In the tablet driver's settings, under Tablet Input Method, disable Windows Ink and choose "High Precision" in Affinity as Tablet input preferences. Restart Affinity Photo or designer. To choose "High Precision" in Affinity software, From the Edit menu in Affinity Photo or Designer, select Preferences. On the Tools tab, under Tablet input method, select one of the 3 available input methods: Low Precision, High Precision, and Windows Ink. 2. Enable Windows Ink This solution is the opposite of the earlier fix. In your tablet driver's settings, enable Windows Ink under the pen settings. Then select "Windows Ink" in Affinity as Tablet input preferences. Restart Affinity Photo or designer. When Windows Ink is enabled, text cannot be selected with cursor, clicking on icons on the taskbar doesn't do anything, scroll bar's movement is reversed. This solution is not as good as first one due to Windows Ink behaviour with other tasks. Do you need a drawing tablet for affinity publisher? Affinity Publisher is a powerful software for desktop publishing, which allows users to create stunning layouts and designs for print or digital media. If you are mainly using Affinity Publisher, InDesign or other software, to make the layouts, in this case you may not need a graphic tablet. Conclusion As an artist or a designer, the tools that you use are important. A drawing tablet allow you to seamlessly use the Affinity Photo and designer, allowing a level of precision and versatility that a mouse can't achieve. Many artists enjoy using digital pen to create wonderful works of art along with editing pictures easily. There are plenty of options out there for artists. It all boils down to what your preferences, needs and budget are. If you've got a small budget to start with, pick something cheaper from our list and start with that. As you grow, you can upgrade to something a little more loaded with features. Source: https://pctechtest.com/drawing-tablet-for-affinity-photo-and-designer |


15.12.2023., petak
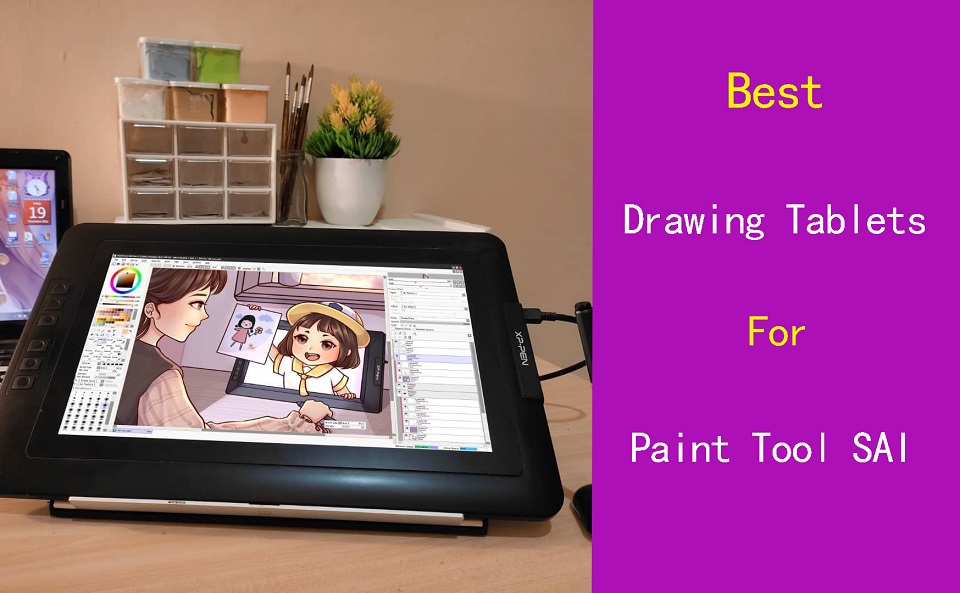
Whats best Pen tablet for Paint Tool SAI?
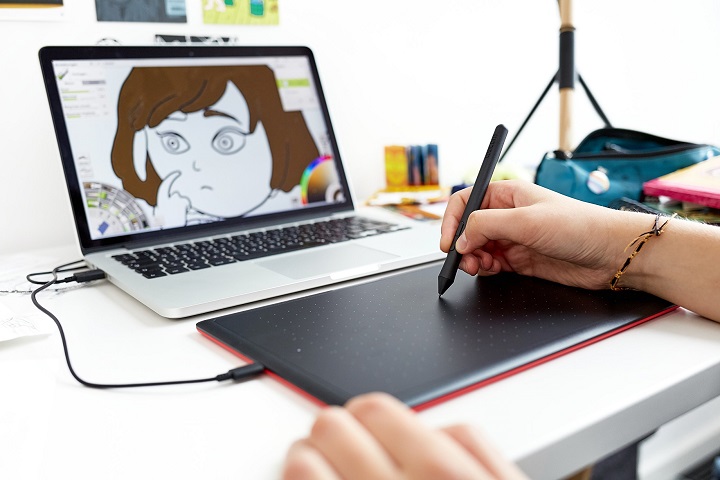
Paint Tool SAI is a lightweight and simple-to-use digital painting software that is popular among manga and anime artists. If you spend a lot of time drawing in Paint tool SAI or other graphics programs, a pen tablet is a must for you. Drawing with a mouse is possible but highly discouraged as it is uncomfortable and could cause adverse effects on your wrists. Today, there are many pen tablets to choose from, ranging from incredibly budget friendly for beginners, to wildly expensive and insanely powerful for the working professional. Are you new to digital art and not sure which tablet to get started with? Are you a professional digital artist wondering which one to upgrade to? In this Article, we'll answer common questions about drawing tablets for Paint tool SAI. We'll address topics such as compatibility with different tablet brands like Wacom, Apple and Microsoft, tablet types and even how to fix pen lag issues. Whether you're a beginner or more experienced artist, this post will provide the information you need to make the most of your drawing tablet when working with Paint tool SAI. What is Paint Tool SAI? How is that benefiting you?
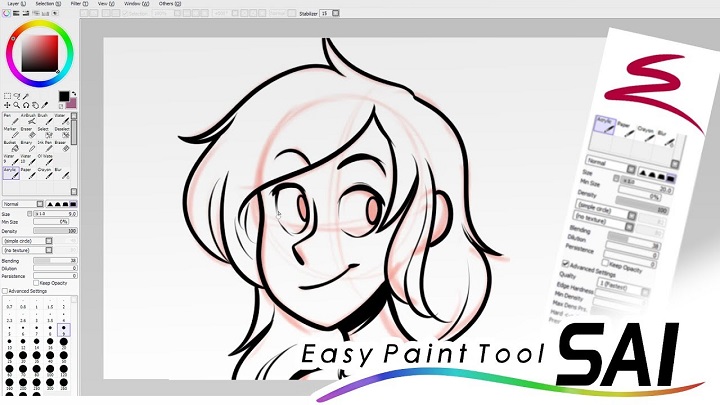
Paint Tool SAI offers a streamlined interface, easy to figure out and use. all necessary tools and settings are visually shown. The program provides a wide range of easy-to-use tools necessary for drawing, layer panel, brushes, selection tools, color wheel, etc. It also offers advanced options for each tool. The lines are beautiful and crisp with the pen and brush tools, while the blend, blur and watercolor tools are particularly excellent. You can also import textures to merge with brush styles and create totally new brushes. Paint Tool SAI supports layers, canvas rotation and custom brush sizes up to 3000×3000 pixels. It offers an anti-aliased drawing functionality that allows artists to minimize distortions across low-resolution images and drawings. SAI provide easy and stable operation with its special line stabilizer feature, which allows for smooth drawing by reducing hand tremors. PaintTool SAI is lightweight and requires less system memory to run than other drawing software, making it less prone to errors while using it. Many artists use Paint Tool SAI as their preferred drawing program to make line art and sketching, and then switch over to Photoshop to do the final touches to their image such as coloring, filters and more advanced effects. Its main limitation is that it has a more reduced number of layer “modes” than Photoshop, outdated interface, windows only, less options to export files to different formats, etc. while it is not as full featured as something like CSP or photoshop, it has enough features to make drawing and painting easy and enjoyable without overwhelming the user. Why use a pen tablet for Paint Tool SAI? A pen tablet is pressure sensitive, which allows you control the thickness and/or opacity of your lines depending on the pressure you apply to the tablet. You cannot do this with a mouse. PaintTool SAI has fully digitizer support with pressure, It is so responsive to the pressure and movement of the pen and it's great. A stylus gives you far more precision and control over the strokes. drawing is more natural so using the shape/brush tools is easier. Not only will drawing with a mouse produce worse results, it is also very hard on your wrists. You'll probably be painting for a substantial amount of hours, which can strain your neck/ back and wrists. Holding a pen is more ergonomic than a mouse. You might not feel as tense using it to draw because it is more natural of a position for your arm to be in. Drawing tablets use absolute positioning. while Mouse use relative positioning. It is much quicker navigating the screen when mapped “correctly”. Selecting multiple things is also made much easier. Most Pen tablets comes equipped with customizable buttons that can be programmed to perform various functions within Paint Tool SAI. Whether you want to assign a specific brush or shortcut to a button, or toggle between different tool modes, the choice is yours. How to Choose The Right Graphic Tablet for Paint tool SAI? There are a handful of important things you must consider when looking to get a drawing tablet for Paint tool SAI, which covers brand, screens vs no screens, buttons, pressure sensitivity and more! 1. Operating System Compatibility Paint tool SAI only runs on Windows devices, it's is not available for Apple mac, iPad OS, Android and Chromebook devices. Make sure the tablet you choose is compatible with the windows OS computer. Luckily, Most drawing tablets are compatible with both Windows and Mac OS computers, so don't need to worry about that. 2. Tablet Types Graphics Tablets
Some, often called “pen tablets,” resemble a blank plastic slab and pen that controls your on-screen cursor. It does not have a built-in screen, so you will need to look at your computer screen while drawing on the tablet. There’s a phase where your eye and hand coordination have to adapt. Compared to a screen tablet, non-screen tablet has many advantages: cheaper, less cable management, wireless compatibility, more durable, etc. If you have a lower budget or want a more portable solution, we recommend you choose a drawing tablet without a screen! such as Wacom Intuos, Huion Inspiroy, XP-Pen Deco, etc. Pen Display Monitors
Others, dubbed “display tablets” include built-in screens, allowing users to draw directly onto the surface that they're viewing. This can make the drawing experience feel more intuitive and natural, and it can also make it easier to see your work as you create it. Display pen tablets can be more expensive than graphic tablets, mainly aimed at professionals. Consider buying a tablet like the Wacom Cintiq, Huion Kamvas, XP-Pen Artist, etc. This type of tablet still needs to be hooked to a PC or Laptop to work, , so less portable. It essentially just a second monitor, no computing units inside. Standalone Drawing Tablets
If you want the Portability or drawing in SAI on the go, you should get a standalone Windows tablet that has a built-in computer, screen and pen stylus. Some of the best choices are Wacom MobileStudio Pros, Huion Kamvas Studios, and Microsoft Surface series. Stand alone graphic tablets can be more expensive than other types, but they can also be more versatile because they can be used for other tasks, such as browsing the internet, watching videos, or playing games. 3. Tablet Size The size of the tablet is important to consider. A bigger tablet may provide more space for drawing, but it may be less portable. A smaller tablet may be easier to carry around, but it might feel cramped when drawing or designing. Think about where and how you plan to use the tablet to determine the best size for you. 4. Pressure Sensitivity The pressure sensitivity allows you to control the thickness and opacity of your lines based on how much pressure you apply to the tablet. Most tablets have 4096 levels of pressure sensitivity, but some models offer up to 8192 levels. Higher levels of pressure sensitivity can give you more control and precision when creating digital art. 5. Brand Some users prefer to stick with Wacom — the most trusted and recognized brand of drawing tablets — because of their reputation for build quality, reliable drivers, and software. But in recent years, other brands, like Huion, XPPen, UGEE, Veikk, and GAOMON, have emerged that offer products with similar functionality at a fraction of Wacom's lofty prices. How do I use my drawing tablet with Paint tool SAI? Using your drawing tablet with Paint tool SAI is a breeze! Simply connect your tablet to your windows computer and download the driver from the manufacturer's official site. If you don't install the tablet drivers, digitizer cannot respond any pressure or more strict cursor information. Once the driver is installed, restart your computer to apply any necessary changes. Within the tablet driver's settings, you'll find options to customize various aspects of your tablet, such as the pen pressure sensitivity, button configuration, and more. Adjust these settings according to your preferences and needs. You will also need to add Paint Tool SAI to the Application line in the Tablet driver's Preferences and then remove the “work with Windows Ink” check. It uses WinTab technology not Windows Ink. Open SAI, go to the “Options” menu at the top of the application window and select “Tablet.” and you'll find options to customize your tablet's pen pressure, button functions, and mapping. Once you're done configuring, you're all set to create digital art like a pro! How do I fix my SAI pen lag? Pen lag can be a real annoyance, but fear not! To fix this issue on SAI, try adjusting your tablet's settings and make sure you have the latest drivers installed. You can also try reducing the canvas size, closing unnecessary applications, or connecting your tablet to a different USB port. Experiment with these solutions, and hopefully, your pen lag will disappear like magic! Source: https://pctechtest.com/best-drawing-tablet-for-paint-tool-sai |
10.12.2023., nedjelja
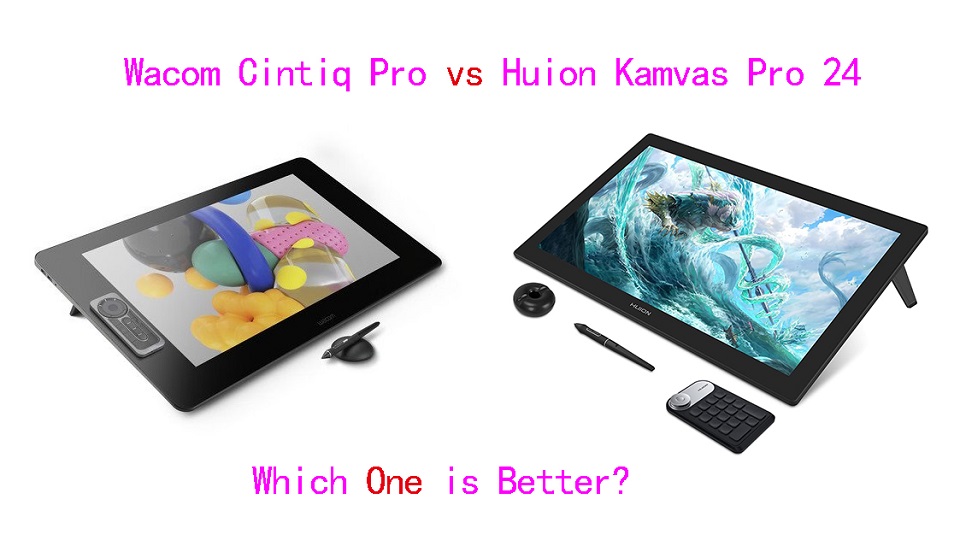
Huion Kamvas Pro 24 vs Wacom Cintiq Pro 24 Comparison
If you're a pro and do art on the computer, you need a drawing tablet with screen. But a small pen display feels cramped for drawing larger images, requiring a lot of zooming. There is something really cool to having a giant display tablet to draw on, Which gives you a lot of drawing area to draw to your heart content. If you have the budget, getting a 24-inch pen display would be terrific. Whether you draw with your wrist or with your arm, this drawing area is more than enough for you for the most part. Far and away, the biggest name in the drawing tablet space is Wacom and the Cintiq Pro 24 is the Rolls-Royce of display drawing tablets. Huion usually covers the budget-end of the graphics tablet market, and the Huion tablet that most closely competes with the Cintiq Pro 24 is the popular Kamvas Pro 24 which supports 4K. Despite how the two device appears too similar, there are quite many differences between them. One may be wondering whether getting the more affordable Kamvas Pro 24 is the best choice, or whether you will need or benefit from the more features Cintiq Pro 24 offers. Wacom Cintiq Pro 24 vs Huion Kamvas Pro 24 Comparison: What are the main differences? In this article, we did a detailed side by side analysis – comparing every single major and minor detail of the tablet. then you will know exactly which tablet is the best on your own. We will look at the design, some of the specs & screen resolution, the pen, including pen pressure sensitivity, screen parallax, drivers, price and much more. Design and Build Quality
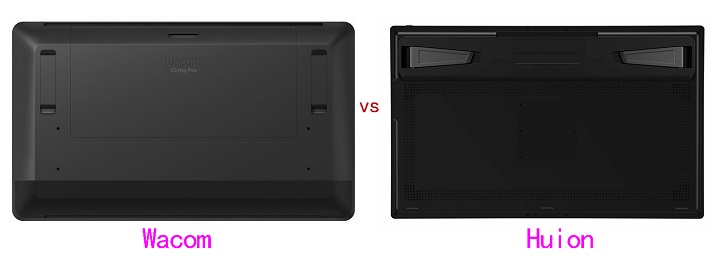
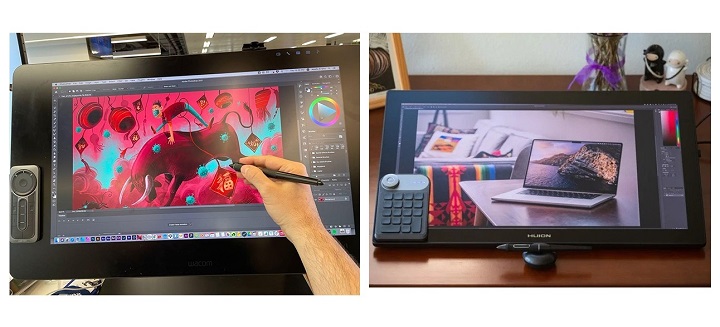
When it comes to design both the tablet follows a minimalistic design, feels strong and sturdy. The tablet itself is all black quality plastic with a front glass screen. The different thing is the overall size. The Wacom is bigger - it has a lot more bezel area around the screen. The one on the Huion is a lot smaller and looks more like a monitor. After using both it is better to have that larger bezel area around the screen to rest your hand on when drawing near the edge. On the tablet back you have two fold-out tablet legs, VESA mount as well as a number of ports for connectivity. The main con of a Cintiq pro 24 or a Kamvas Pro 24 is its weight and bulk. Both devices are quite heavy and big —especially compared to smaller pen display, so less portable. Screen Size and Resolution
With the Cintiq Pro 24 and Kamvas Pro 24 you're getting a 24 inch diagonal screen at full 4K UHD (3840x2160-pixel) resolution. At a whopping 188 pixels per inch, the pixels is small and densely packed and you won't see individual pixels when you work (draw) up close to the screen. If you're using a 24-inch screen with 1080p resolution for detailed drawing then you'll be distracted by how jaggedy your lines look. In Comparison, having this 4K resolution does make a big difference, it's much crisper and feels great to see your artwork. Plus, 2160P screen has significantly more canvas space compared to 1080P, This is great for productivity. You can place a reference photo by the side and still have enough canvas space to draw with. Screen panel and Color Gamut With IPS Panel, Cintiq pro 24 have excellent 99% Adobe RGB color gamut, 1000:1 contrast ratio, a billion colours, and the colors do look good right out of the box. Kamvas Pro 24 uses the QLED technique to increase the color gamut to 102% Adobe RGB (140% sRGB), 1200:1 contrast ratio, 1.07 billion (10bit) colors for a more vibrant and saturated color on the display. You may find that the colors on Kamvas Pro 24 are very oversaturated but not accurate, you should invest in a colorimeter to calibrate the screen. That said, the most accurate colors are not necessarily the most vivid. Wacom Cintiq is designed to deliver the most accurate colors instead of over saturated vibrant ones so that when your work is viewed on other peoples' screens, it looks similar to what you, the artist, intended. Screen Lamination Both the tablets come with the exact same laminated screen, which means less parallax while drawing. To give you an idea on what that is, Laminated screen is the screen that's made so that the top glass, digitizer, and the display are made of one flat piece. This offers multiple advantages over non-laminated screens: preventing dust from getting under the screen glass, as well as having a thinner display. The most notable one is the reduced parallax. Drawing Surface Both Cintiq Pro 24 and Kamvas Pro 24 has an etched glass surface that gives the pen a slight tactility when drawing on it that would not be there if the screen were glossy. You will also appreciated the glare reduction on the matte etched screen, which prevented the light from obstructing your vision. In contrast, glossy screens reflect the world around them, which can be distracting and distort color accuracy unless you are working in a dark room. Multi-Touch The Cintiq Pro 24 comes in two variants – one with multitouch and one without it. You will have to pay extra for this feature. The Huion Kamvas Pro 24, on the other hand, does not come with any touch support – whatsoever. Being able to perform shortcuts such as zoom, pan, scroll and rotate using touch-based gestures can be very convenient. But Multitouch support on the Cintiq Pro 24 is pretty terrible. Its palm rejection is bad and the overall touch experience feels laggy and unreliable. Most artists simple choose the tablet without the multitouch or just stop using it after a while. Wacom Pro Pen 2 vs Huion PW517 Stylus
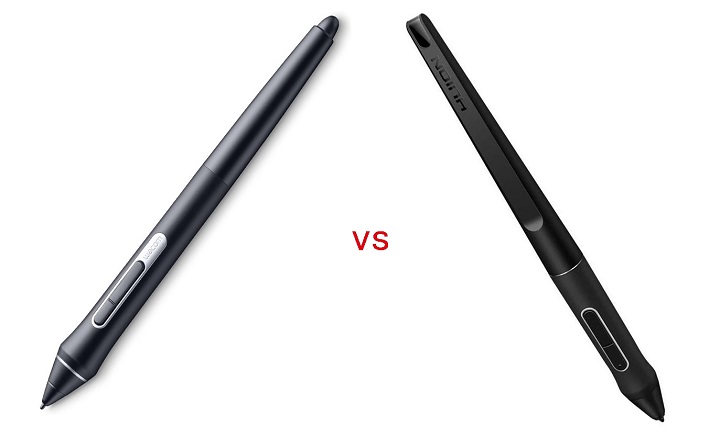
Both the Cintiq Pro 24 and Kamvas Pro 24 comes with a very comparable stylus. They have two buttons on the side and a soft rubber grip at the front half. But Wacom Pro pen 2 has an eraser at the back whereas Huion PW517 stylus doesn't have an eraser at the back. They are battery-free, comes with 8192 levels of pressure sensitivity, 60 degrees of tilt recognition, fast response time and accurate tracking that provide an equally good drawing experience. However, The Huion PW517 pen has a higher Initial Activation Force than Wacom pro pen 2. It require you to press down ever so slightly more to get it to register. In addition, The tilt of Huion stylus can cause the cursor to move a little when you don't want it to and it can be really annoying. Overall Huion stylus is good, but the Wacom Pen is the best. Tablet Stand & VESA Mount
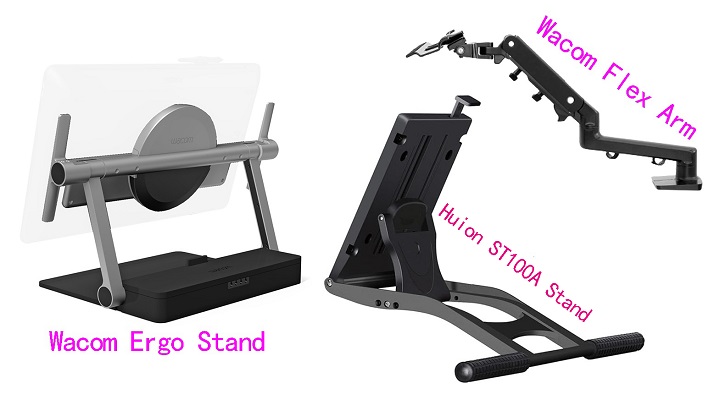
The fold-out feet of both tablets can only prop up the pen display at a fixed angle of 20°, If you want a comfortable angle to work with for drawing, then you will need a proper stand. The back of the Kamvas Pro 24 comes with a 100 x 100mm standard VESA mounting holes, it's compatible with a wide variety of arms, stands, and brackets. Unfortunately, Cintiq Pro 24 can't be mounted with VESA mount, as it has a weird 80x495mm hole pattern, which only supports Wacom's own stand. The Huion ST100A multi-adjustable stand is an extra-cost option ($49.99)—highly recommended. Wacom has two options with the Ergo Stand and the Wacom Flex Arm, with both compatible with the Cintiq Pro 24. Wacom's stands are a bit expensive for some artist, the Ergo stand retails for $500 alone, and the Wacom Flex Arm retails for $379. Wacom Expresskey Remote vs Huion Keydial Mini K20
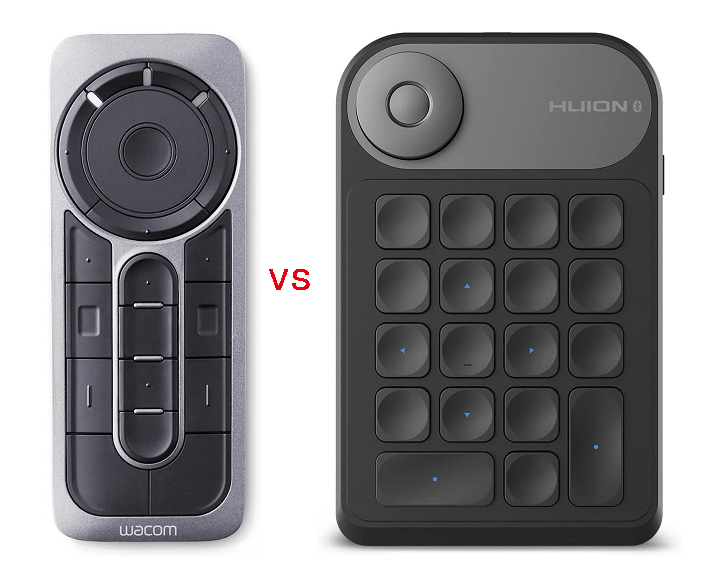
Neither display comes with built-in express keys, and instead including their handy express key remote. Both will magnetically stick to either side of the display keeping it handy at all times. This is more flexible, allowing you to freely place it on the screen or the desktop. Wacom's Expresskey remote has a total of 17 buttons and a touch ring. It connects wirelessly via 2.4GHz Wifi to the computer. The Huion's mini keydial K20 remote has a similar design to the Wacom with 18 buttons on the bottom, and a circular button on the top. But It connects wirelessly via bluetooth to the computer. All the buttons on both Expresskey remotes can be assigned to any shortcut of your choice, making the workflow more fluid. It works across all the drawing, editing and modeling programs. Pen Holder
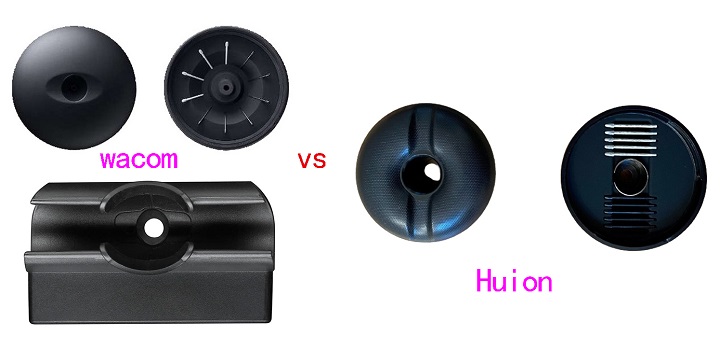
The Wacom Cintiq Pro 24 has a pen stand that holds 10 extra pen nibs (they do wear down with use, 6 standard, 4 felt). There's also an extra pen holder that snaps to the top of the display. As for Huion, The doughnut-shaped pen holder is a secure place to keep the pencil when not in use, and it contains ten extra pen nibs, of which five are felt nibs intended to simulate drawing on paper. Compatibility and Connectivity Both Cintiq pro 24 and Kamvas pro 24 are compatible with various operating systems, including MacOS, Windows and Linux. They also works with a range of software including programs from Adobe, Autodesk, Affinity, Corel and more. Cintiq Pro 24's Connectivity is excellent. You'll find twin USB-A ports on its right and left sides, plus a standard 3.5mm audio jack and full-sized SD card slot. Round the back is USB-C port plus HDMI, and DisplayPort connectors. Several connectivity options are lined up on the back of the Kamvas Pro 24, such as USB-C, Display Port, and HDMI. It also equipped with two USB-A ports and a 3.5mm headphone jack. You can connect both devices to a PC/Mac using the DisplayPort, USB Type-C sockets, or HDMI. There are two cables: one for power, and one USB-C/HDMI cable for video data. Driver Software Once you've got everything plugged in you'll need to download the latest drivers from the Wacom or Huion official website. Whilst you're in the settings menus of wacom driver software you'll notice there's an enormous amount of customisation available to you. As well as setting shortcut keys on the Remote, you can even set your own pressure sensitivity curves and click thresholds. Each application can have its own settings, and you can save your custom settings as different profiles, for almost limitless flexibility. Huion has less fully featured driver software as Wacom's, for example, You can't set application-specific settings. Huion's driver work fine, reliability has improved quite a bit, except for some crashing and minor issues. Cooling There is a fan on Cintiq Pro 24, which keeps the display from ever getting really hot. But many users were not fond of the level of noise that the Cintiq Pro fans make when running. There are no fans with Huion kamvas Pro 24 so no fan noise. And the unit doesn't get hot at all, the thermals are pretty decent. Price Huion kamvas Pro 24 is the clear winner if we take the price into account-1,299.00. Wacom Cintiq Pro 24 cost more at $1,949.95, leaving many artists out of the market. There are a number of other 24-inch tablets that you can look into such as the – Huion Kamvas Pro 24 (2.5k) and XP-Pen Artist 24 Pro, which is cheaper but has a slightly lower resolution of 2.5K. Related Posts: Huion Kamvas 13 vs Wacom One 13 Comparison, Huion Kamvas Pro 16 vs Wacom Cintiq 16 Comparison, XPPen Artist 22R Pro vs Wacom Cintiq 22 Comparison . Conclusion Both are top-quality display tablets, the screen is extremely clear and the colors are vivacious, probably the best that money can buy. The 24 inches of diagonals really allow you to go into details very easily, and especially without straining the eyes. If you're the one that paints and draws from the shoulder with big arm movements and if you can afford it, this is your tablet. Despite some flaws, Huion Kamvas Pro 24 is a better option, it manages to finely balance having a good selection of features at a reasonable price. But We also recommend saving up more for Cintiq Pro 24 if line quality, durability and longevity is concern. For something that is used in a professional setting or even an advanced hobbyist the Wacom is a must. Source: https://pctechtest.com/wacom-cintiq-pro-24-vs-huion-kamvas-pro-24 |
06.12.2023., srijeda
10 Best Photo Editing Software
Photo editing programs are an easy, fun and creative way to make your images pop! In this article, I want to share with you some really cool photo editors that will enhance your images and position your brand more strongly on your social feeds. Some photo editing apps are better than others, some are free others are paid. Just keep in mind the free ones can be limiting and not offer what you need. 10 best Photo editing software
Several photo editing options are available, catering to various skill levels. Here are some popular choices: 1. Photoshop CC Adobe Photoshop CC is known for its ability to create a wide range of images from scratch. It is used by many professional photographers and graphic designers. It allows users to do things like crop images, adjust lighting, add effects like gradients or shadow boxes, change background colors and more. It can also be used to create animations like time-lapse videos or stop motion animations using layers. The software also allows users to create their own custom brushes and filters which they can use on any image they wish including photos taken with their smartphone! Photoshop comes with many other features such as layers which allow you to stack up different saved images on top of each other without losing any quality or detail when overlaying them onto another image. 2. Lightroom CC Adobe Lightroom CC is a powerful tool mainly used by photographers but it's relatively easy to pick up and play. It has a variety of features that help to curate, process, and showcase photos. Lightroom lets you work with the raw files from your camera as well as support other file types. It also lets you adjust the photos with a wide range of tools like editing and retouching tools, noise reduction tools, different filters and presets that can be applied to your photo or video, photo layout options for print or web publishing, and many more features. 3. Snapseed Snapseed is an easy-to-use photo editor that is available on both iOS and Android devices. It has a variety of editing tools that can be used to give photos a professional look. It has a wide range of filters, textures, tools, frames and more. It also has an in-app camera for taking new photos from different angles or perspectives. A user can edit the same photo with Snapseed for several hours without getting bored of it. 4. Affinity Photo Affinity Photo is a powerful image editing program with capabilities that can easily rival Photoshop. From its vast array of tools like RGB color sliders, exposure, tone curve and sharpening controls, to its modern editing features like Live Blend Modes and Clipping Masks, Affinity Photo is one of the most comprehensive image editing suites available. While Photoshop might have a larger library of features, Affinity Photo comes close if not surpassing it in many areas. It is well accepted by professionals and common users due to its high performance and low price. 5. Canva While primarily a graphic design tool, Canva also offers basic photo editing features. It's easy to use and great for social media graphics. The interface is simple with all the necessary functions to create advertisements, posters, invitations, presentations, websites or social media posts. There are also function buttons that allow you to change the layout, size and color of your design. There are various templates available for different types of projects as well available in different languages. 6. Pixlr Pixlr is a cloud-based set of image tools and utilities, including a number of photo editors, a screen grabber browser extension, and a photo sharing service. The suite was intended for non-professionals, however the apps range from simple to advanced photo editing. It has a free version and a more advanced paid version. 7. Fotor This online photo editing tool offers a range of features, including filters, retouching, and graphic design elements. It has a user-friendly interface and offers pre-made templates as well. Everyone has the ability to design any form of graphics and covers, limited only by their imaginations. 8. PhotoScape X PhotoScape X is mainly dedicated to photo editing and cropping, with which you will be able to retouch all the images you want in a very simple and fast way. Especially now when it is very important to have good photos to share through social networks. There's a free version available. However, it should be noted that PhotoScape is not yet as popular as other editing programs. 9. GIMP GIMP is a great tool and generally has almost the same features as the photoshop has. It includes many advanced editing capabilities, including layers, plug-ins, painting, text, filters, selection, and masking. Counting that its free and supported on linux, it can be great for students and anyone who's not ready to pay for Adobe subscription. 10. Darktable Darktable is a free and open-source photography workflow application that works well for managing and editing raw images. Rather than being a raster graphics editor like Adobe Photoshop or GIMP, it comprises a subset of image editing operations specifically aimed at non-destructive raw photo post-production. It's a bit clunky and lacks some of the latest features of Lightroom / Lightroom Classic. Conclusion Many people will recommend Adobe Photoshop and Adobe Lightroom. Both are really great programs and the industry standards. But they are not for beginners and they are expensive. For beginners I suggest starting with something free or very inexpensive just to get the basics of photo editing. Then go a little more advanced. Remember to explore these options based on your specific editing needs and skill level. FAQs Do I need a drawing tablet for Photo editing?
Yes, it's far superior than a mouse for editing and retouch work in Photoshop. more details here: Pen tablets for Photoshop, digital tablets for Gimp, Graphics Pads for photo editing. You can get a low priced pen tablet that will do very nicely for this. You will find that you just have so much more fine control this way. It's good to have it as an option. It also will help speed up your workflow significantly better than a tablet in Lightroom. In LR you want to minimize how much you use the mouse. So editing controller and hotkeys are the way to go. In addition, You can use it with note taking apps, graphic design program and digital drawing software. I can't imagine going back to just using a mouse, especially sacrificing pressure sensitivity. How to choose the best photo editing software? There is no one-size-fits-all answer to the question of what's the best photo software for your needs. It depends on your skill level, your needs, your preferences, and your goals. The best way to choose the best photo software for your budget is to try them out for yourself. Most photo software offer free trials or demos that allow you to test their features and functions before you buy them. You can also read reviews and watch tutorials online to get a better idea of how they work and what they can do. Ultimately, the best photo software for your budget is the one that suits your style and helps you achieve your vision. |


